This week’s tip requires the use of software (in this case Lightroom, but this can be done in other applications as well – Instagram even has this effect!). I’m going to quickly cover vignetting, which is one of those “icing on the cake” type of effects that can really add some impact to your images. Often times when I’m processing photos in Lightroom, the last step I’ll take is to add a bit of vignetting to the image to see if it adds anything. Usually it does, and quite often I’ll say, “that’s the one thing this photo needed.” Vignetting (in case you are wondering) is a soft rounded edge added to the photo, which is usually dark.
Here’s a couple of examples. In the first one, I’ll use a shot taken on the Island Belle (the ferry that takes you to Blennerhassett Island in Parkersburg, WV). Here’s the image without the addition of a vignette (click to enlarge):

Now here’s the same photo with a nice, subtle vignette added (click to enlarge):
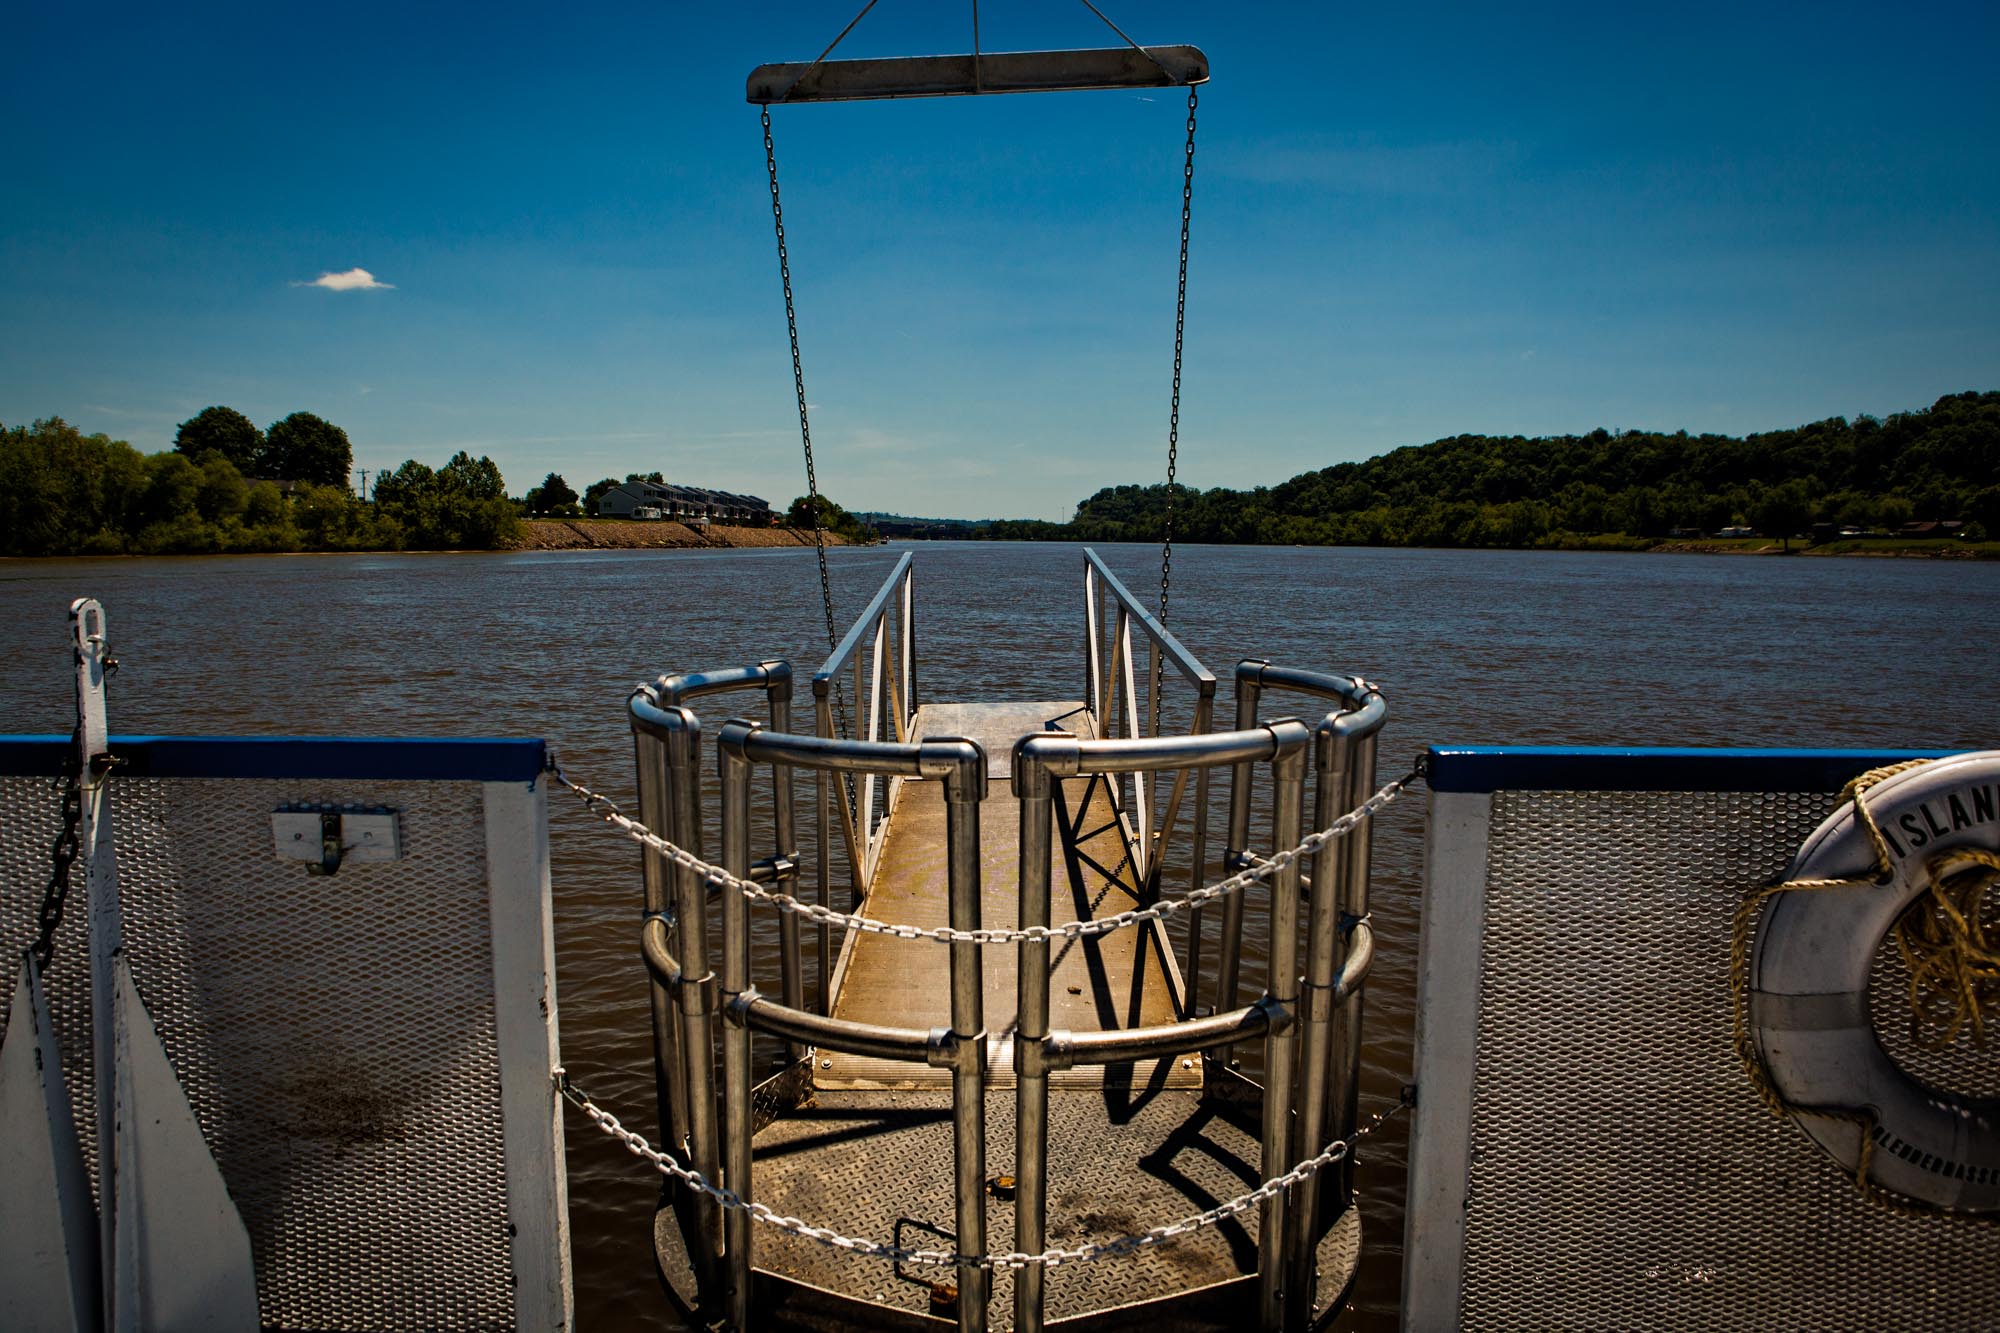
It’s a very subtle effect, but look at the corners of the photo to see what’s been done. You’ll notice there’s a slight darkening of the edges (look at the sky especially). It adds that extra little touch that the photo needed to draw your eye inward.
Here’s another example, this time using a truck. Here’s the original photo without any vignetting (click to enlarge):

Now here’s the same photo with vignetting added (click to enlarge):

Notice the edges of the photo appear to be darkened a bit, almost as if an oval shaped spotlight is shining on the photo? That’s vignetting, and in this case it really helps to draw your eye to the center of the photo.
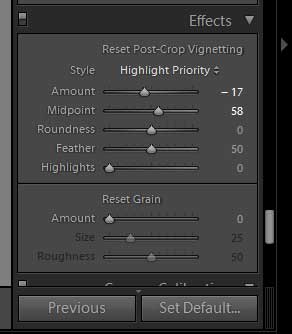
So how do you create a vignette? If you are using Lightroom, it’s ridiculously easy. Just go into the “Develop” module, scroll down almost to the bottom of the panel on the right, then you’ll find a panel named “Effects”. Within the Effects panel, you’ll see an option titled “Post-Crop Vignetting.” Drag the “Amount” slider to the left, and you’ll immediately see the effects as the vignette is added. Drag to the right, and the vignette actually makes the edges brighter instead of darker. Either way though, it’s a super easy way to add that little bit of extra punch to your images.
Here’s what the slider looks like:
Once you start using vignettes, you’ll find it hard to stop. You’ll even start noticing them everywhere; they are used heavily in video production as well as photography.
By the way, if you don’t have Lightroom yet, you can still buy it as a standalone product. You can even buy it from Amazon right here.
That’s about it for this week. Thanks for stopping by!


