I recently got my hands on a Canon 5D Mark IV (upgraded from a Mark II) and one thing that I was eager to try on it was recording to an external HDMI device, specifically the Atomos Ninja 2 HDMI recorder that I’ve had for a while now. Atomos has replaced the Ninja 2 in recent years by the Ninja Flame (probably due to the lack of 4k support on the Ninja 2). This tutorial focuses on using the Ninja 2 with the 1080 HDMI output of the Canon 5D Mark IV. The Canon 5D Mark IV does not support 4k video out of its HDMI port, so the Ninja 2 is actually a perfect external recorder for it.
I also recently did a post about using an Atomos Ninja Inferno with a Sony A7R3 if that’s something you might be interested in. You can check out that post here.
The Ninja 2 is a portable HDMI recorder that records directly from your camera’s sensor. Your camera is saved from the usual wear and tear of having the sensor heat up (which can also result in noisy footage) and you get better video quality in the Ninja 2. Not to mention the only limitation in terms of the length of the clip that can be recorded is the size of the hard drive you’ve chosen for the Ninja. For long form video shoots where 1080i is an acceptable resolution, The Ninja 2 is a great solution. So how does it work with the 5D Mark IV? Read on…
The Canon 5D Mark IV does not output 4k from its HDMI port, which was a big complaint among users when it was released in 2016 (it does record 4k internally, however). For my workflow, this was not an issue as I’m almost always shooting and editing in 1080p. In fact, for me the 5D Mark IV is a huge upgrade in terms of recording to an external device as the 5D Mark II had no reliable way to do so. Sure, you could install Magic Lantern, but even that didn’t get you a full 1080p resolution from the HDMI port. Not a problem with the Mark IV! So the Ninja 2 is a great solution, and the price can’t be beat ($295).
The Ninja 2 and 5D Mark IV work nearly perfectly together directly out of the box, but there are some settings you need to be aware of, which I’ll cover below.
Setting up the 5D Mark IV to work with the Atomos Ninja 2
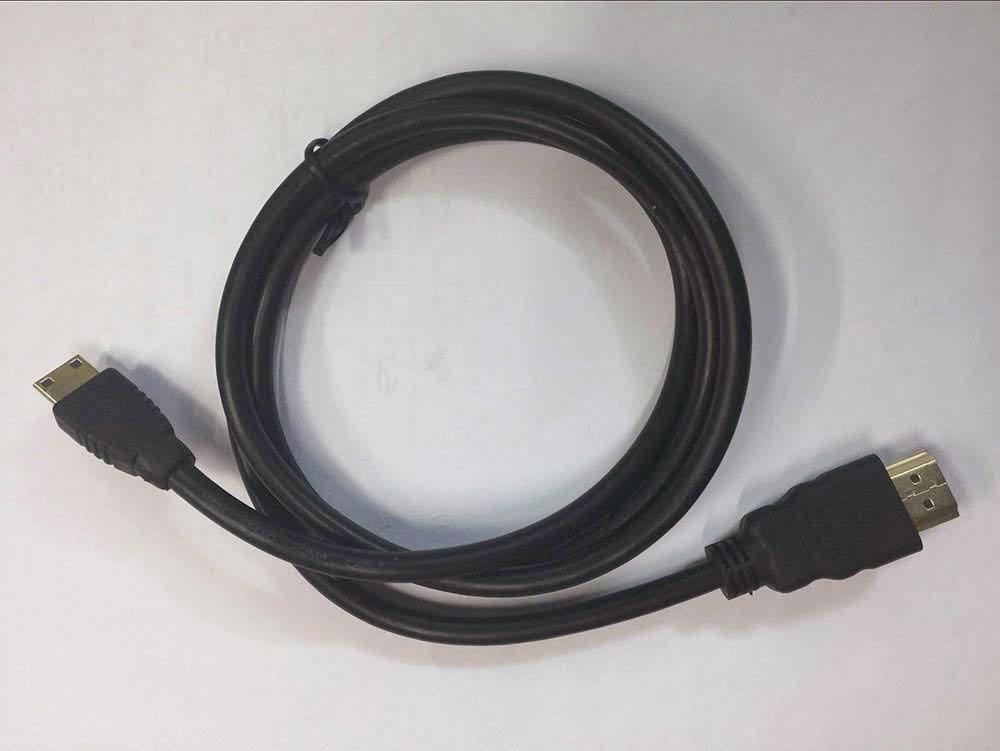
The 5D Mark IV does not come with an HDMI cable, so you’ll need to buy one. This one will work – even with the cable protector (more on the cable protector below).
With that cable in hand, you’ll need to dive into a few camera settings. First off, you’ll want to set the HDMI frame rate to match what the Ninja 2 will be recording. The Ninja 2 can record at the following resolutions and Frame rates:
HD: 1080i 60, 1080i 59.94, 1080i 50, 1080p 30, 1080p 25, 1080p 24, 1080p 23.98, 1080p 30(60i), 1080p 25(50i), 1080p 24(60i), 1080p 23.98(60i), 720p 60, 720p 59.94,
20p 50
SD: 480i, 576i
Realtime hardware encoding, 1920 x 1080 8/10-bit 4:2:2 to:
Apple ProRes:
HQ – 220Mbps
422 – 150Mbps
LT – 100Mbps
Avid DNxHD (requires codec unlock):
Avid DNxHD-220X – 220Mbps (10-bit)
Avid DNxHD-220 – 36 Mbps (8-bit)
Avid DNxHD-145 – 36 Mbps (8-bit)
The 5D Mark IV’s output resolution from the HDMI port is 1920 x 1080 (1080p uncompressed YCbCr 4:2:2, 8-bit). NTSC frame rate options are 59.94i, 59.94p, and 23.98p. PAL frame rate options are 50.00p and 50.00i.
For NTSC users, I recommend that you set the frame rate on the camera to 59.94i when working with the Ninja 2. For PAL users, I recommend that you set the frame rate on the camera to 50.00i when working with the Ninja 2. Set the HDMI frame rate by hitting the “Menu” button on the back of the camera, then go to page 4 of the Setup menu (the little wrench icon). The HDMI frame rate setting is the first one listed (NTSC settings shown below).
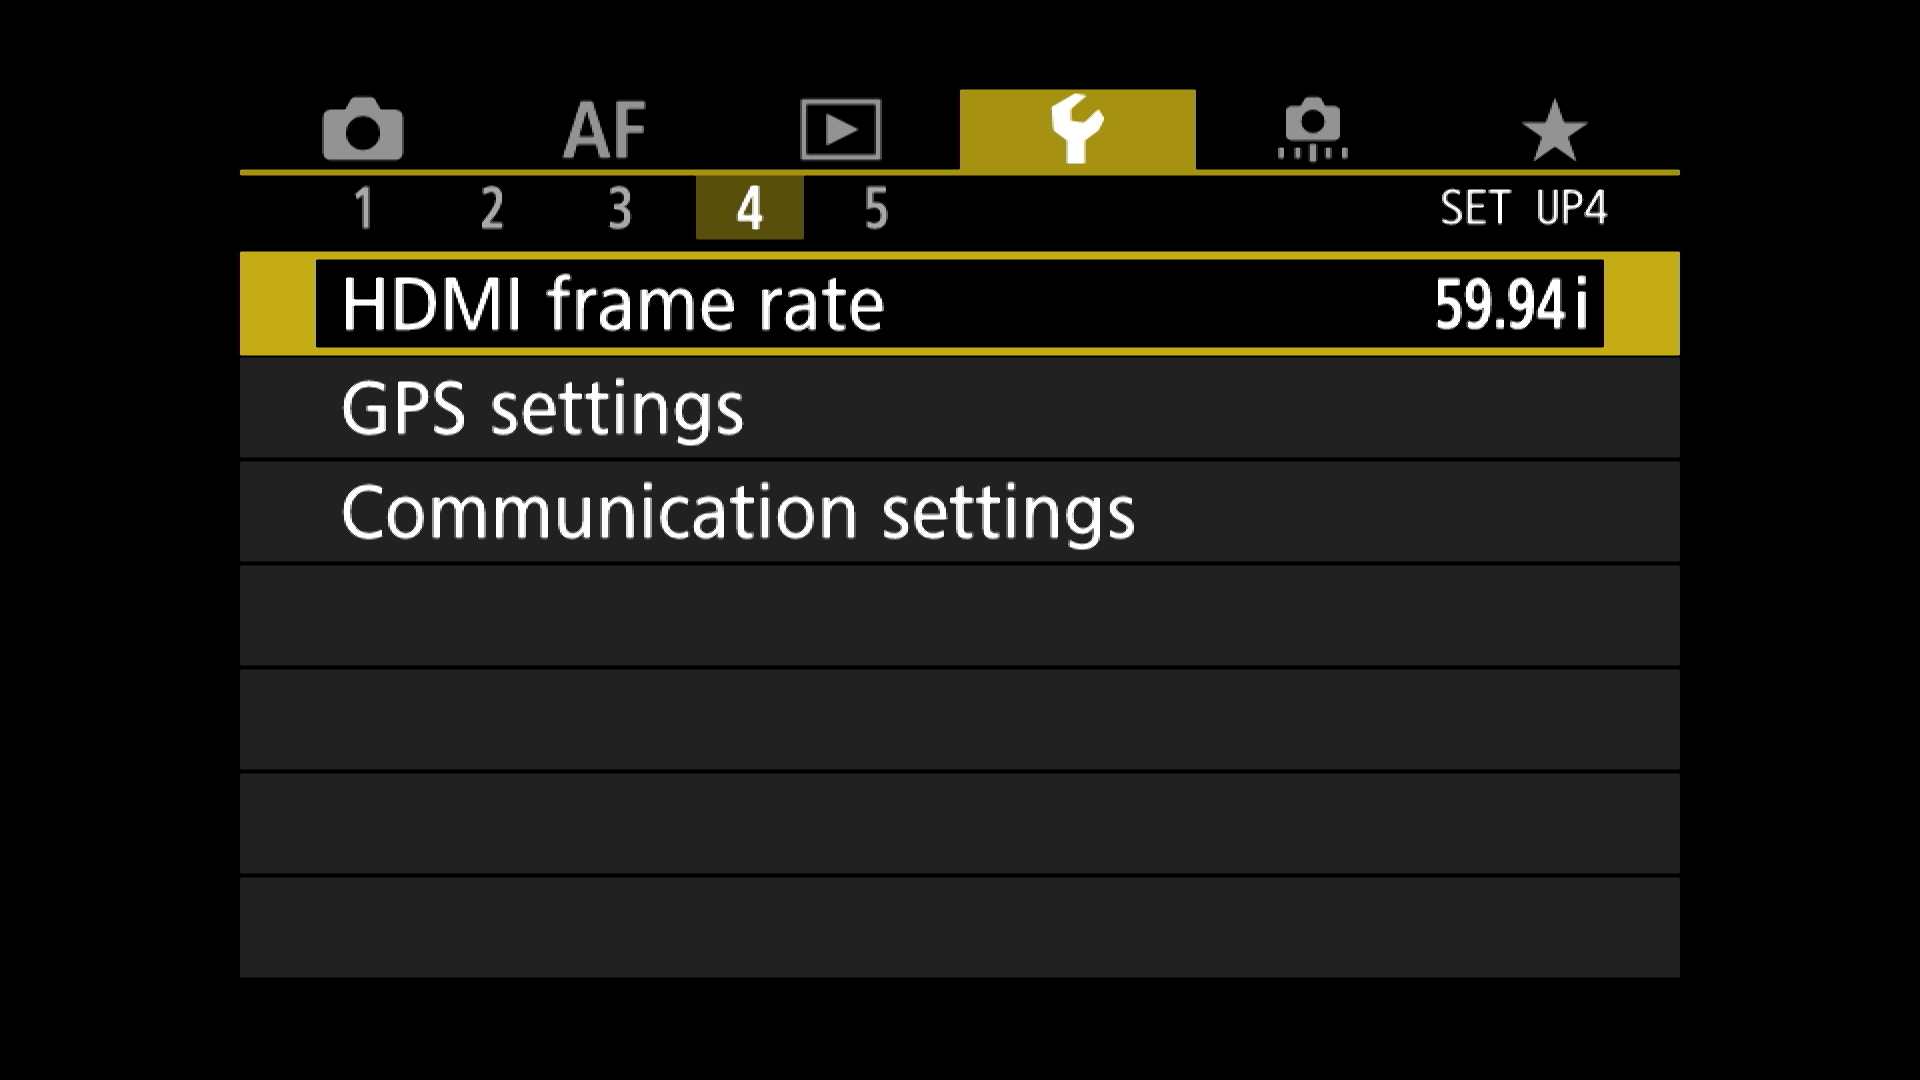
Settings for HDMI frame rate
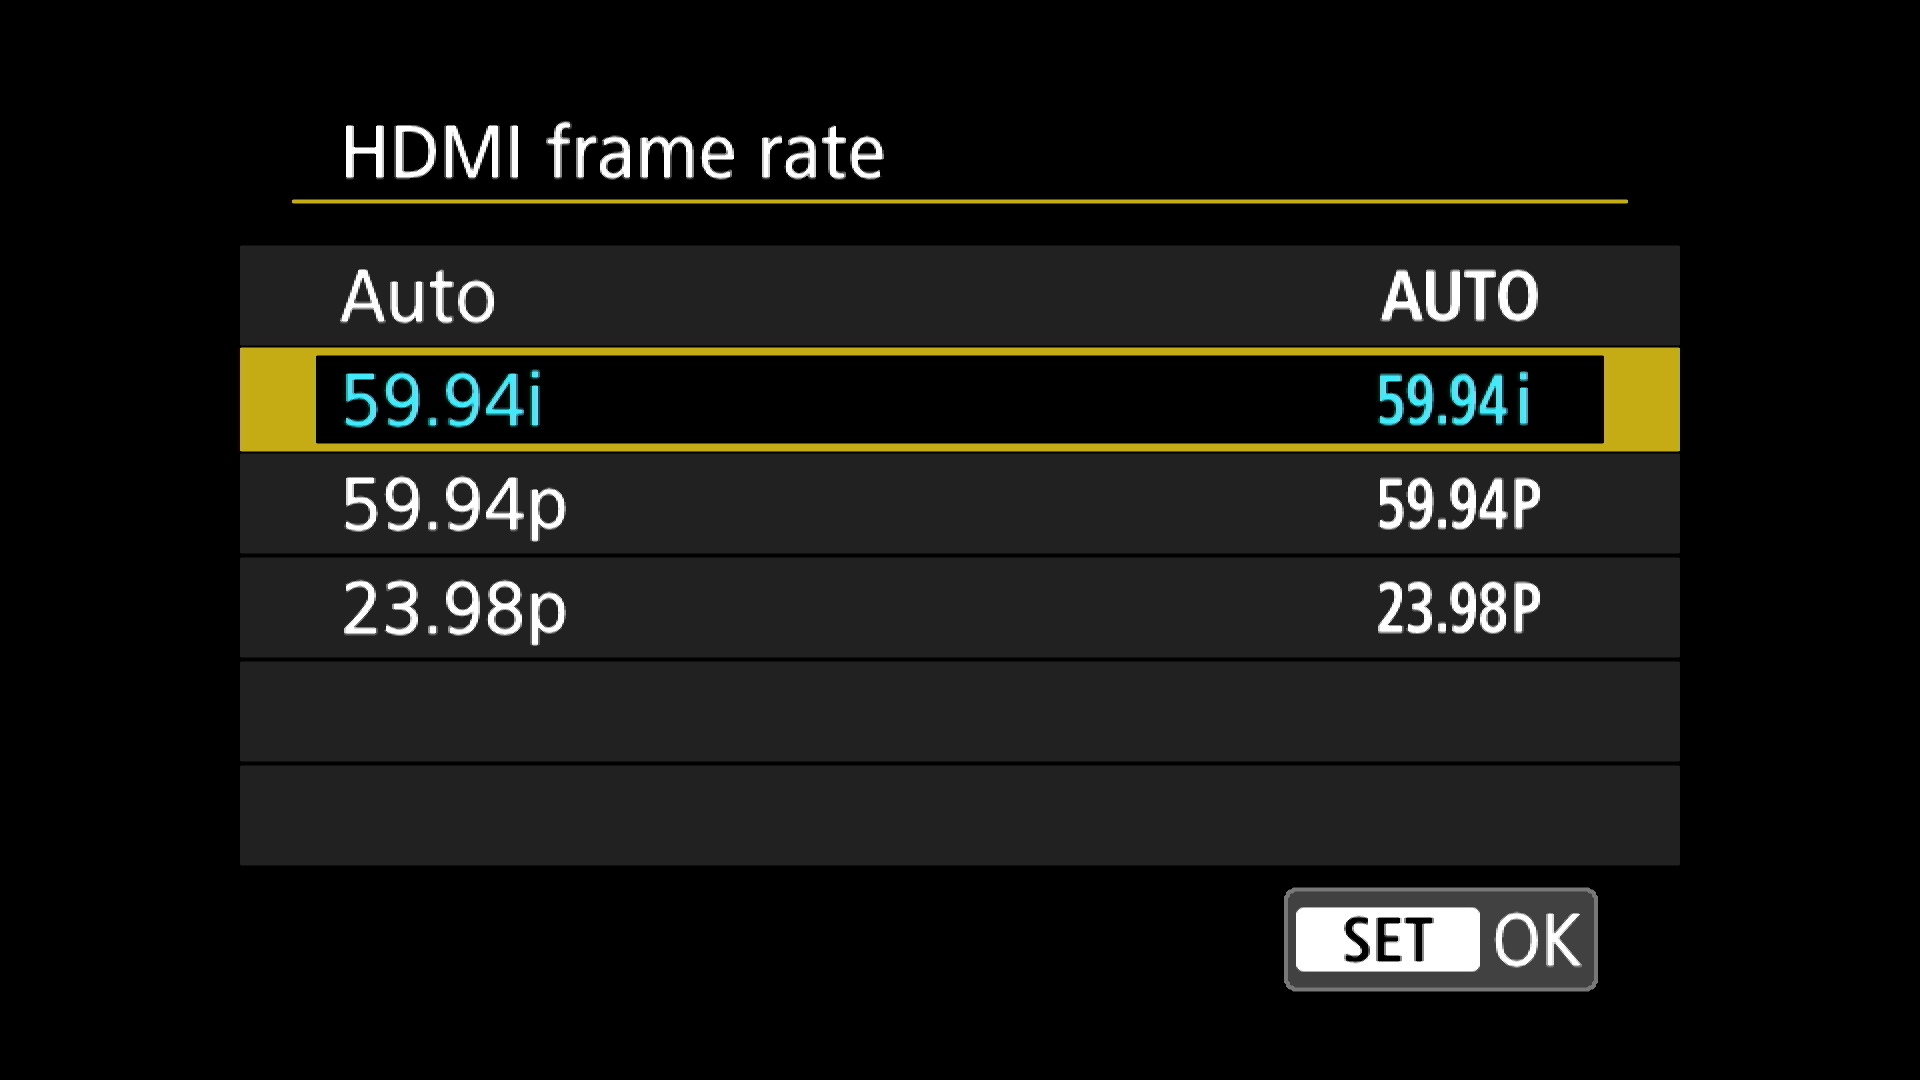
Select 59.94i
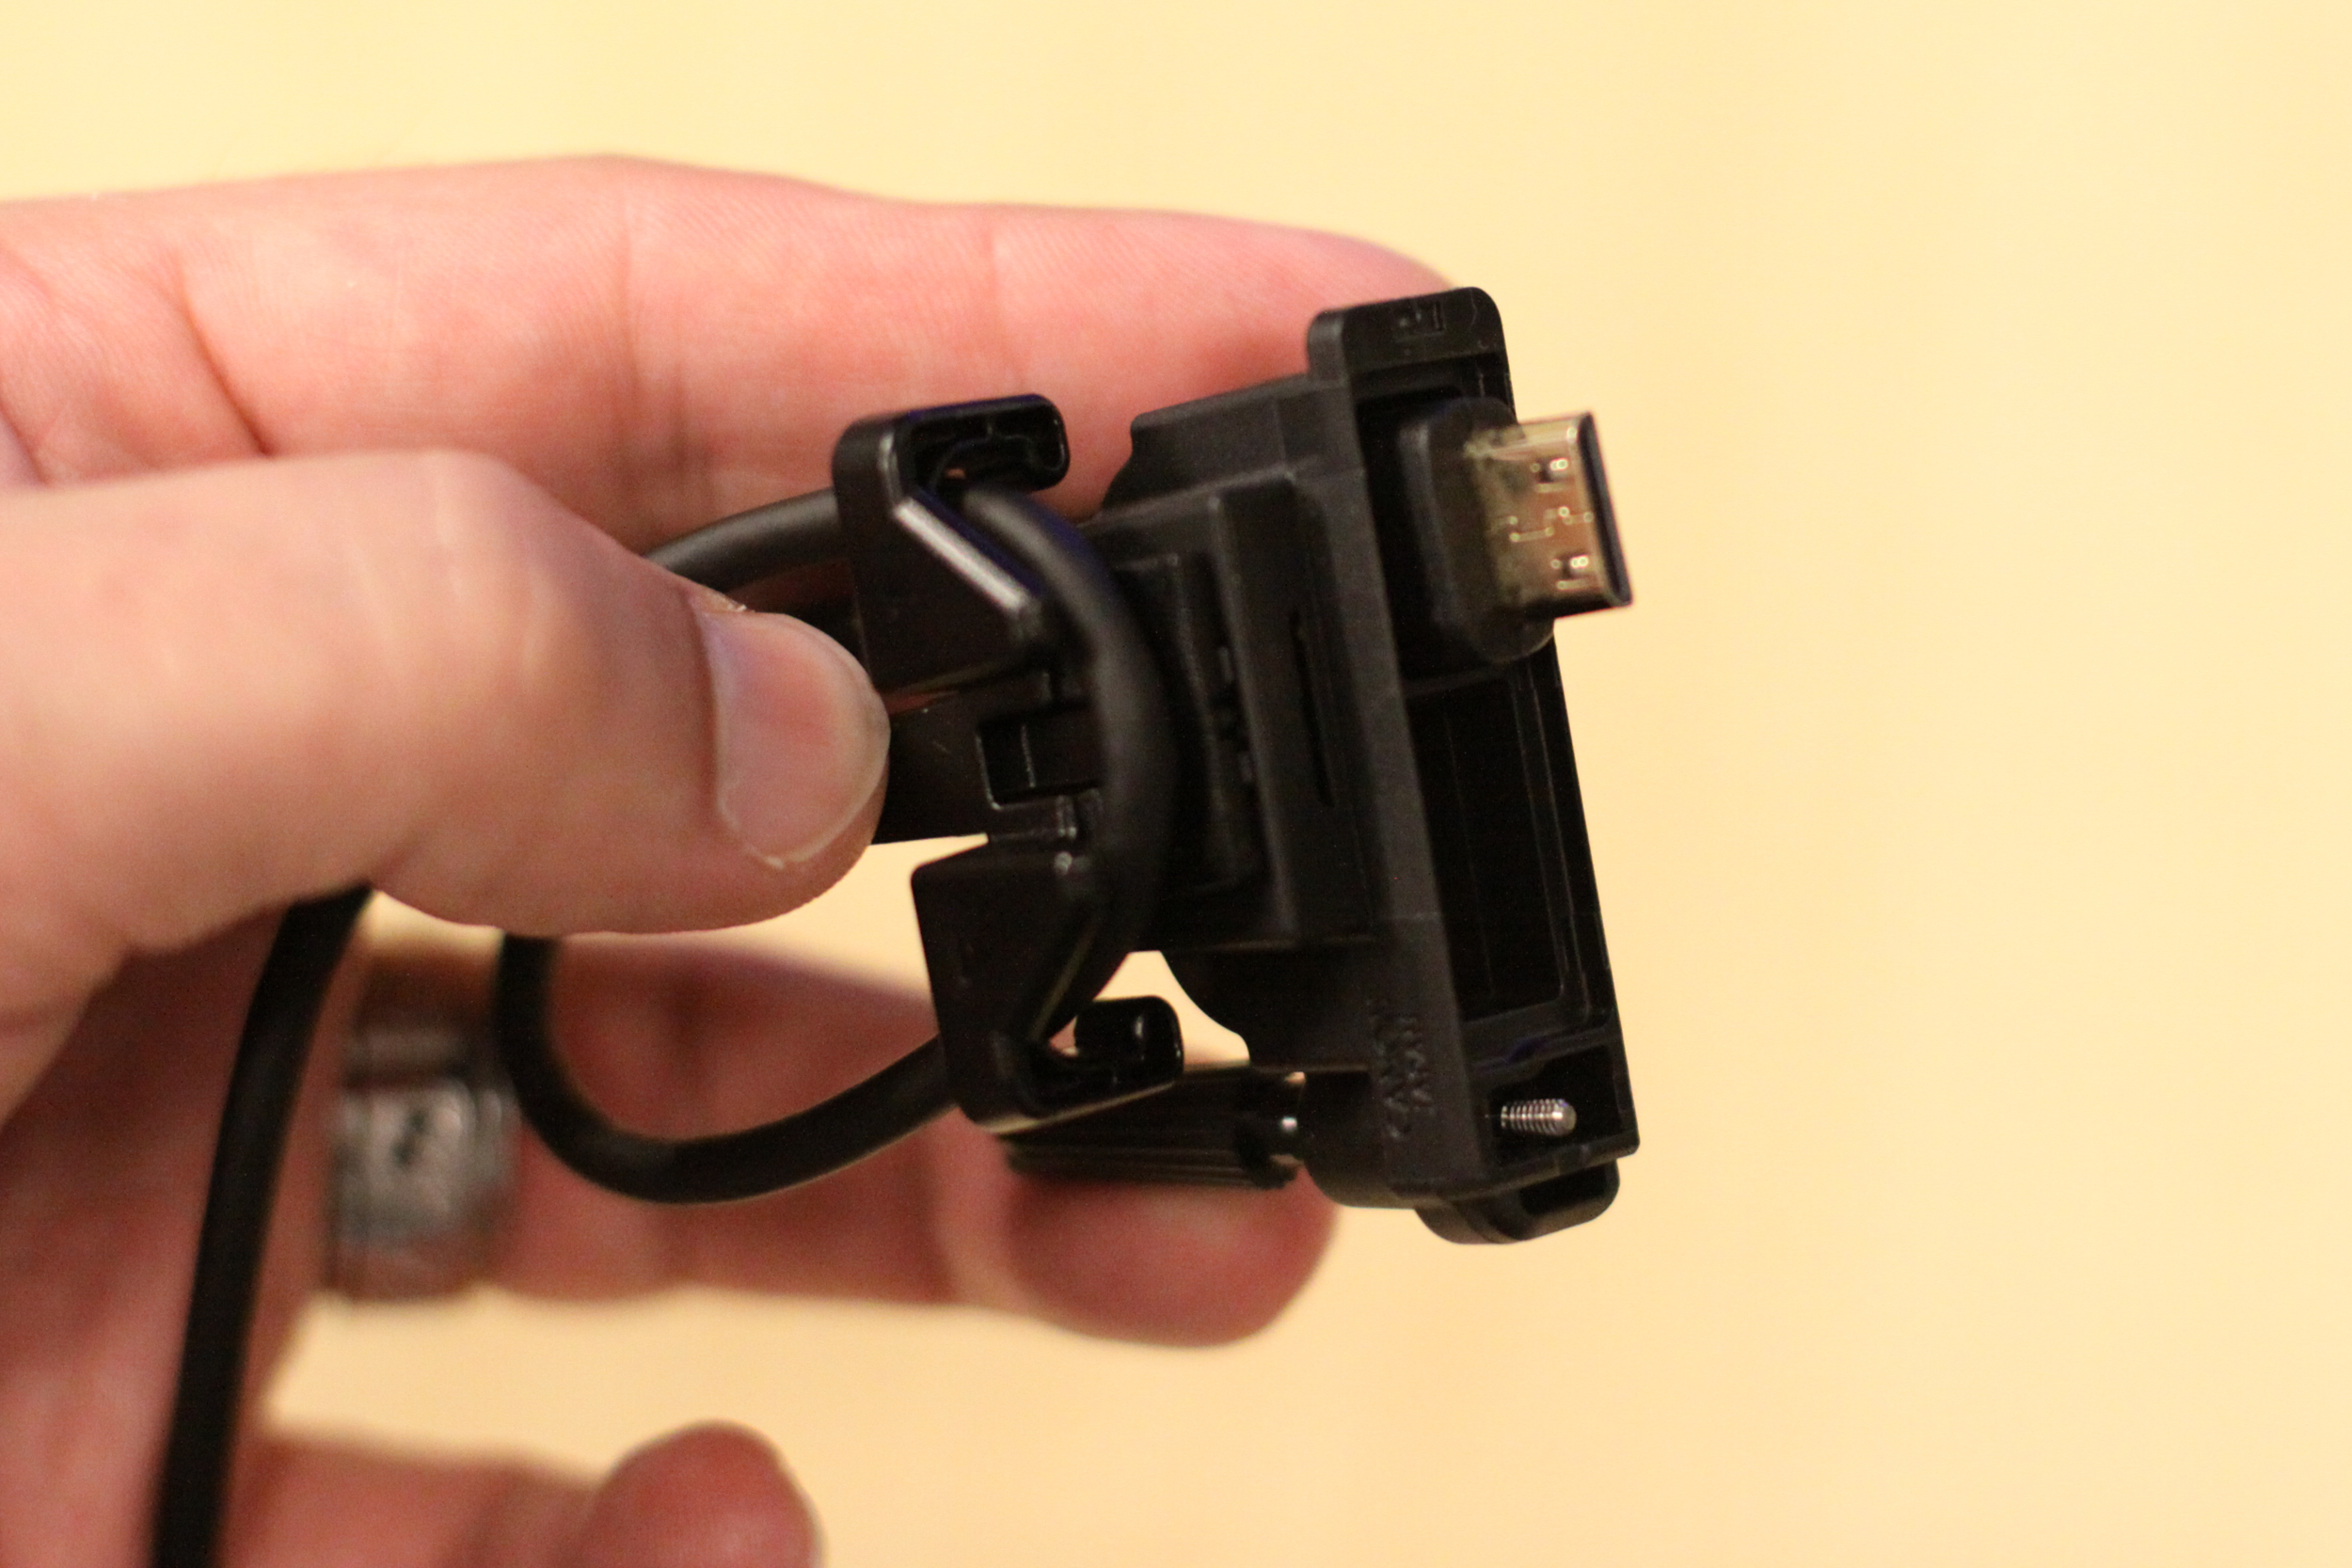
Your 5D Mark IV came with a cable protector (it’s a weird looking plastic thing). The purpose of the protector is to prevent damage to the HDMI input, which apparently costs a LOT of money to repair. Here’s what the cable protector looks like with the HDMI cable routed through it:
Attach the cable protector to the camera, as shown below:
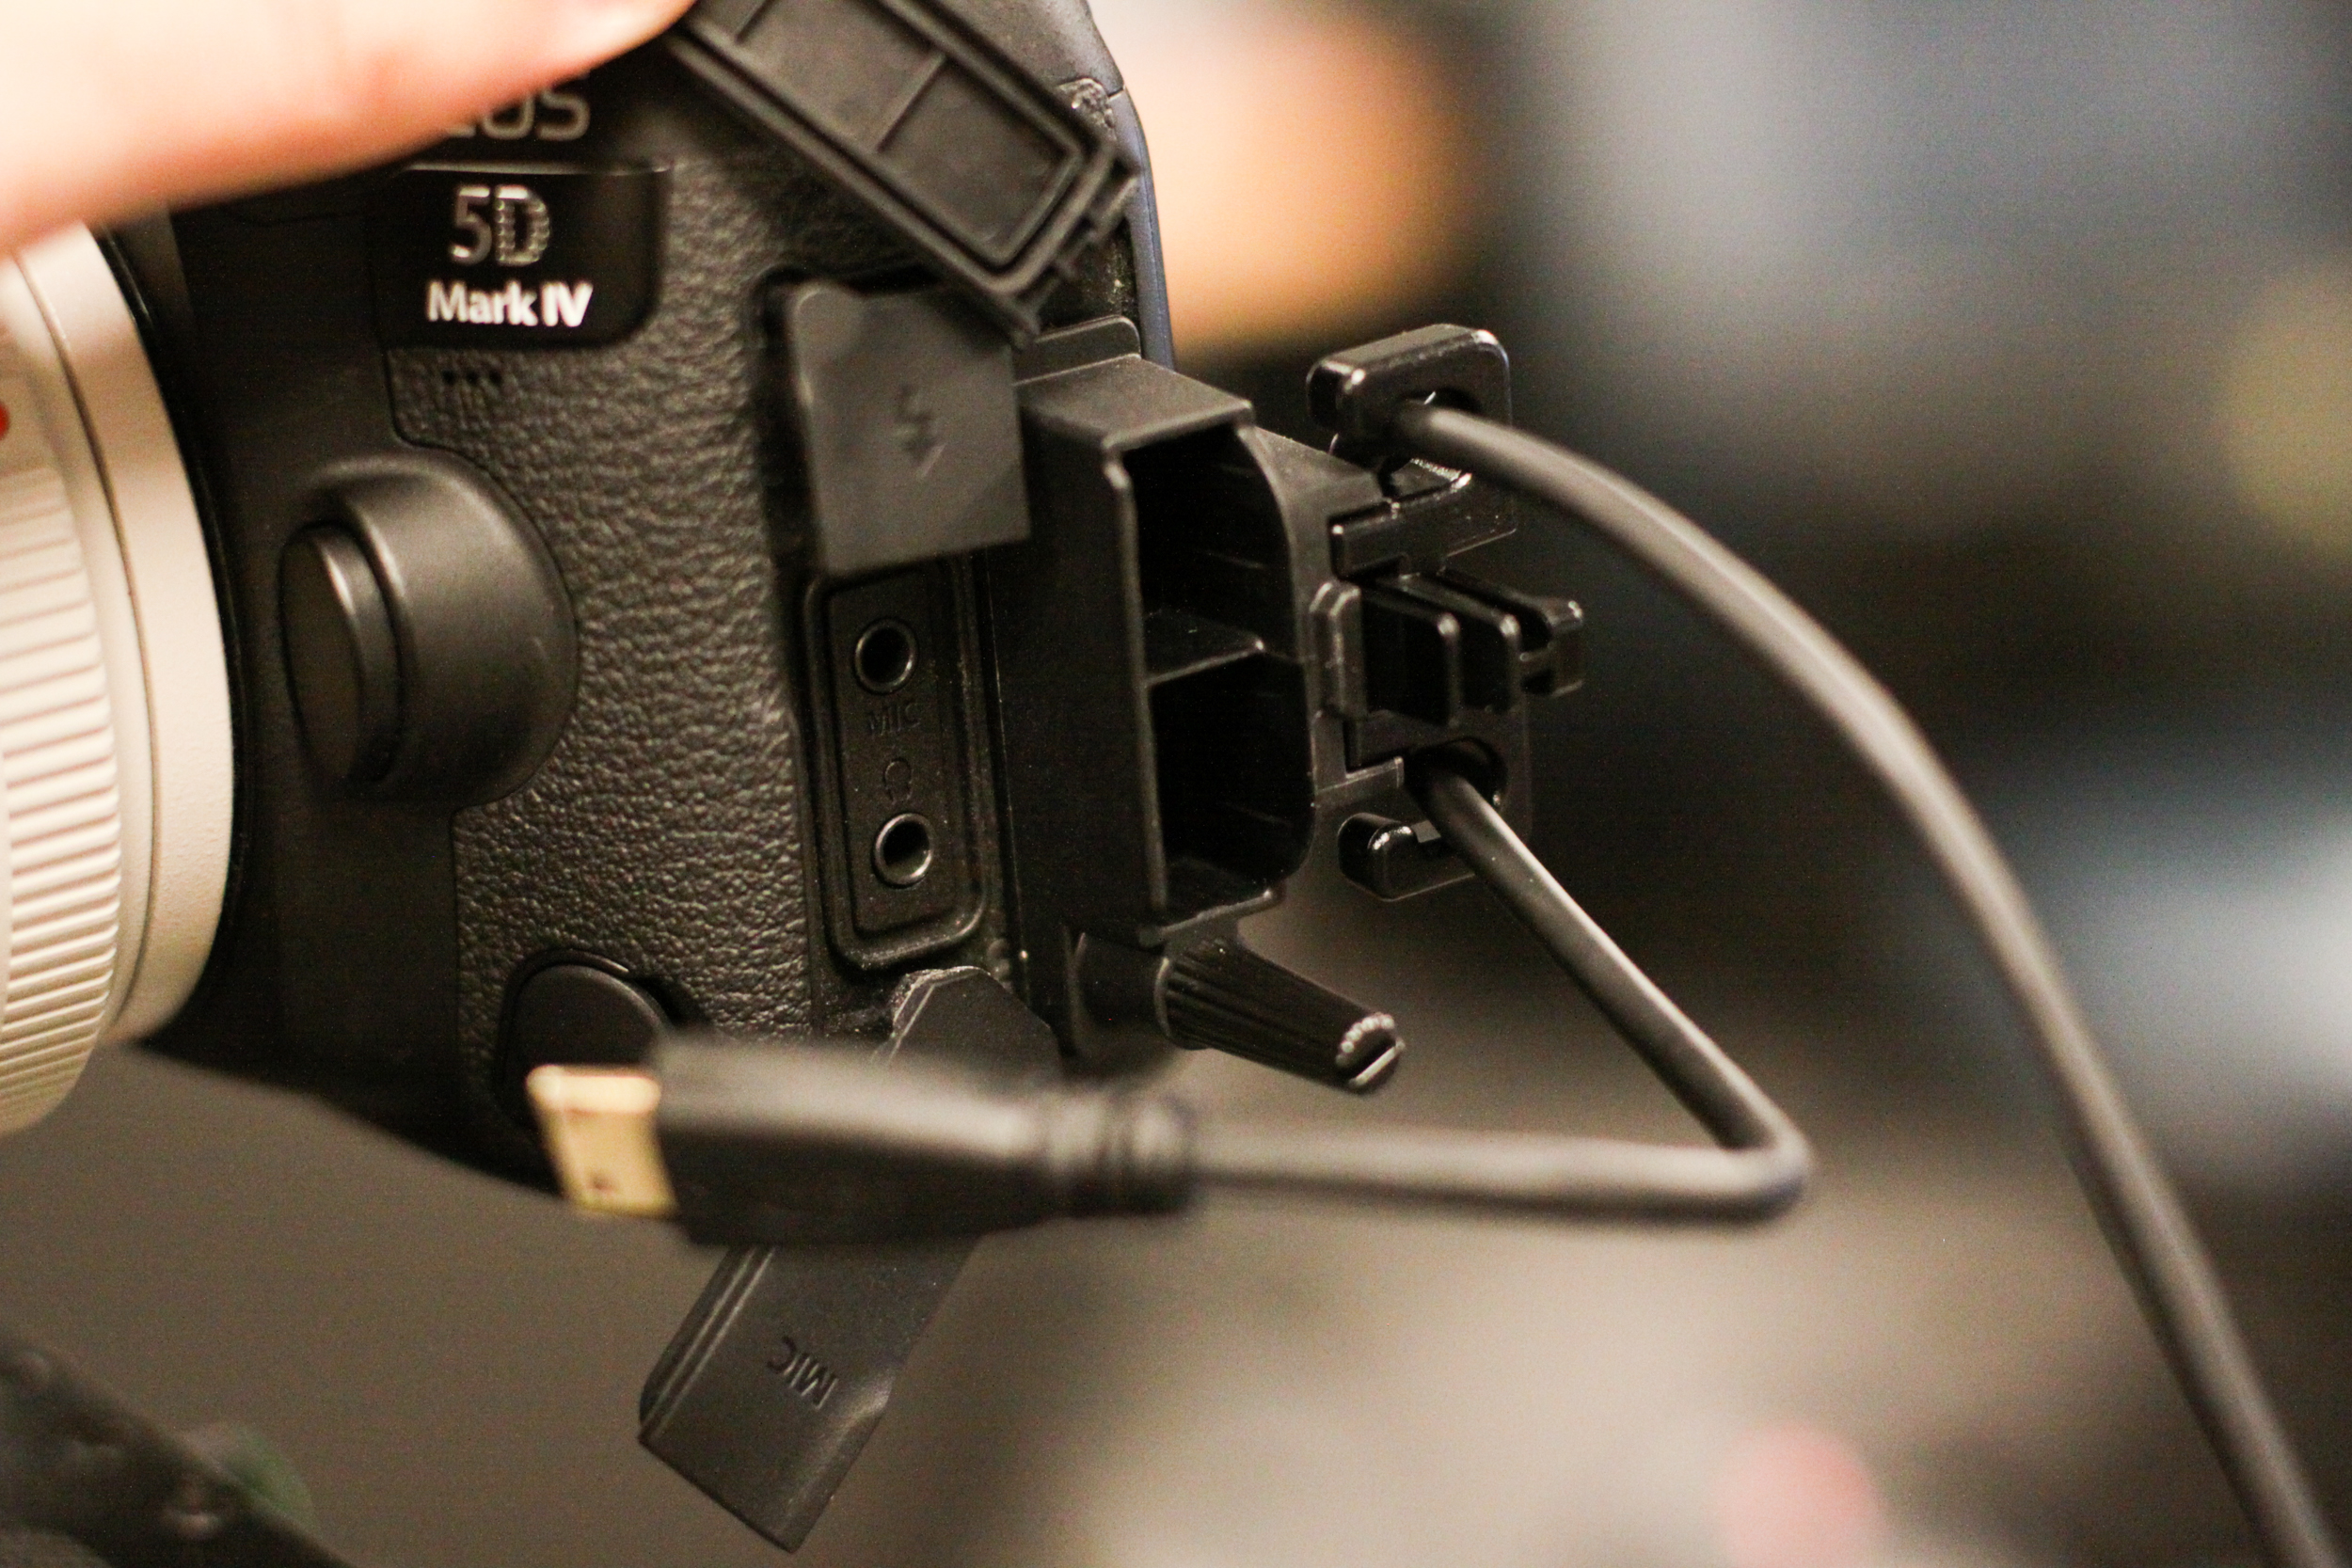
Next, go ahead and plug your HDMI cable in, as shown below:
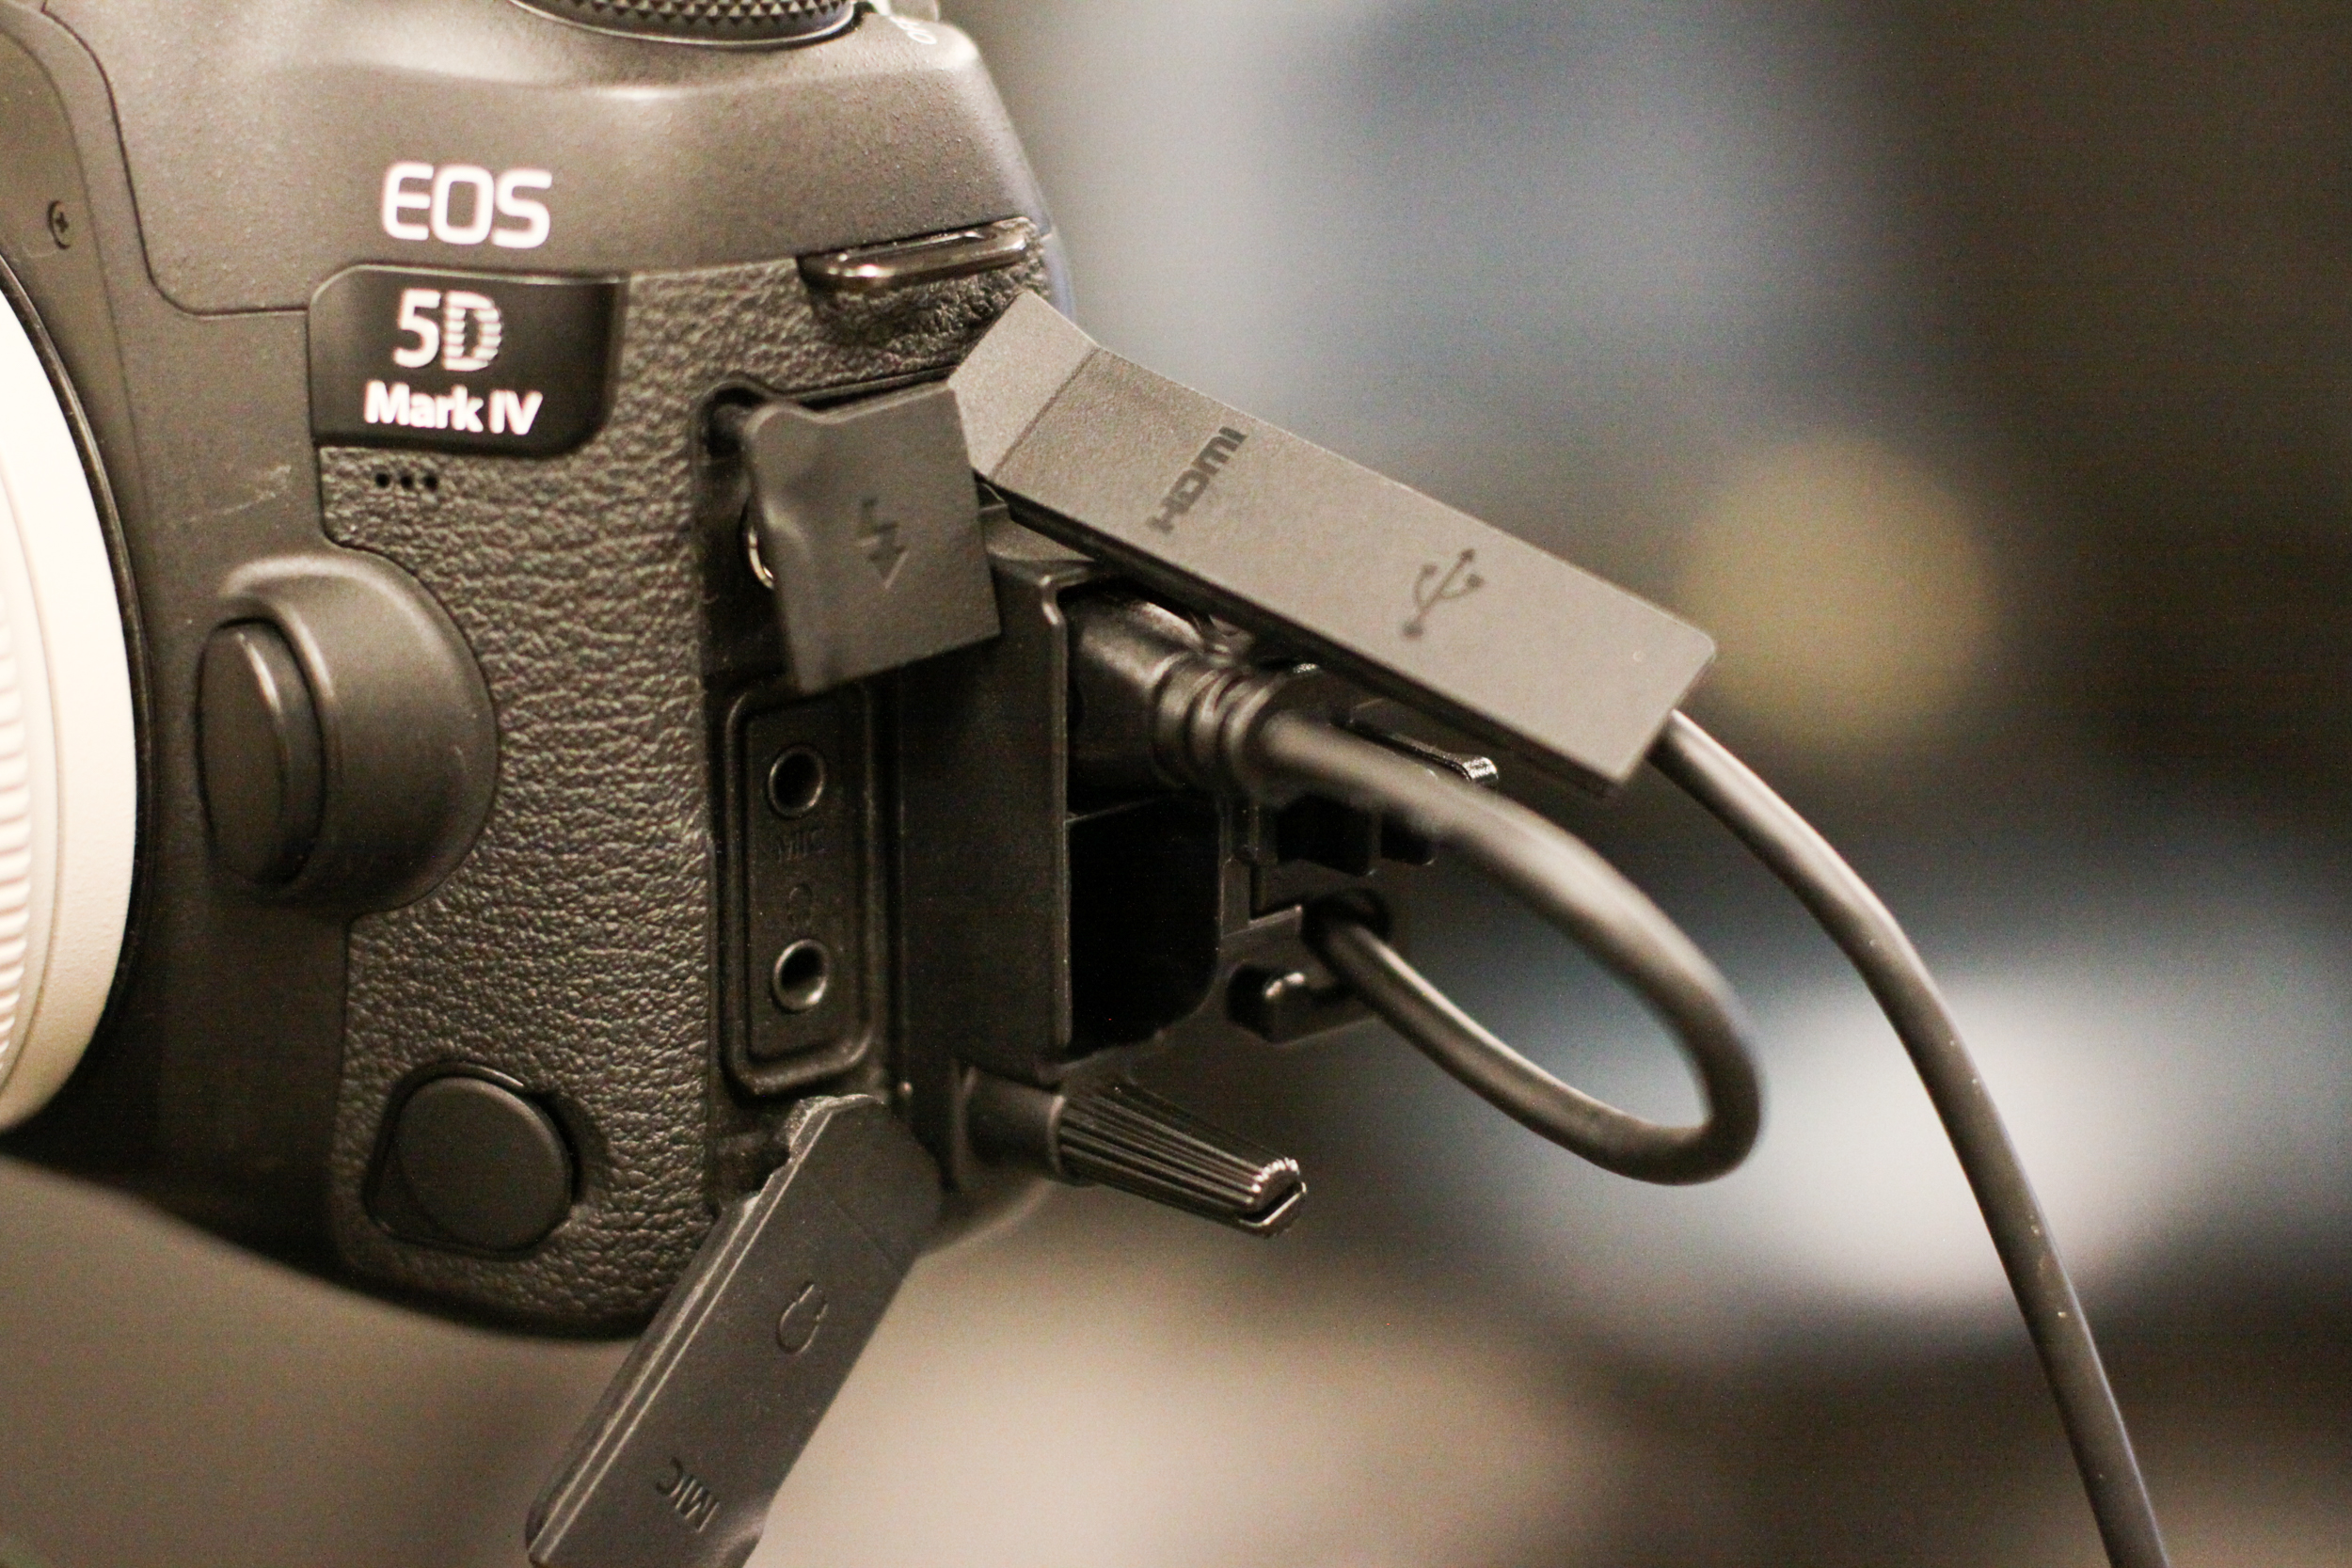
HDMI cable plugged into the camera with Canon cable protector
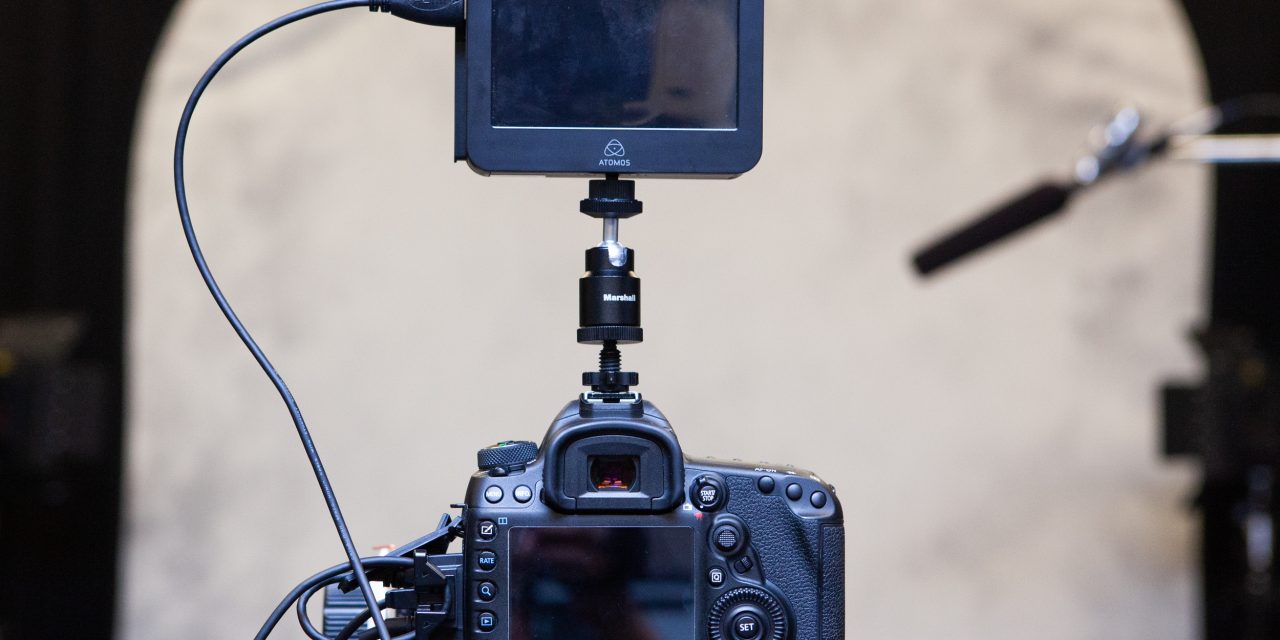
Attach the Ninja 2 to the camera using a hot shoe adapter
You’ll need a hot shoe adapter in order to attach the Ninja to your camera. There are several to choose from on Amazon, but getting one with a ball head is the best choice – this one will get the job done. The image below shows how the adapter allows you to attach the Ninja to your camera and how the ball head allowed me to fine tune the position:

Ninja 2 attached to hotshoe adapter and attached to the camera
Setting the resolution, frame rate and codec on the Ninja 2
Resolution and frame rate settings on the Ninja 2 can only be changed when an HDMI cable is plugged in, so plug in the HDMI cable from the camera to the Ninja as shown below:

Plug the HDMI cable into the Ninja using the top port.
Next, put the camera in video mode using the switch on the back of the camera, as shown below:
5D Mark IV Video Mode Switch
Power the Ninja 2 on by pressing and holding the power button on the side of the unit as shown below:
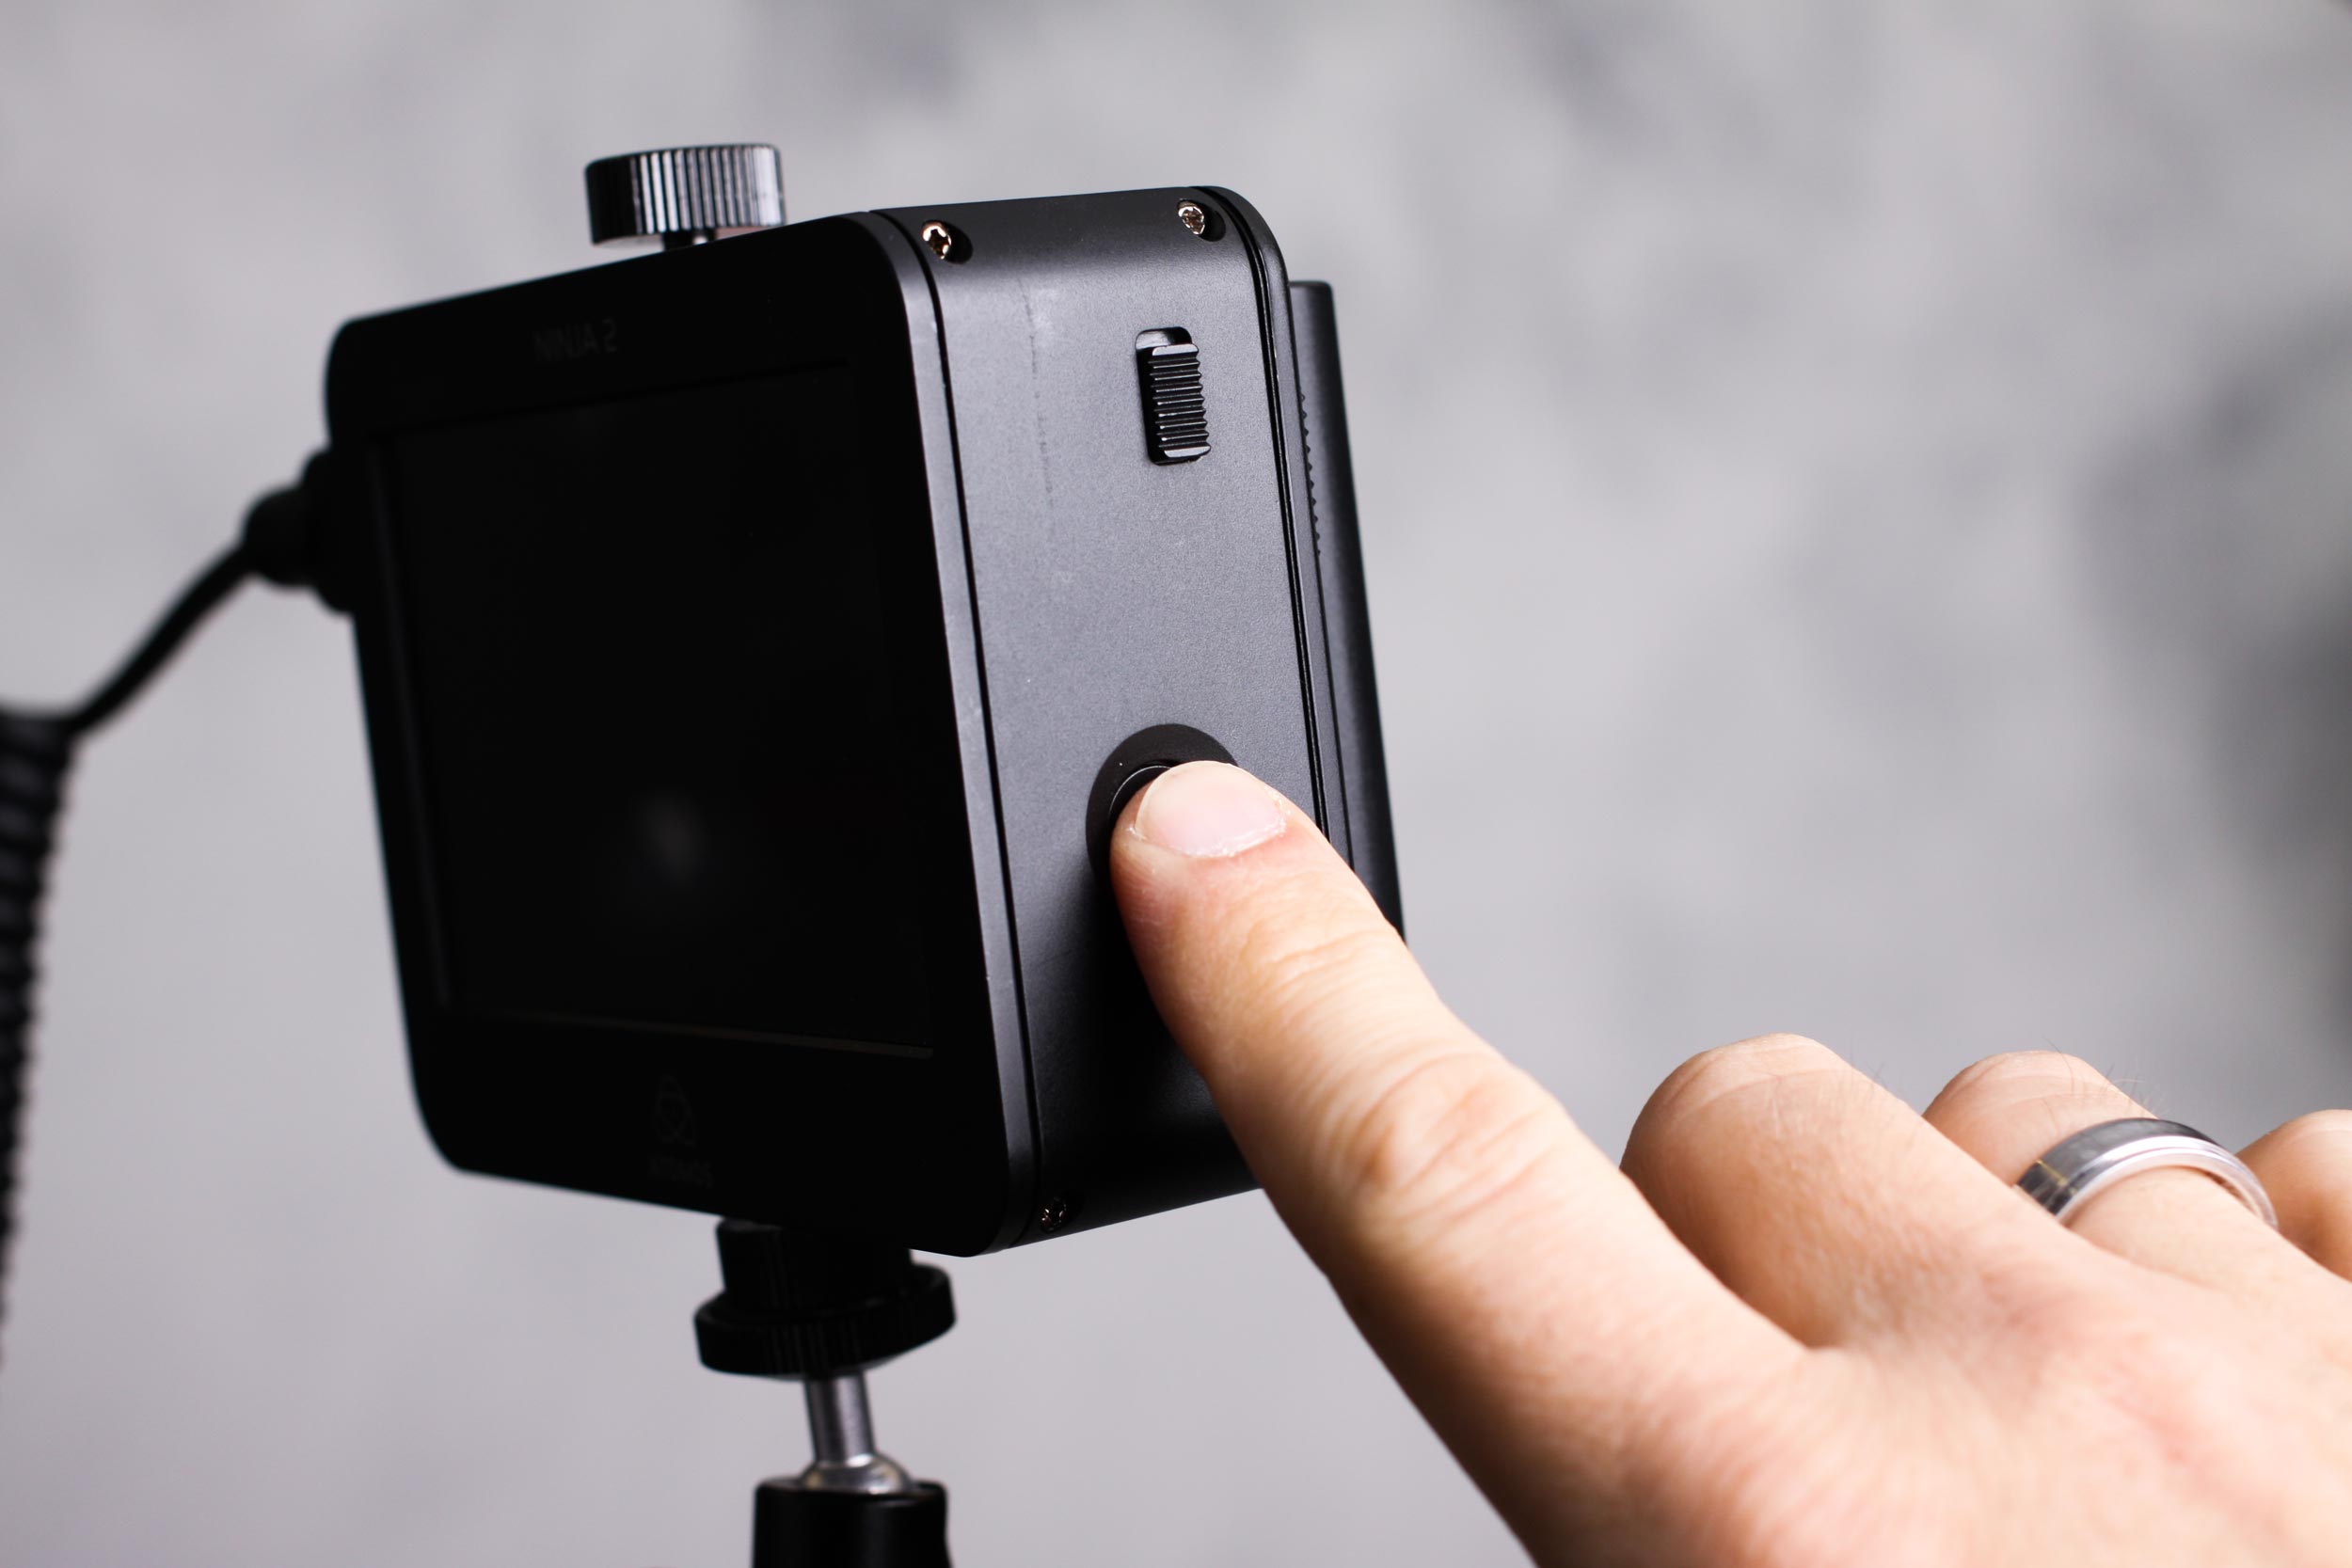
Powering on the Ninja 2
Next you’ll want to set the resolution and frame rate on the Ninja 2 to match the output of the 5D Mark IV, which should be 1080i 59.94. Shown below is the setting on the back of the Ninja 2 that you’ll need to tap on in order to set the resolution and frame rate. Continue tapping the frame rate until the desired setting appears.

Select 1080i 59.94 on the Ninja
To change the codec, tap the screen where the codec is currently listed (you can see that mine is set to “ProRes HQ” which I recommend).
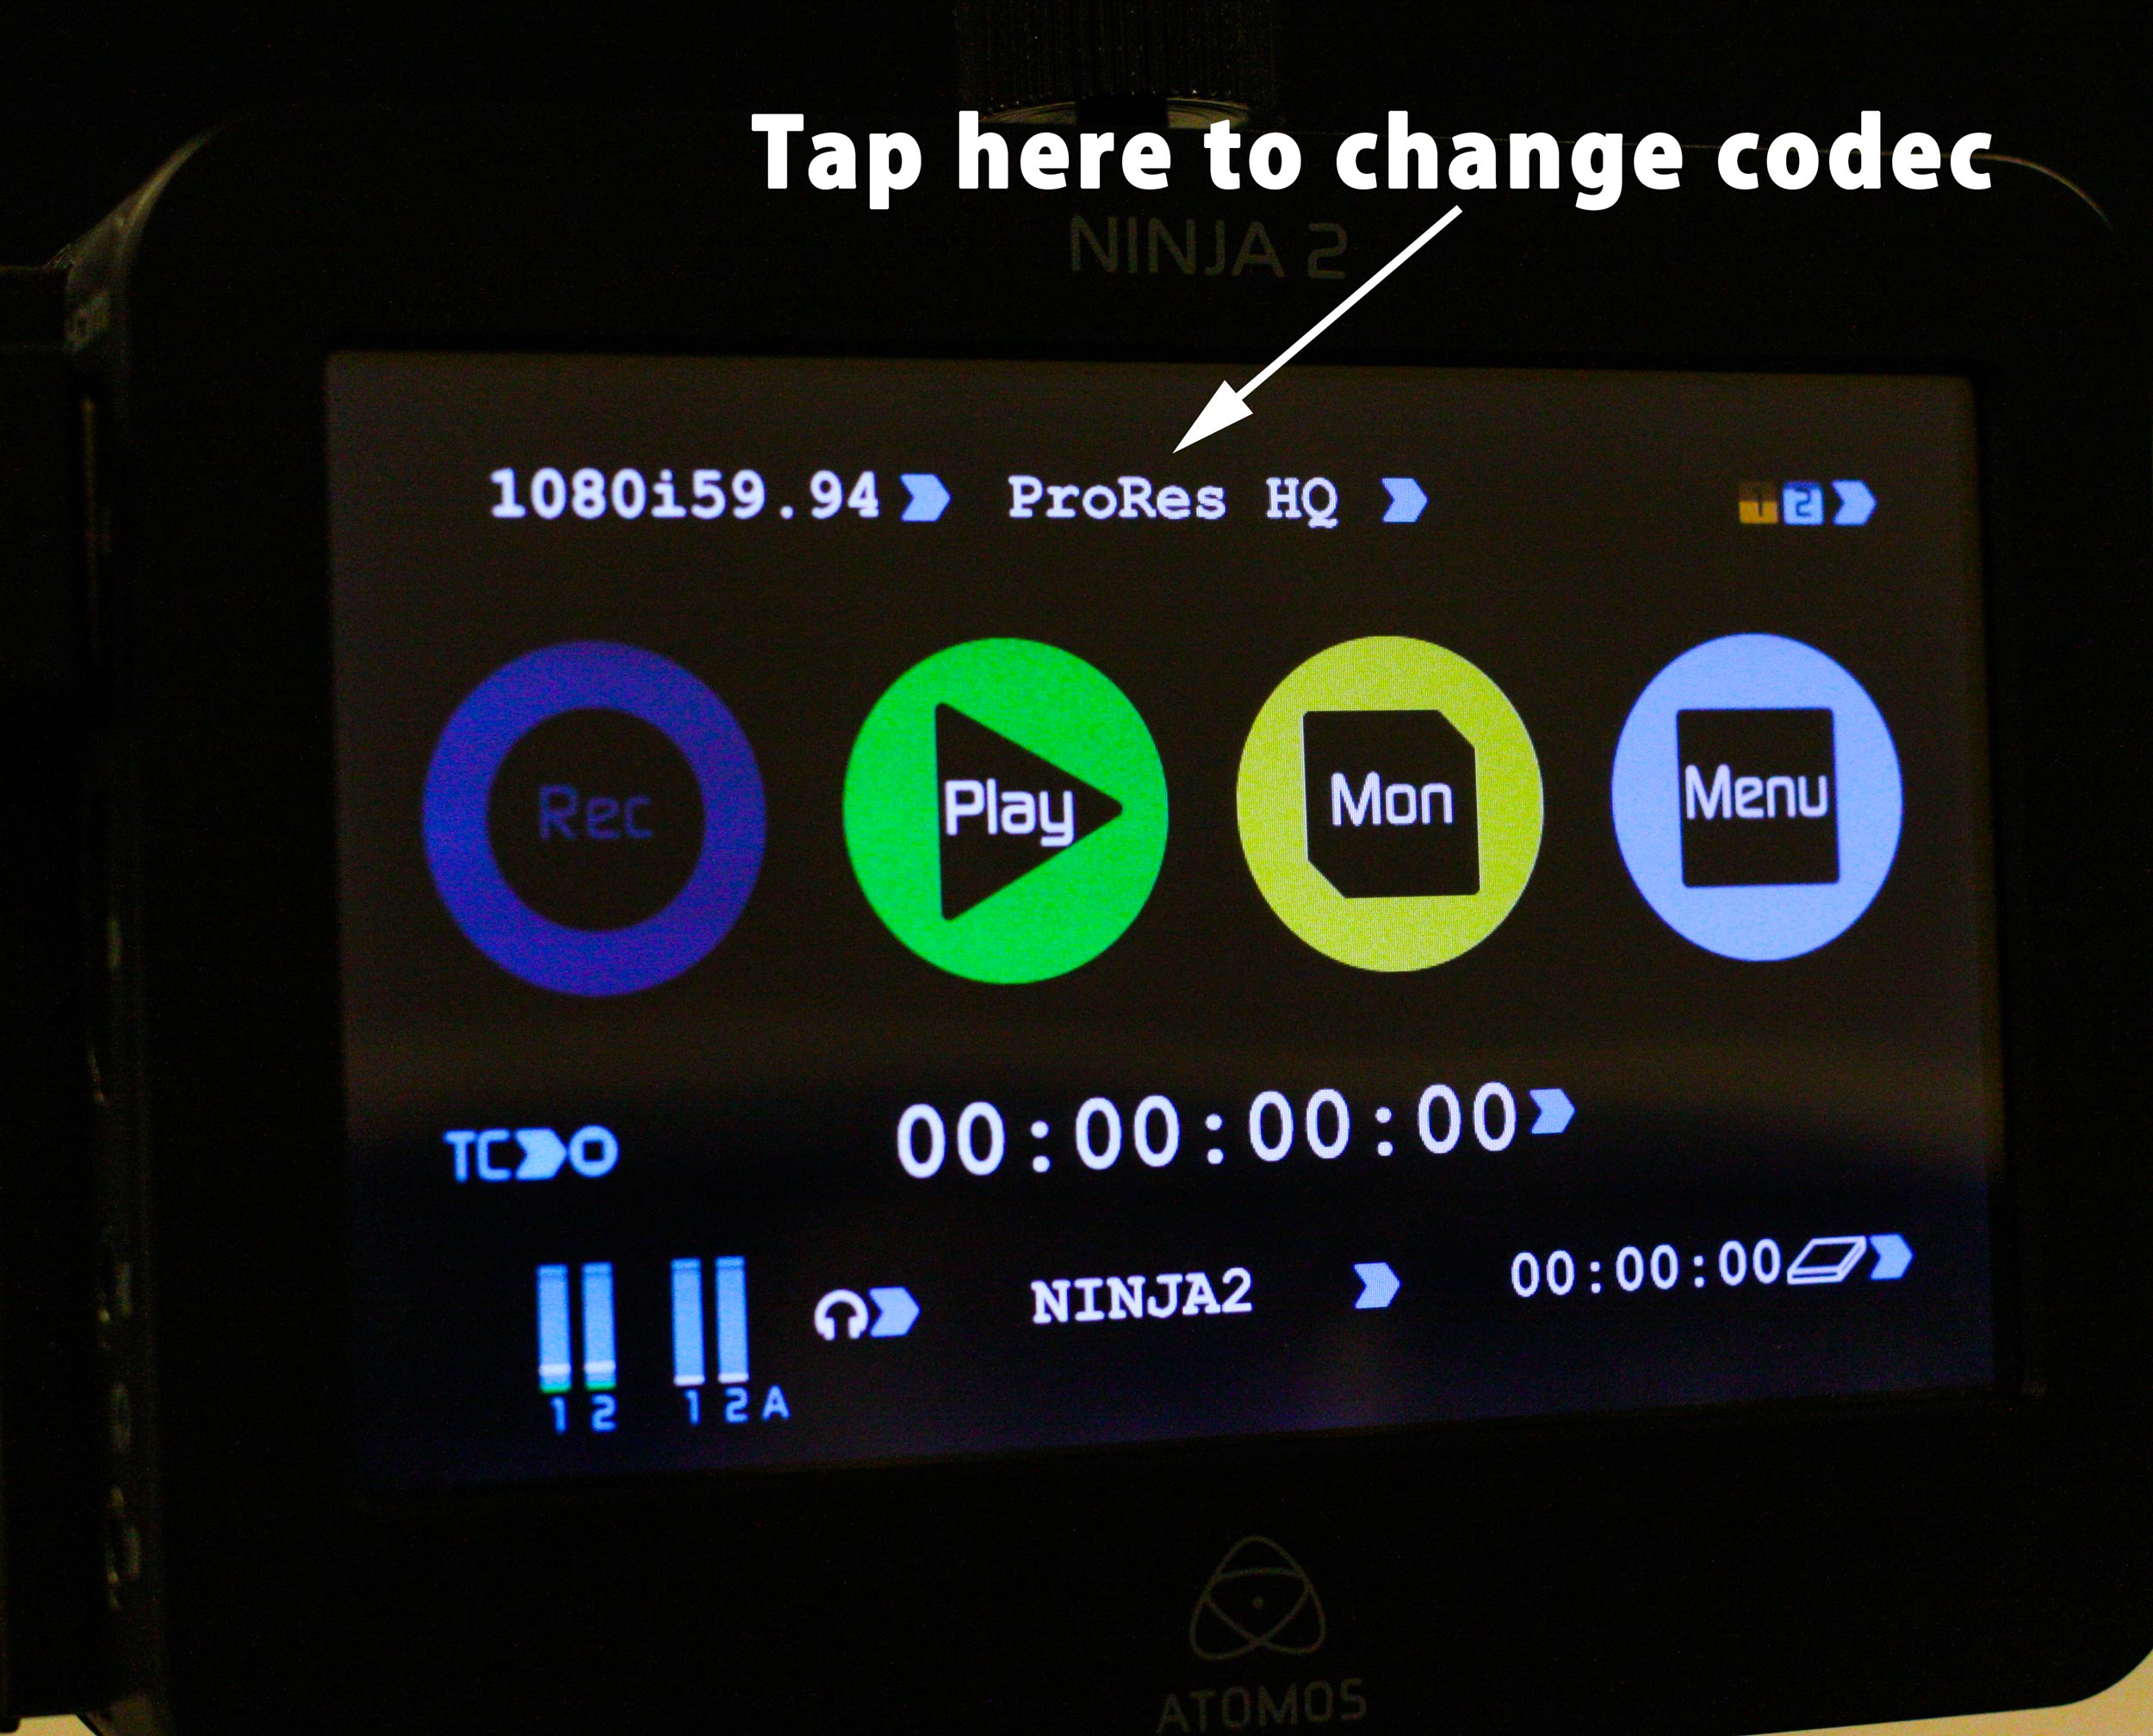
Changing the codec on the Ninja
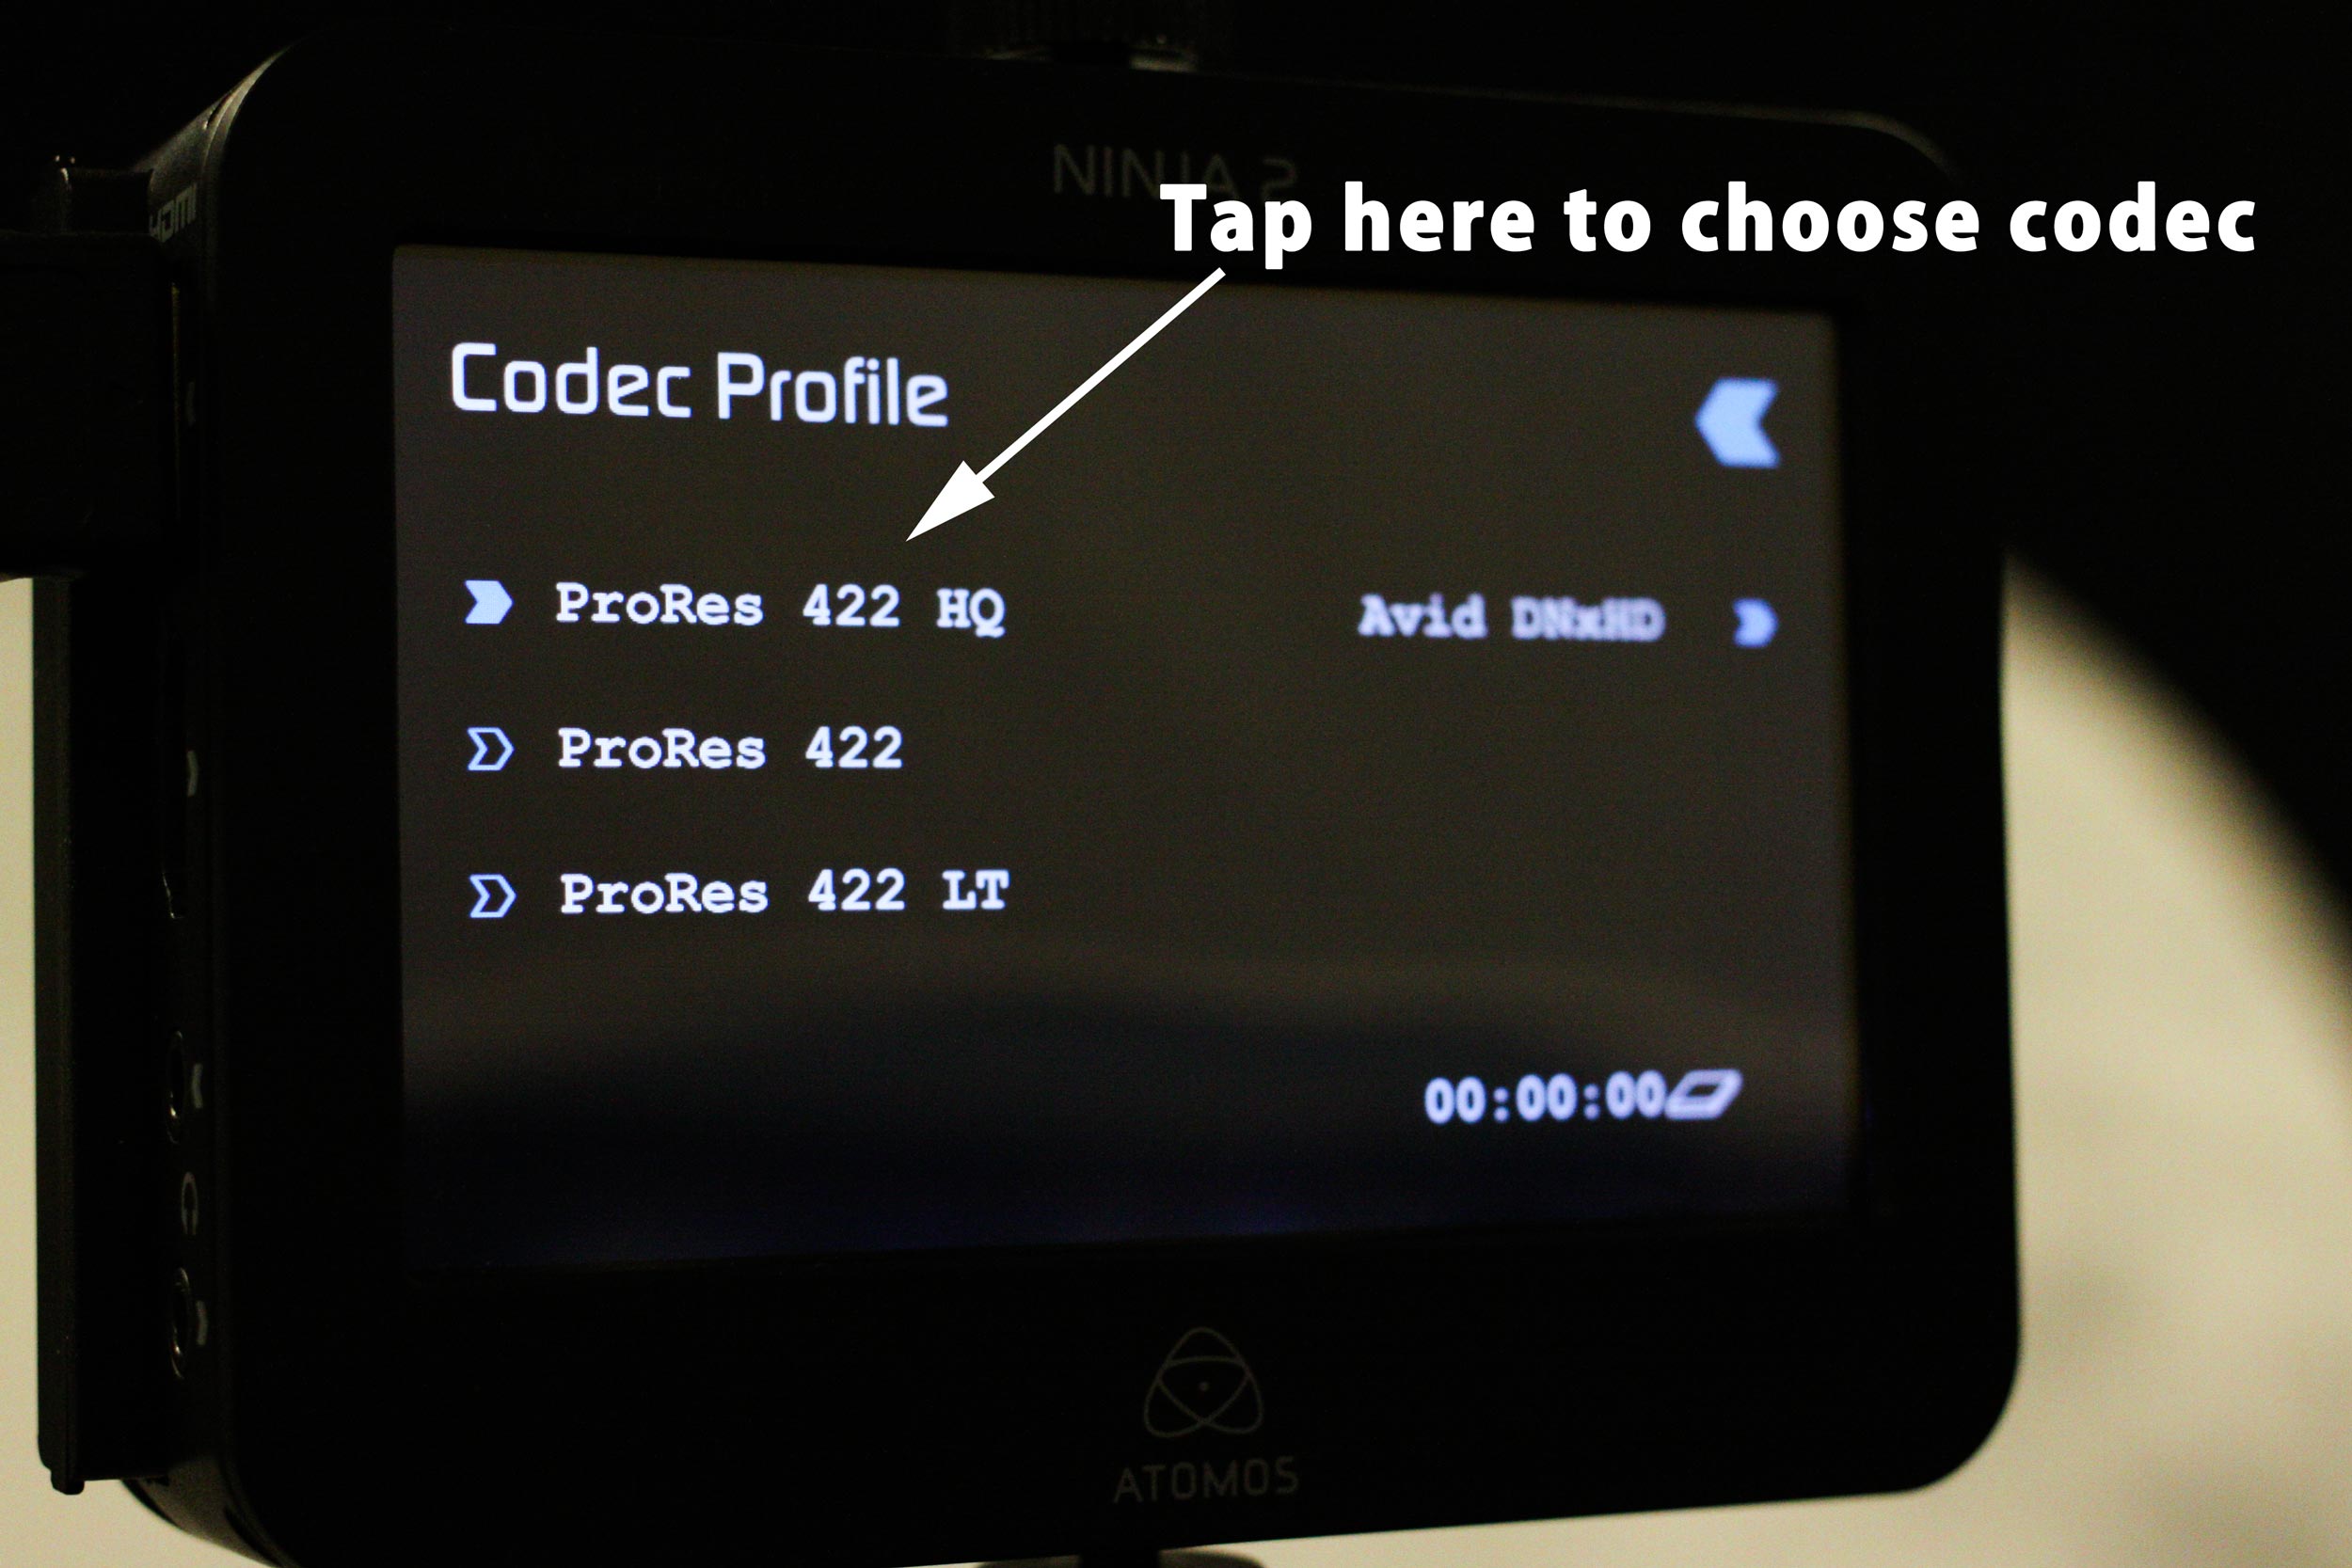
Choosing a codec
Using the 5D Mark IV with the Ninja 2
Now that all of your resolution and frame rate settings are correct on both devices, push the “Mon” button on the Ninja. Mon stands for “monitor” in case you were wondering.
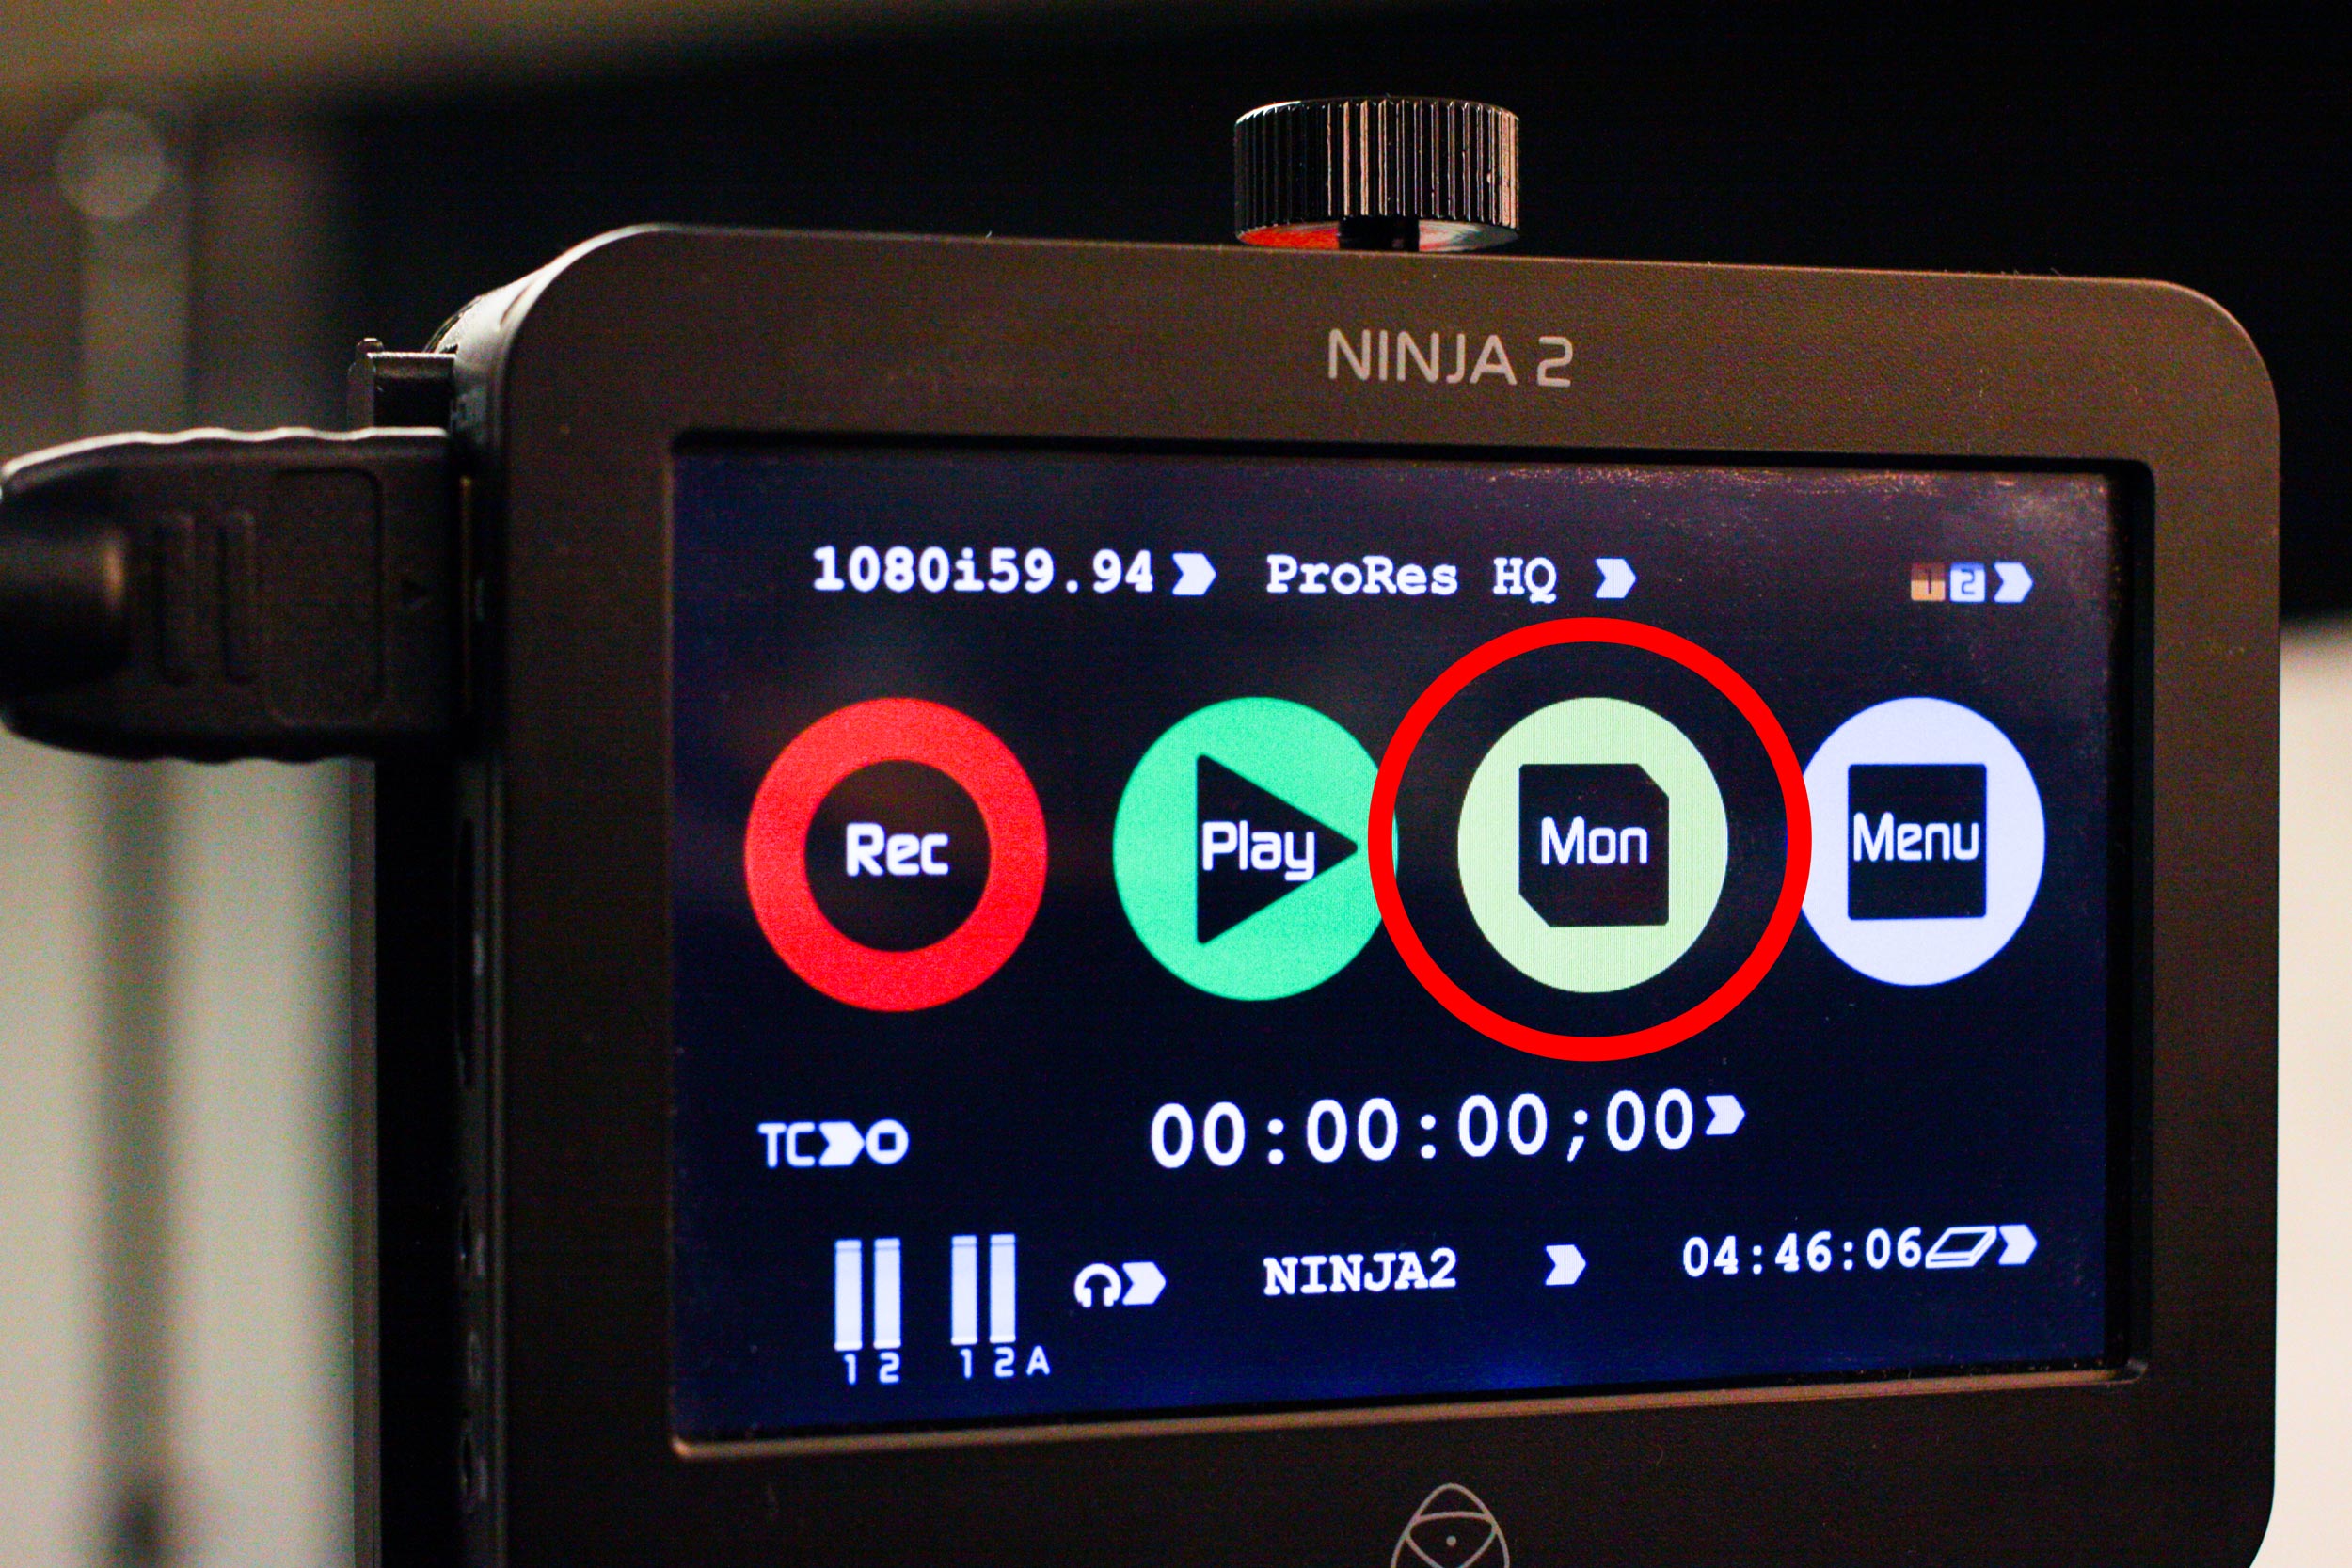
Ninja 2 monitor button
You’ll now see a preview on the back of the Ninja, along with a few other menu items.
You might also see a bunch of menu items from the camera itself, and you’ll definitely want to get rid of those! You can easily remove them by pressing the “INFO” button on the back of the camera.
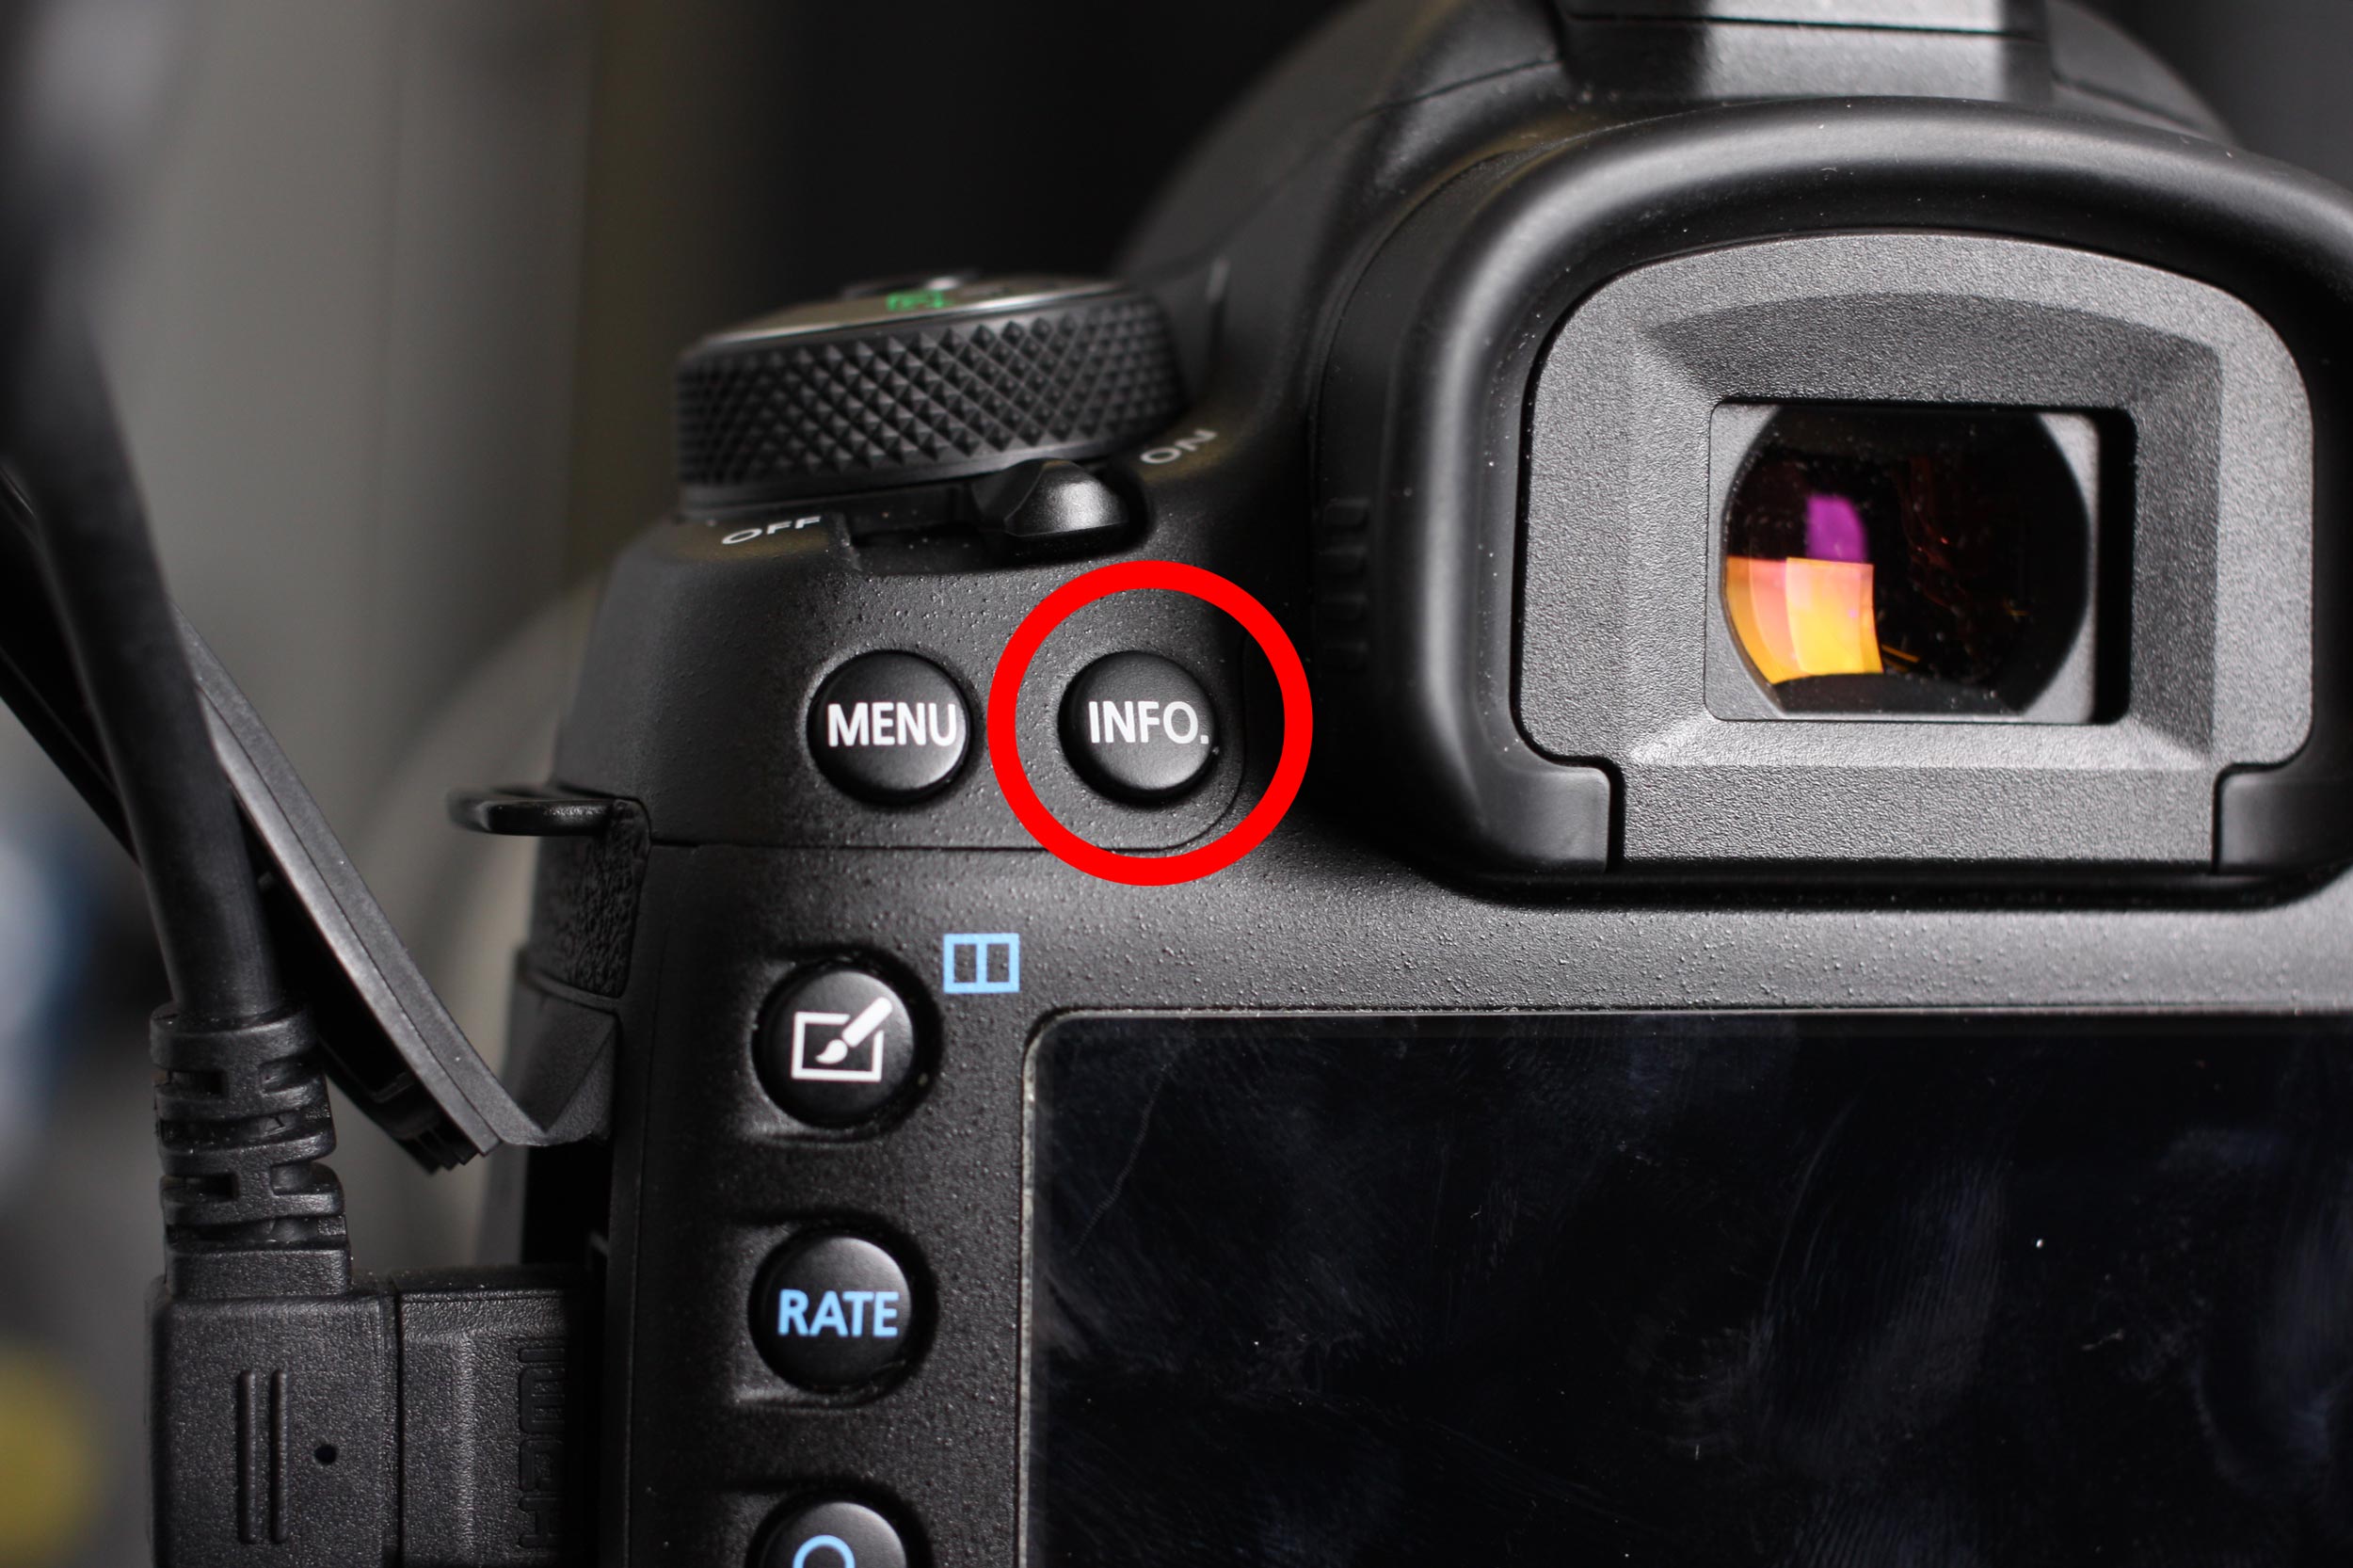
Info button on the back of the Canon 5D Mark IV
Keep pressing the Info button until you get a clean signal from the camera to the Ninja that’s not showing a bunch of menu items. The Ninja records whatever it shows on its monitor (other than its own menu items). It’s literally “what you see is what you get.”
If you don’t want those menu items to ever show up, there’s a setting on the camera that allows you to change that. On page 5 of the “shoot” menu on the 5D Mark IV (the menu with the little camera icon), there’s a setting for “HDMI display.” Press that and you’ll see that you can choose to have the camera output a signal without any info showing.
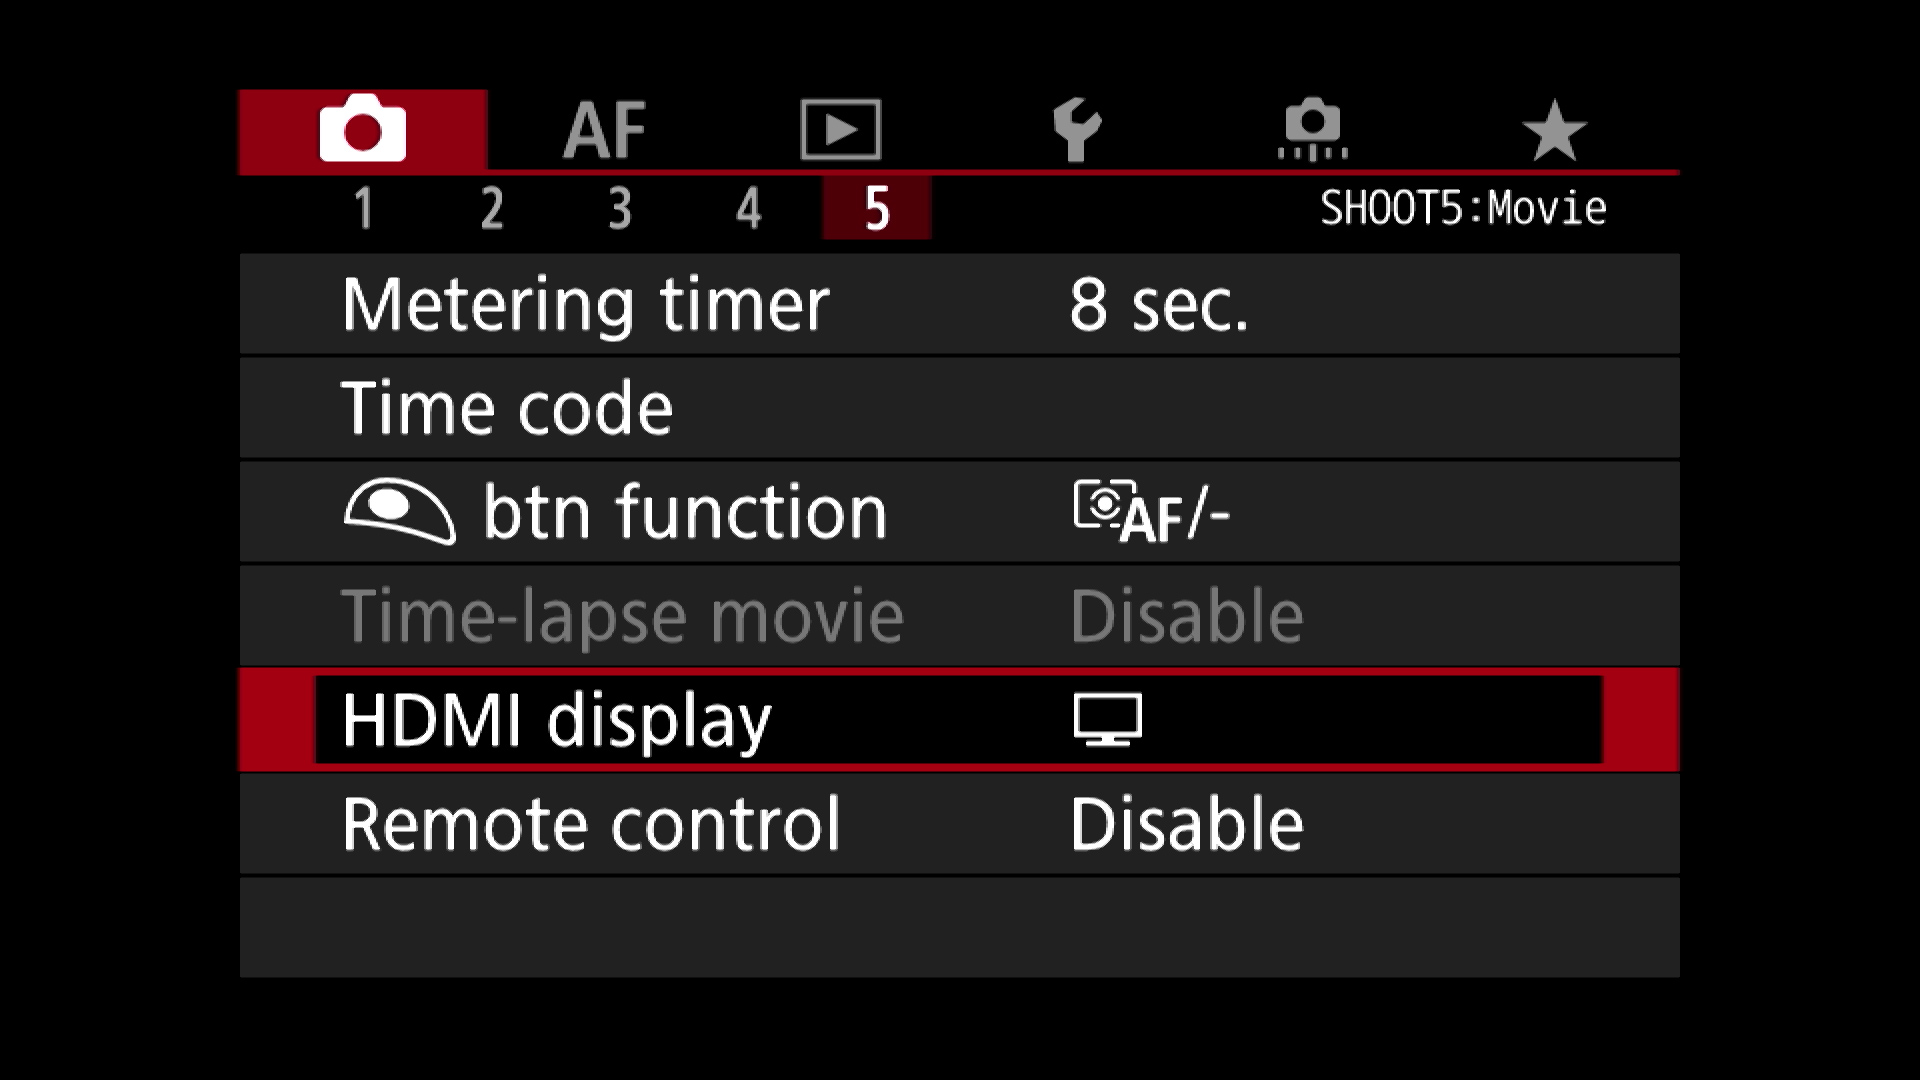
HDMI display setting

Output the HDMI signal without any info screens showing
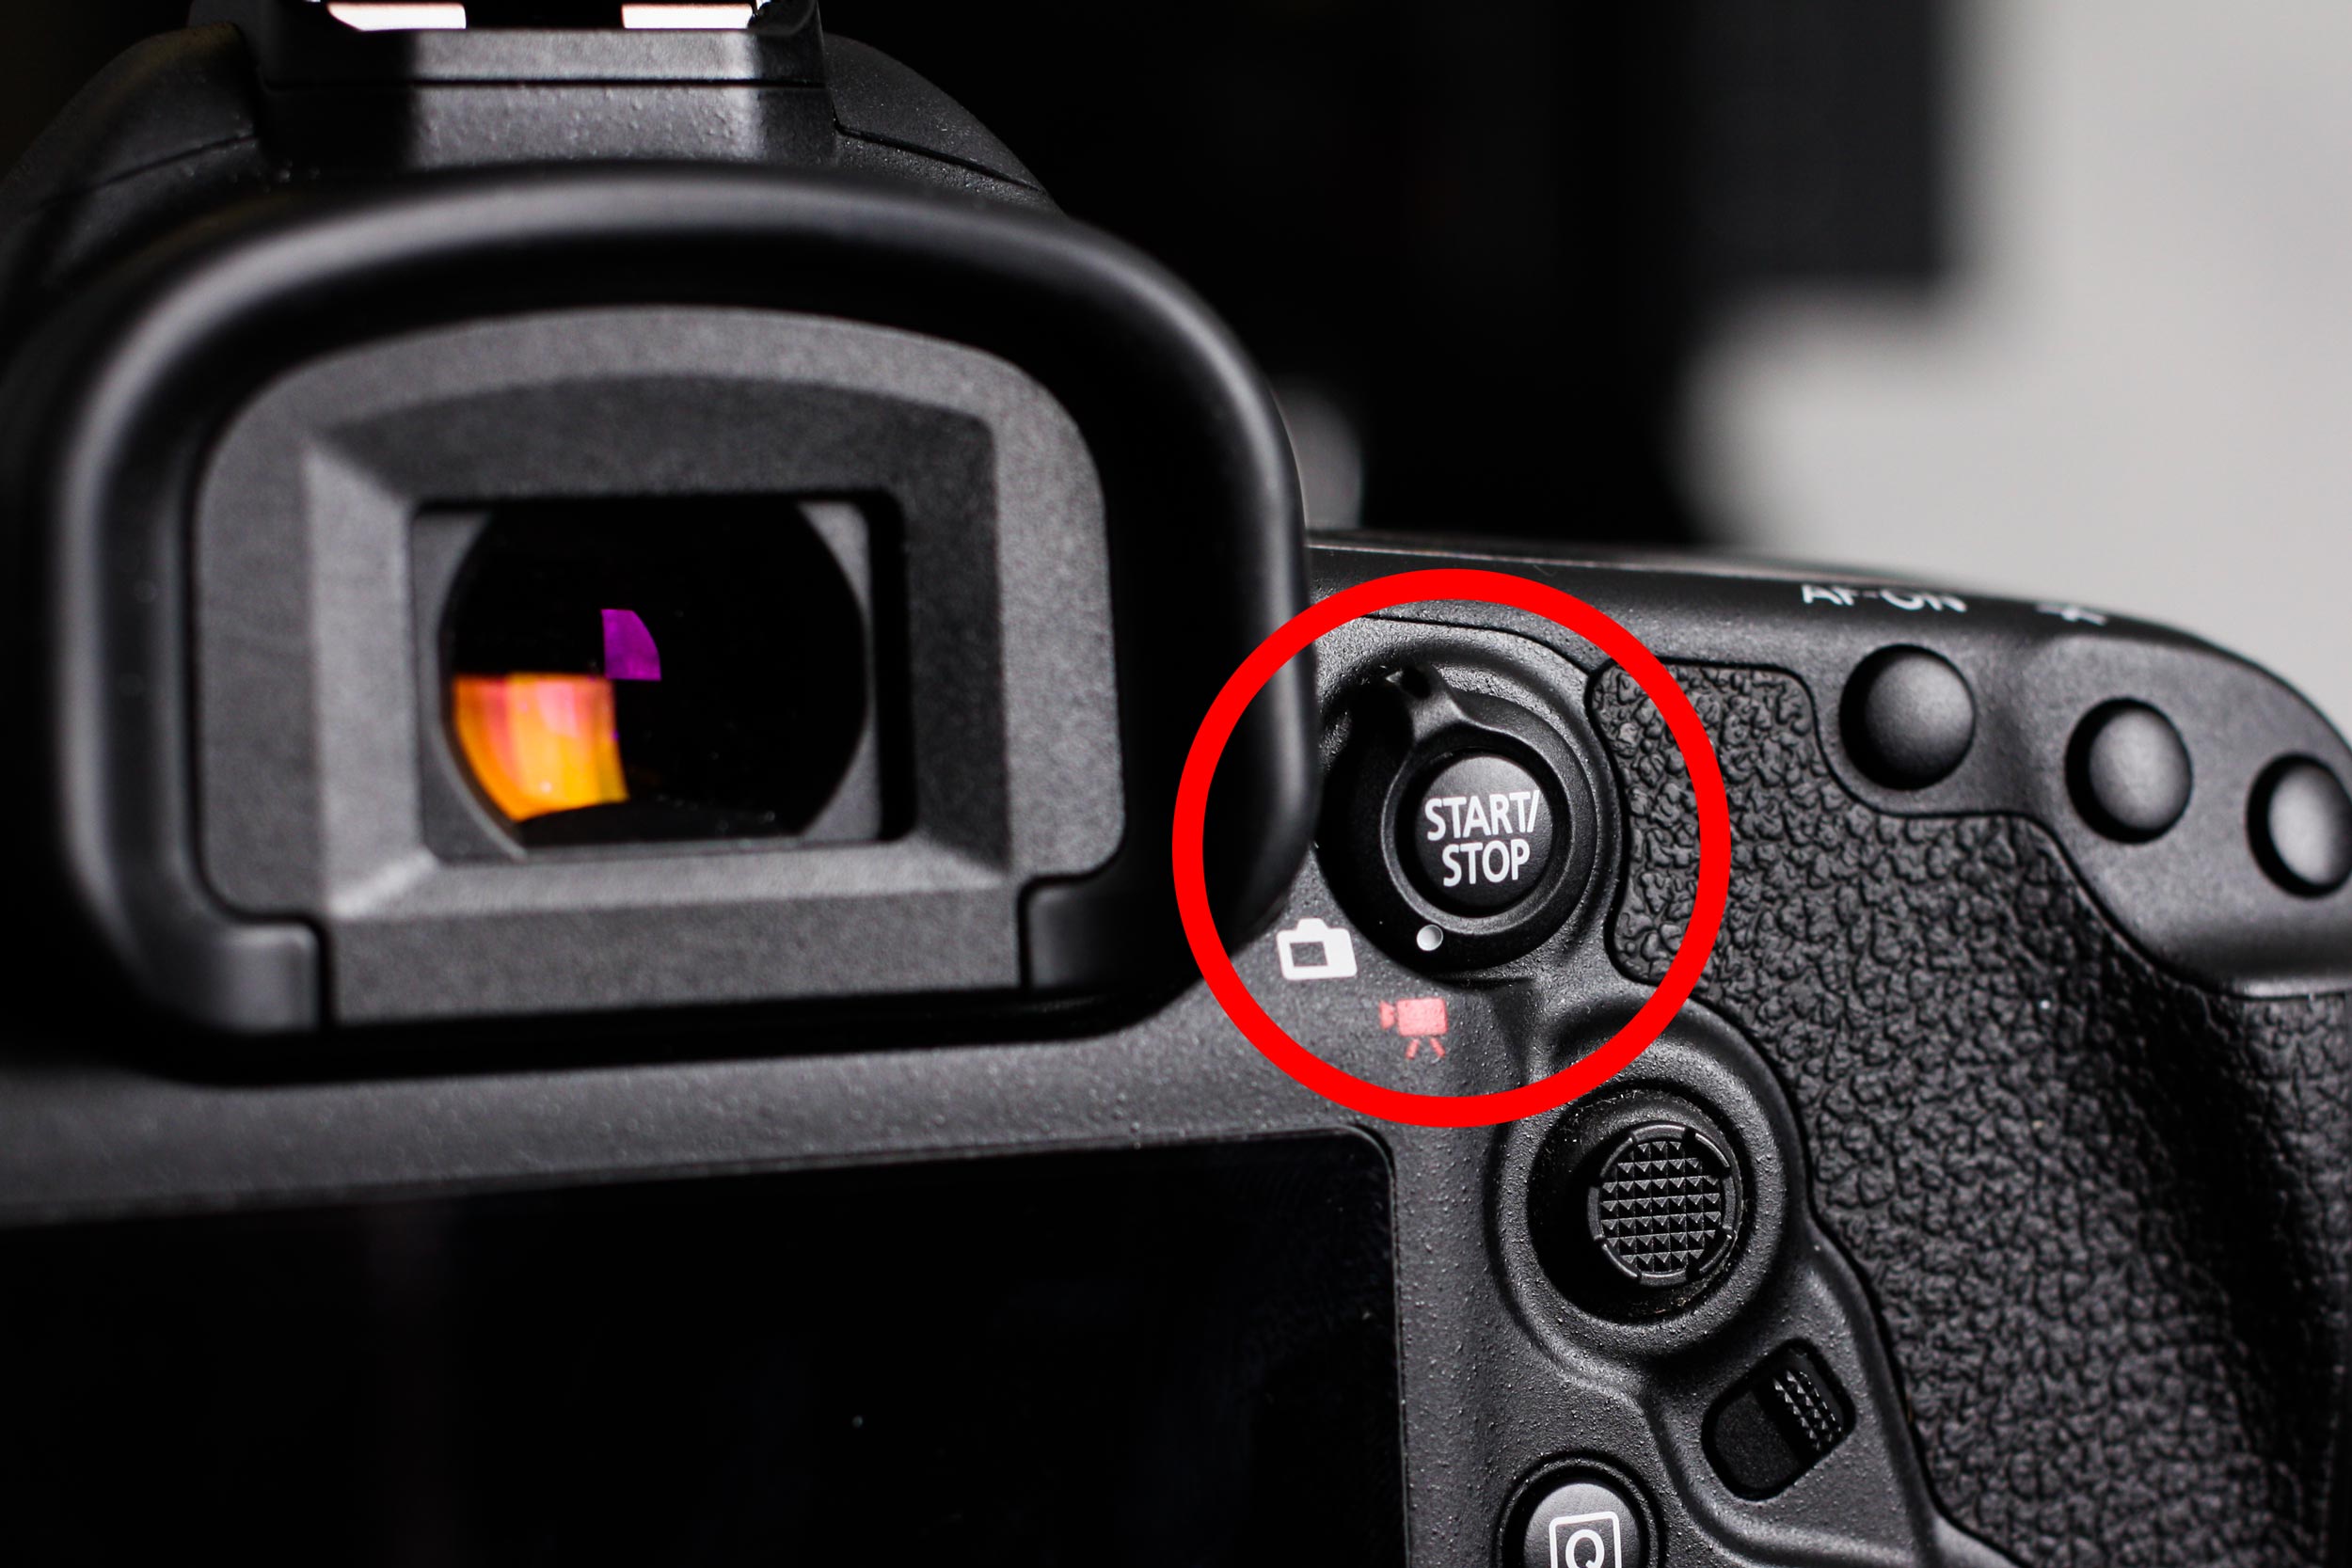
VERY IMPORTANT: There’s also an HDMI display setting on the camera that allows you to utilize the LCD on the camera as well as the LCD on the Ninja (simultaneously), with the added benefit being that the only thing seen by the Ninja is the video from the camera (no menus). Sounds perfect, but if you plan on shooting for more than 35 minutes without interacting with the LCD at all, DO NOT USE THIS SETTING! For some reason, if the camera’s LCD remains on and there’s no interaction between you and the camera, the camera will shut its screen off after 35 minutes and give you a message that says “Press Start/Stop button to activate movie shooting.” Worse still, recording will stop on the Ninja 2. I found this out the hard way, so trust me – if your camera will be recording for over 35 minutes without any interaction from you, never use this setting! The setting is shown below.
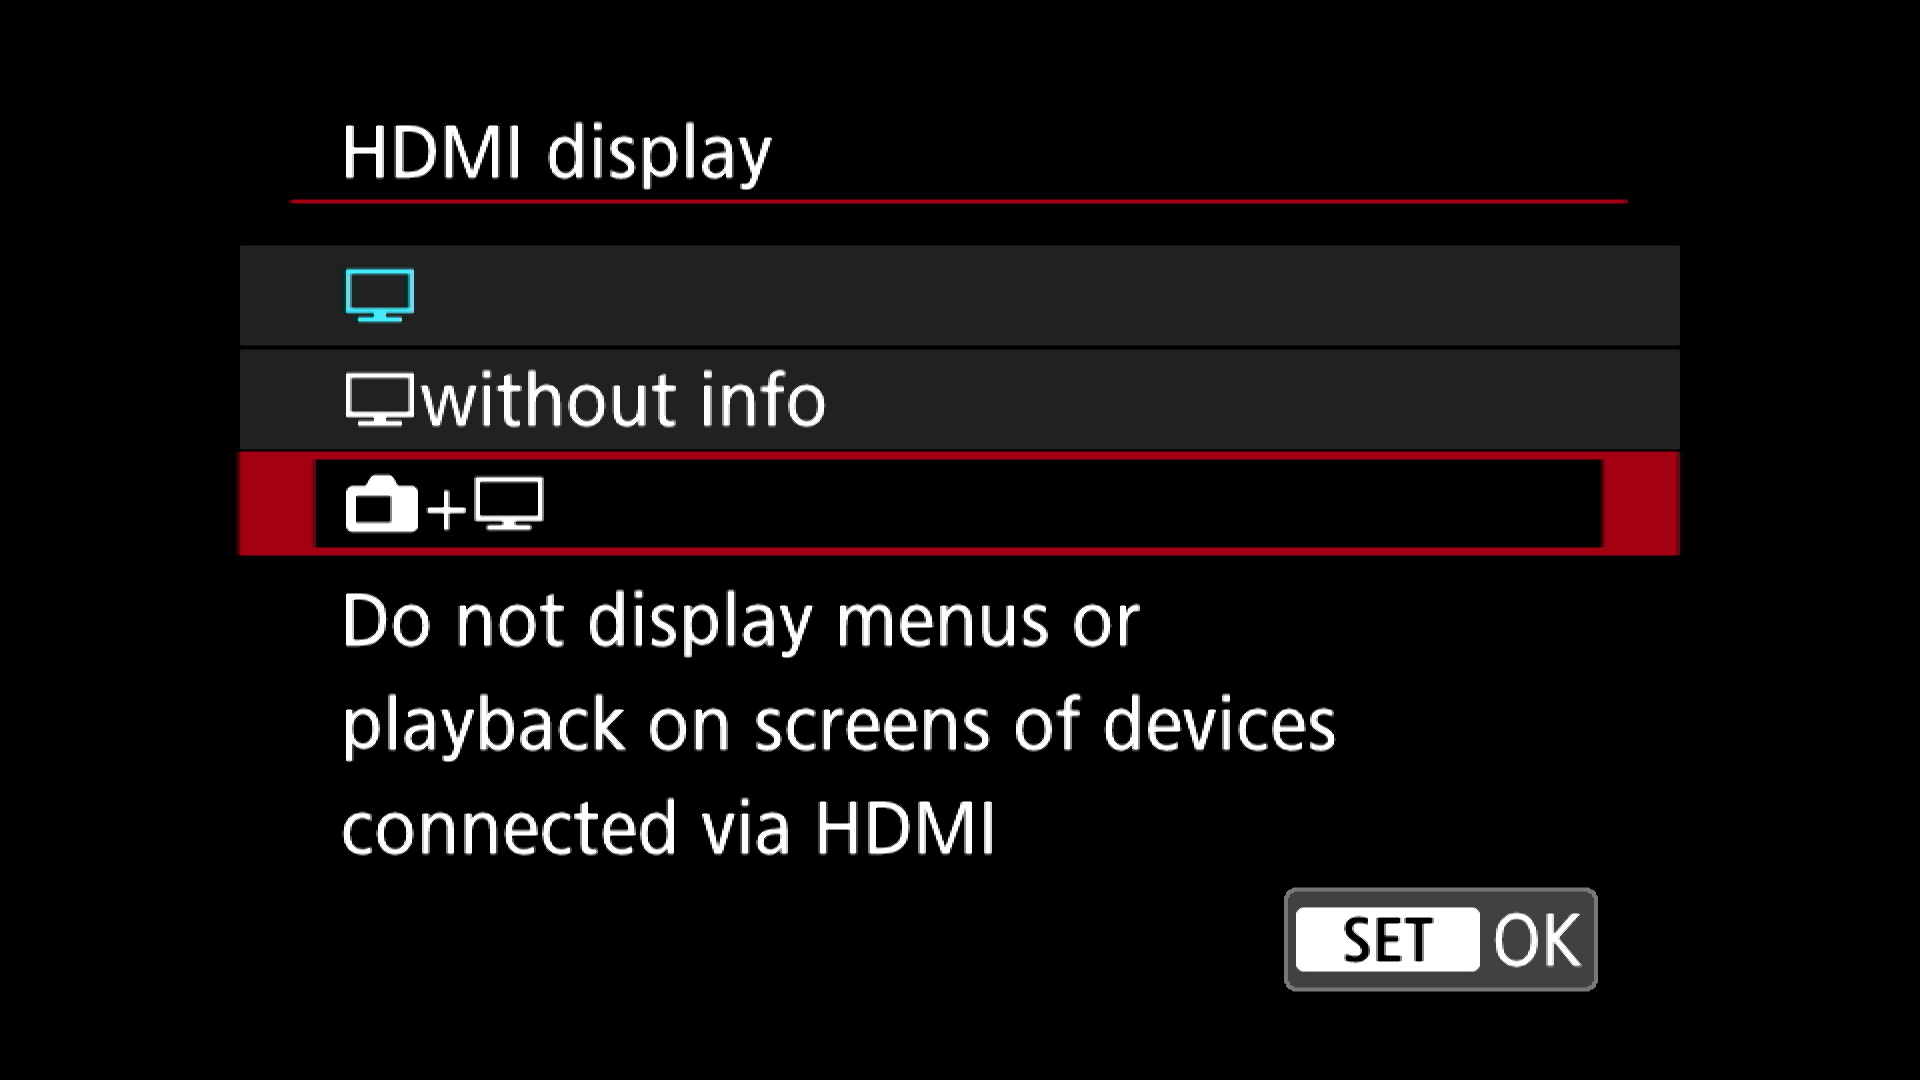
DO NOT USE THIS SETTING UNLESS YOU’LL BE INTERACTING WITH THE LCD DURING RECORDING!
Disable Auto power off!
There’s one last setting you need to be aware of, and it’s a big one. Disable the “Auto power off” feature on the camera! Otherwise the camera will literally just shut itself off while you are recording. To disable the auto power off setting, hit the “Menu” button on the back of the camera, then go to page 2 of the Setup menu (the little wrench icon). You’ll find the “Auto power off” as the first setting listed. Be sure to set it to “Disable.”

Auto Power Off settings
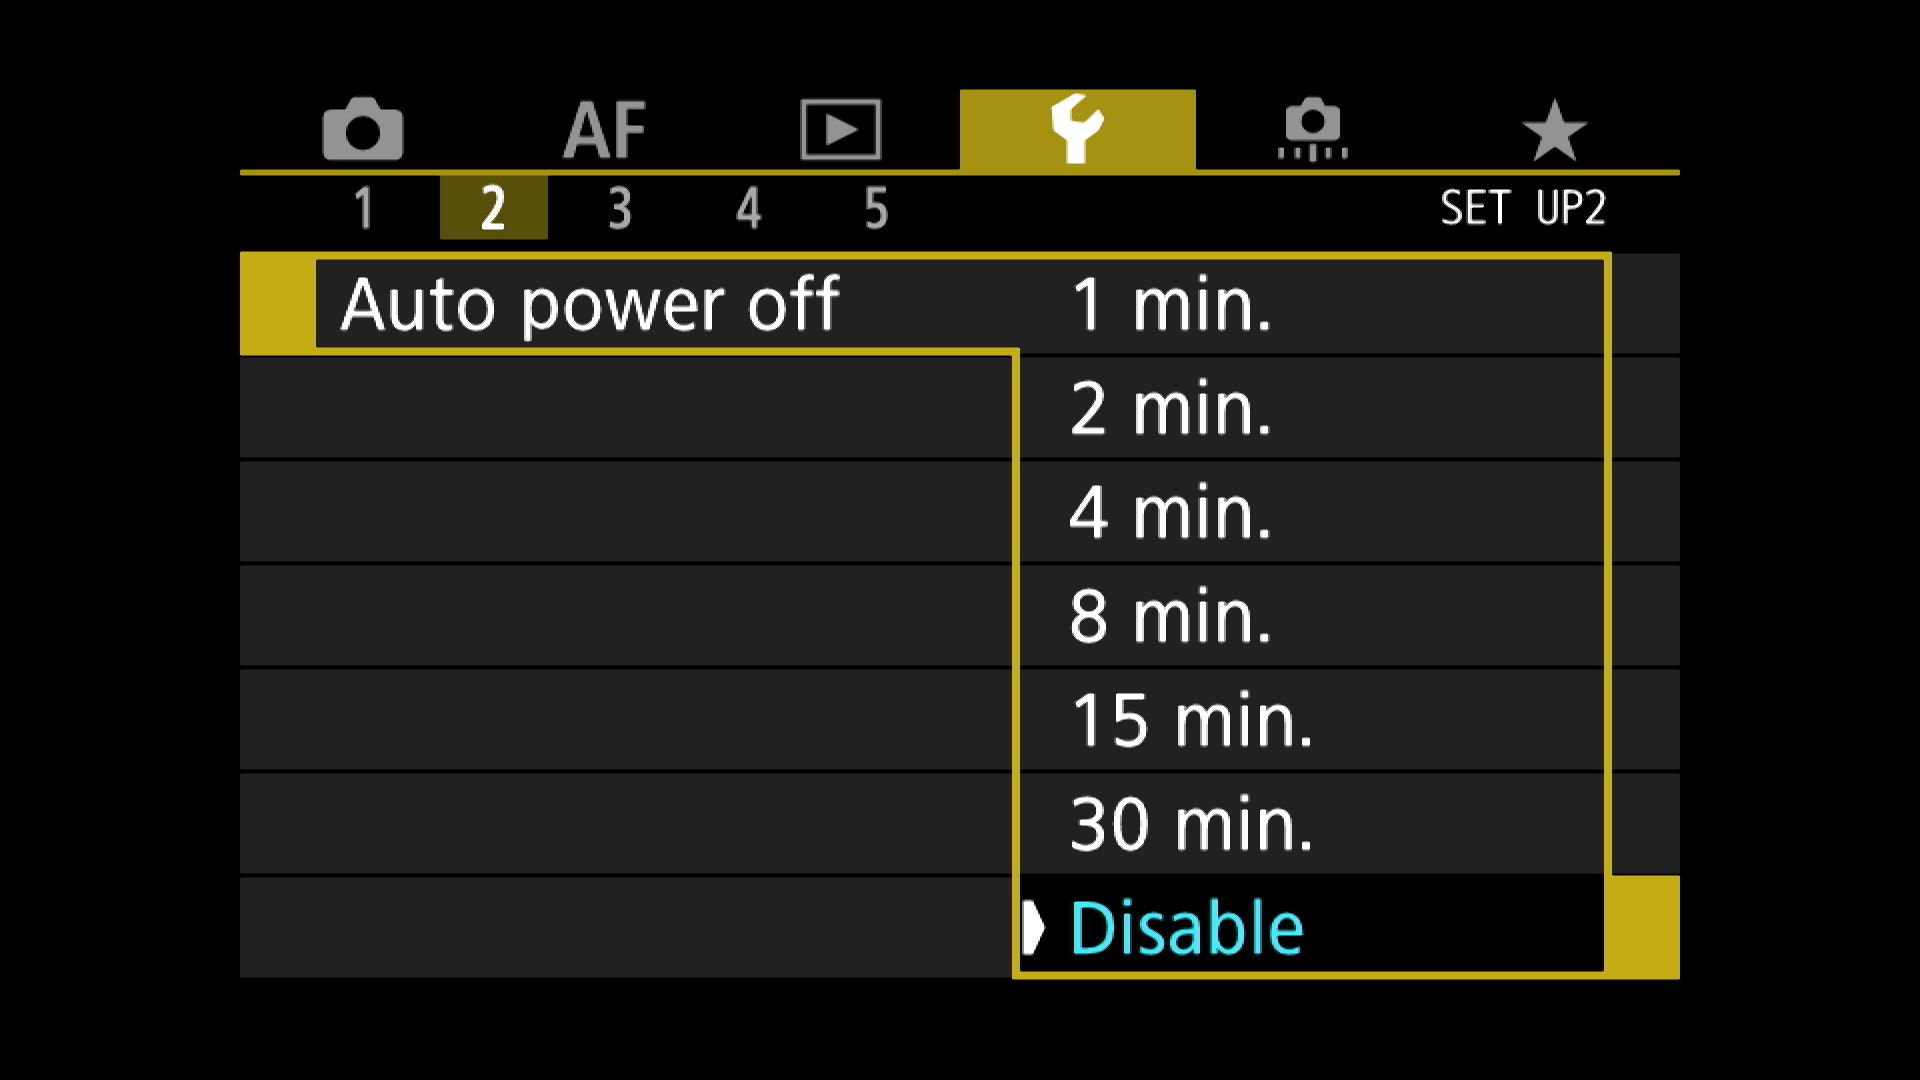
Disable the Auto power off settings!
Battery Life
While the Ninja 2 solves the problem of allowing you to record for longer periods of time than the camera default, what about battery life? Sadly, the standard battery won’t last very long without a bit of help. Fortunately, there is a solution.
The setup that I put together utilizes these four pieces of equipment (around $187 total):
- EasyAcc Monster 20000mAh Power Bank ($32.99) – this is your “battery”
- Tether Tools Case Relay Camera Power System ($99.99)
- Tether Tools Relay Camera Coupler ($34.99)
- Tether Tools StrapMoore ($18.95)
Here’s how it works:
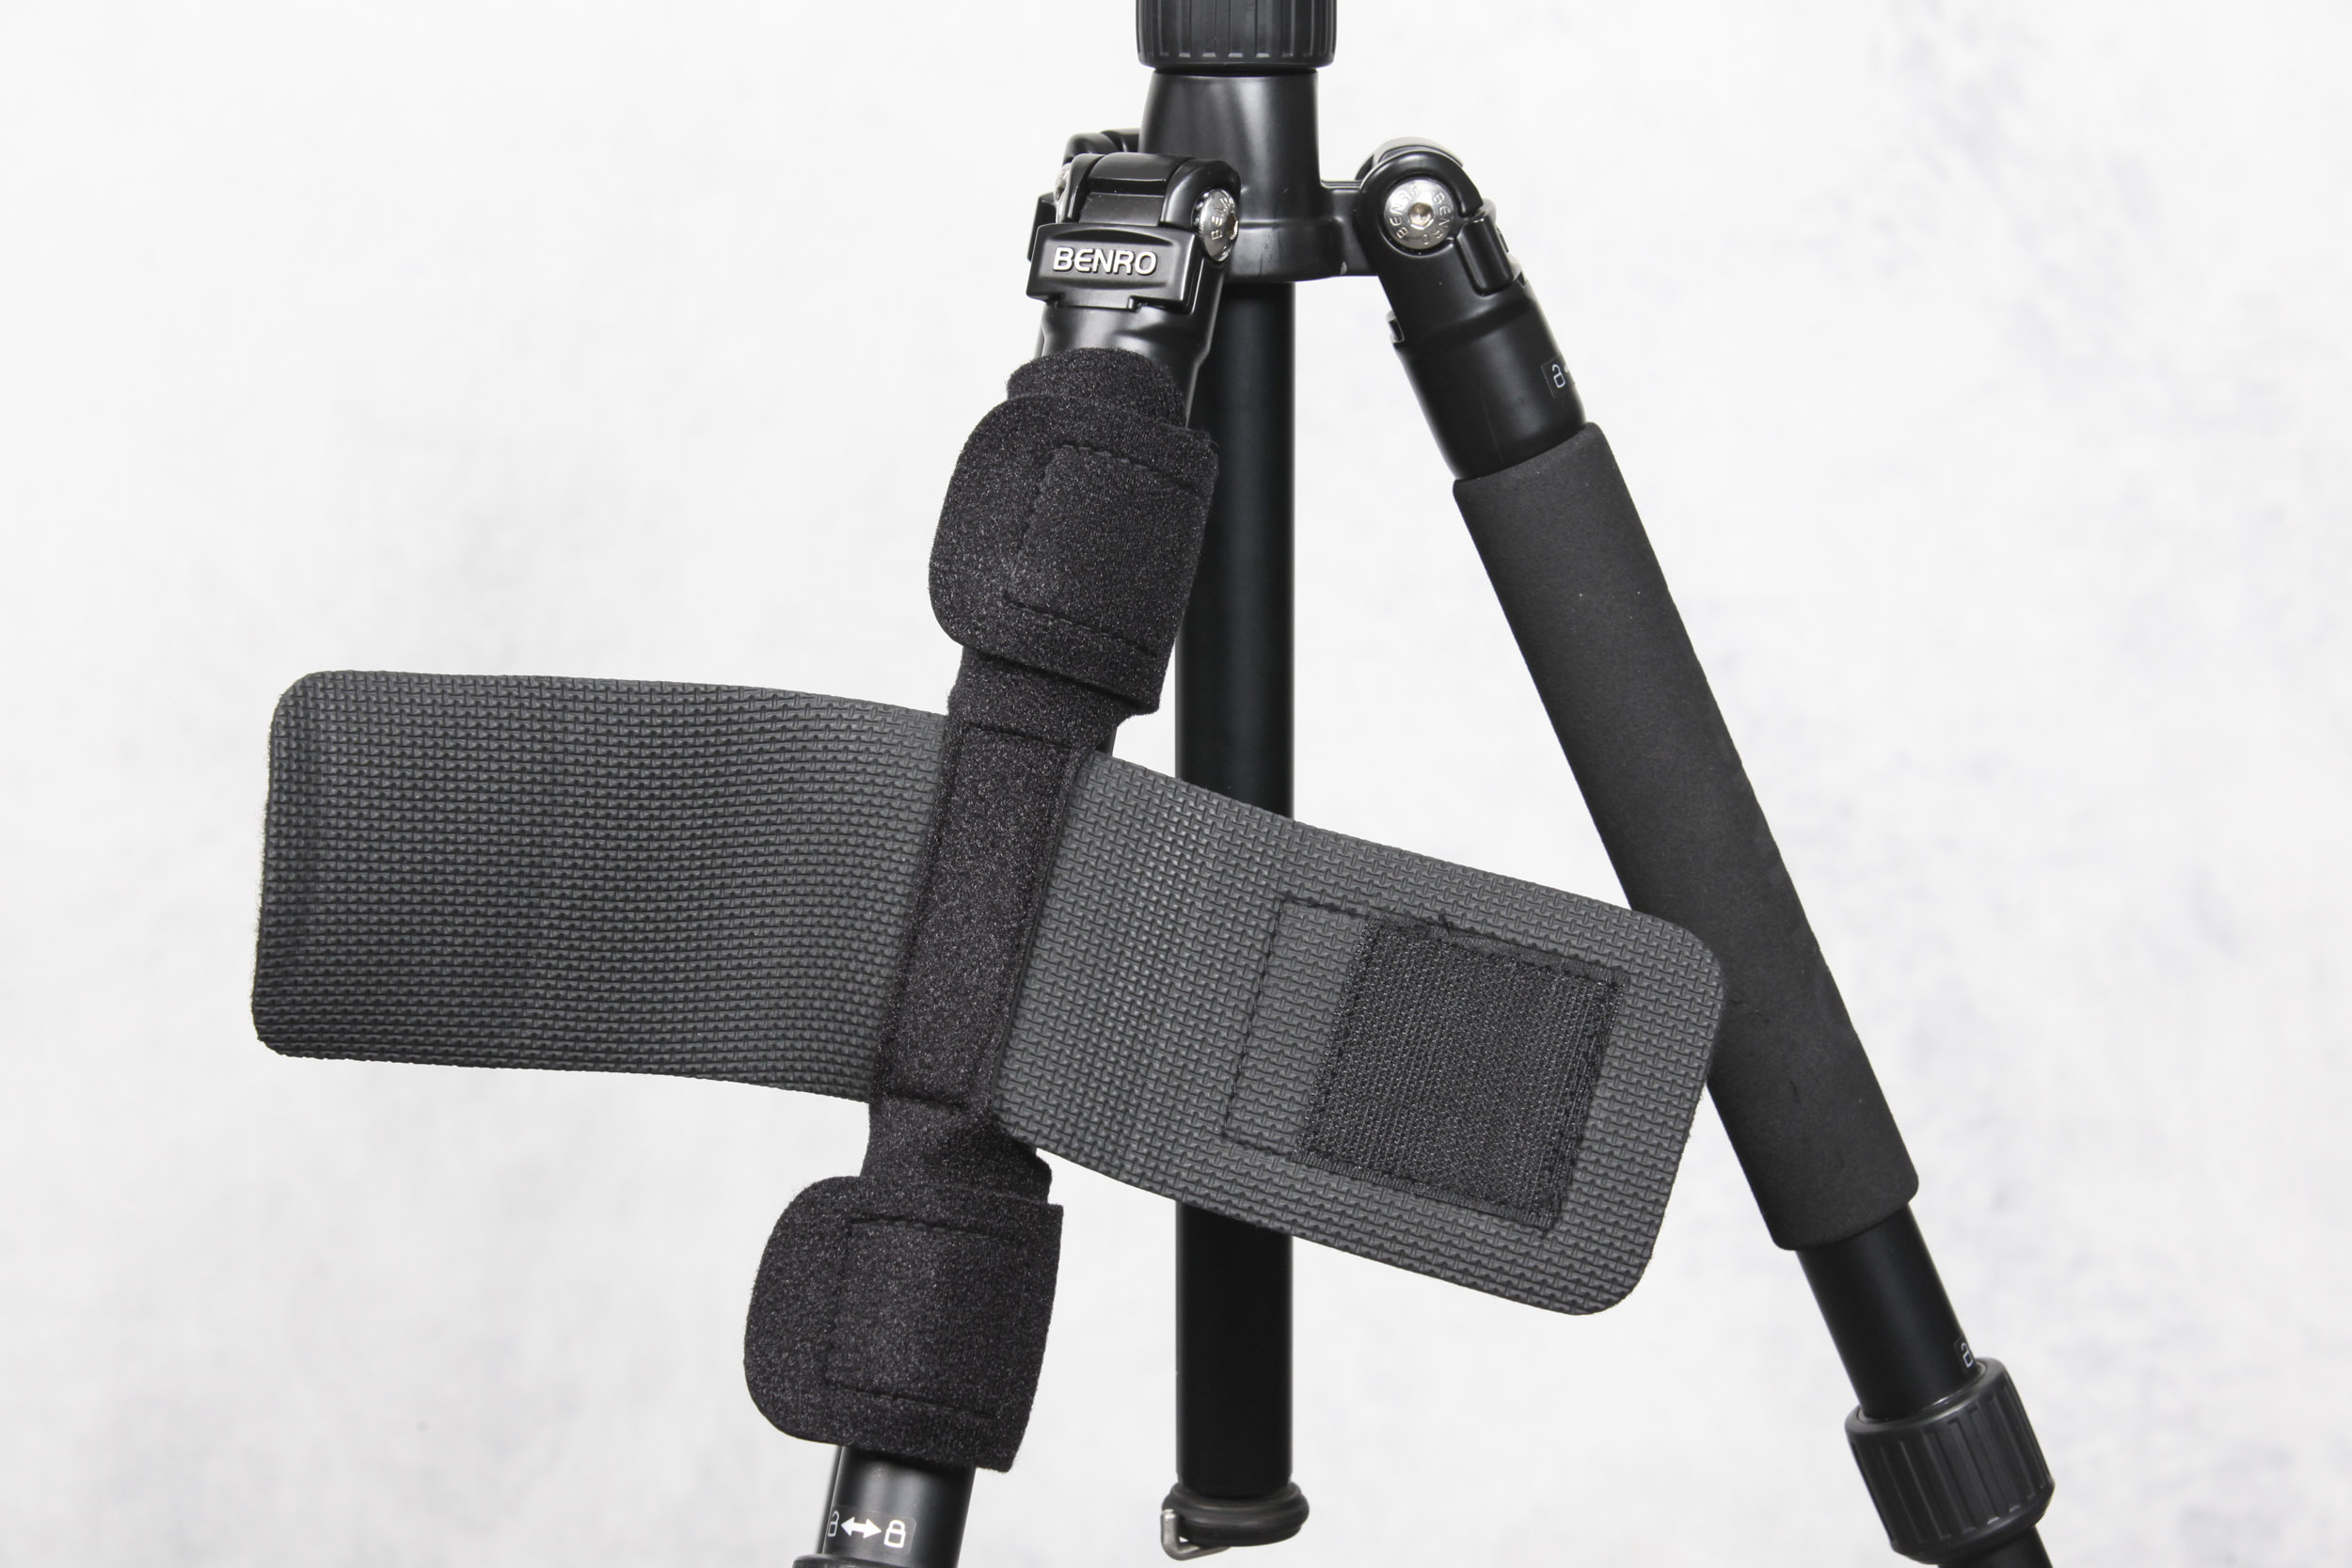
If you are using a tripod, the first thing to do is attach the Tether Tools StrapMoore to a leg on your tripod, as shown below:
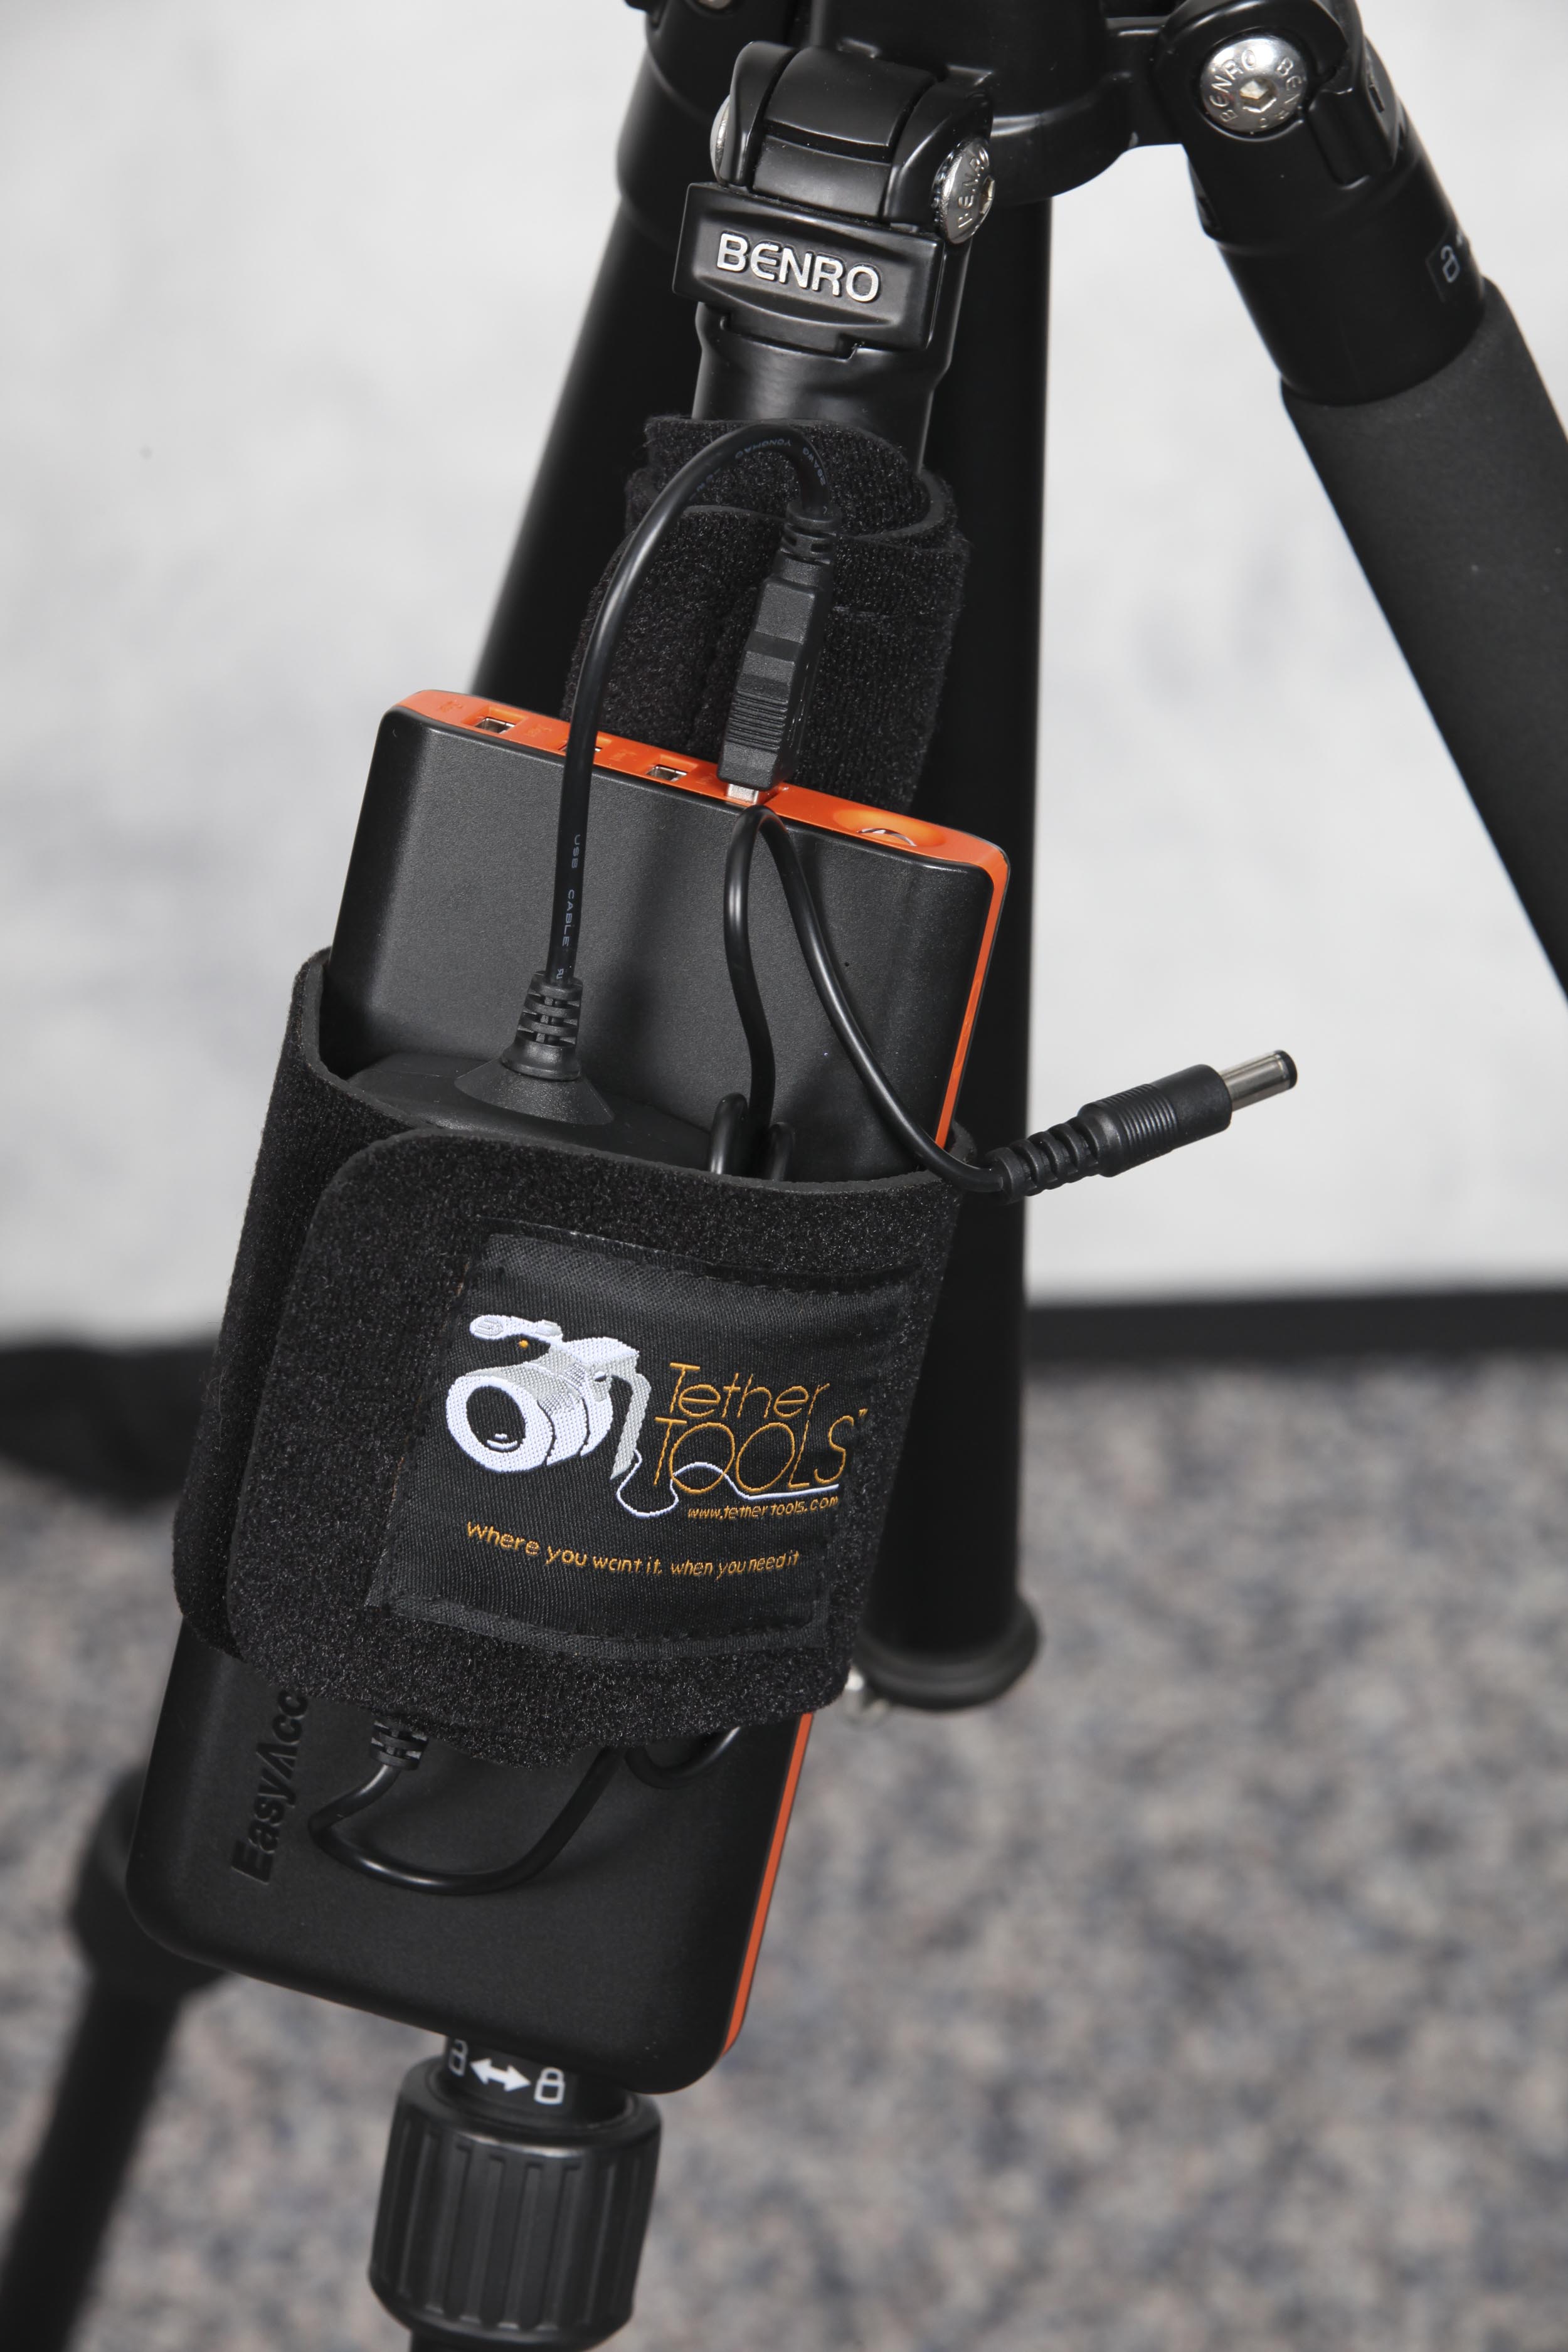
Next, grab the power bank and the Case Relay Camera Power System. For my setup, I stacked the Power System on top of the power bank (in the middle), then holding both together, wrapped the TetherTool’s StrapMoore’s strap around them. The power bank and Power System are held in place both by the StrapMoore’s strap as well as the heavy-duty GripperElastic that the StrapMoore is lined with on the inside. The StrapMoore can hold up to two pounds without a problem.
Once attached, you’ll have both the power bank and the Case Relay Power System fitted snugly to your tripod leg via the StrapMoore. Go ahead and plug the USB cable from the Case Relay Camera Power System into any of the available USB ports on the power bank. Once that’s done, your setup should look similar to what’s shown below:
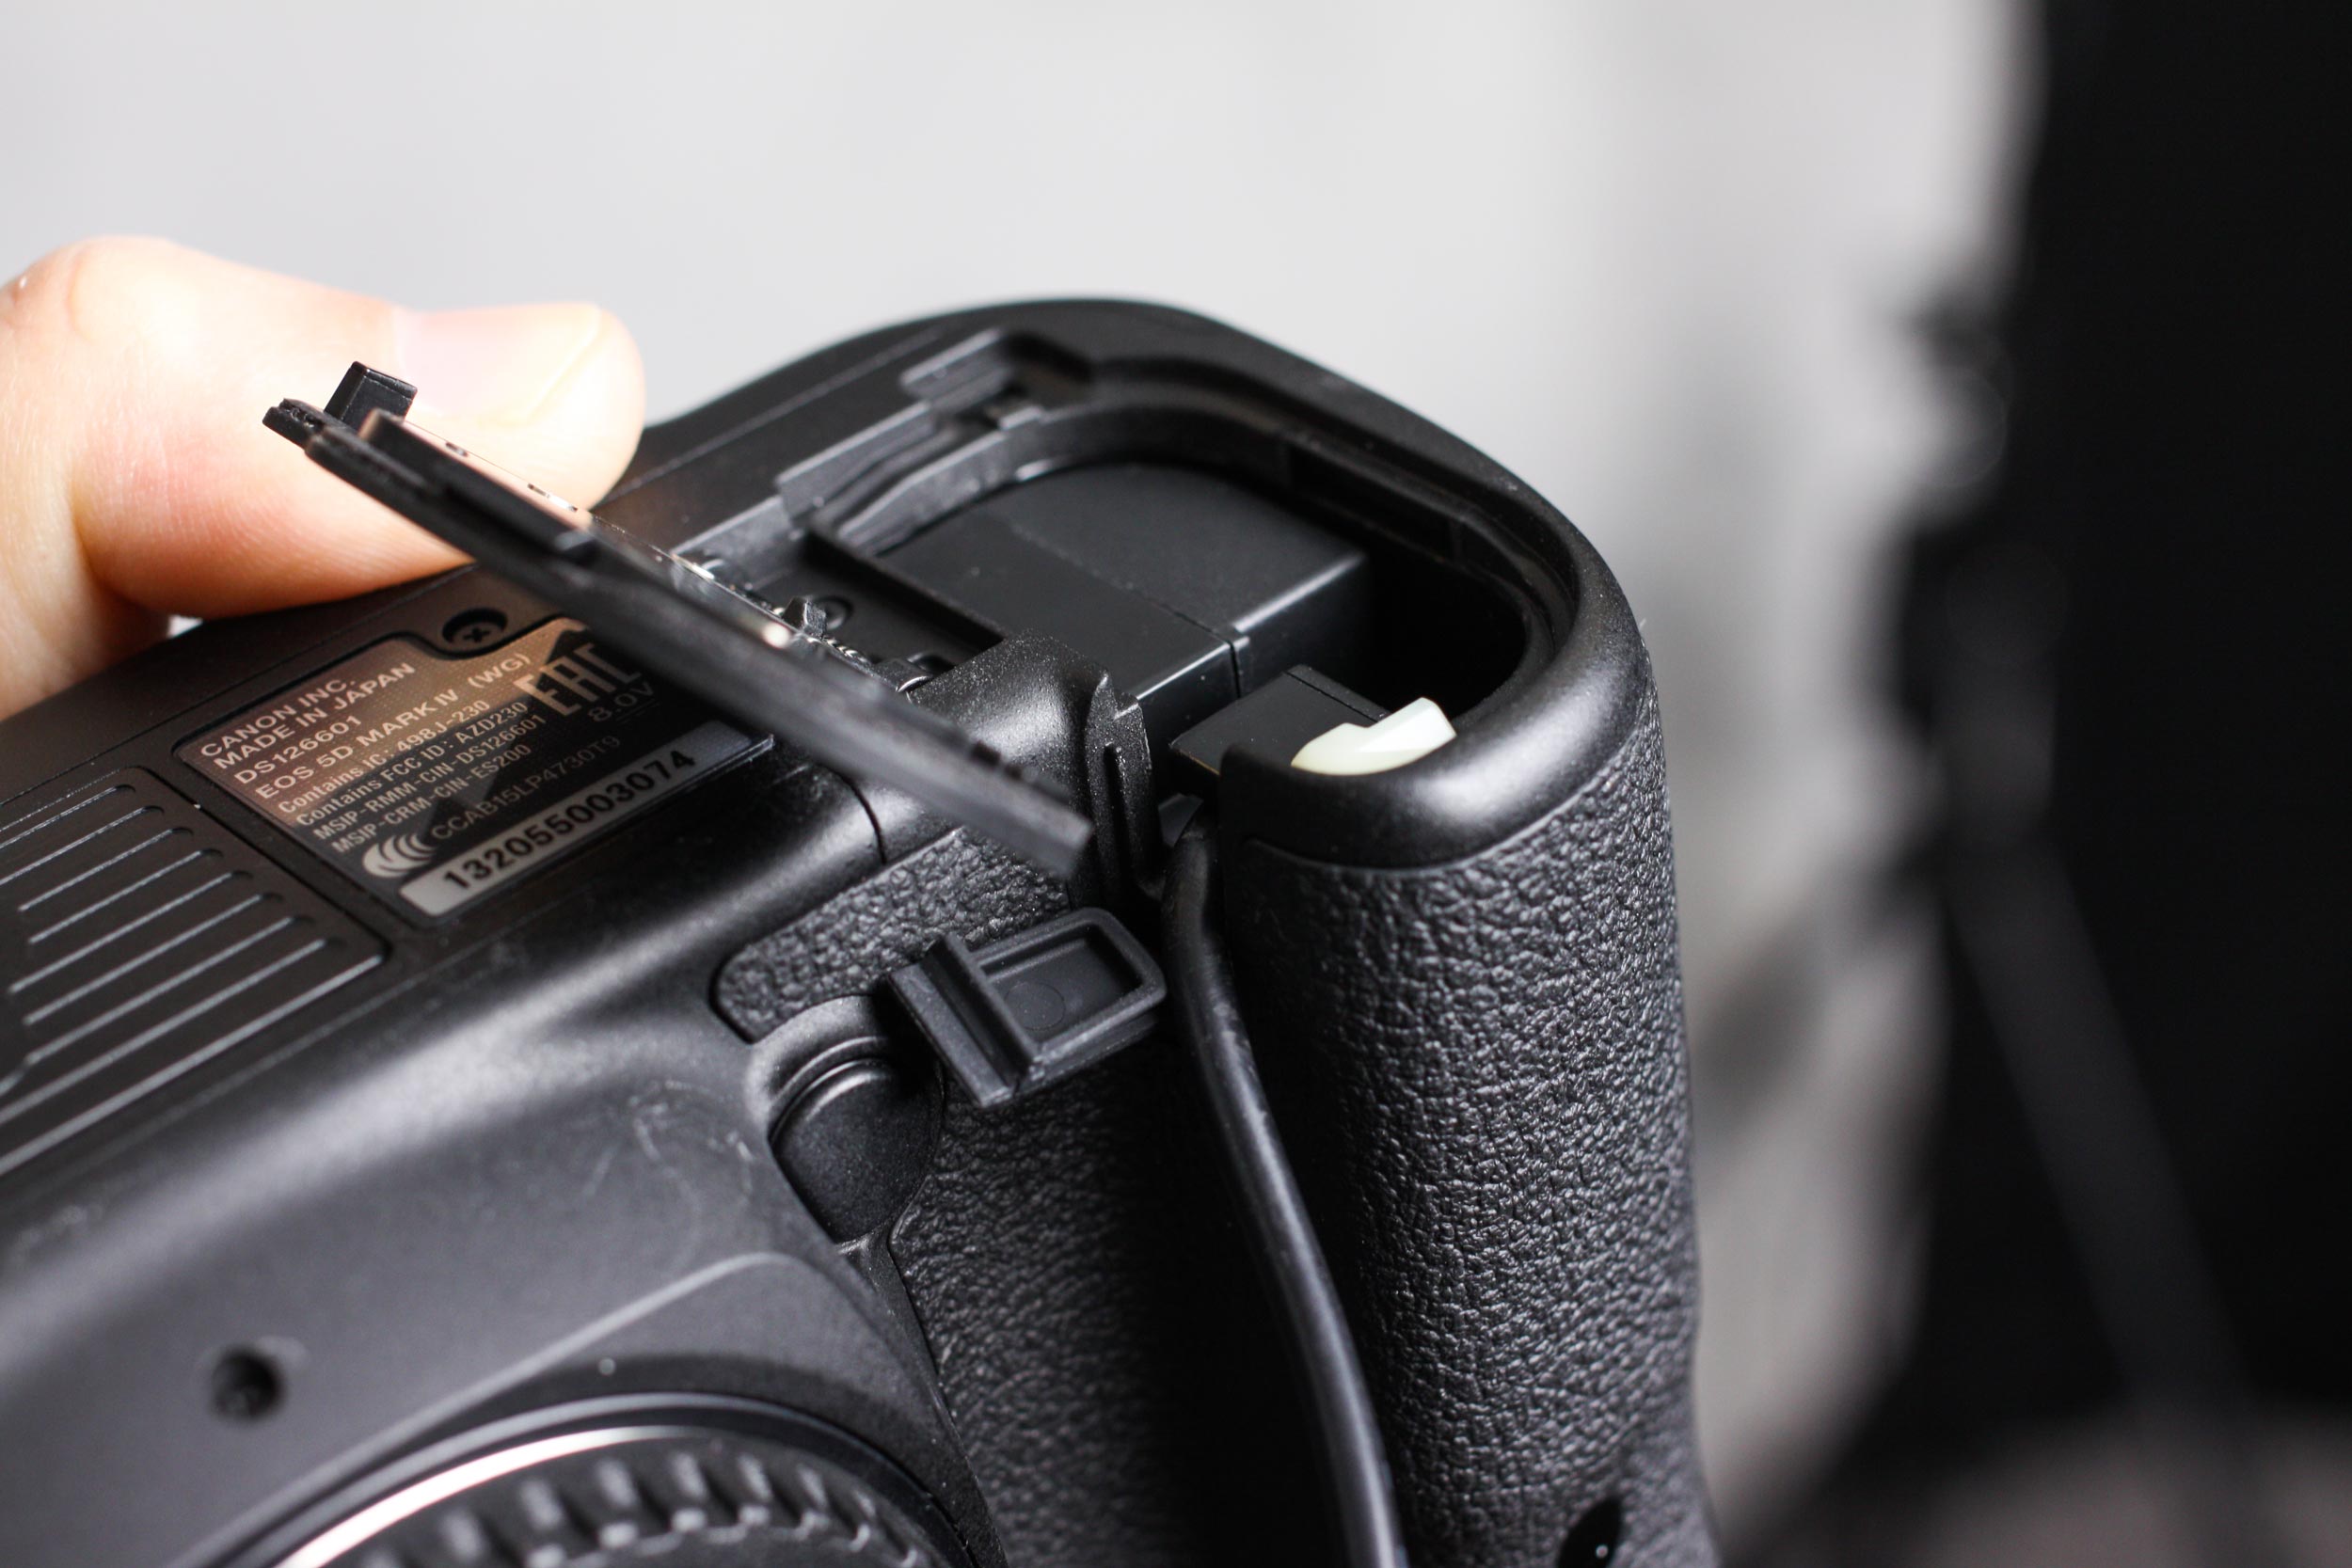
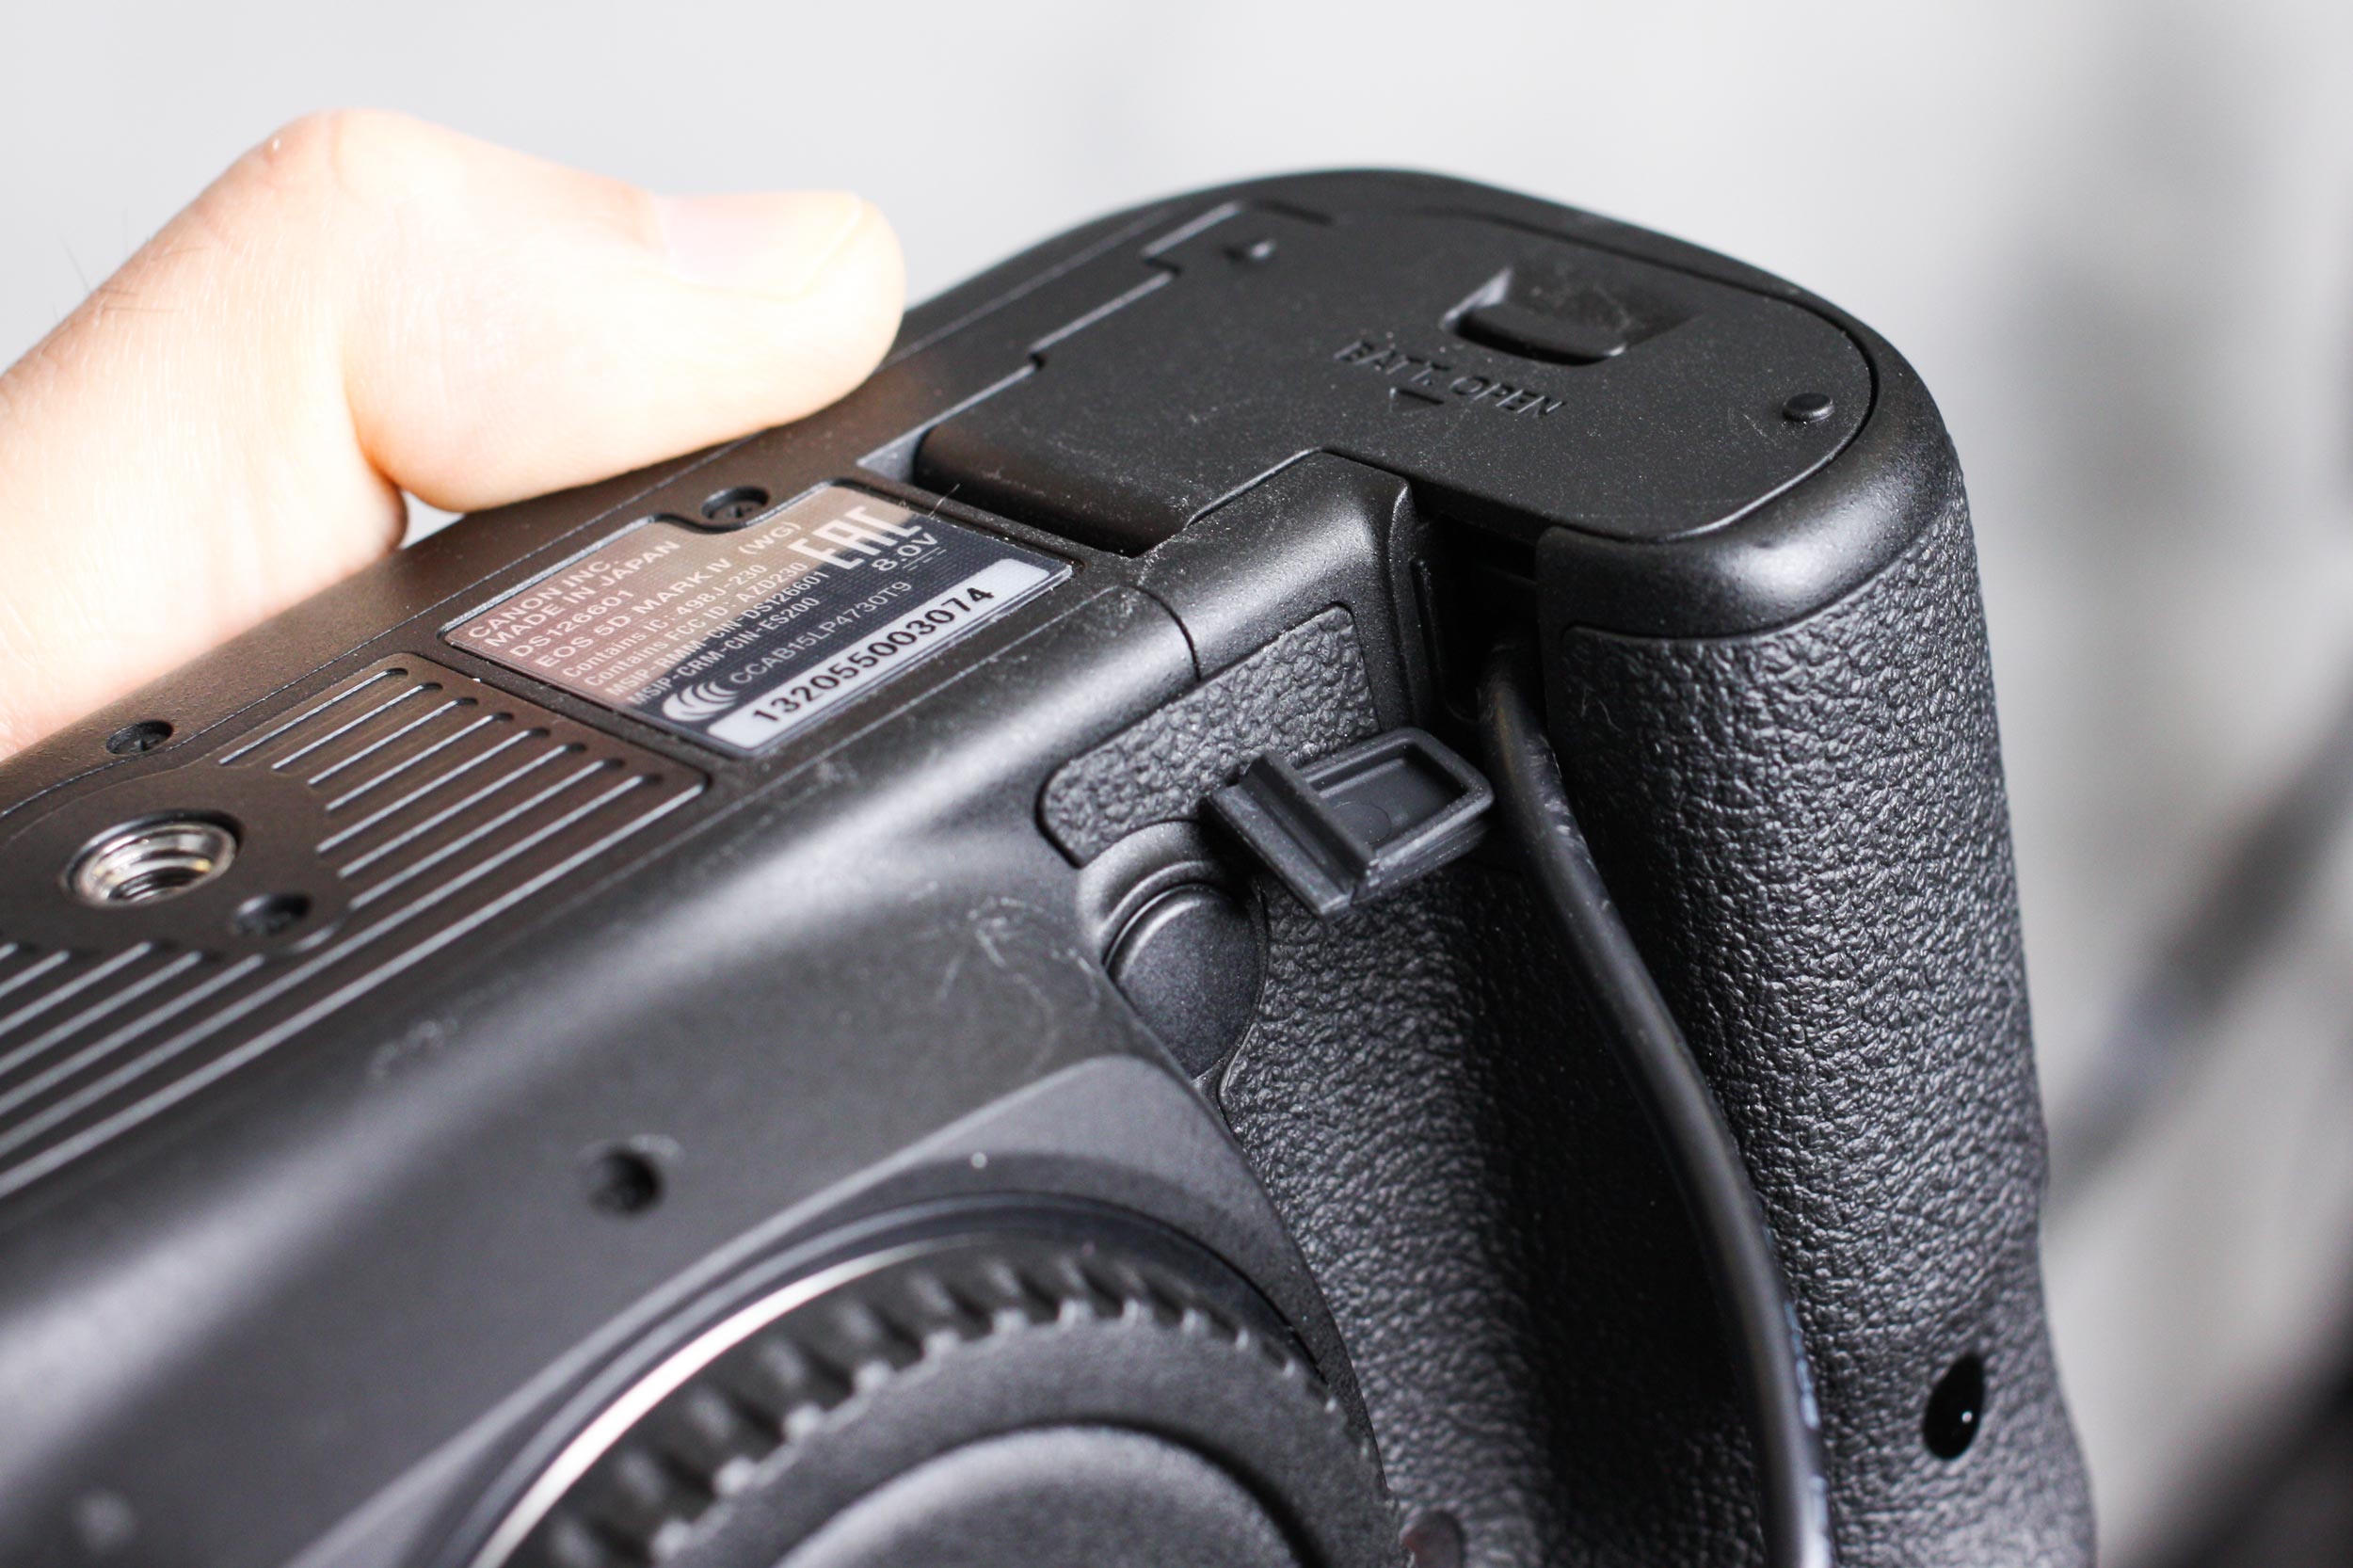
The only thing left to do now is attach the Tether Tools Relay Camera Coupler and plug it into your camera where your original battery was. Keep in mind that in order for this to work on the Canon 5D Mark IV, you’ll need to use the little hidden “trap door” and run the cable from the Camera Coupler through it. The camera will literally not turn on unless the battery door is closed nice and tight, so this is a vital step! Shown below are some shots of how the hidden door works along with both ends of the Camera Coupler plugged in:
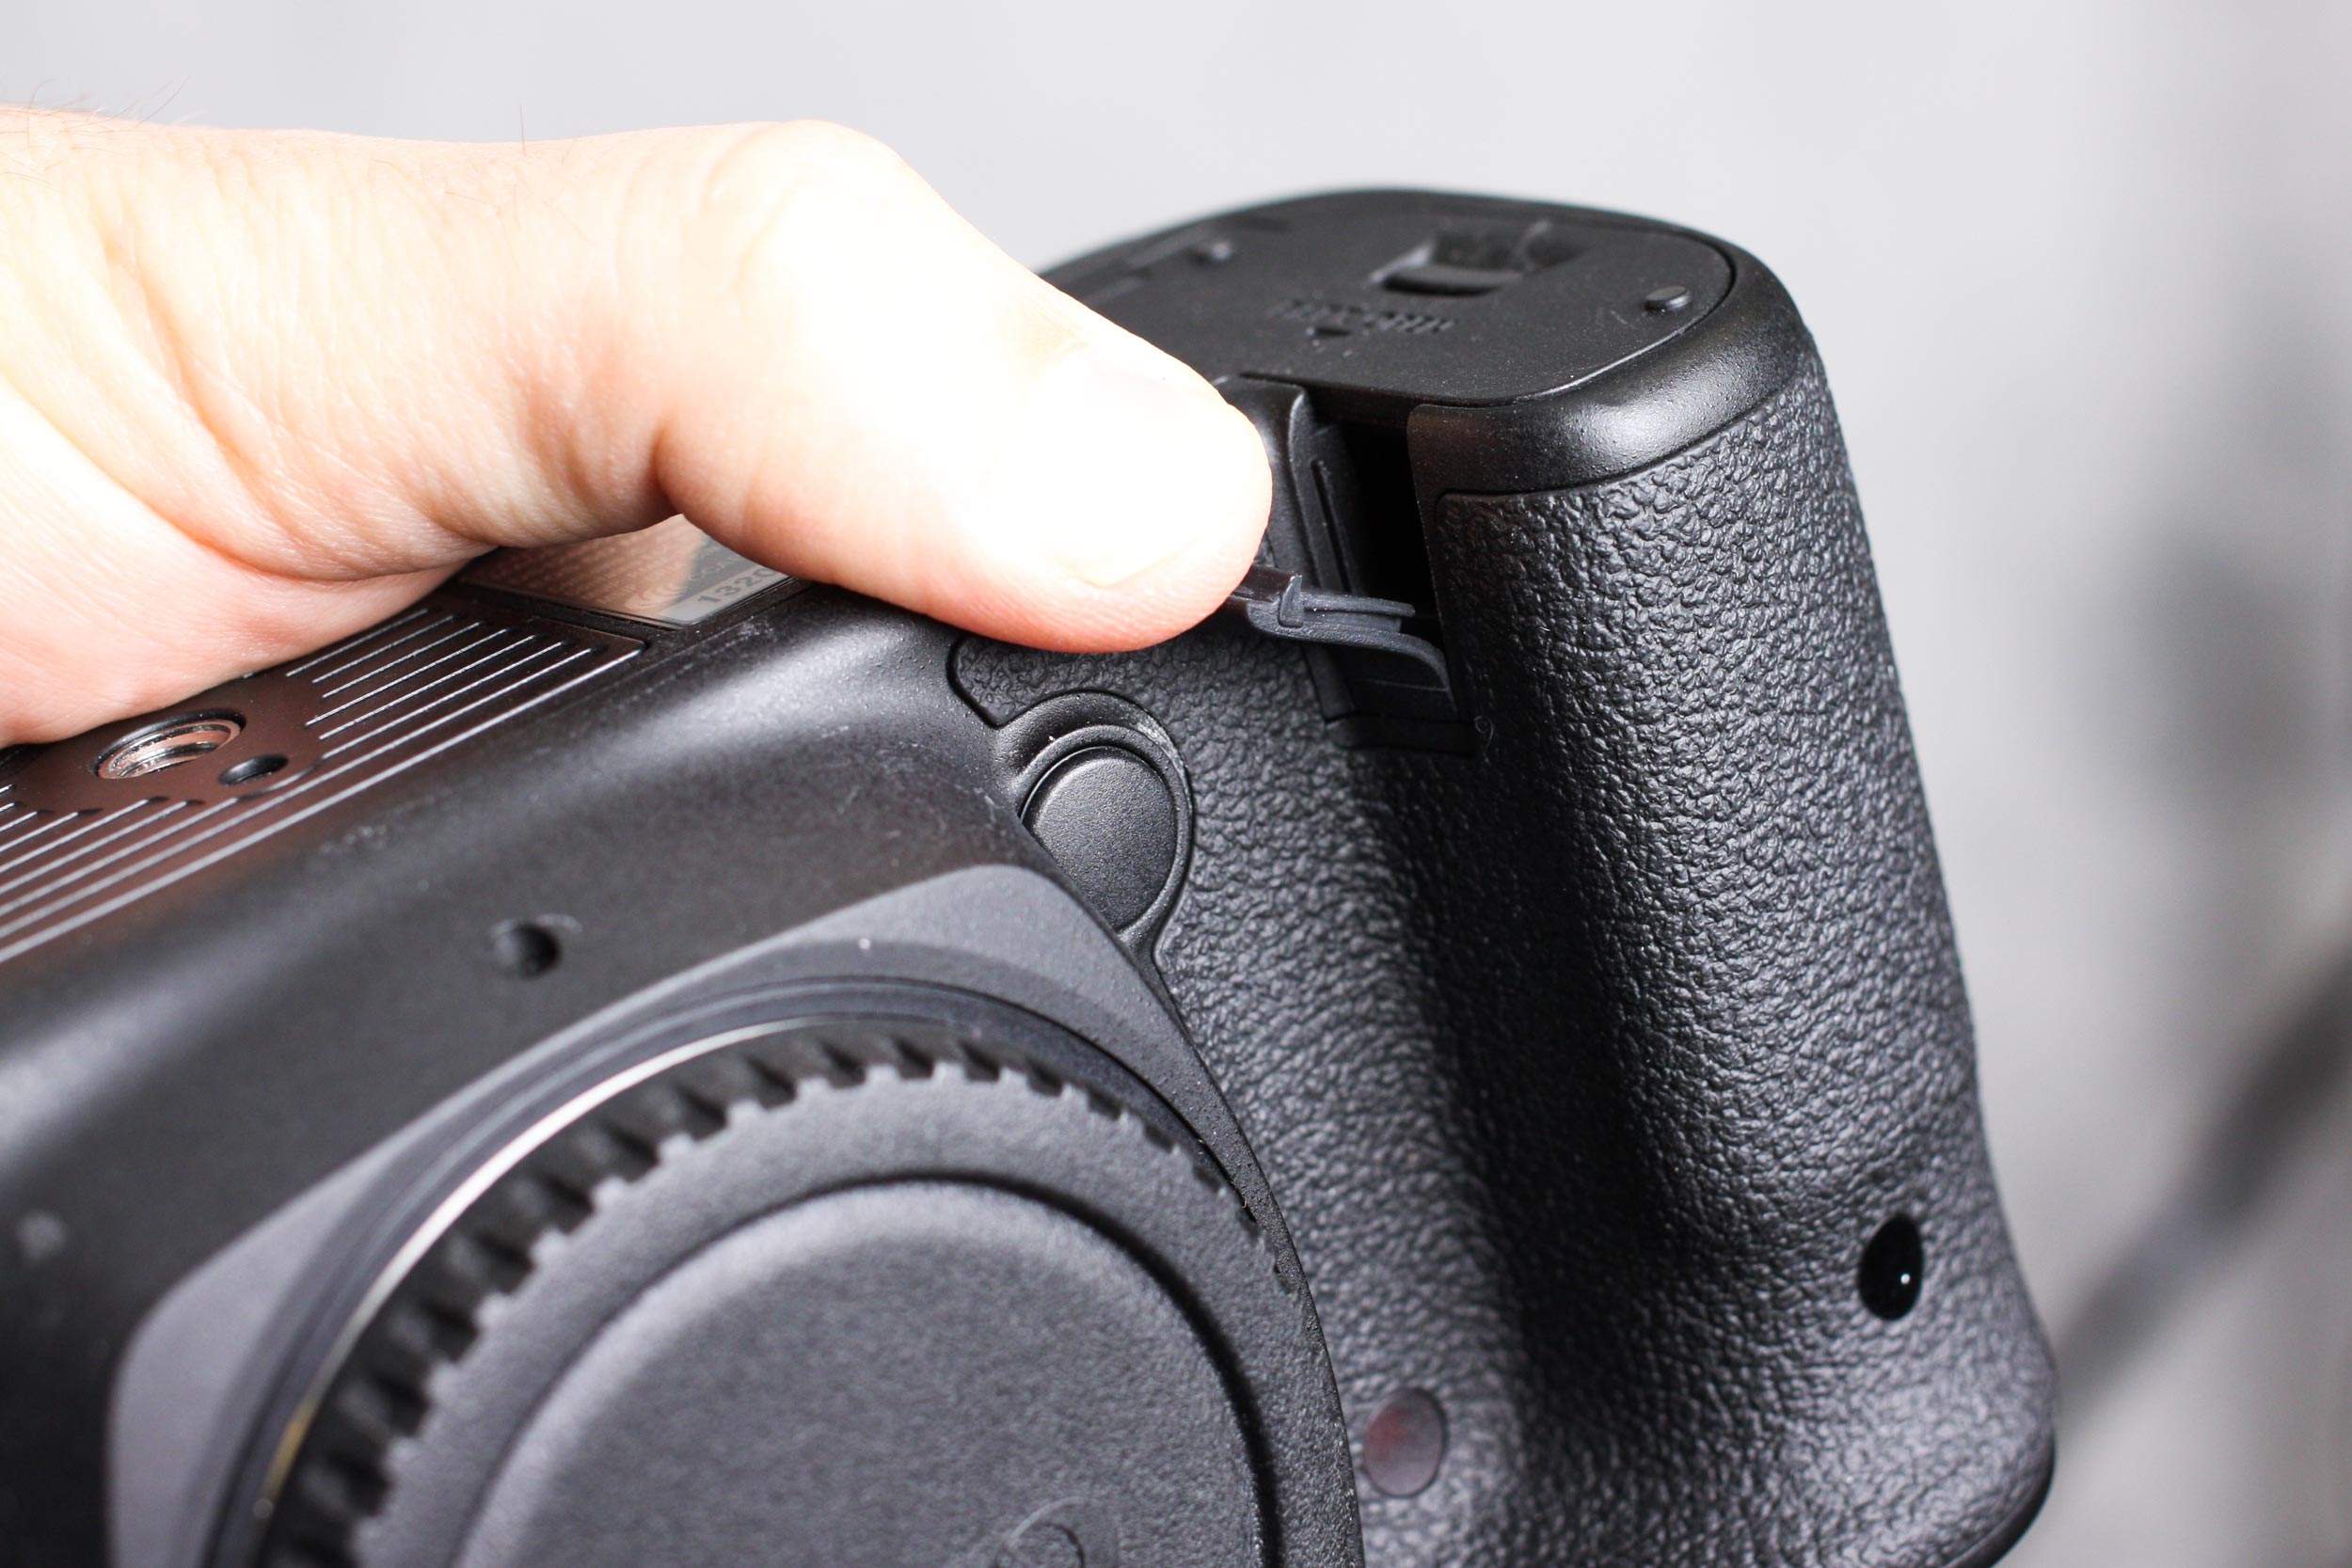
Hidden “trap door” on the body of the Canon 5D Mark IV
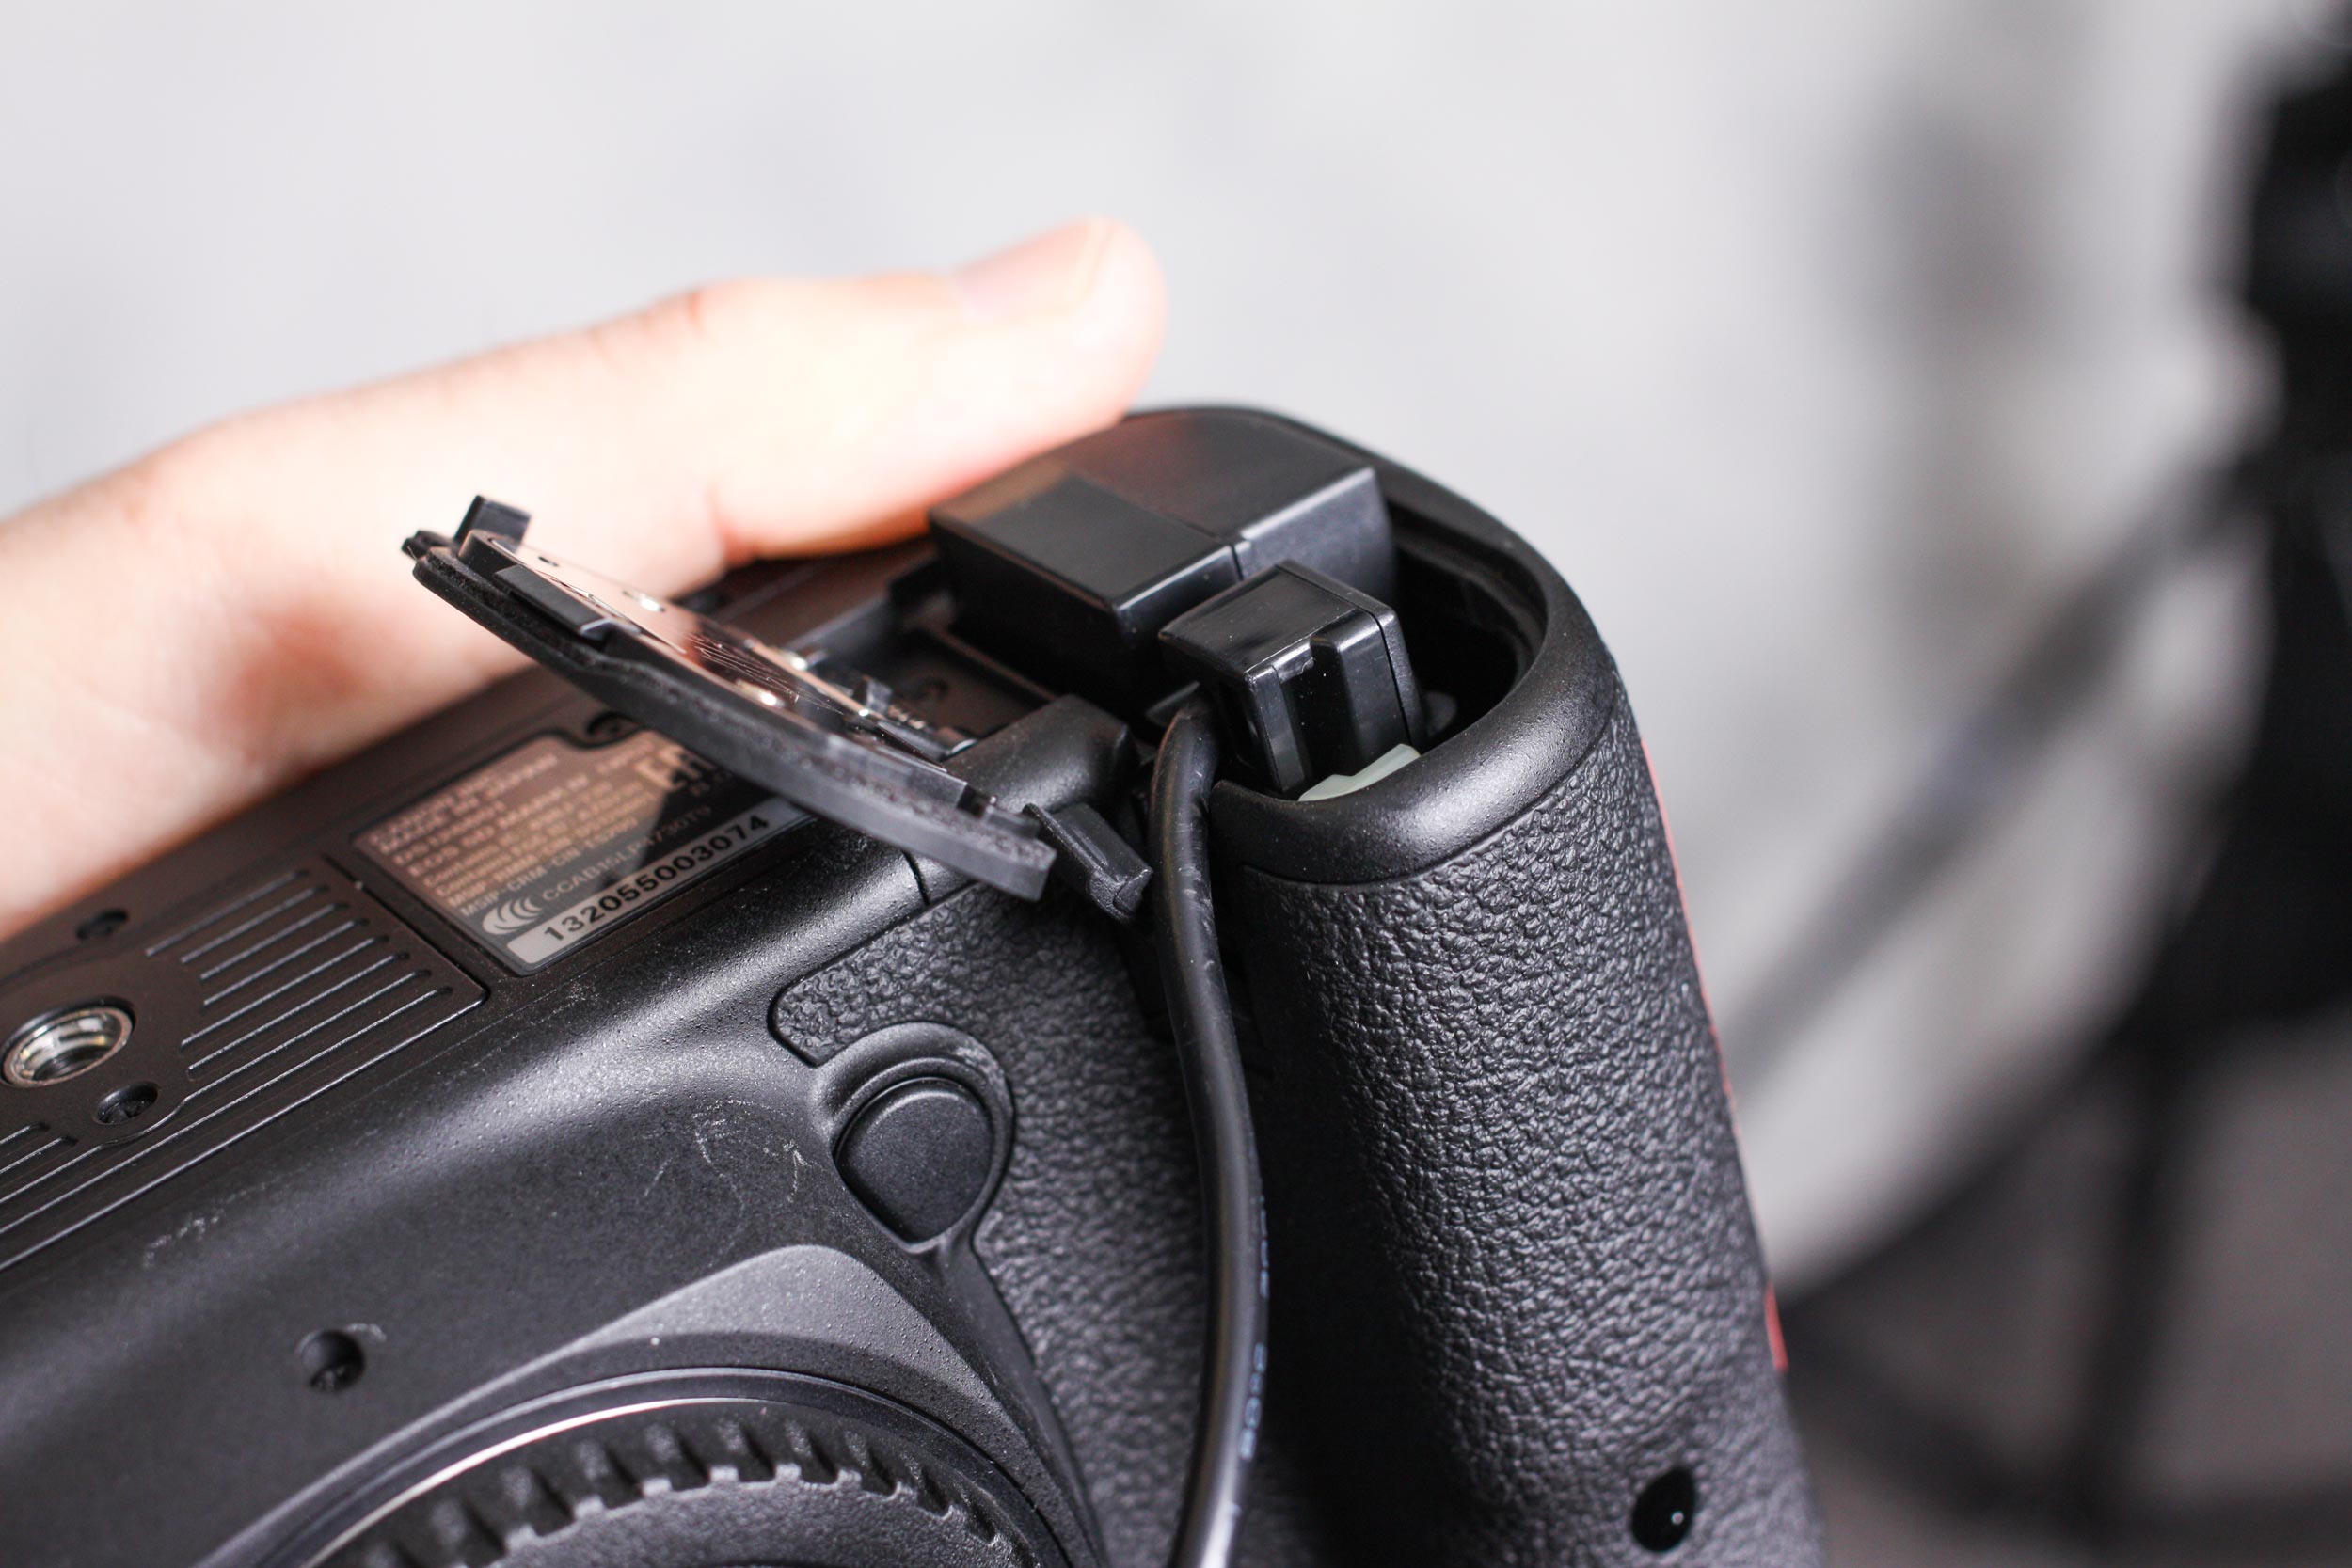
Camera Coupler fully seated in the camera’s battery housing.
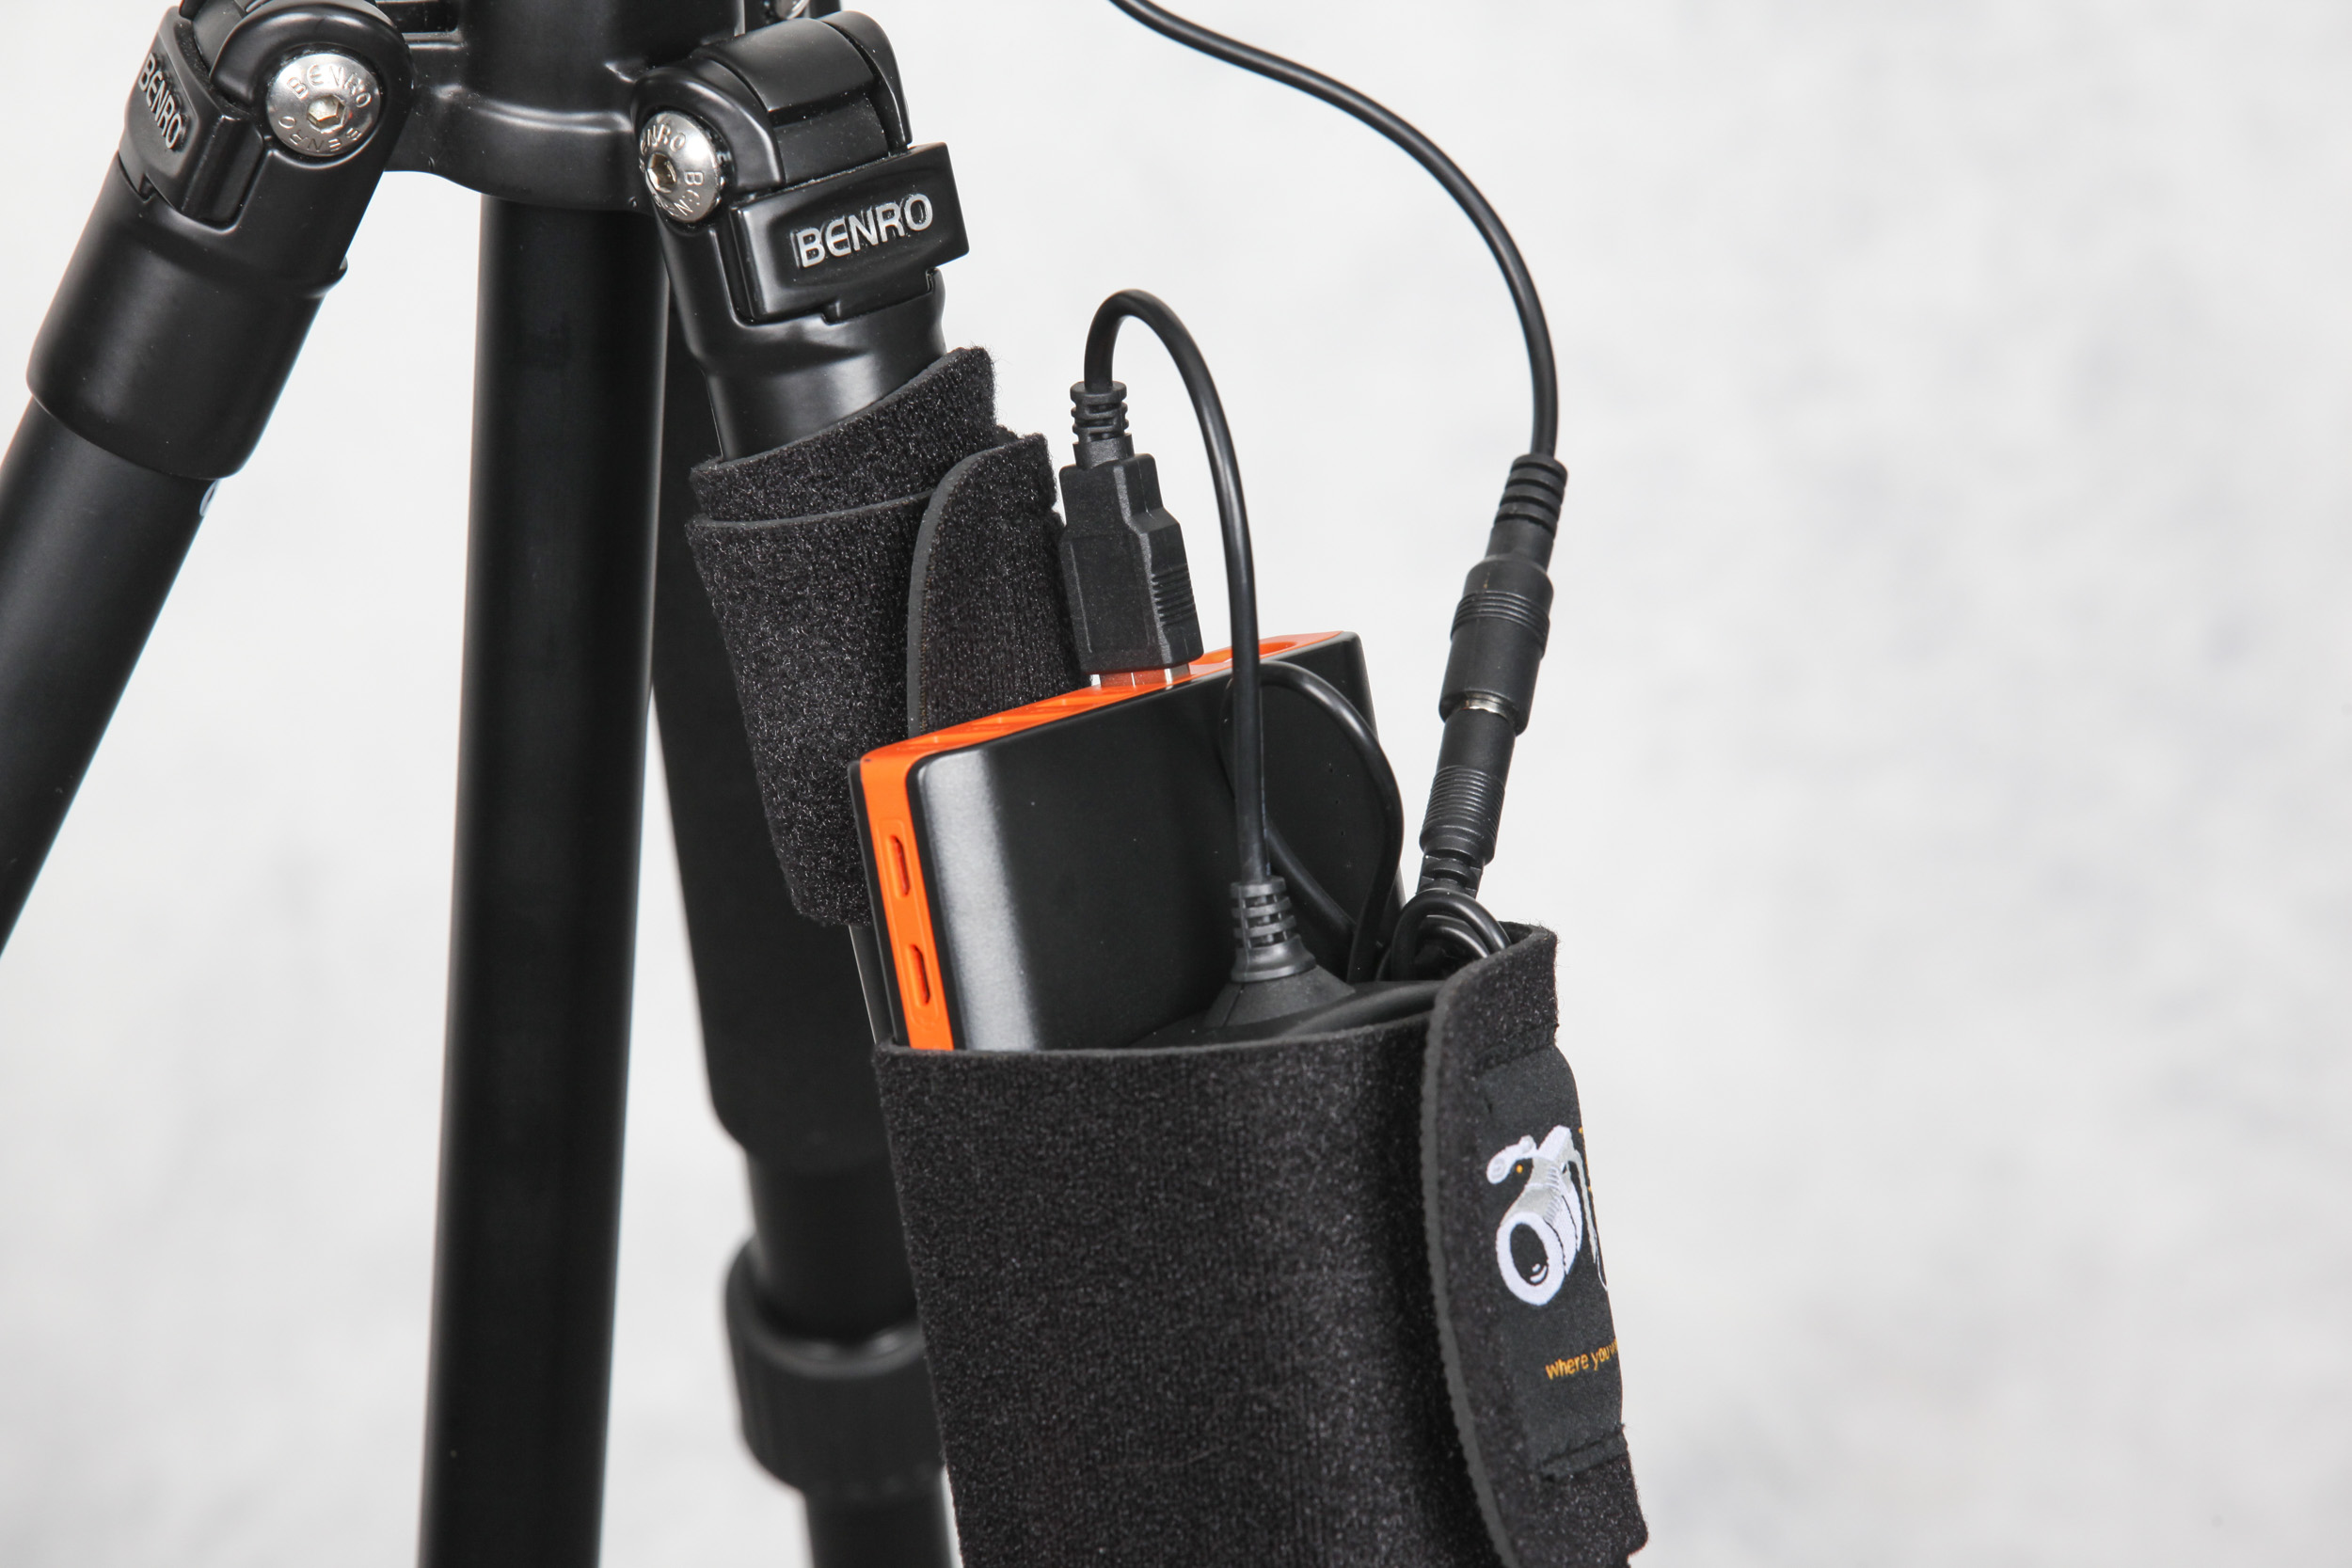
The StrapMoore and the Case Relay Power System working together!
Once the Camera Coupler is attached, you can turn your camera on and enjoy hours of hot-swappable battery life!
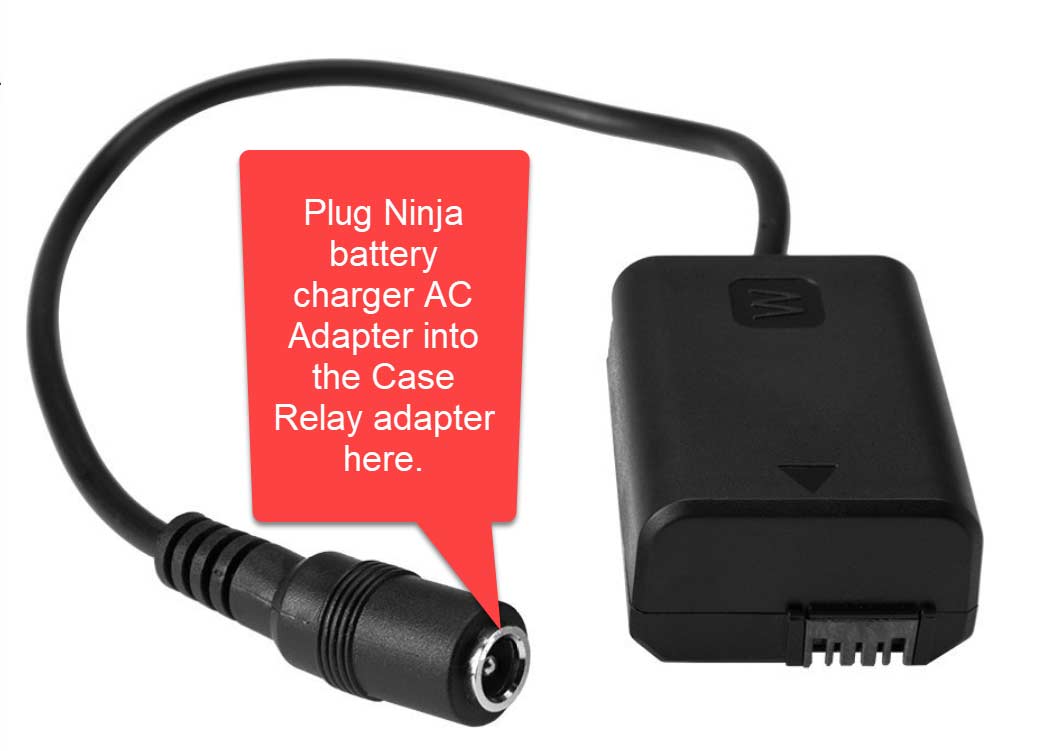
If you need a continuous power source for a long video shoot, you can (oddly enough) use the AC adapter that came with the Ninja’s battery charger. Just plug the adapter from the Ninja’s battery charger directly into the Case Relay adapter (see image below):
The Ninja 2 also comes with its own A/C power adapter, so it can also be plugged into a continuous power supply. Not only that, but the Ninja 2’s batteries are hot-swappable (there are two batteries on the back).
That’s it! The beauty of this system is that you can now record for much longer than the default recording time that’s inherent to the camera, plus there’s far less wear and tear on the camera’s sensor.


