I recently learned how to shoot “stroboscopic” photos and I thought I’d share what I learned. The word “stroboscopic” sounds daunting and super technical, but really all it means is “shooting a photo with a strobe light”. In this case, the strobe light is an external flash.
The four minute video on this page is one that shows how to set up a Canon 580 EXII Speedlite flash for stroboscopic mode, and how you can use yourself as a subject in a stroboscopic image using a remote trigger.
If you don’t feel like watching the video, here’s the “text only” version:
In order to shoot stroboscopic photos, you need an external flash that can be fired remotely. There are several of these on the market with varying price points. In this demo I’m using a Canon 580 EXII Speedlite, but a quick search on Amazon will yield several results. Same goes for the firing mechanism. In this demo I used the Canon Speedlite Transmitter ST-E2, but there are any number of ways to remotely fire your flash. You’ll also need a black background and if you plan to be in the shot doing something like swinging a golf club or a drumstick, you should wear a black long sleeved shirt.
The most confusing aspect of this technique is setting up the flash. On the 580 EXII, you need to hold down the “Mode” button, then you’ll see the letter “M” start to blink. Hit the Mode button one more time, and the screen will read “Multi” and a few new options will appear. This is stroboscopic mode. The settings can be a bit confusing, there’s a a set of numbers that appear (from left to right) to be a fraction, another random number, and a Hz setting. Once you understand what these settings are for though, it all makes perfect sense. Here’s what they mean:
The “fraction” (such as 1/32) is the flash power. This setting is important because it controls the actual brightness of the flash. You are taking a photograph using multiple quick bursts of light, so it would be very easy to overexpose whatever you are attempting to shoot. So the flash power setting is very useful for controlling exposure. It would also be very easy to overwhelm your flash as well as your batteries if you were to shoot at full power.
Going left to right, the next number is actually how many TOTAL flashes you’d like the flash to fire.
The last number (shown in Hz) is how many times per second the flash will fire. The image below shows all of these settings.
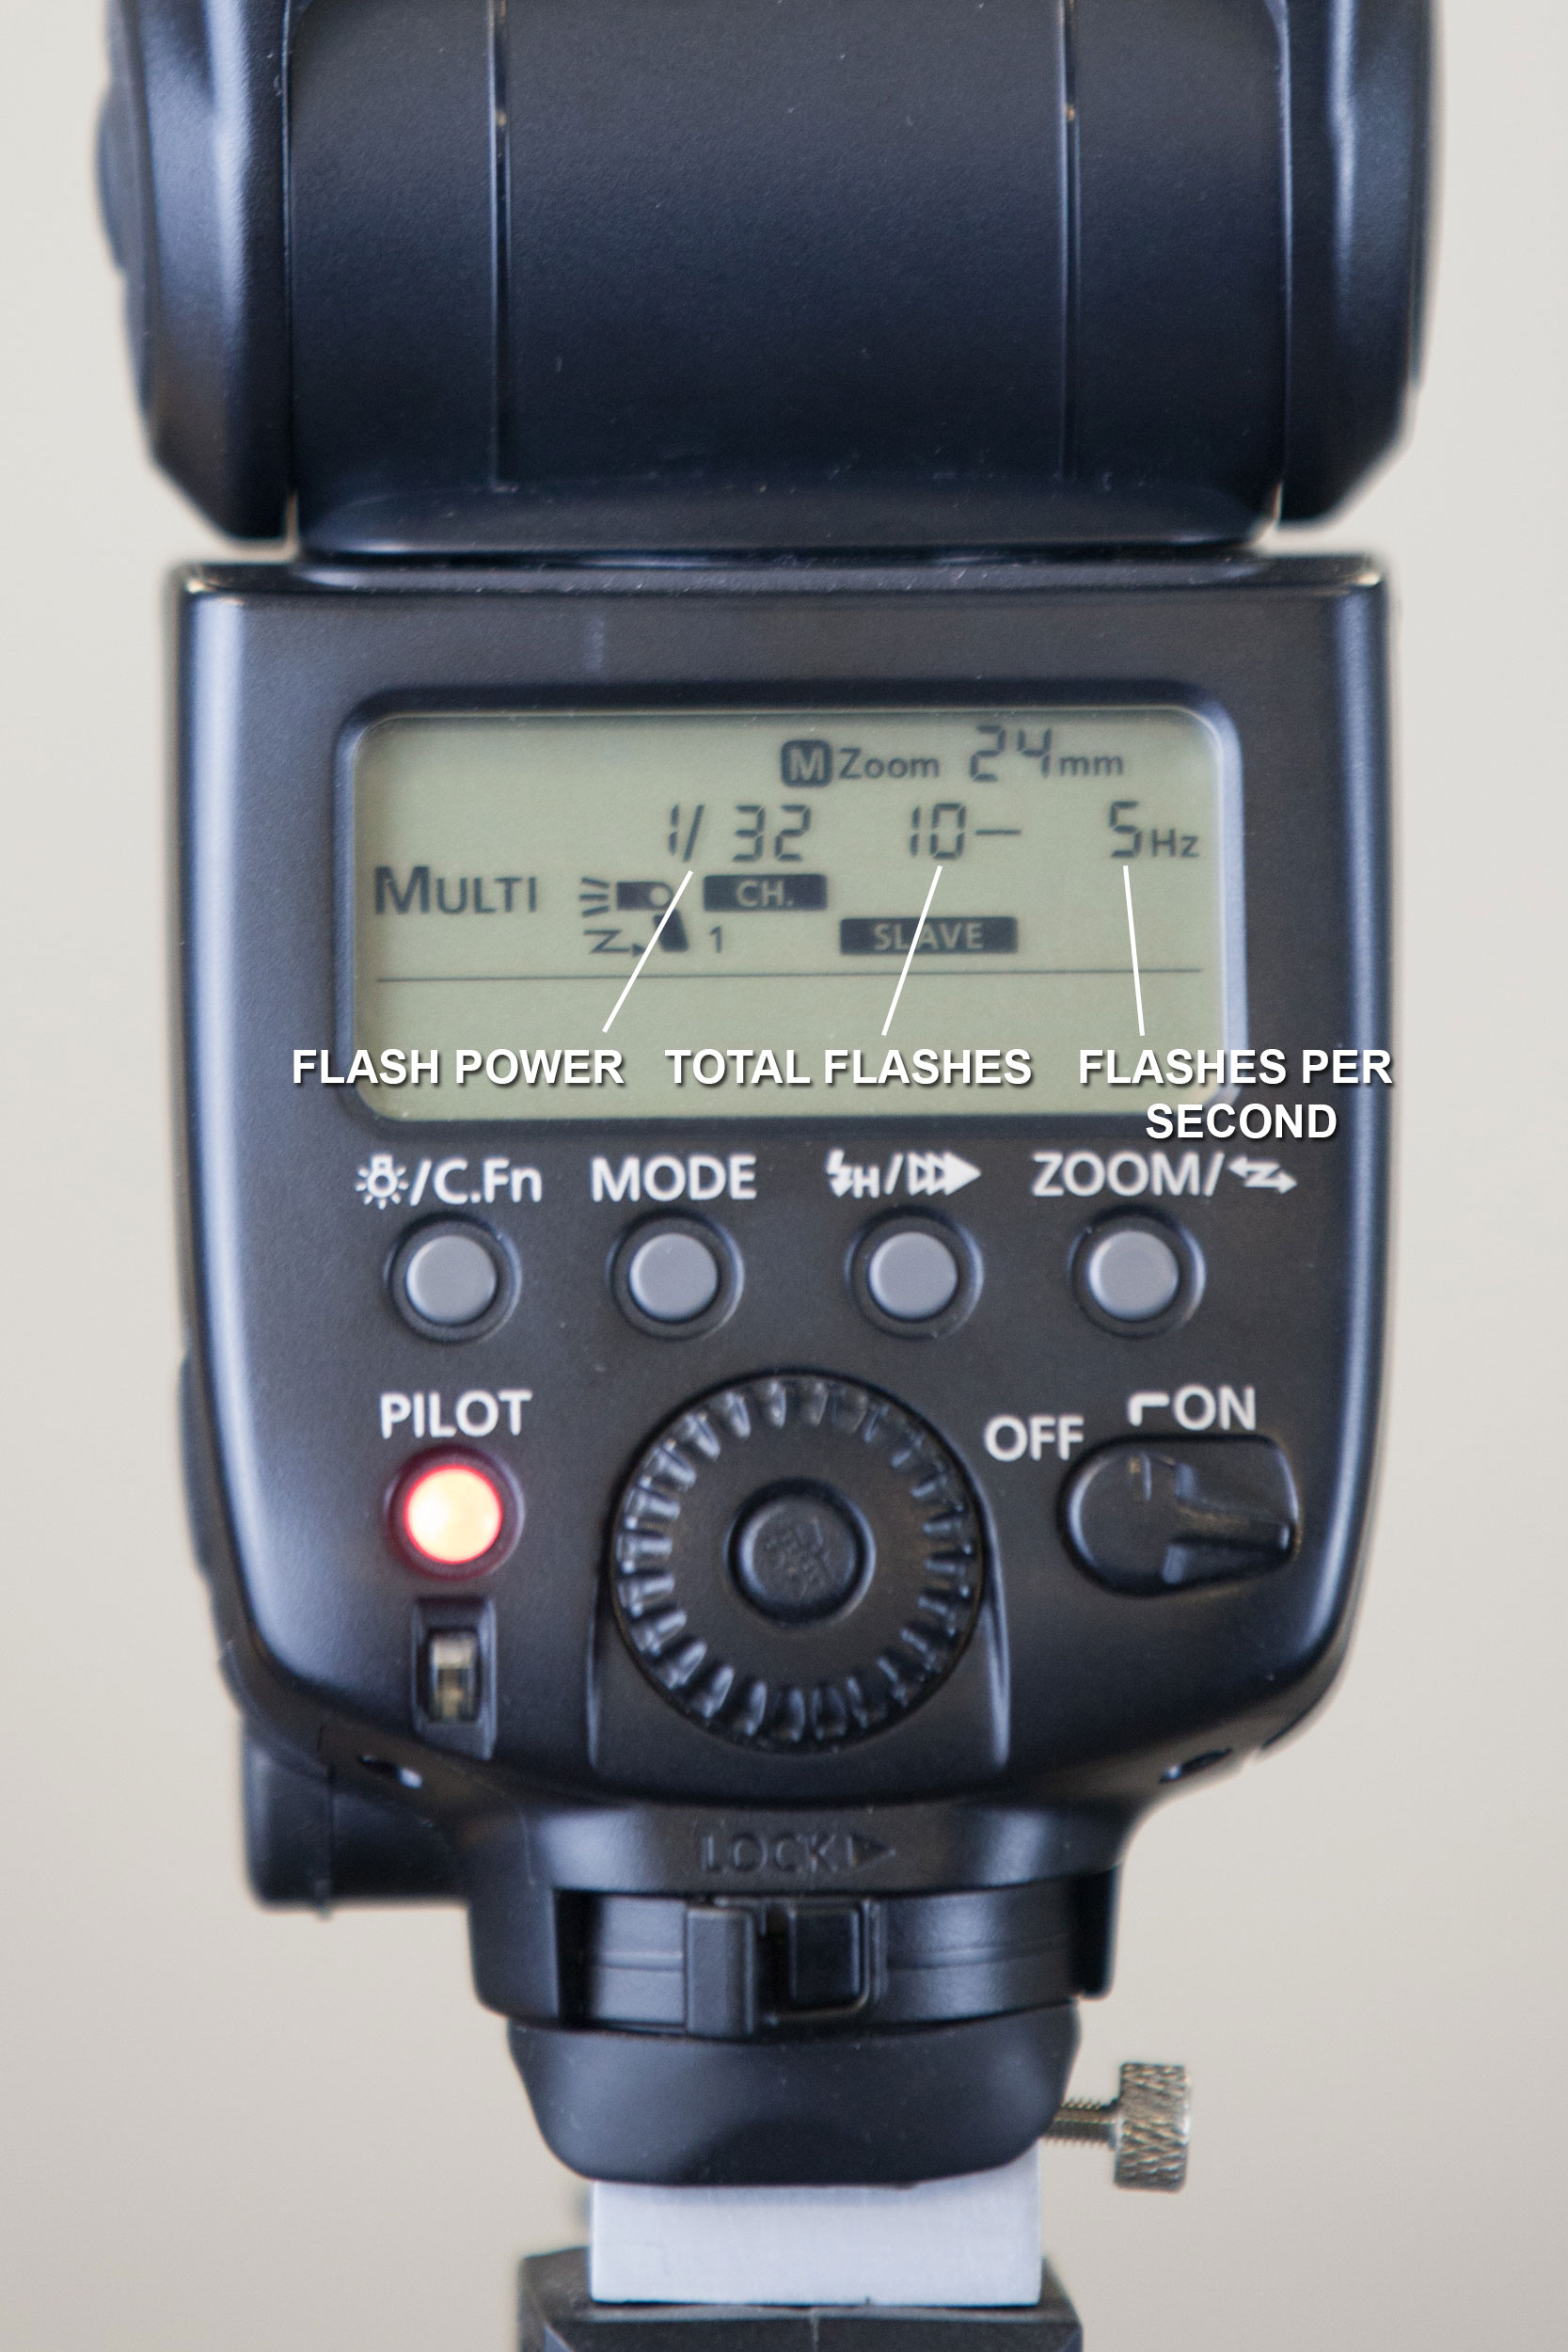
Stroboscopic settings on the Canon 580 EXII
You’ll need to do several test shots In order to figure out your f-stop settings, although you do want to stay away from anything lower than around 5.6. Lower f-stops mean shorter depth of field, which in this case is a bad thing. You are shooting something that has a range of motion, so you are better off working with an f-stop that gives you a bit more depth of field so that everything remains in focus. You can also use ISO to adjust your exposure, though these shots have a lot of black in them so if your camera doesn’t handle high ISO very well, I wouldn’t go above 800. I shot my test shots at 200 ISO. You’ll also need to determine the best placement of your flash. In my case, I had the flash on a light stand at around four feet in height, and it sat about a foot and a half away from what I was shooting (and off to the left). You don’t want the flash too close to your subject, otherwise you’ll actually see the bursts of light from the flash at the edge of your shot. Watch the video to better see where the flash was placed.
For the shutter speed, you need to do some very simple math. The goal is to have the shutter open for as many flashes as you have the speedlite set for. In my example, I’m doing 10 flashes total, with the key being that there are five flashes per second. So how would you figure out how long to have your shutter open in order to capture all ten flashes? Just divide the total number of flashes by the flashes per second. So in this case, the shutter speed should be 2 seconds (five flashes the first second, five flashes the 2nd second).
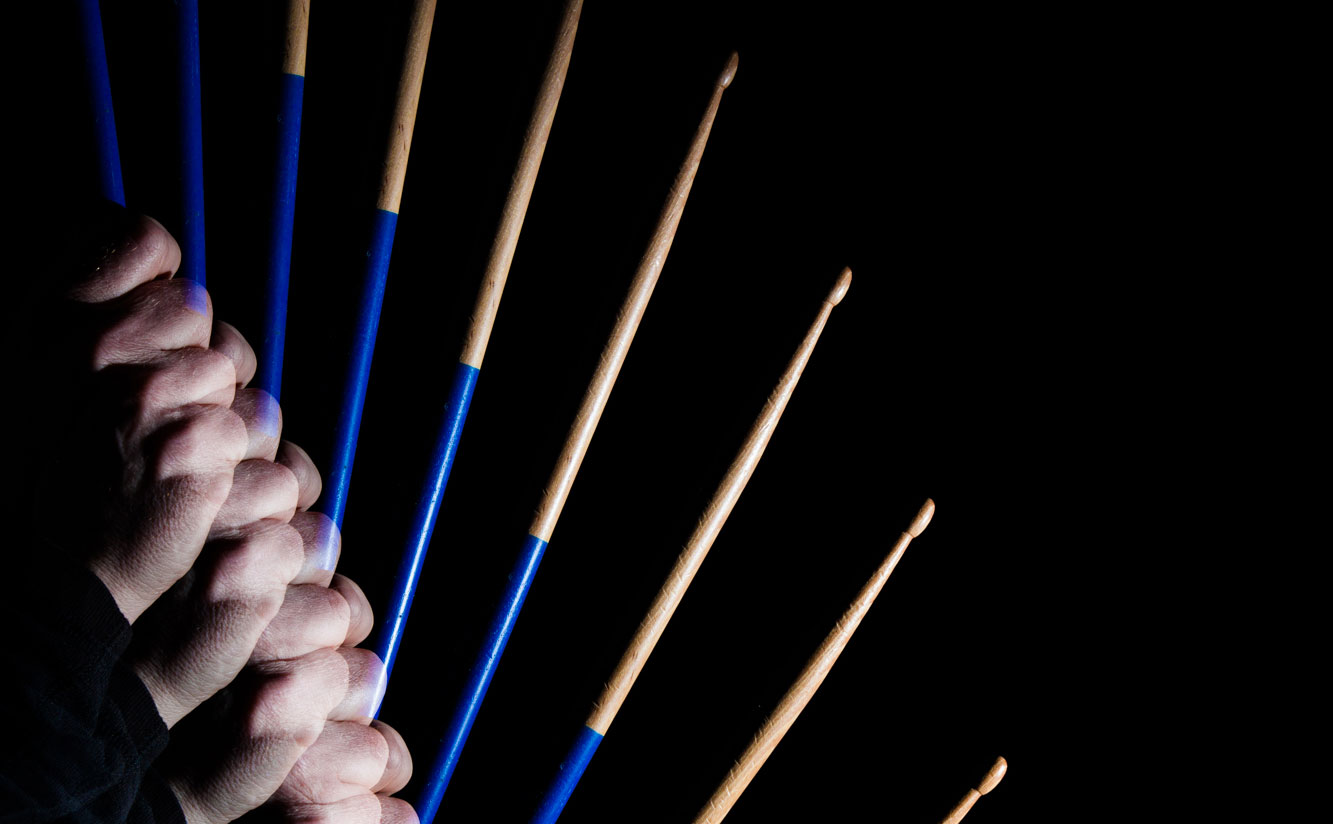
If you are doing these shots on your own, it’s a good idea to have a remote trigger for you camera. For my test shots, I put a small piece of tape on the floor marking where I’d be placing my arm. I then held my arm out (you could also just stand on the spot) and remotely focused the camera until I heard the telltale “beep-beep” sound telling me the lens had focused. I then put the lens in manual focus mode to lock the focus in place. I mentioned the other settings earlier, but they were: ISO 200, f/5.6, and a two second shutter speed. After everything was good to go, I shut off the lights, walked back over to where I had marked the floor with a sticker, hit the remote shutter release and moved the drumstick up in an arcing motion. The flash fired ten times in two seconds, and the resulting image is below.

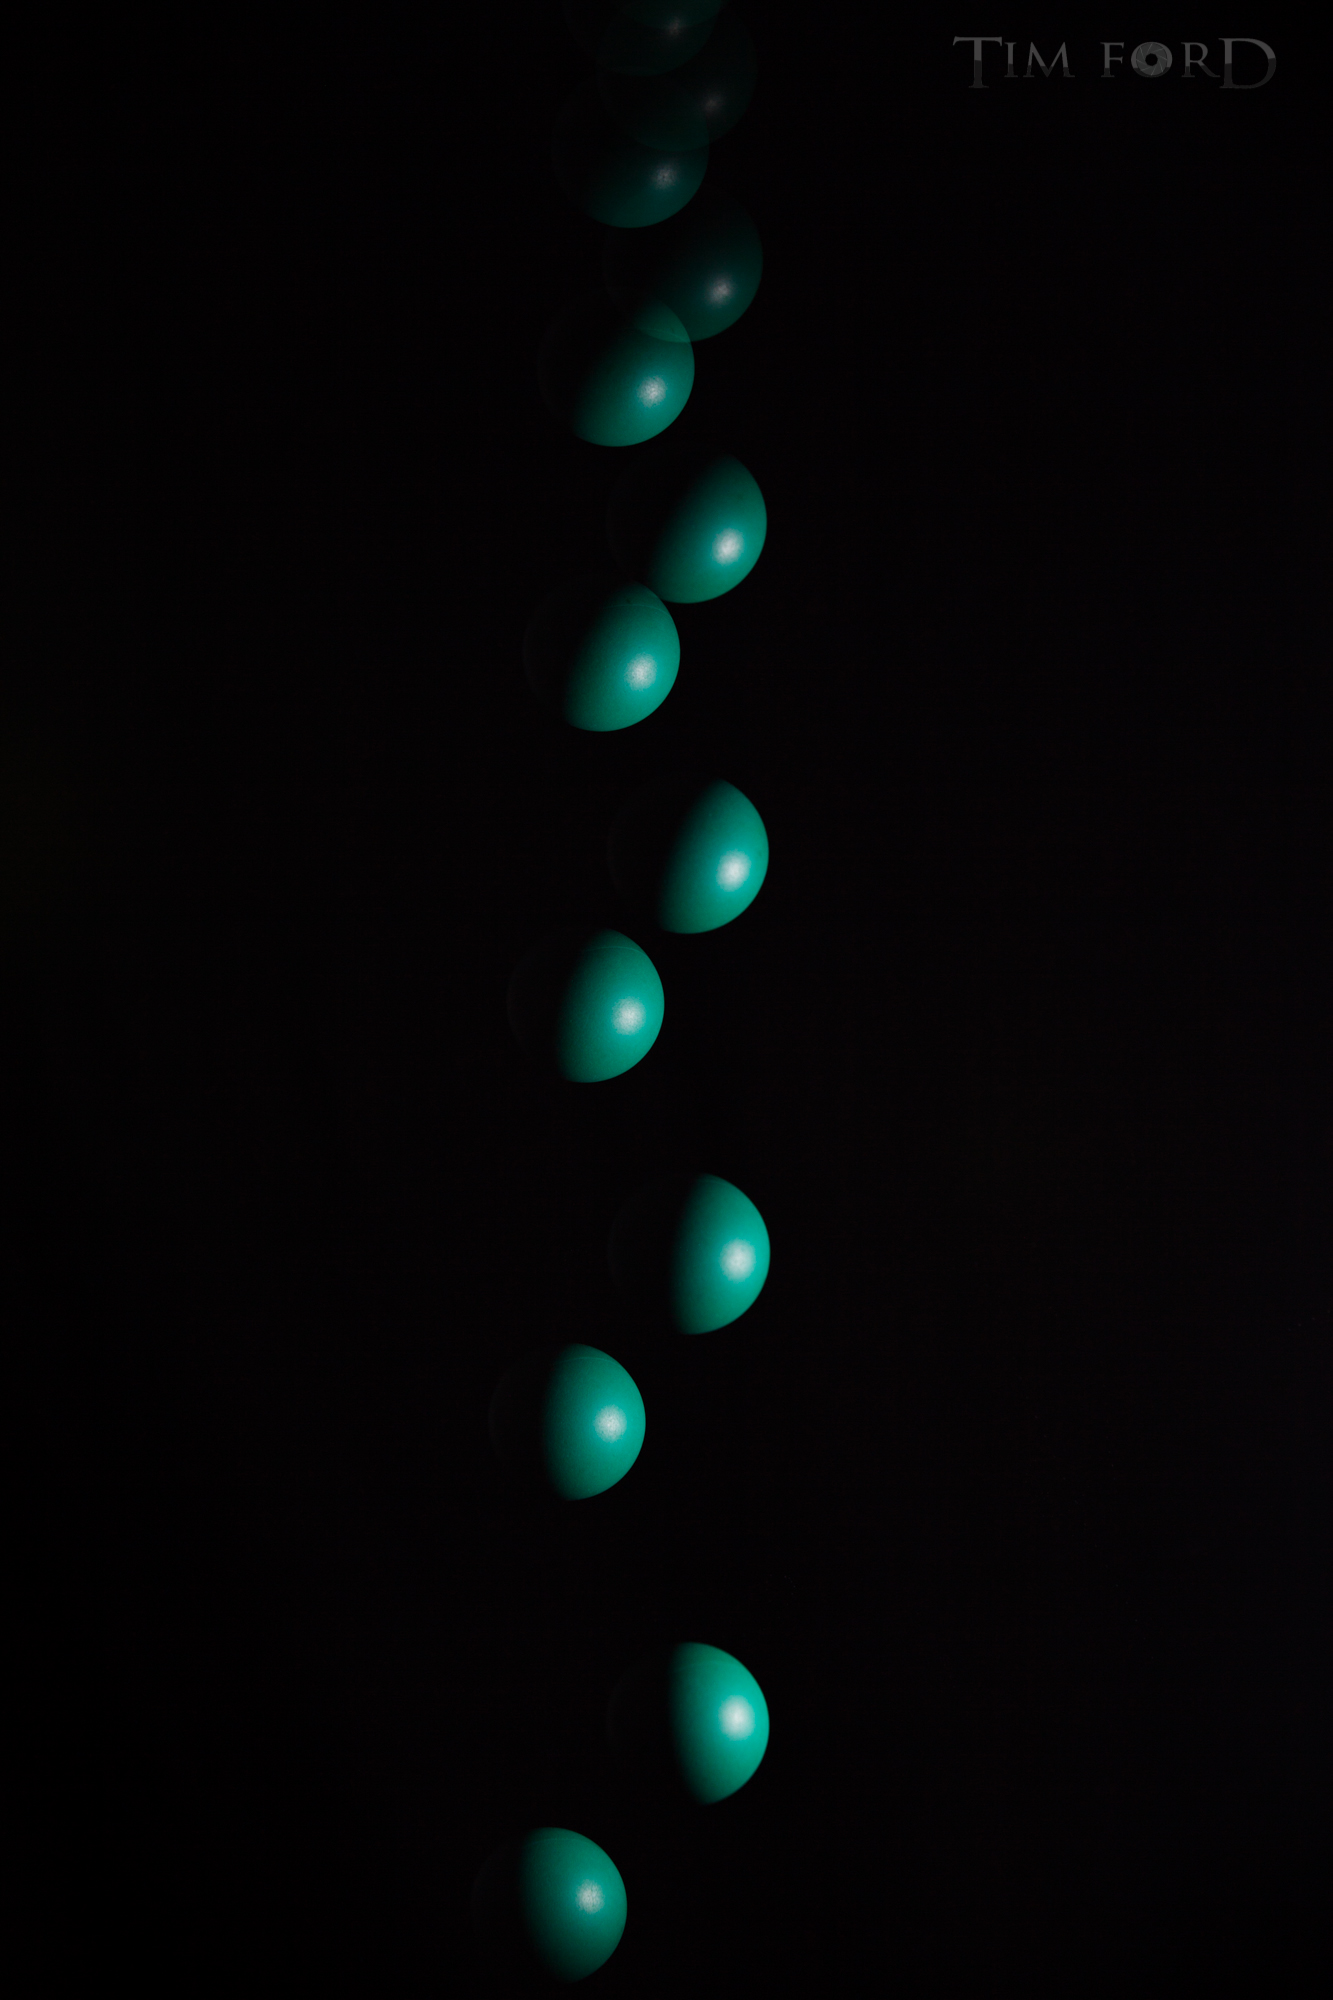
Another cool application is just simply dropping a ball and seeing how many shots of it you can get. I dropped a racquetball and ended up with this image:
This is some pretty fun stuff, and there’s no Photoshop involved whatsoever!
I’d love to see what other people are doing with this technique. Leave me a comment if you want to share!


