One of the somewhat hidden features of the Canon Speedlite 600EX-RT flashes is the ability to connect two (or more) of them together without an additional transmitter. Basically, one flash becomes the sender and the rest become the receivers. I have two of these flashes, so in this tutorial I’ll discuss the various ways to connect two of them.
Note: This setup ONLY works with Canon cameras. I tried putting the 600EX-RT flash on a Sony camera with the intent to use it as a master to fire a slave flash, and nothing happened.
How it Works
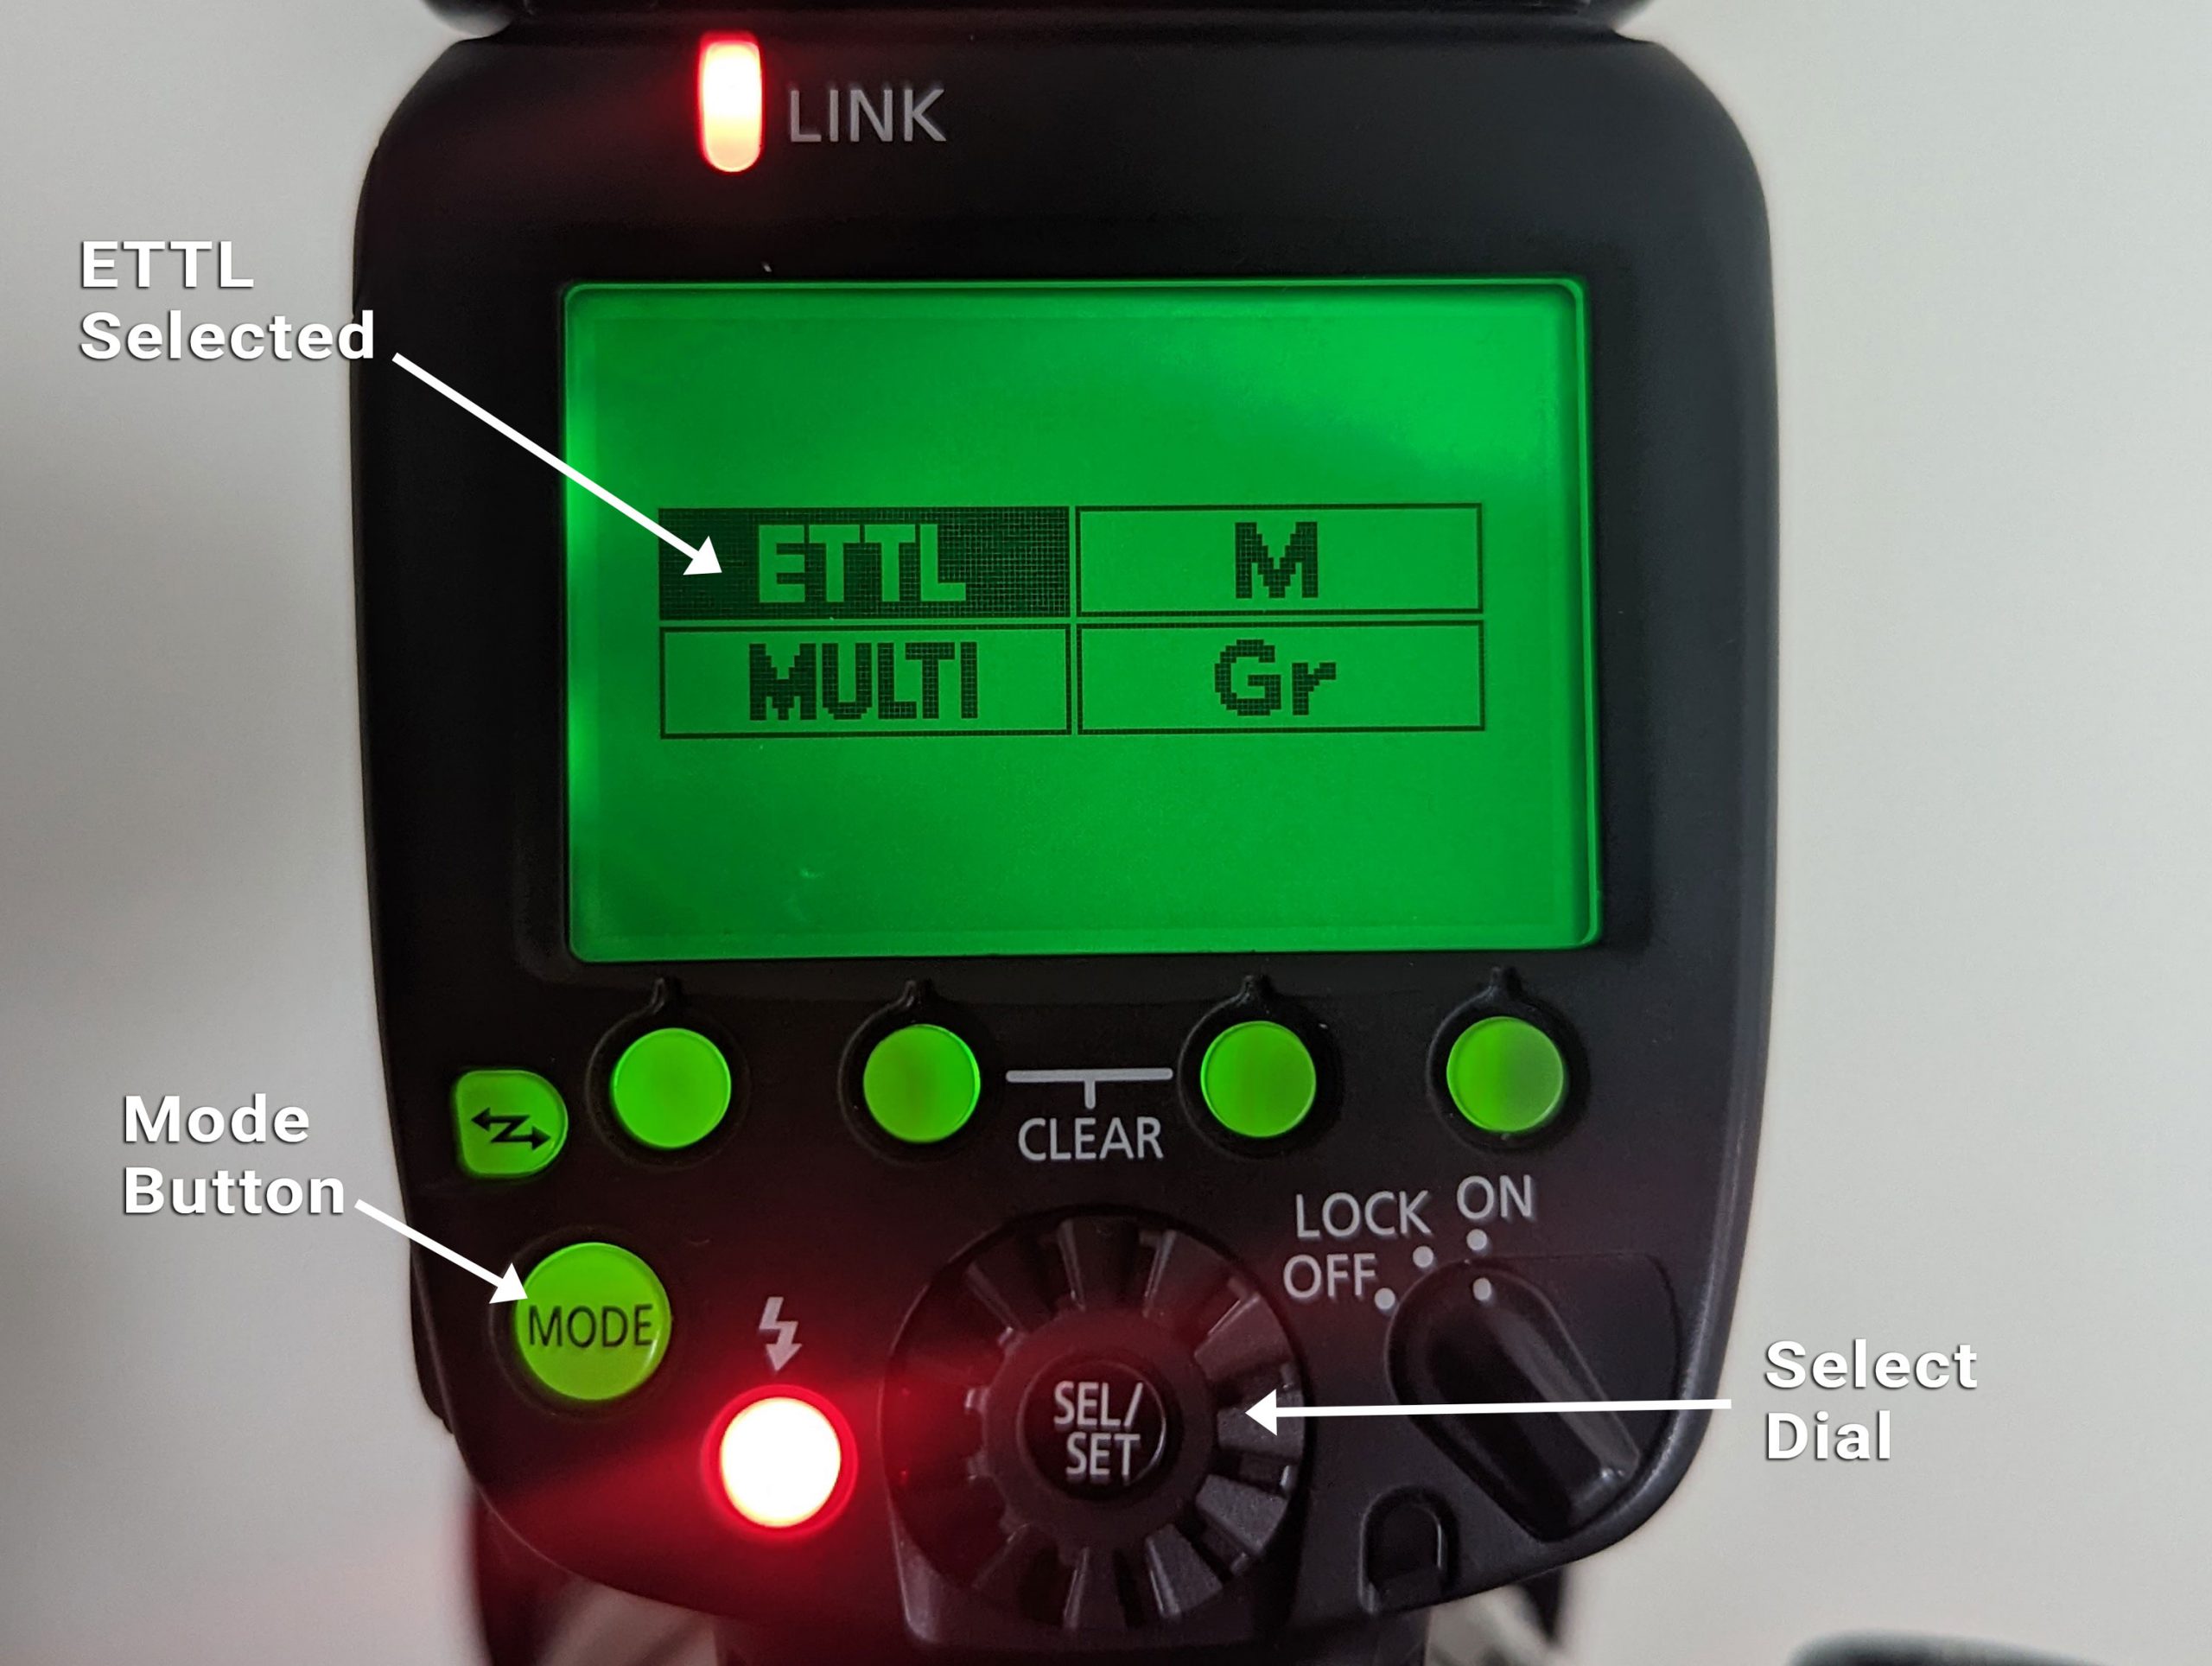
Set the Flashes to “Master” and “Slave”
On the Master flash:
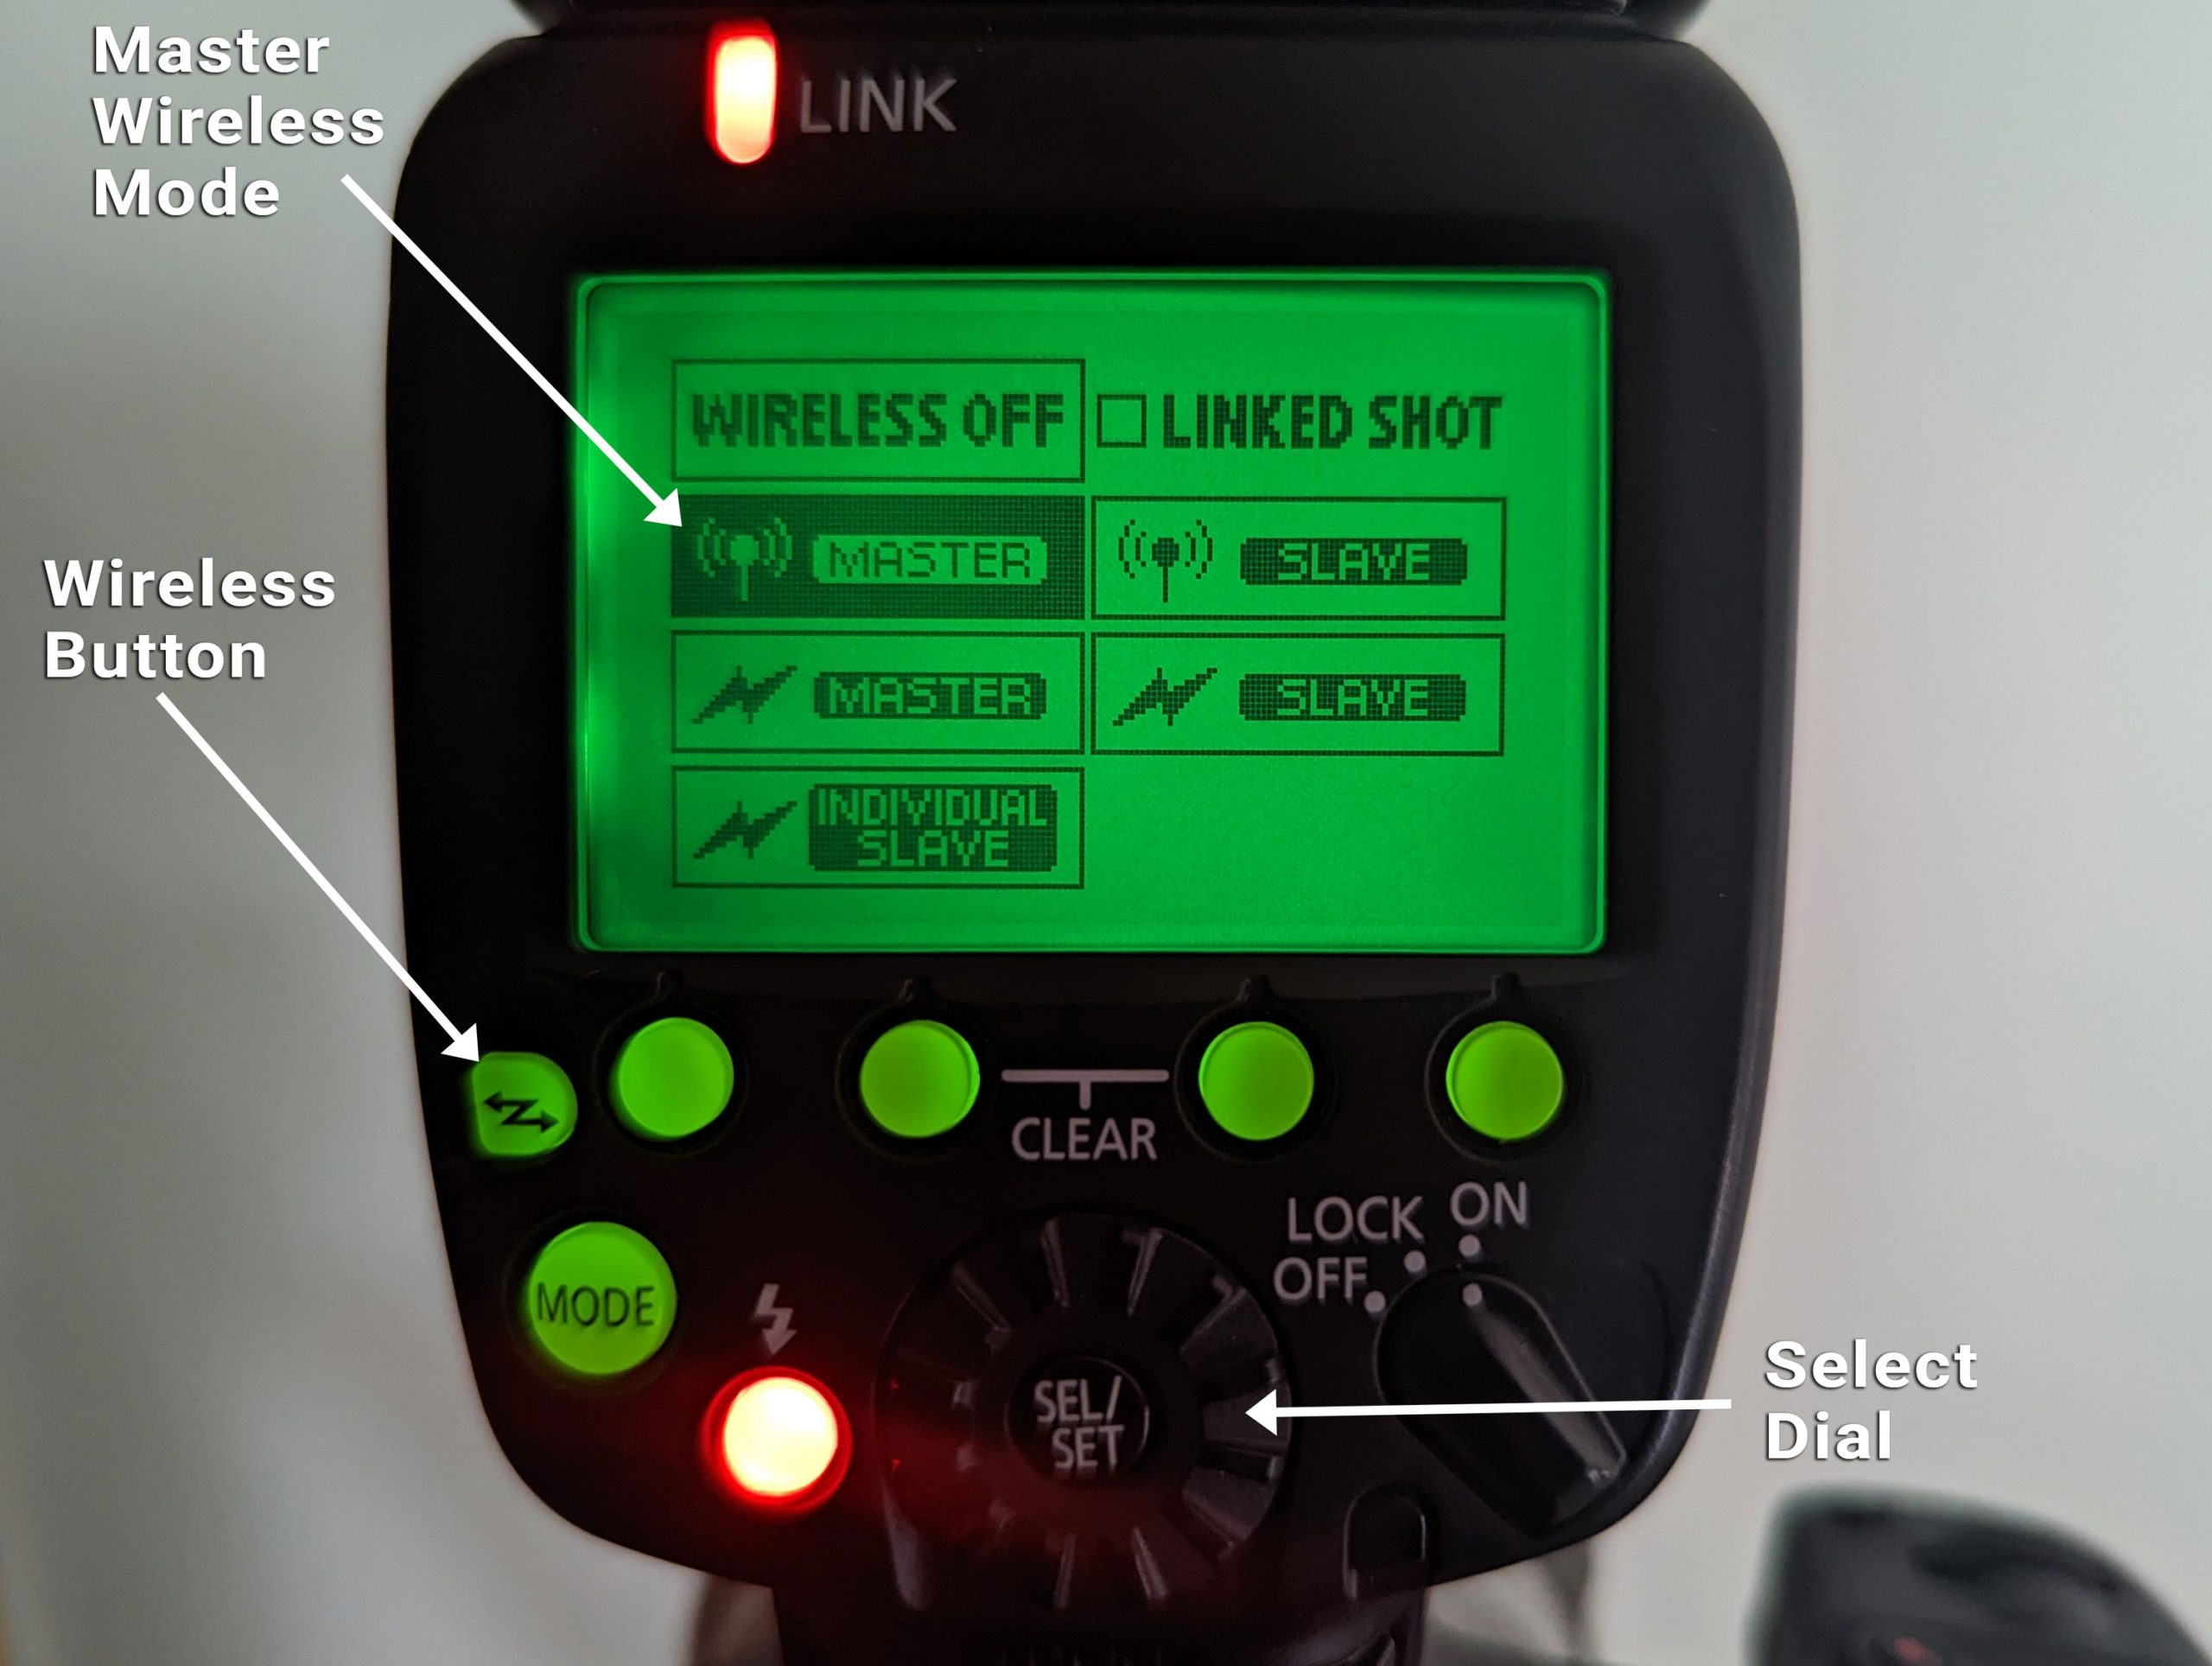
- Press the Wireless button.
- Use the Select Dial to set the mode to “Master”.
The Buttons and settings you’ll use are shown below:
On the Slave flash:
- press the Wireless button.
- use the Select Dial to set the mode to “Slave”.
The Buttons and settings you’ll use are shown below:

Set the Channel
On the Master flash:
- Press Fn Button 4 (the button on the far right) until “MENU 3” is shown.
- Press the channel button (Fn Button 1, under the “CH” icon). The channel number will highlight immediately and will default to “AUTO.”
- You can optionally turn the selector to the channel number you want (1 to 15) or keep it on AUTO. If you keep it on AUTO, the 600EX-RT will automatically set the channel with the best reception. If you choose any of the channels, be sure to set the master and receiver units to the same one.
The Buttons and settings you’ll use are shown below:

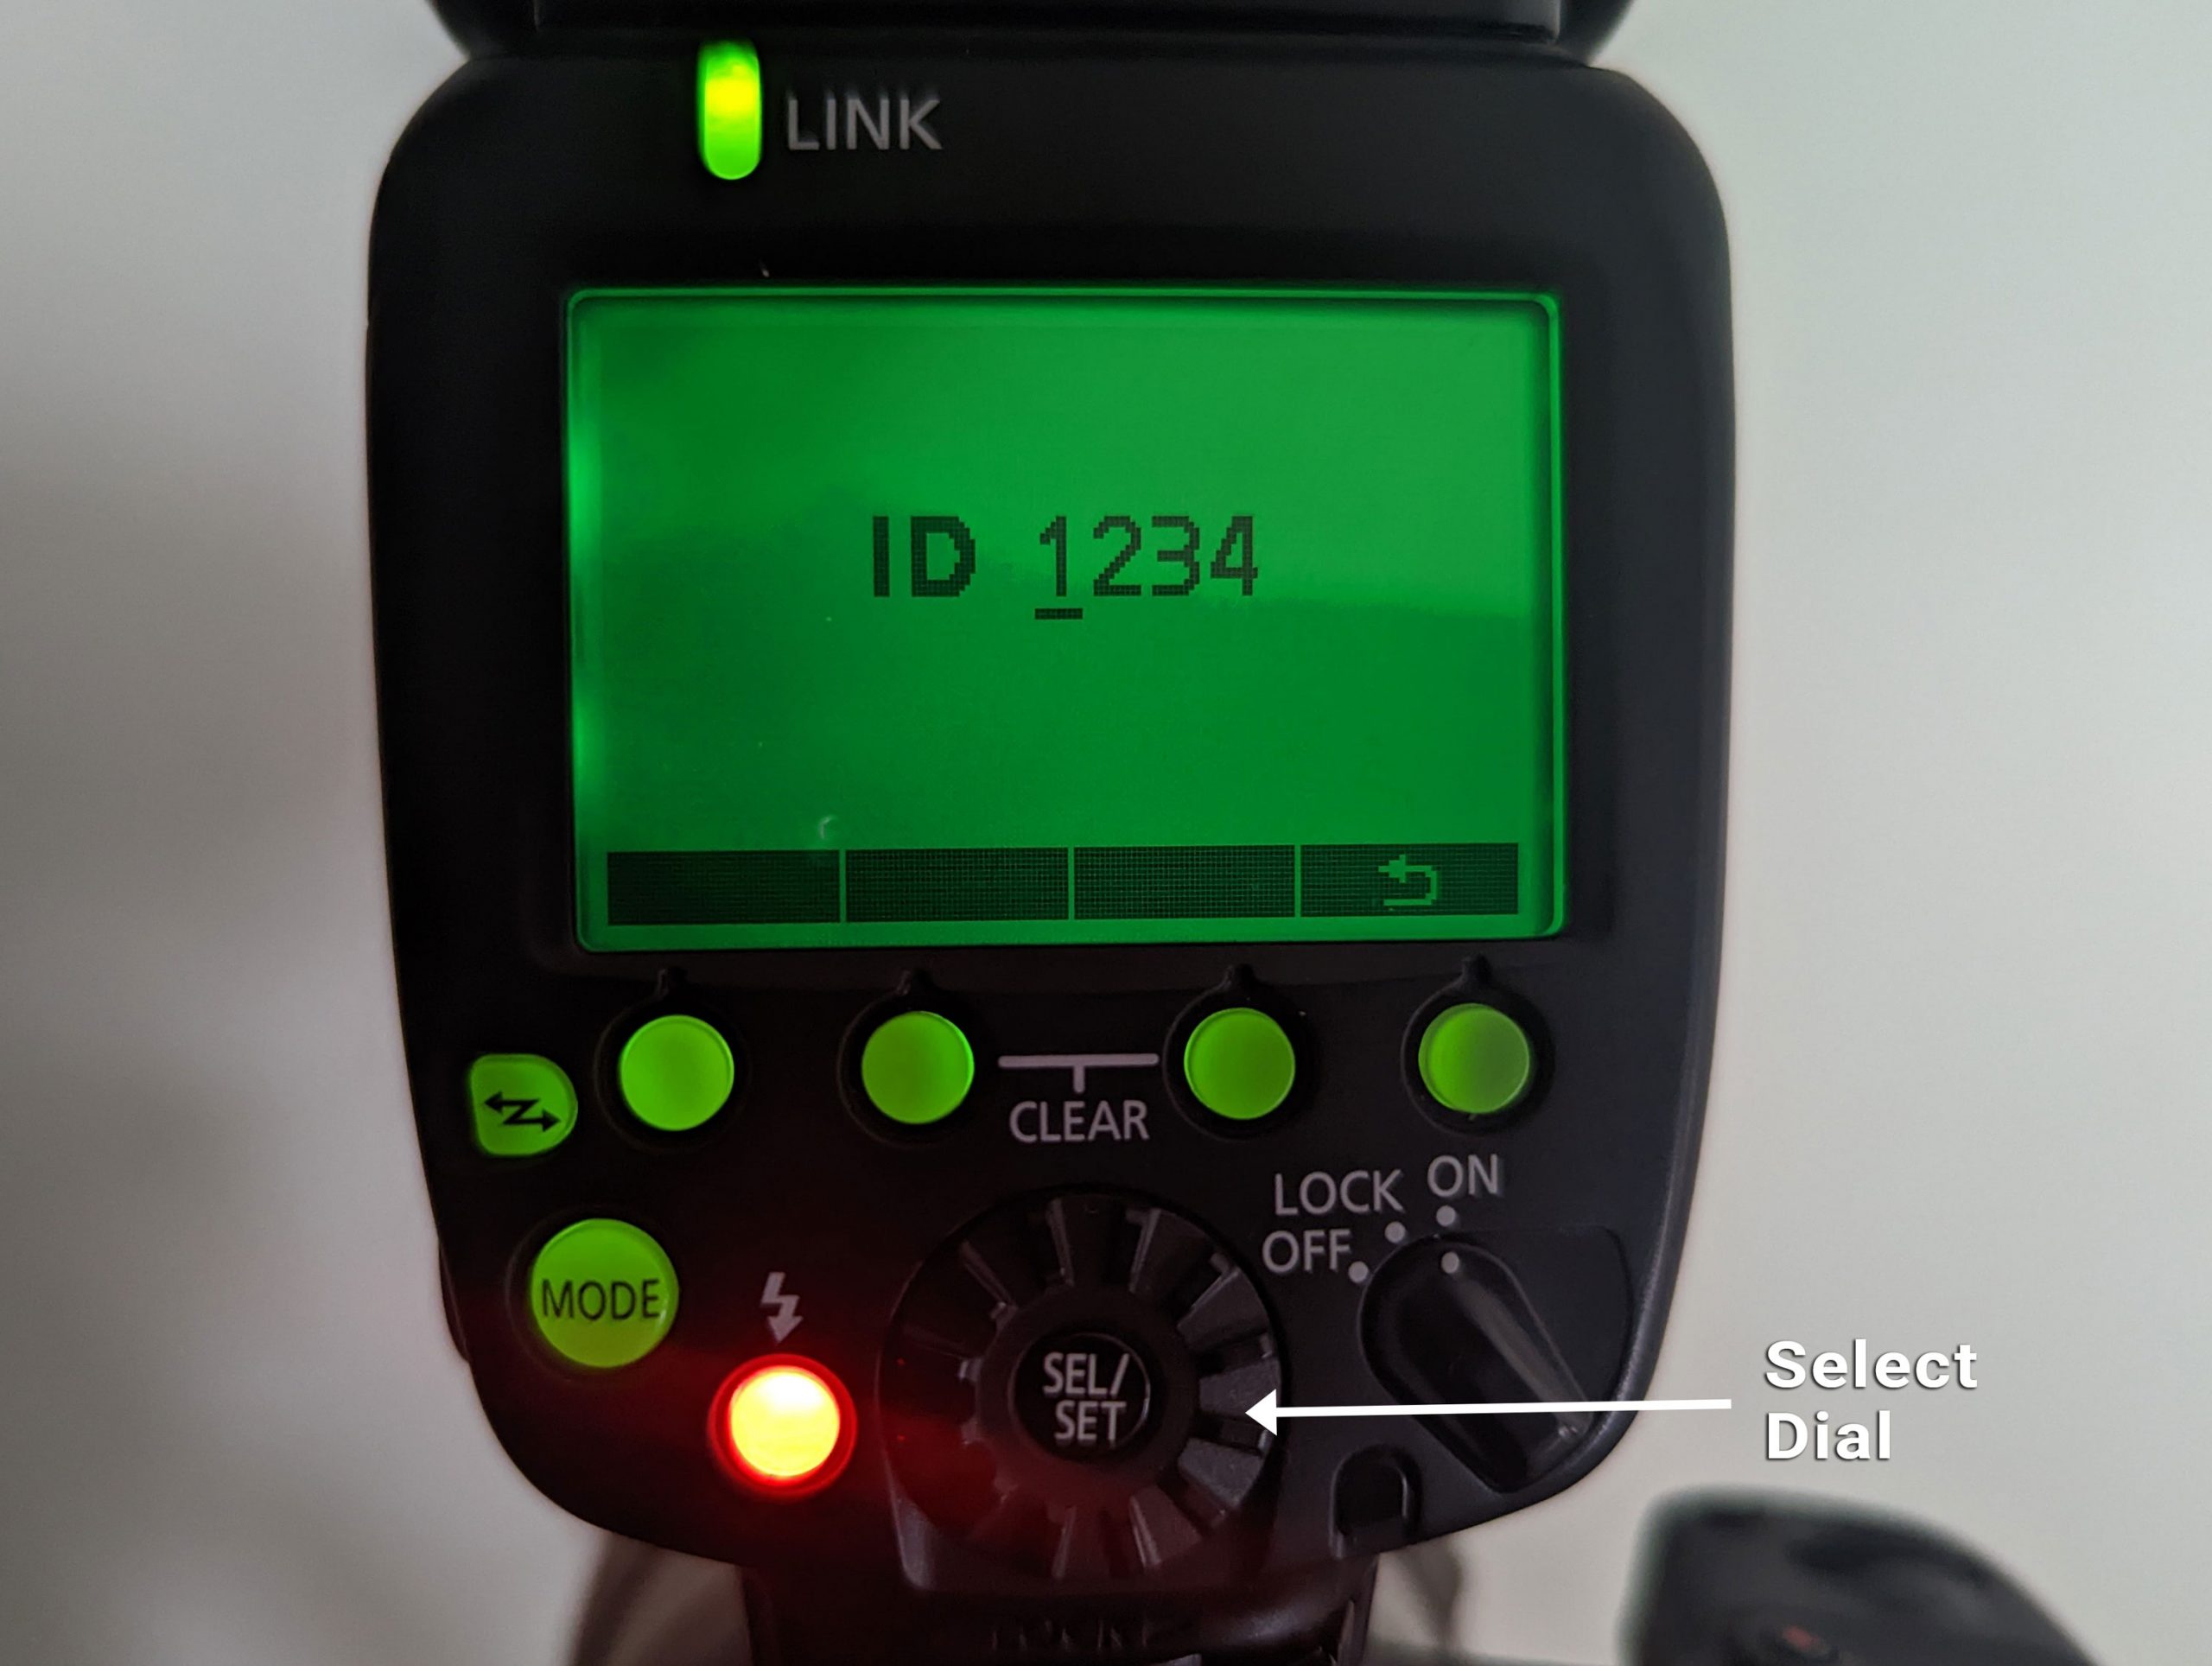
Set the Radio ID
While in the same menu (“MENU 3”), press Fn Button 2 to highlight the “ID” menu option (shown below):

Once the ID option is active, set your ID using these steps:
- Turn the Select Dial to the digit you want to set. There are four digits.
- Press the Select/Set Button to activate the digit setting.
- Turn the Select Dial to set any digit from 0 to 9, then press the Select/Set Button to register your setting on the flash you are using as your master flash. I set mine to “1234” (shown below):
Repeat these same steps on the flash you’ll be using as your slave. The sender and receiver units must be set to same ID number. The number you set must be different from any other 600EX-RT shooters in the vicinity.
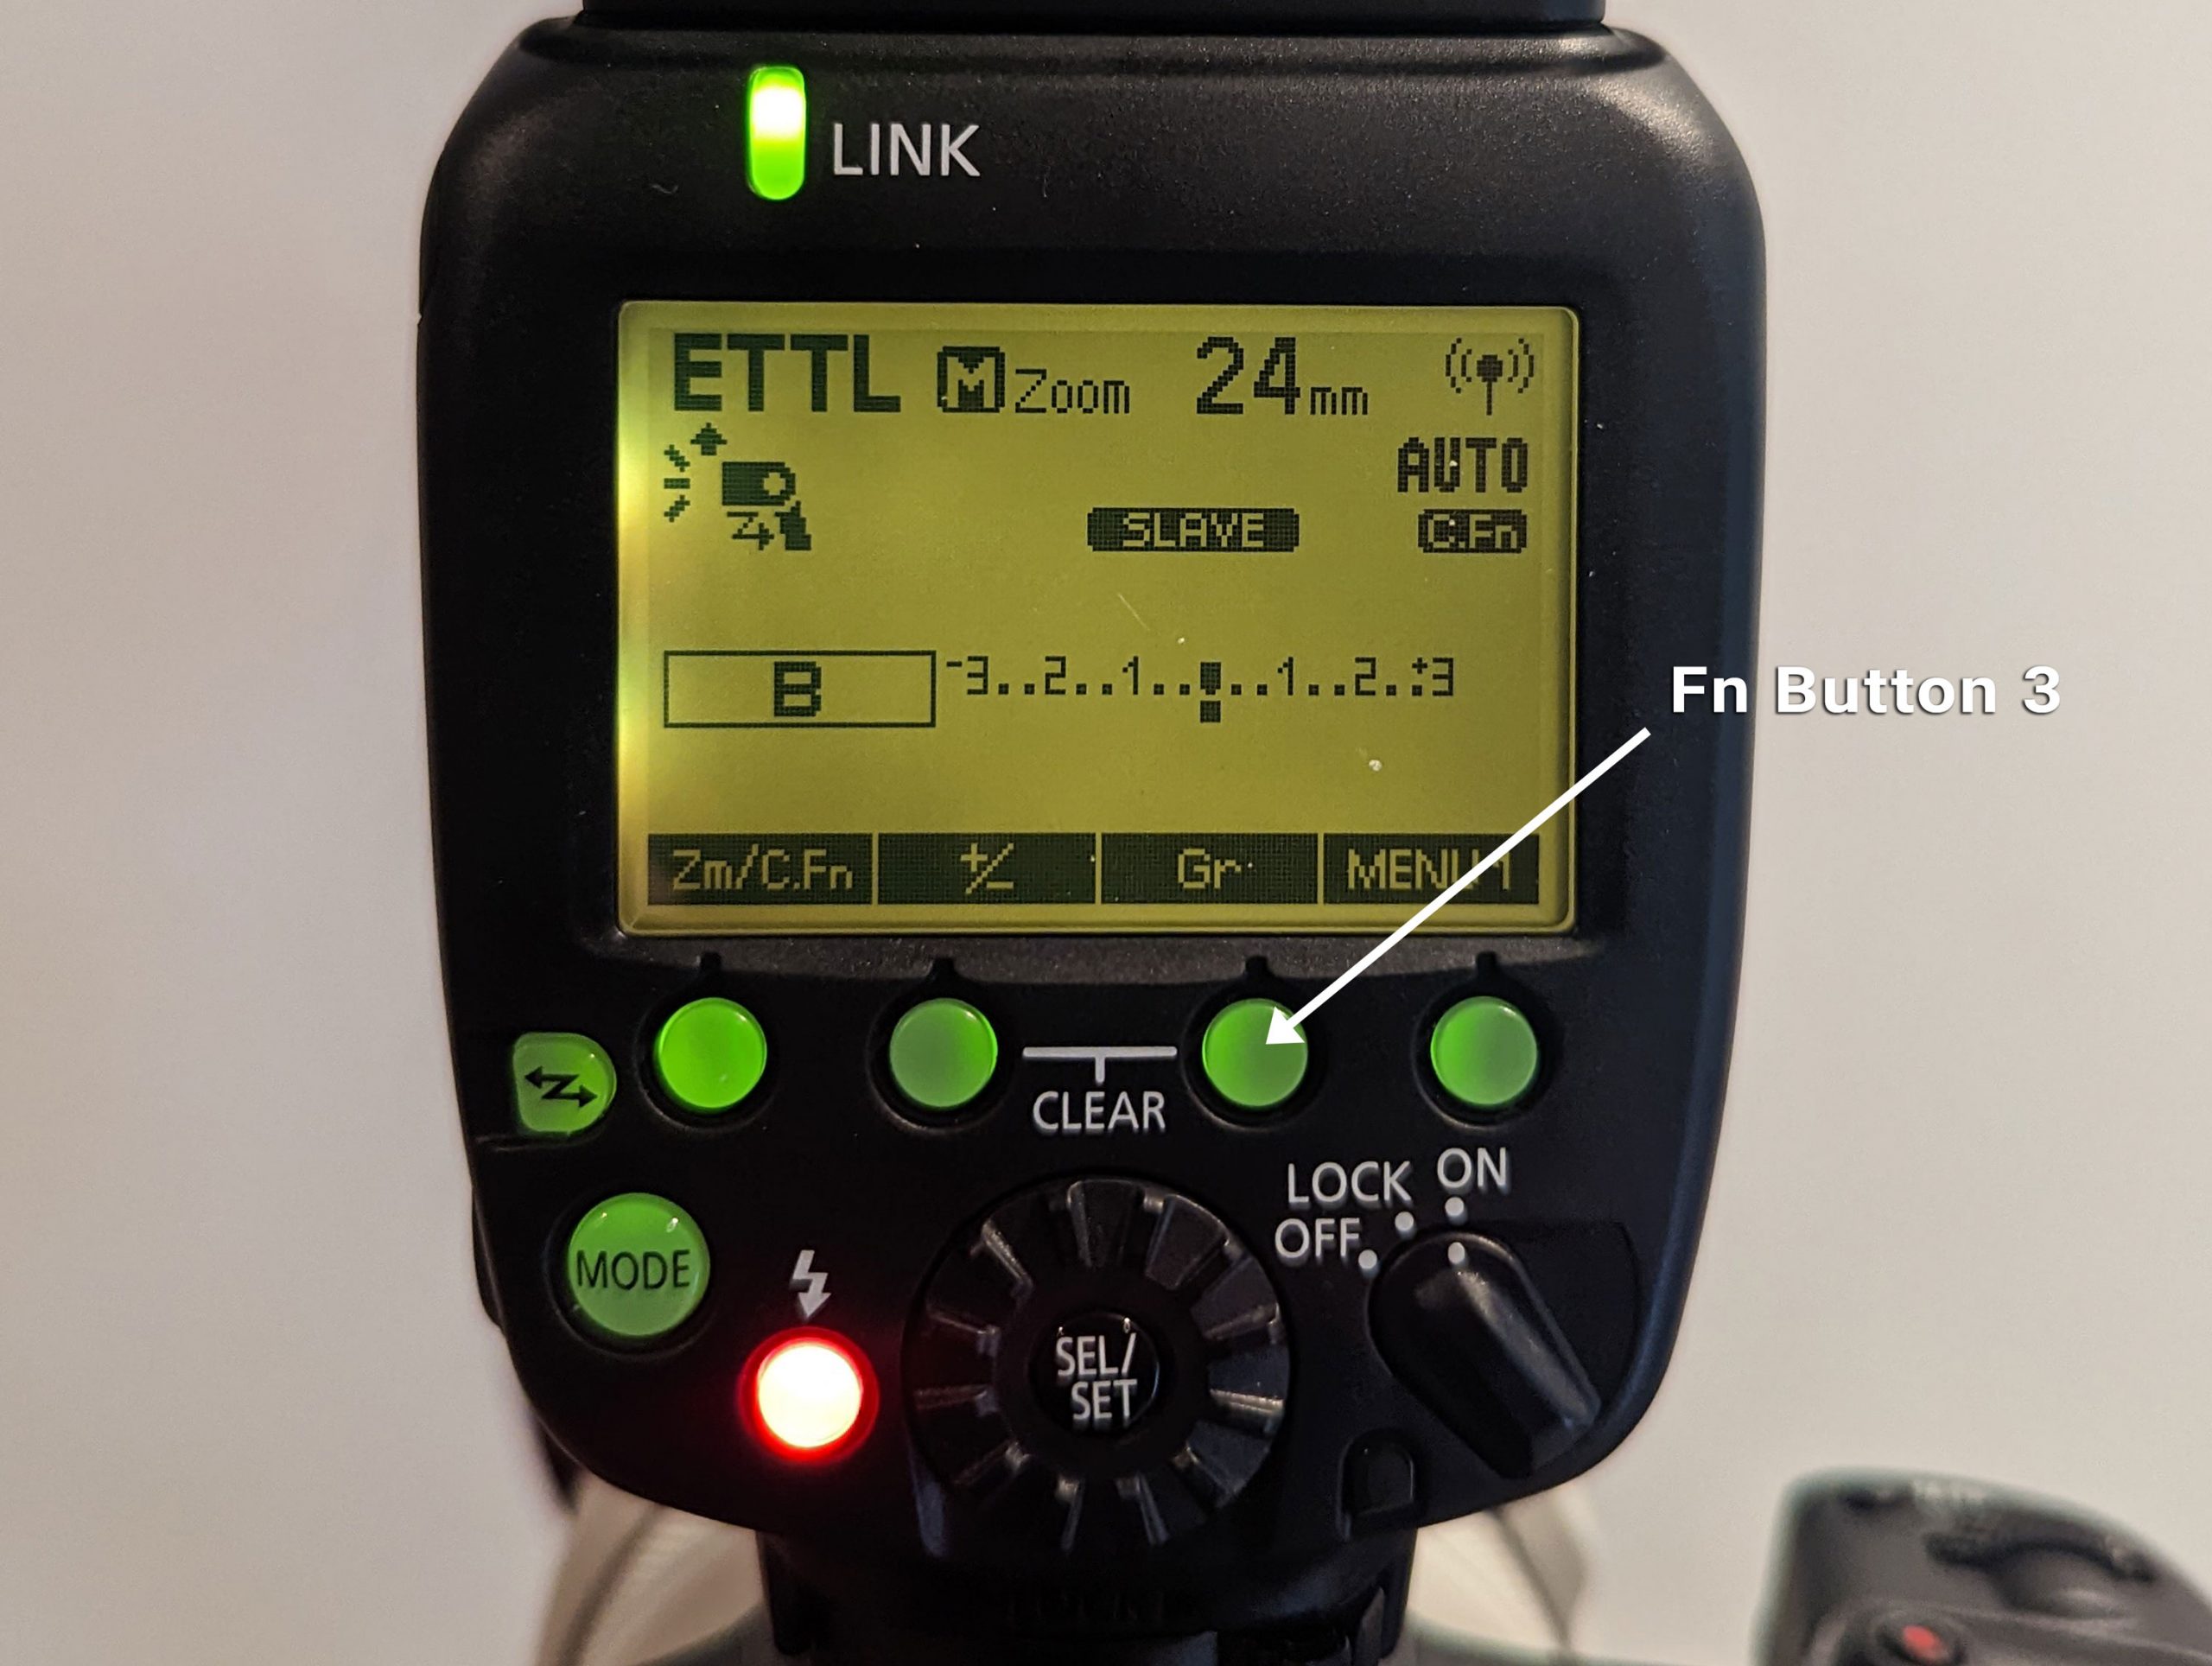
Press Fn Button 4 to return the flash to shoot-ready mode (shown below):

The “LINK” lamp (just above the LCD screen) should be green, which indicates that both flashes are linked, and the AF-assist beam emitter on the slave flash will blink at 1-second intervals (assuming both are turned on and set to same Channel/ID).
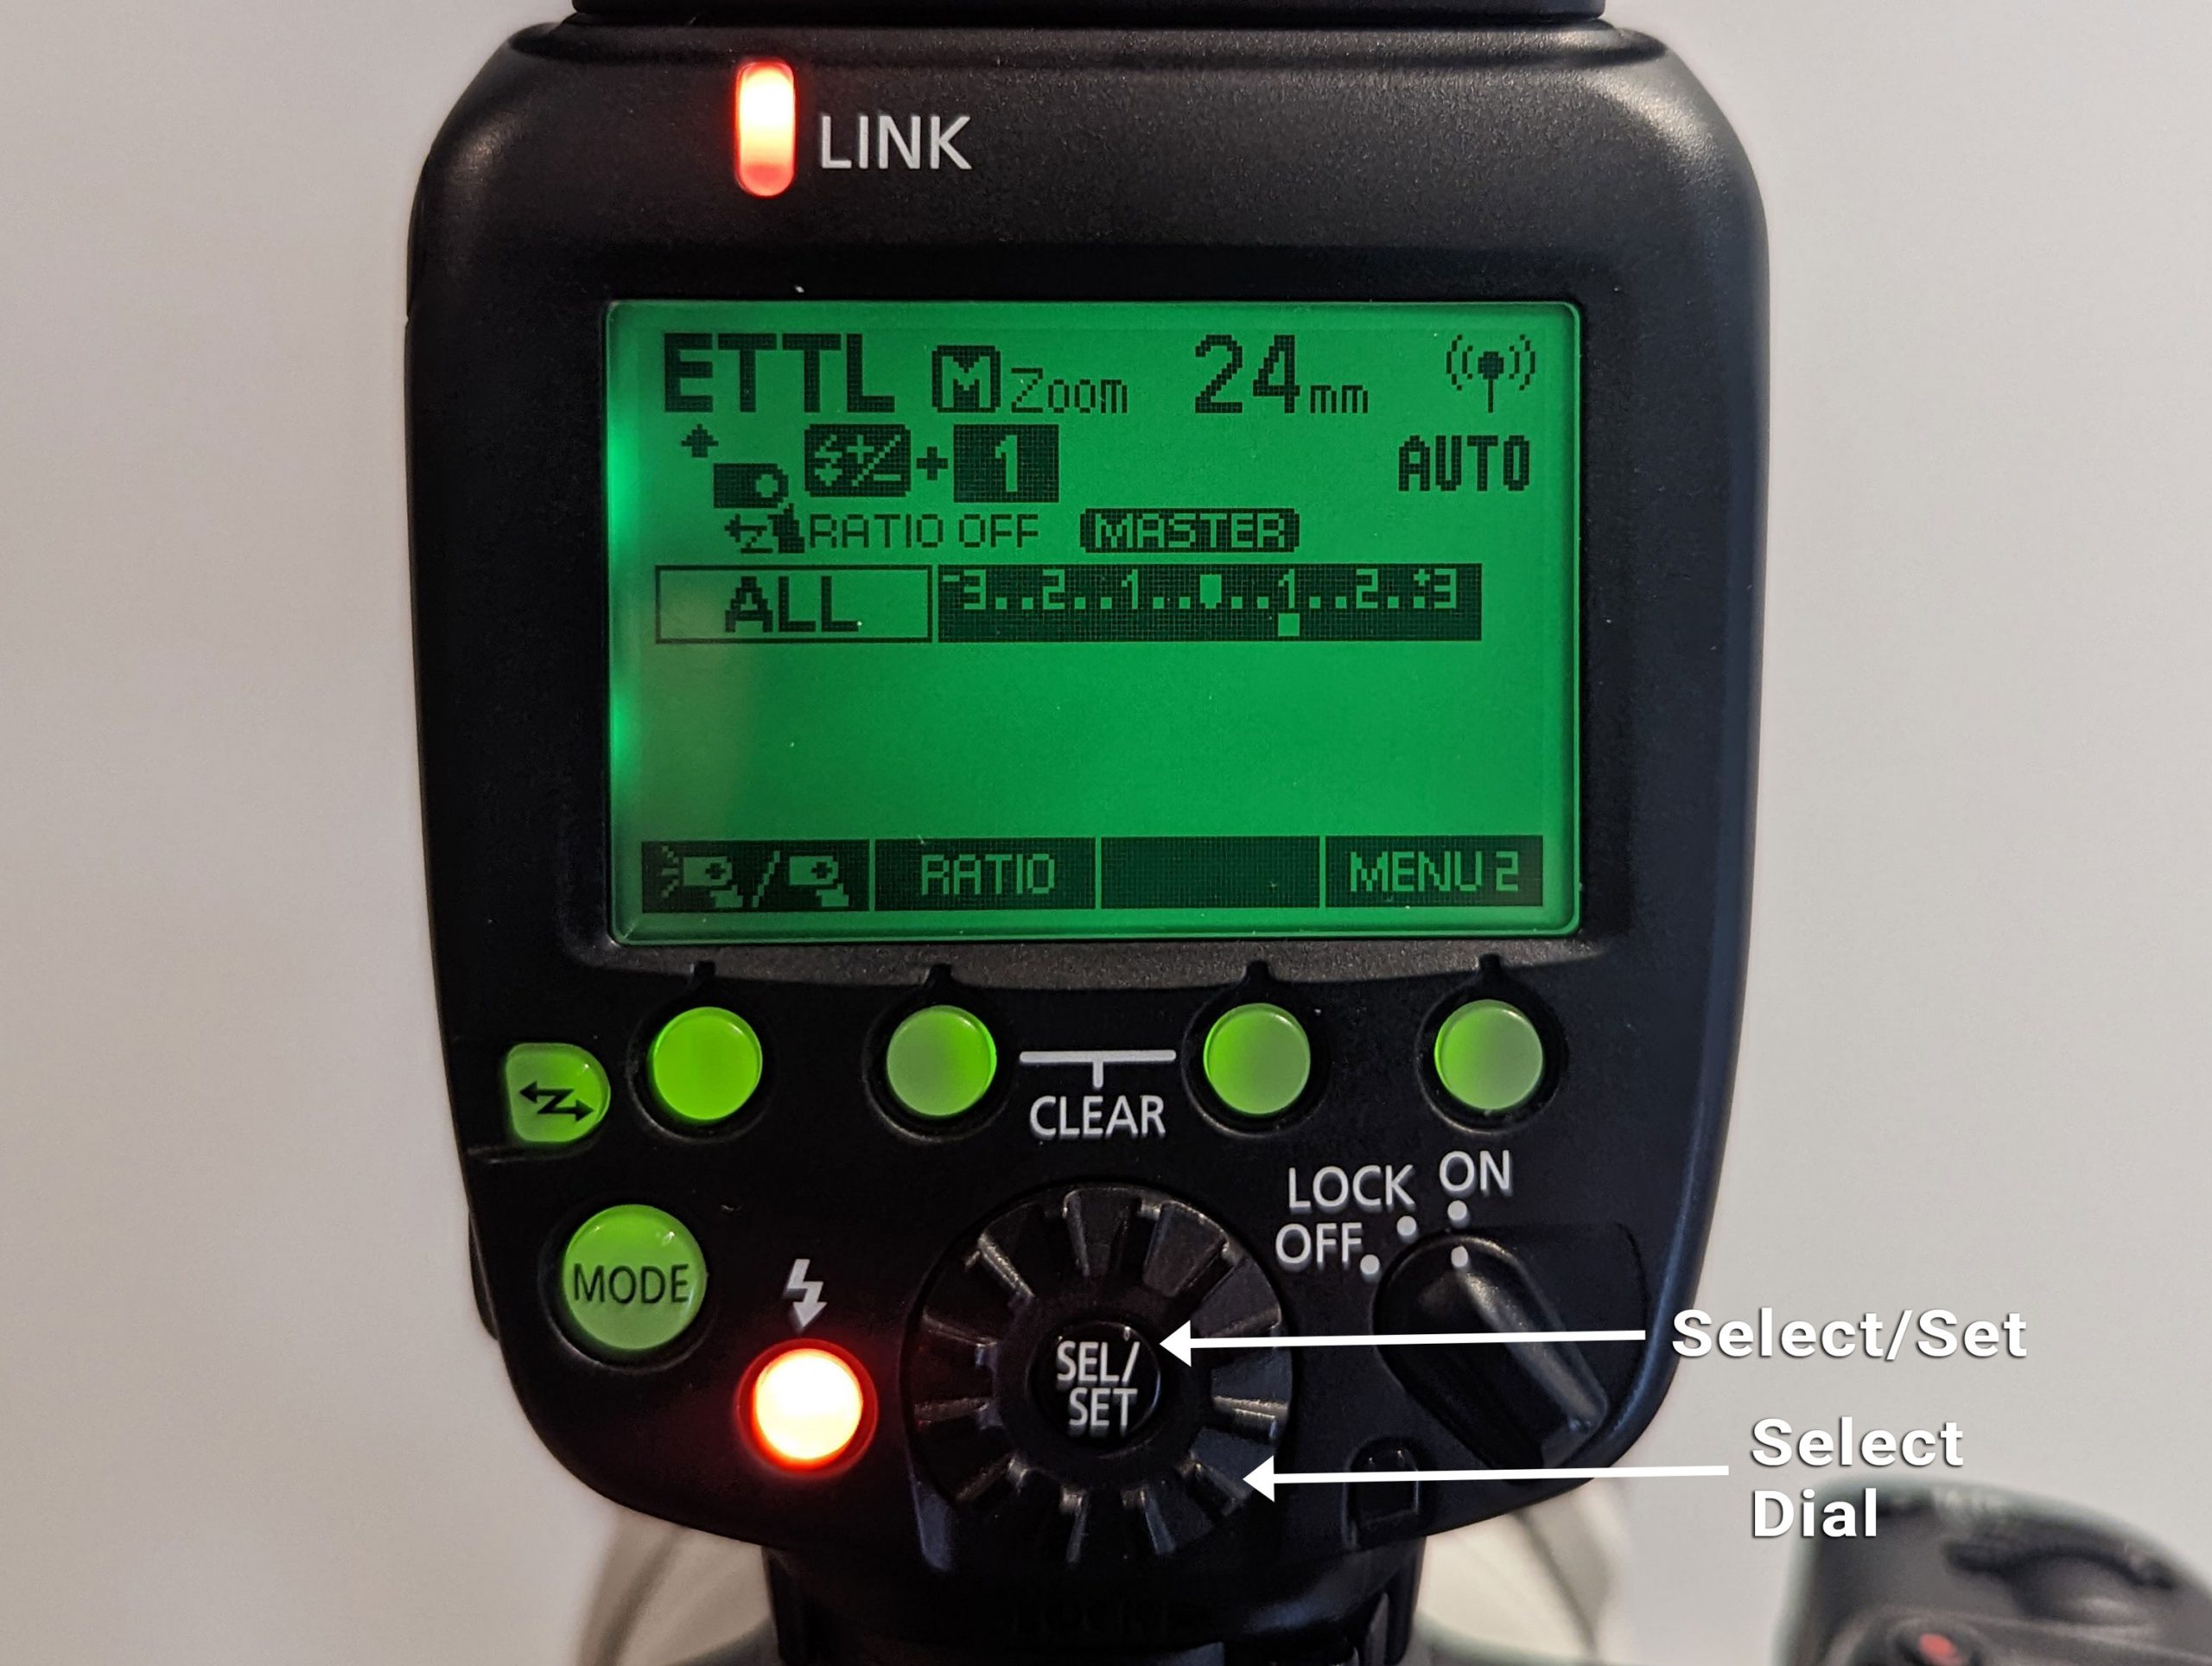
Before digging further into the various settings, you can verify that you flashes are correctly setup by pressing the “test” button on the master flash. If your flash isn’t physically connected to the camera, the master will fire, then the slave will follow (don’t worry, they’ll be synced when you shoot from the camera). Test button shown below:

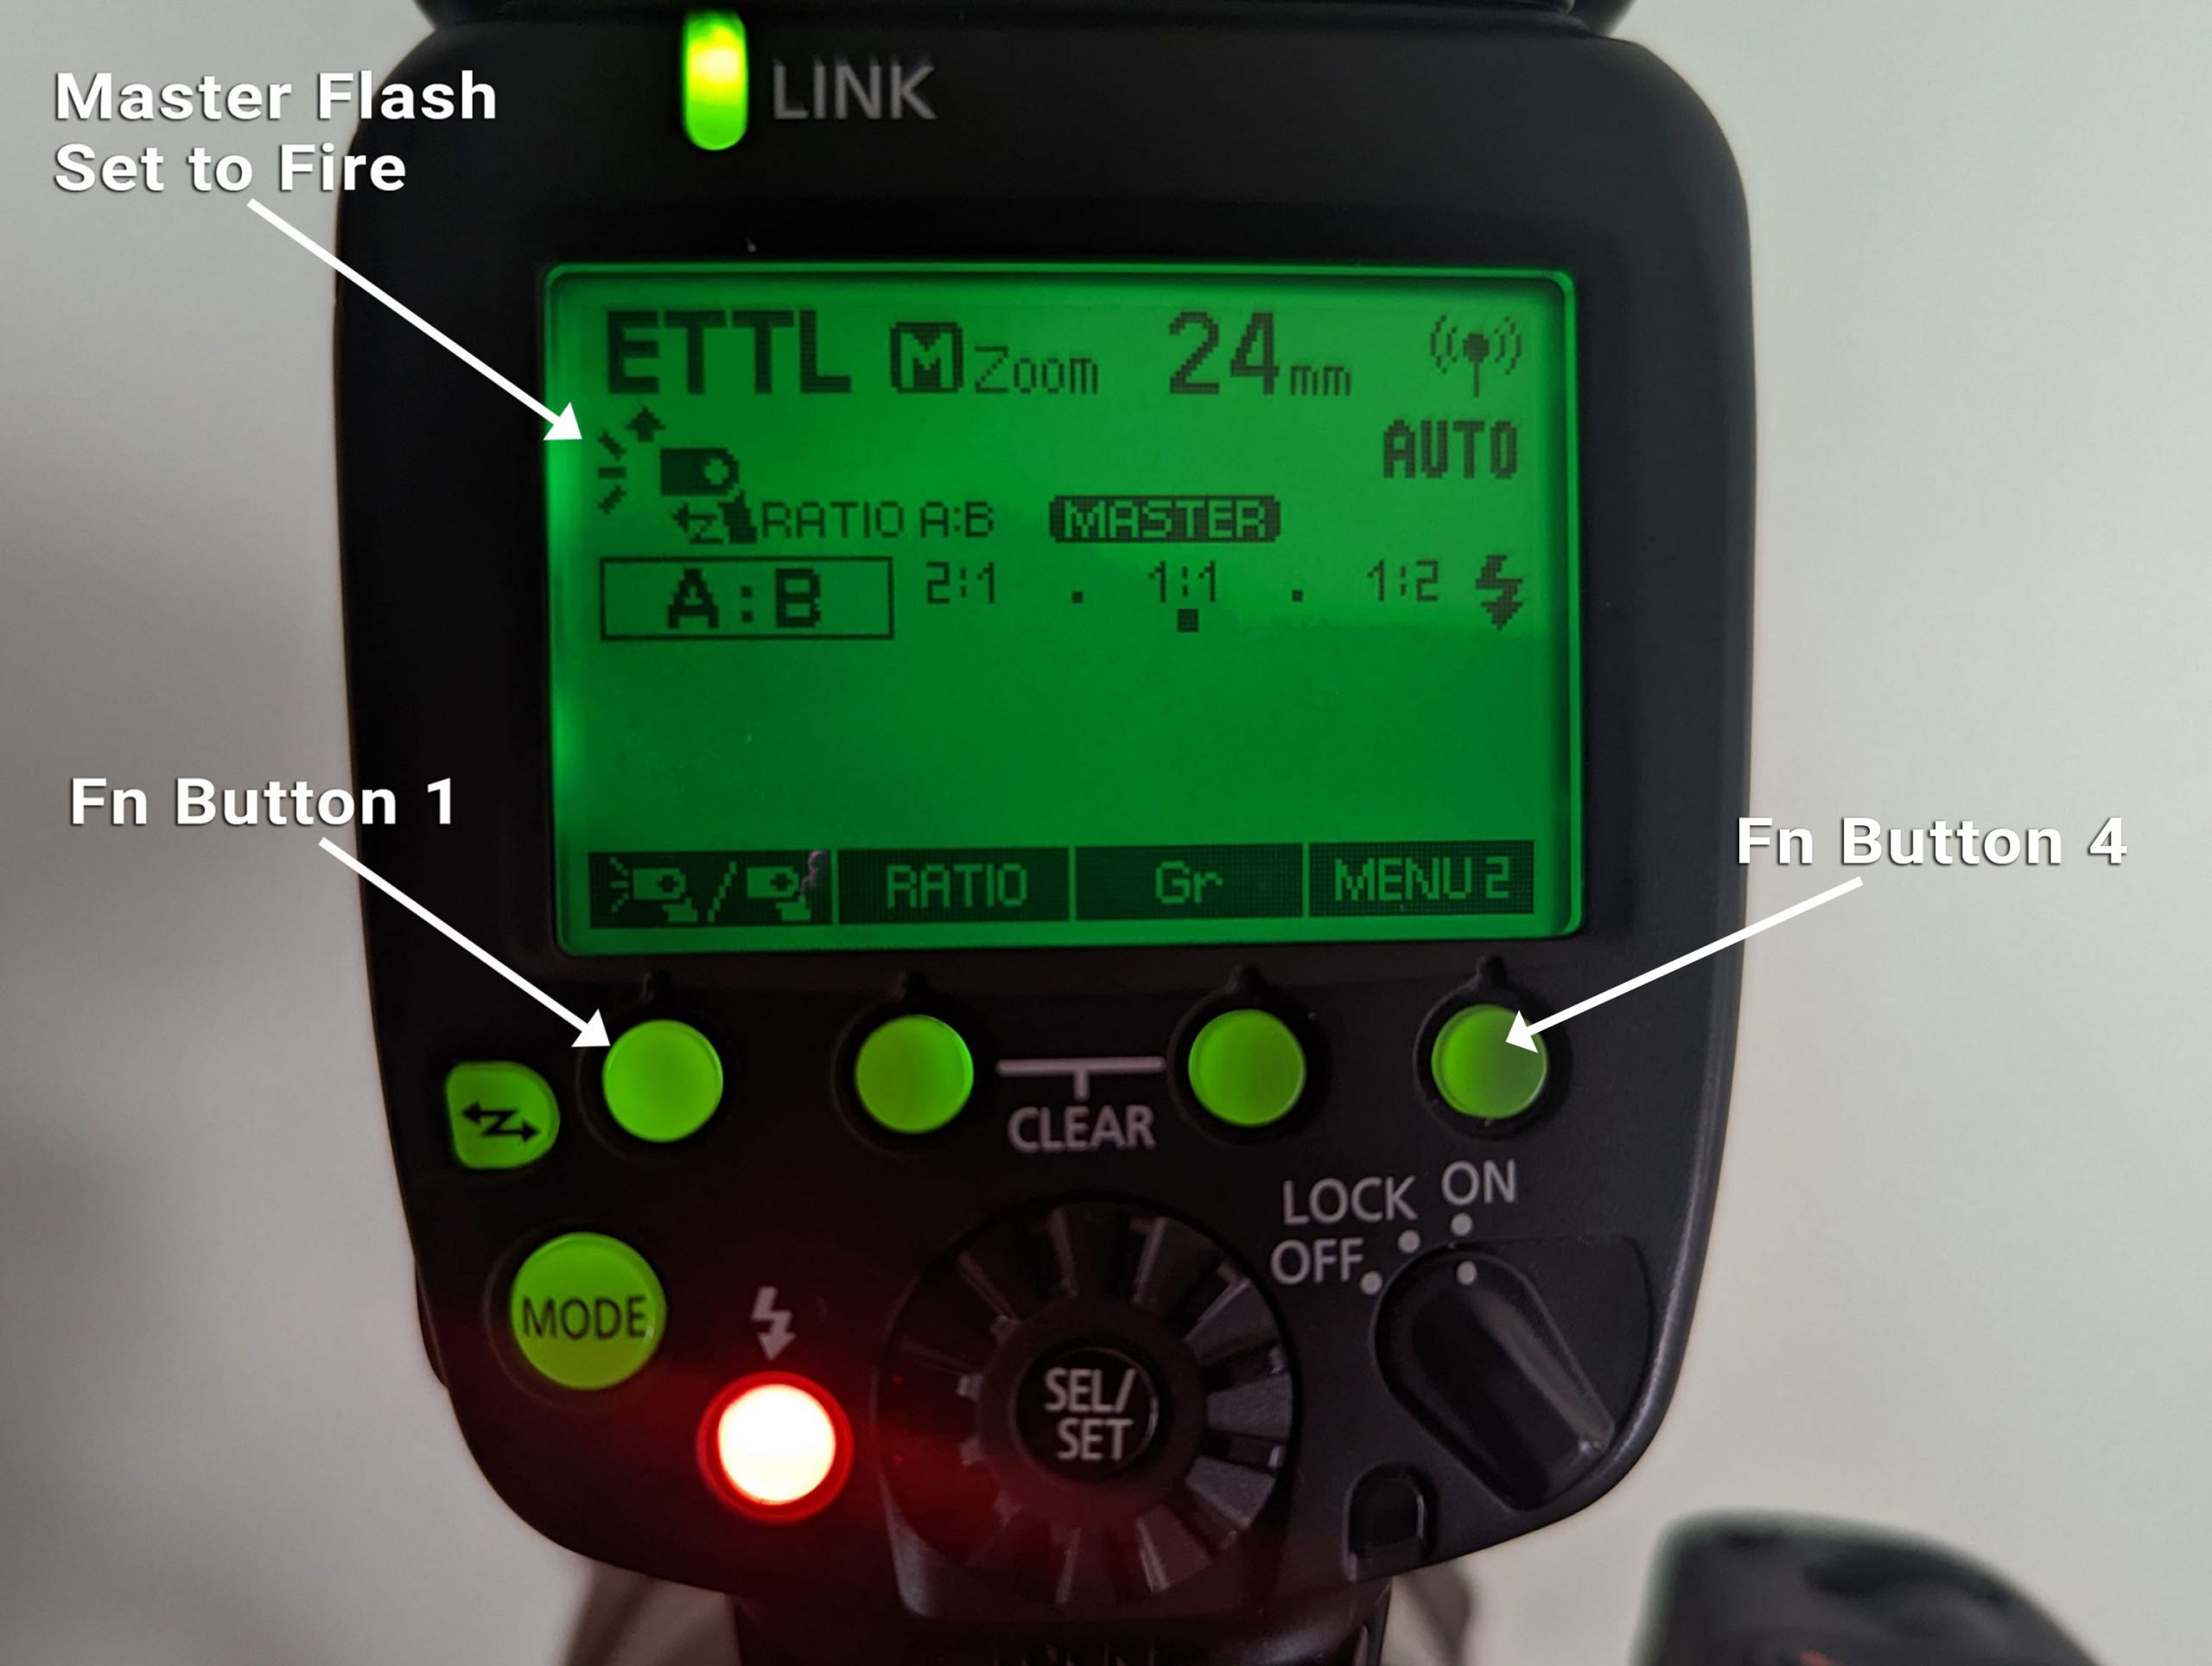
Setting the Master Flash to Fire (or Not to Fire)
You can choose whether the Master will or won’t fire in addition to controlling the Slave flash. To do so:
- On the master flash, press Fn Button 4 until Menu 2 displays.
- Press Fn Button 1 (under Flash On/Off icon) to ON or OFF.
Wireless ETTL – “ALL” Setting (Master and Slave Flashes Use the Same Settings)
With this setup, any settings you make to the Master flash will automatically be sent to the Slave flash. Here’s how to set it up:
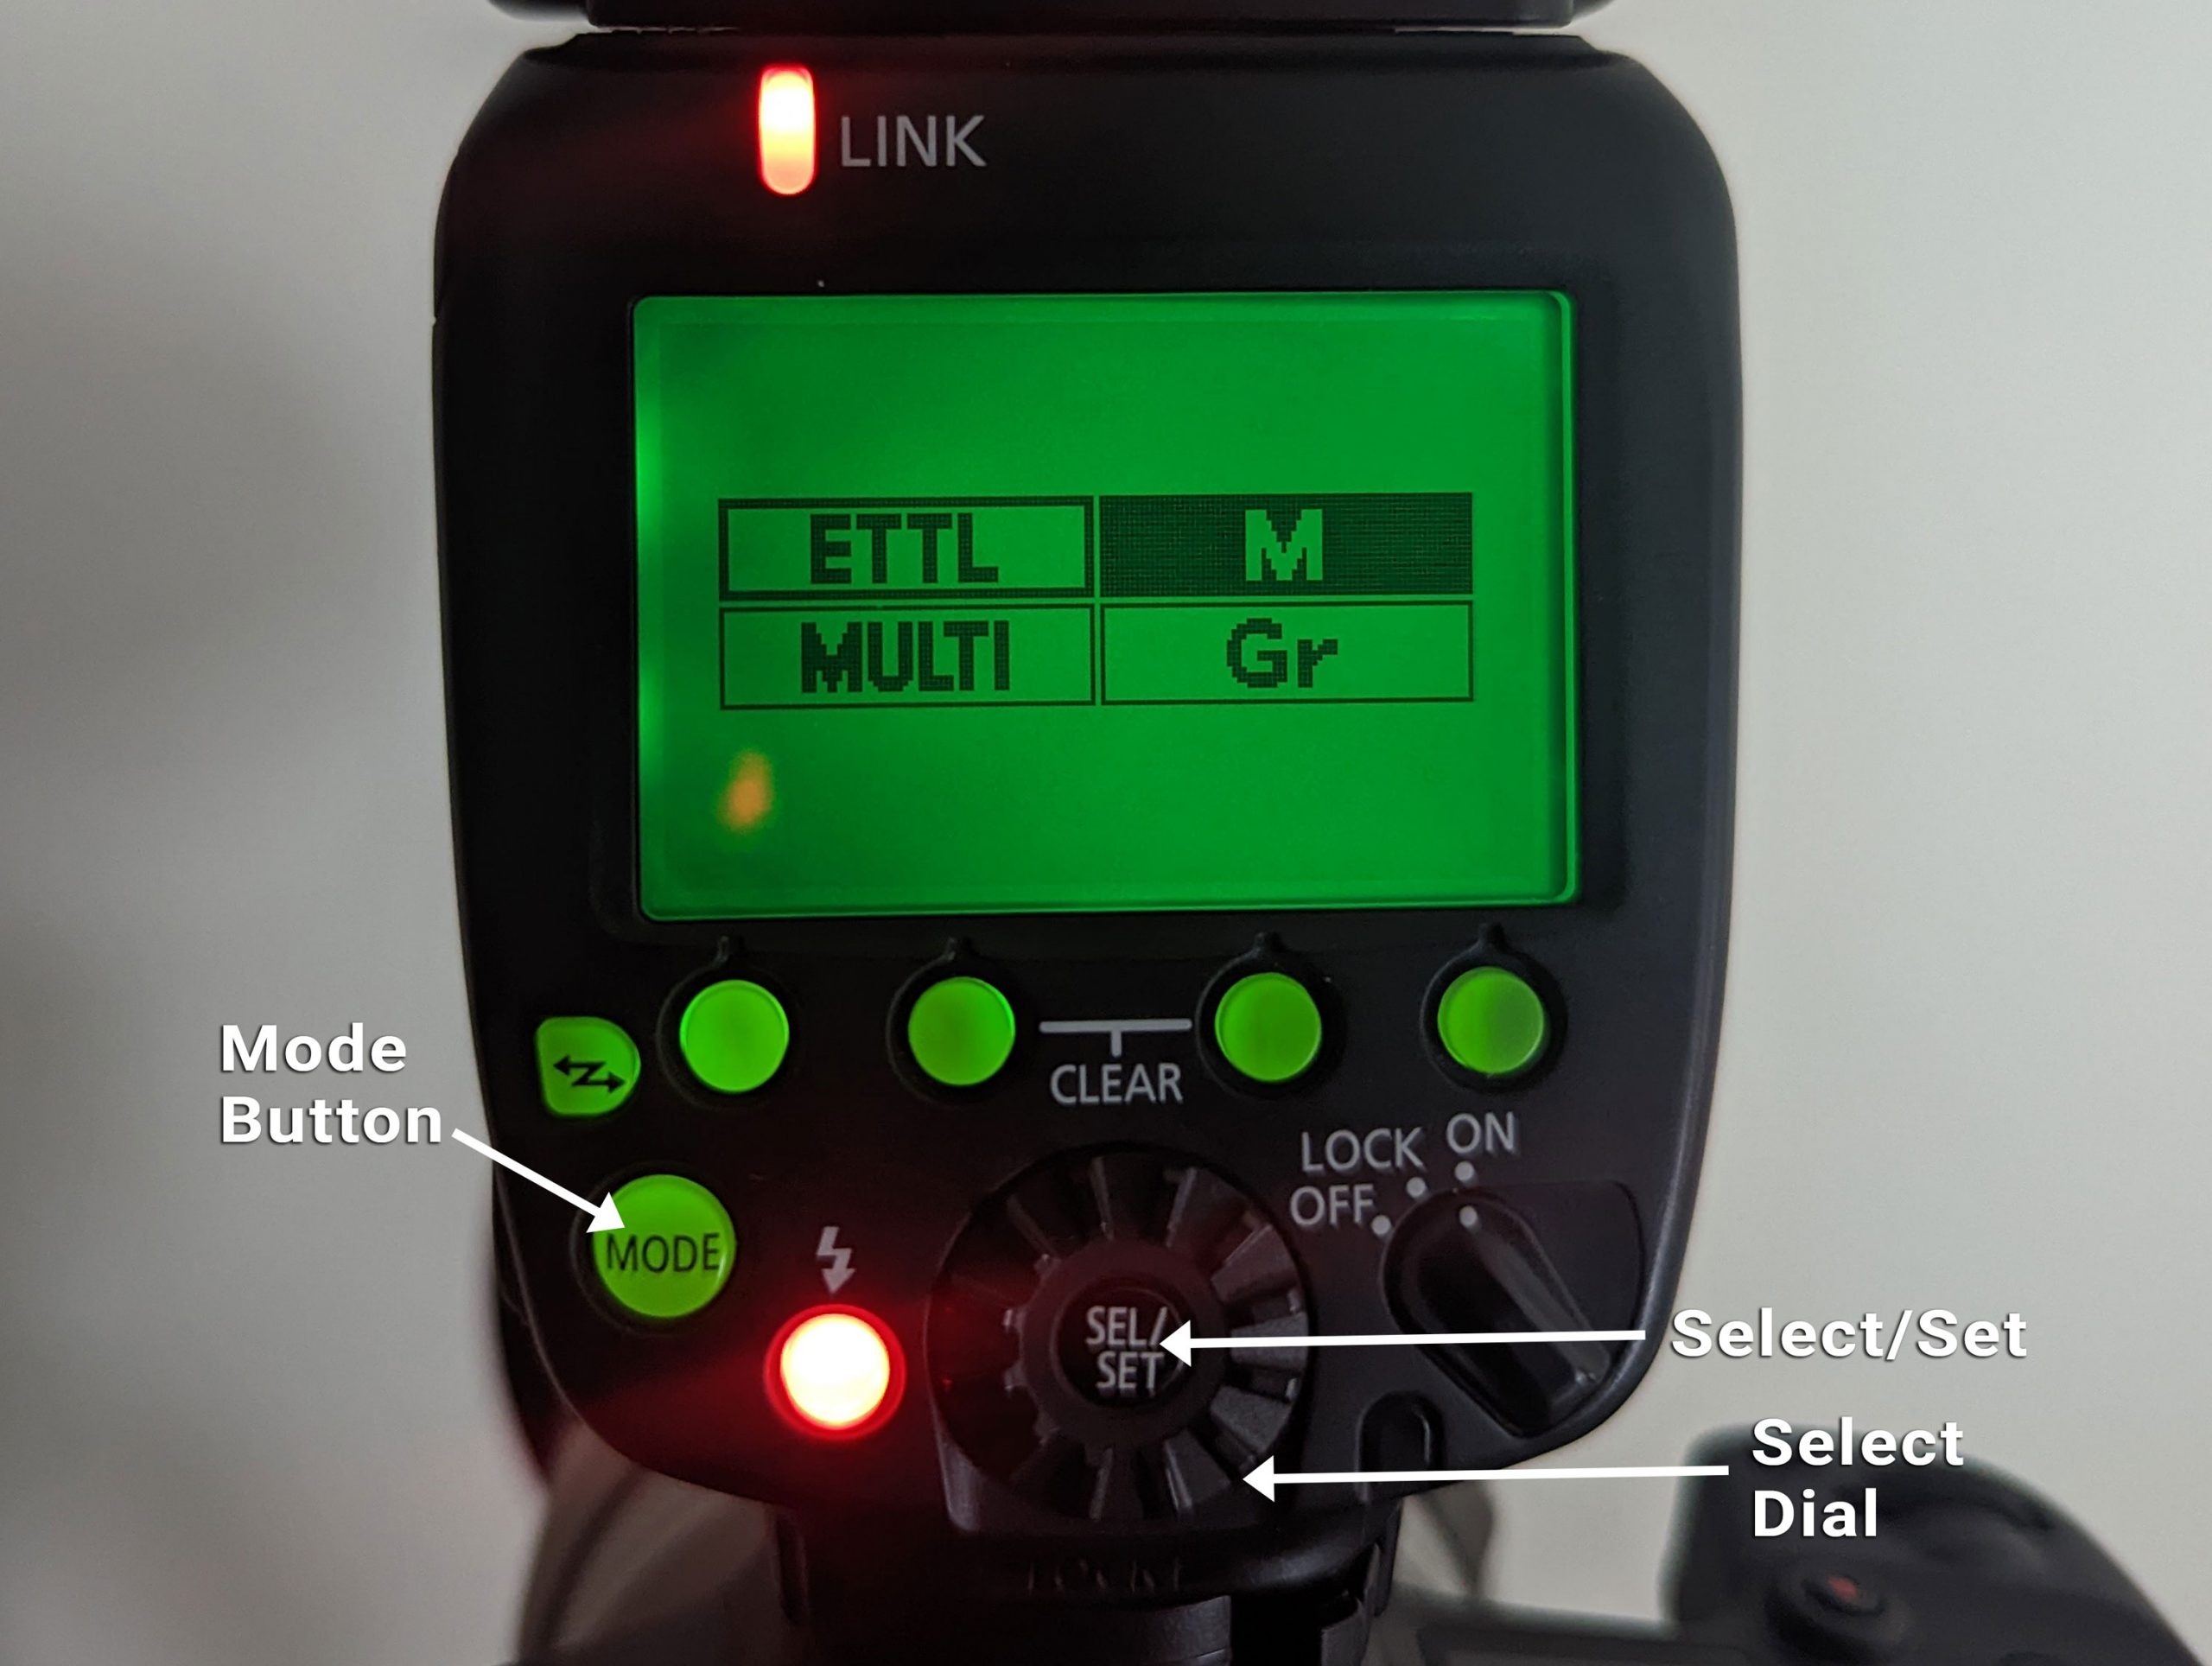
1. Set the Master flash to radio-based Wireless ETTL by Pressing the “MODE” button. Select “ETTL” as shown below:
2. Set the Ratio to “ALL” by pressing Fn Button 4 until Menu 2 appears, then press Fn Button 2 (the “Ratio” button) until “ALL” appears on the LCD panel as shown below:

3. Press the Select/Set Button, then turn the Select Dial if you want to adjust flash power (shown below). Flash power set here will apply to all connected flashes.
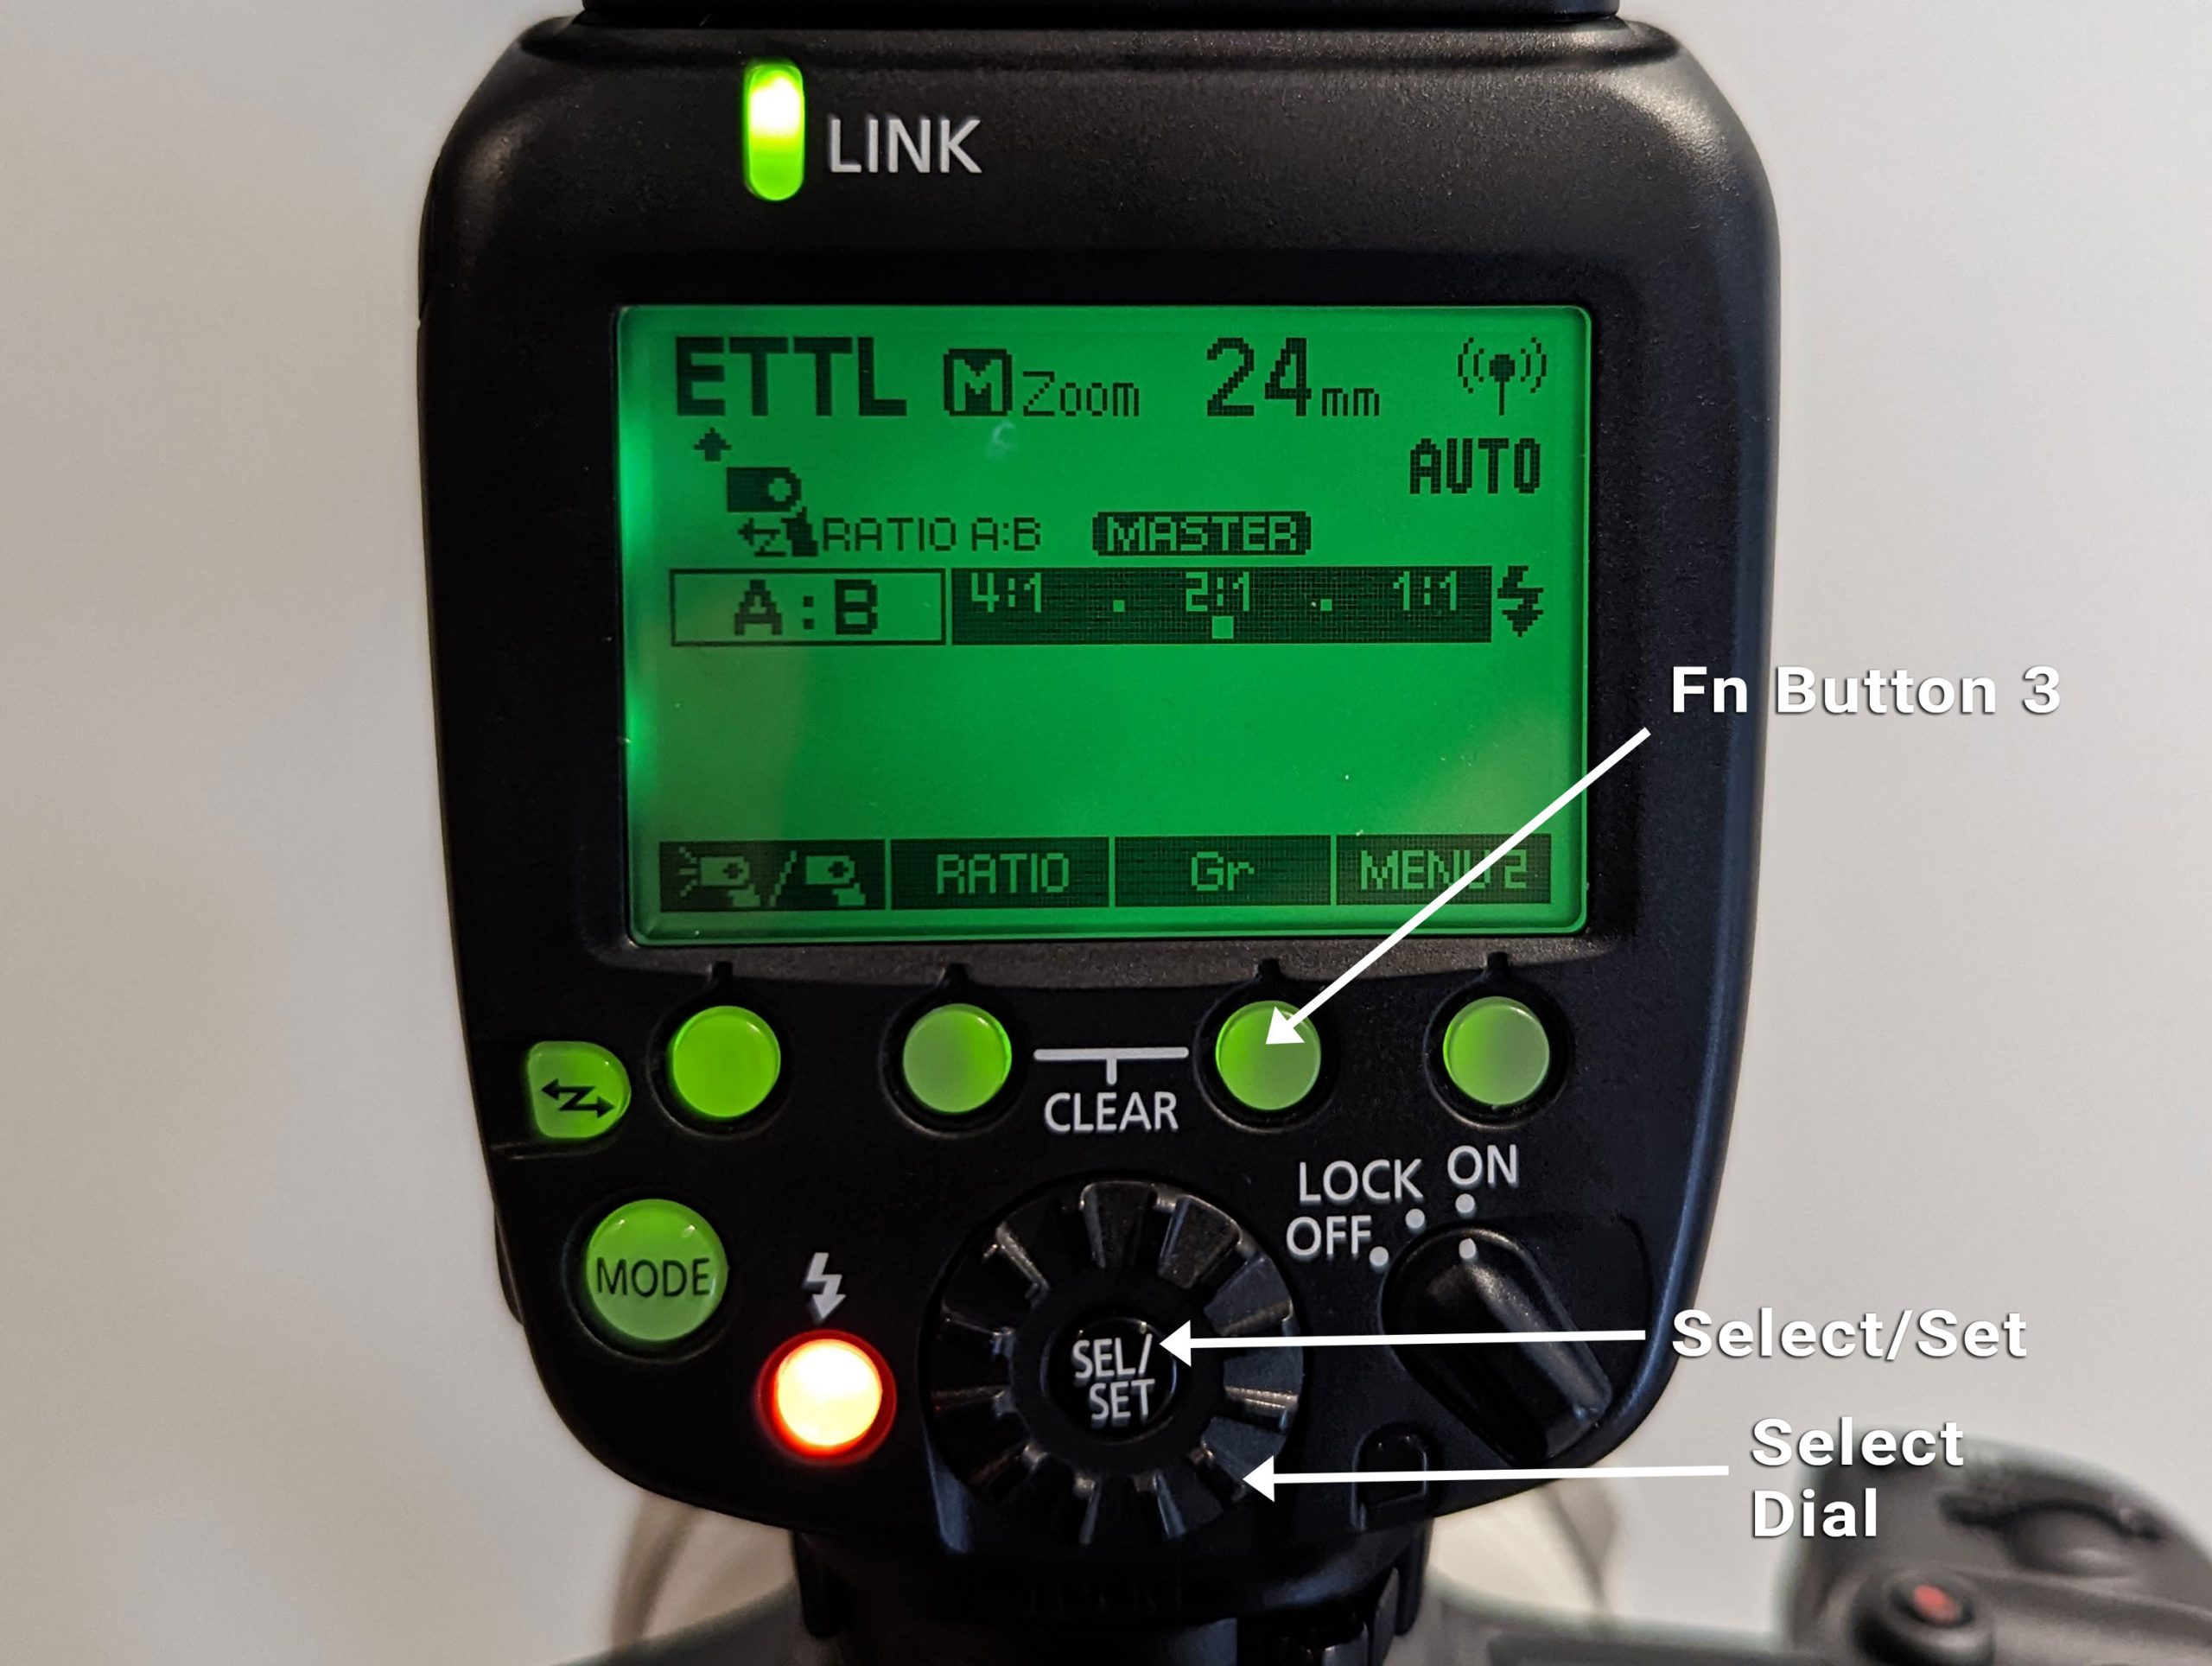
Wireless ETTL – “Group” Setting (Master and Slave Flashes Use Power Ratio Settings)
This mode is somewhat confusing, but basically the way it works is that your power output is dictated by a “ratio” that you set on the flash, which are shown as “A” and “B” (and sometimes “C”). I set the Slave flash as “B” to make things simpler.
When setting the ratio, the number on the left represents the Master flash and the number on the right represents the Slave flash (or flashes). So “1:1” means all flashes will produce equal output, “2:1” means flash A (the Master) will produce twice as much output (one stop more) than B (the Slave), “1:2” means B will produce twice as much output as A, and “8:1” means A will produce eight times (3 stops) more output than B.
Here’s how to set it up:
- If you haven’t already, perform the initial flash setup described above.
- On the Slave flash, with Menu 1 displayed on the LCD panel, press Fn. Button 3 (under the “GR” icon) and set the flash to group B. Note: Do not set the slave flash to “D” or “E”, since it won’t fire in those settings.
Slave flash set to group B shown below:
Now, to set the ratio on the Master flash:
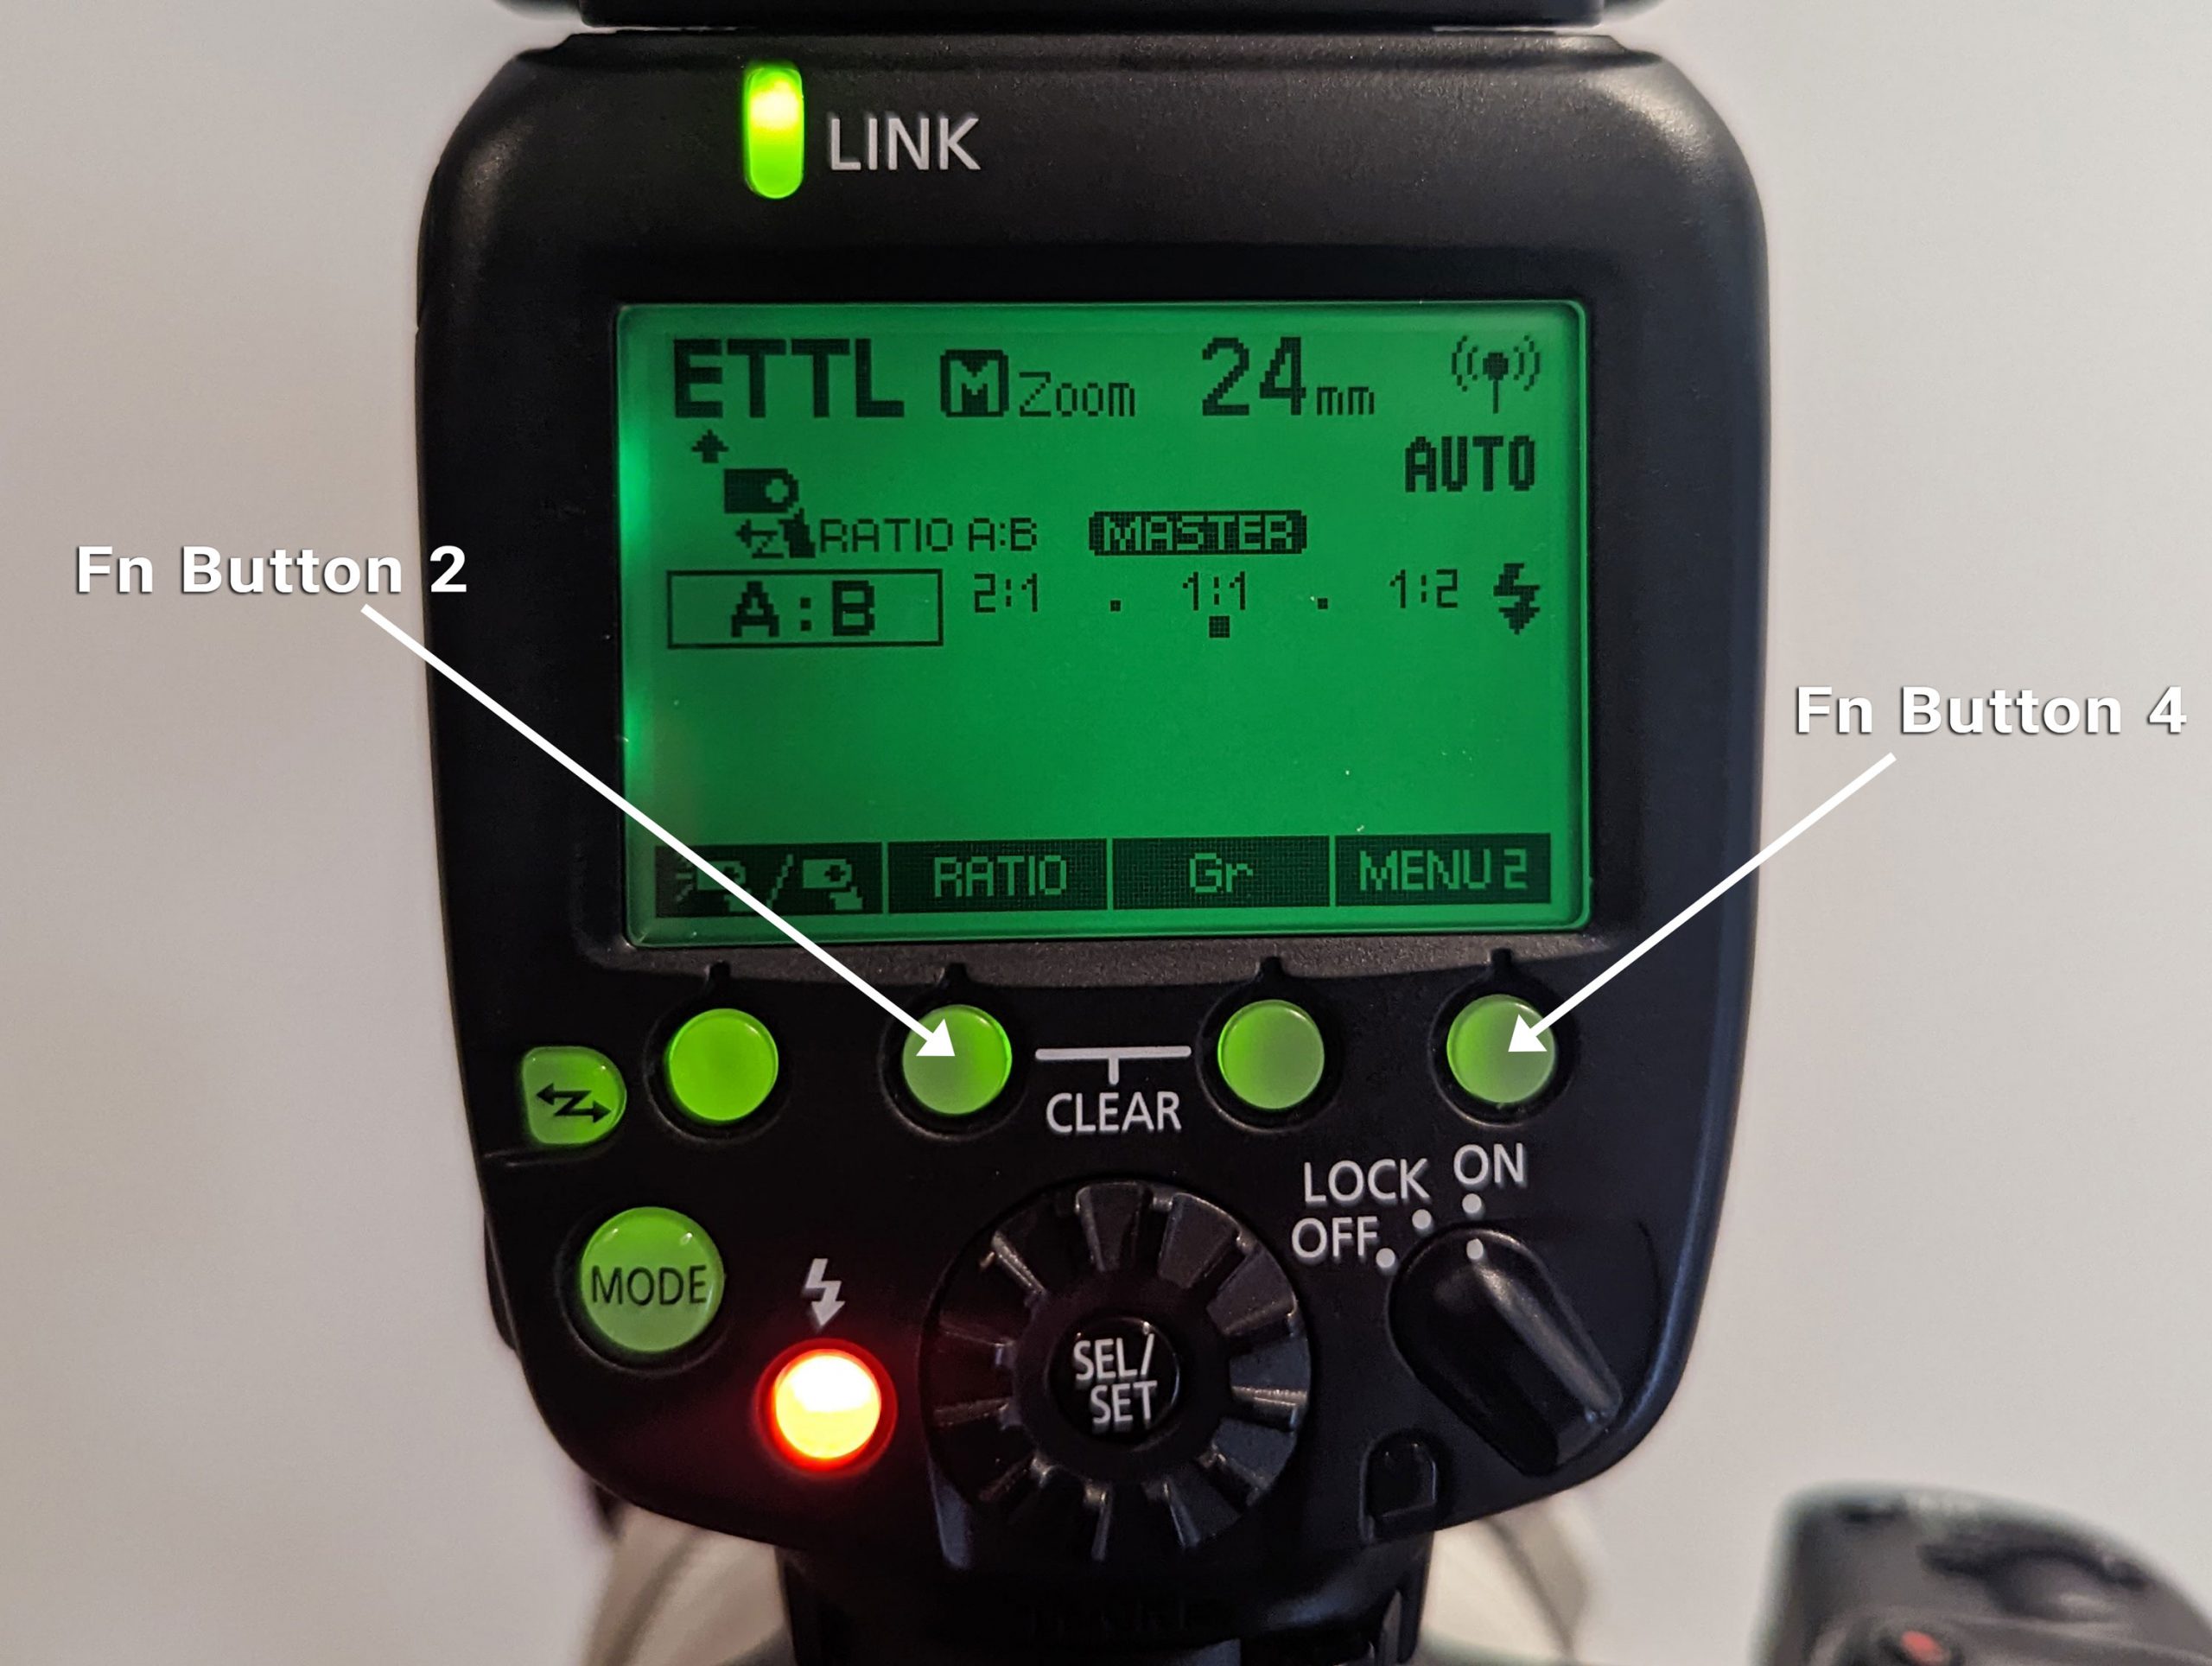
1. Press the Fn Button 4 to display “Menu 2” and then press Fn Button 2 (under the “Ratio” icon), to toggle between “ALL”, “A:B” or “A:B C” (for this tutorial, set it to “A:B”).
Note: A:B requires a minimum of two flashes. A:B C requires a minimum of three, but you can adjust the power ratio only between groups A and B. Group C is independent of A and B.
Settings are shown below:
2. Press Fn Button 3 under the “GR” icon, then turn the Select Dial to set the flash ratio. Once you’ve chosen the setting you want, press the Select/Set Button (shown below):
Wireless Manual Mode (Master and Slave Flashes Use Individual Power Settings)
In this mode, you’ll control the output manually via groups (A, B, or C). To simplify things, I always set the Master flash to group A and the Slave flash to B.
Here’s how to set it up:
On the Slave flash:
- If you haven’t already, perform the initial flash setup described at the beginning of this tutorial.
- With Menu 1 displayed on the LCD panel, press Fn. Button 3 on the sender unit (under the “GR” icon).
- Set the flash to group B. Note: Do not set the slave flash to “D” or “E”, since it won’t fire in those settings.
On the Master flash
- Press the “Mode” button and use the Select Dial to select “M” (Manual).
- Once you’ve chosen the setting you want, press the Select/Set Button. Settings are shown below:
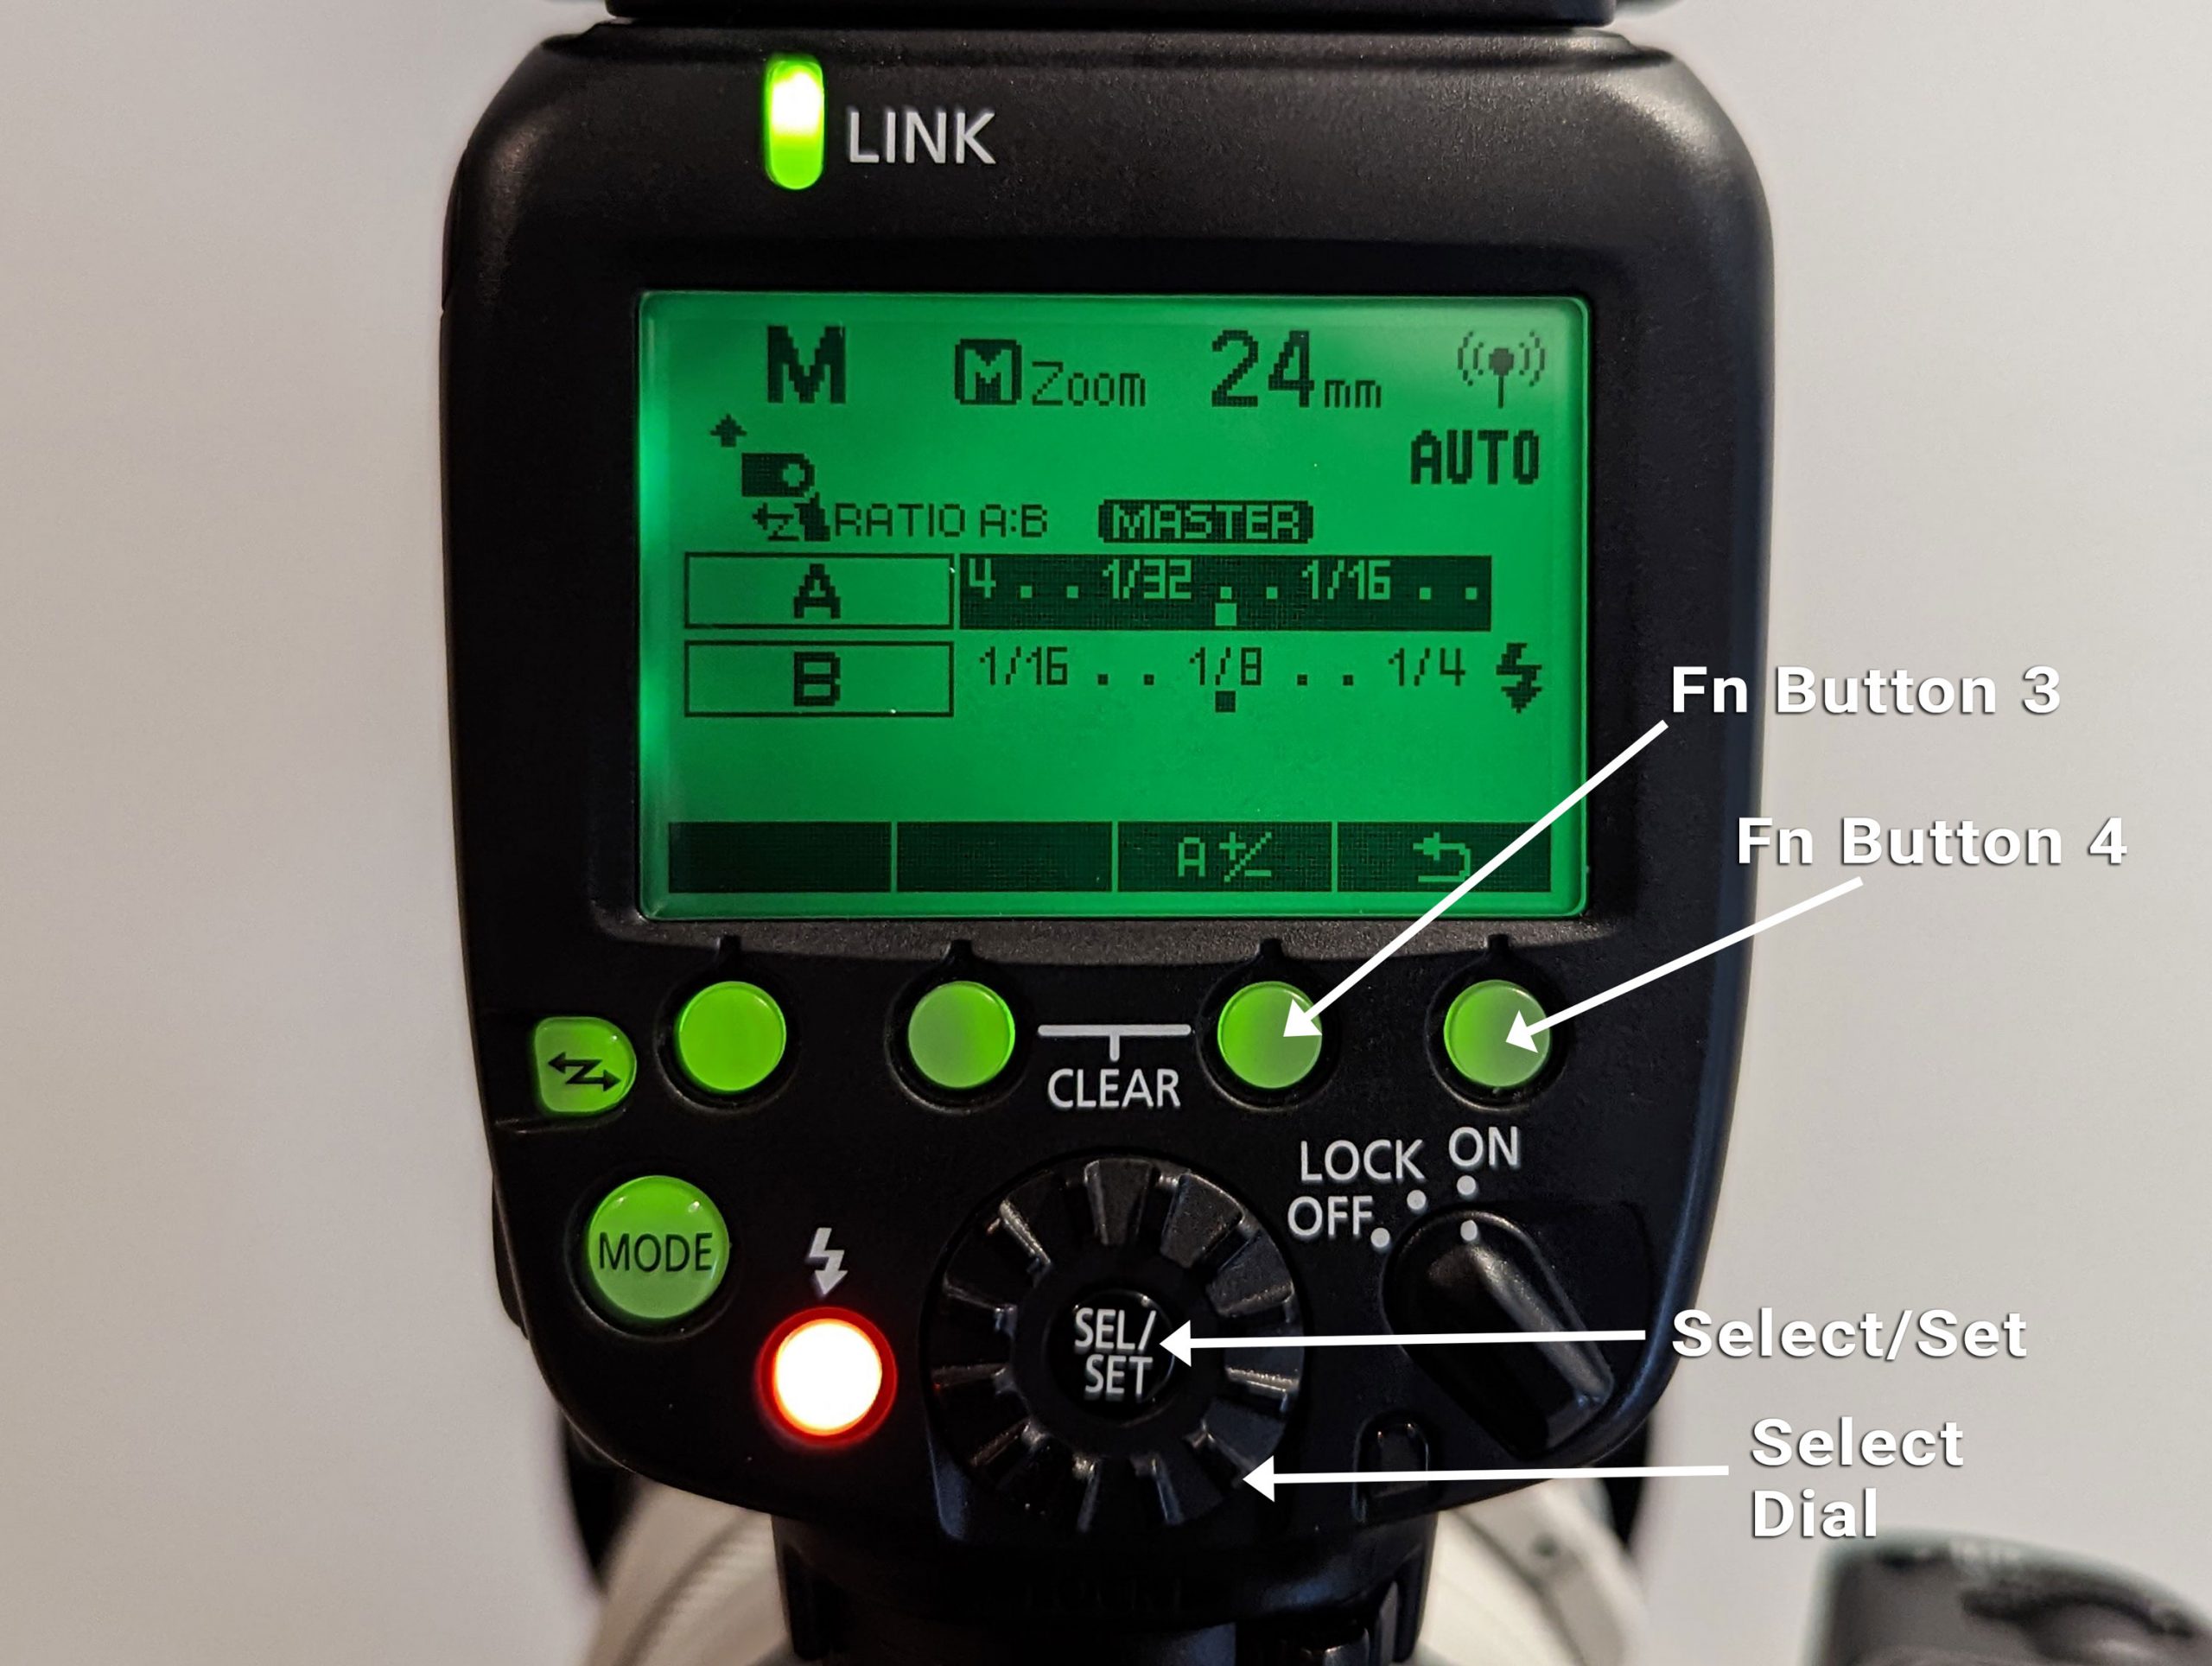
Setting the Individual Power Settings
On the Master flash
1. Press the Fn Button 4 to display “Menu 1” and then press Fn Button 2 (under the “Ratio” icon), to toggle between “ALL”, “A:B” or “A:B C” (for this tutorial, set it to “A:B” – if you select the “ALL” the power adjustments will apply to both flashes). The “A:B” setting is shown below:
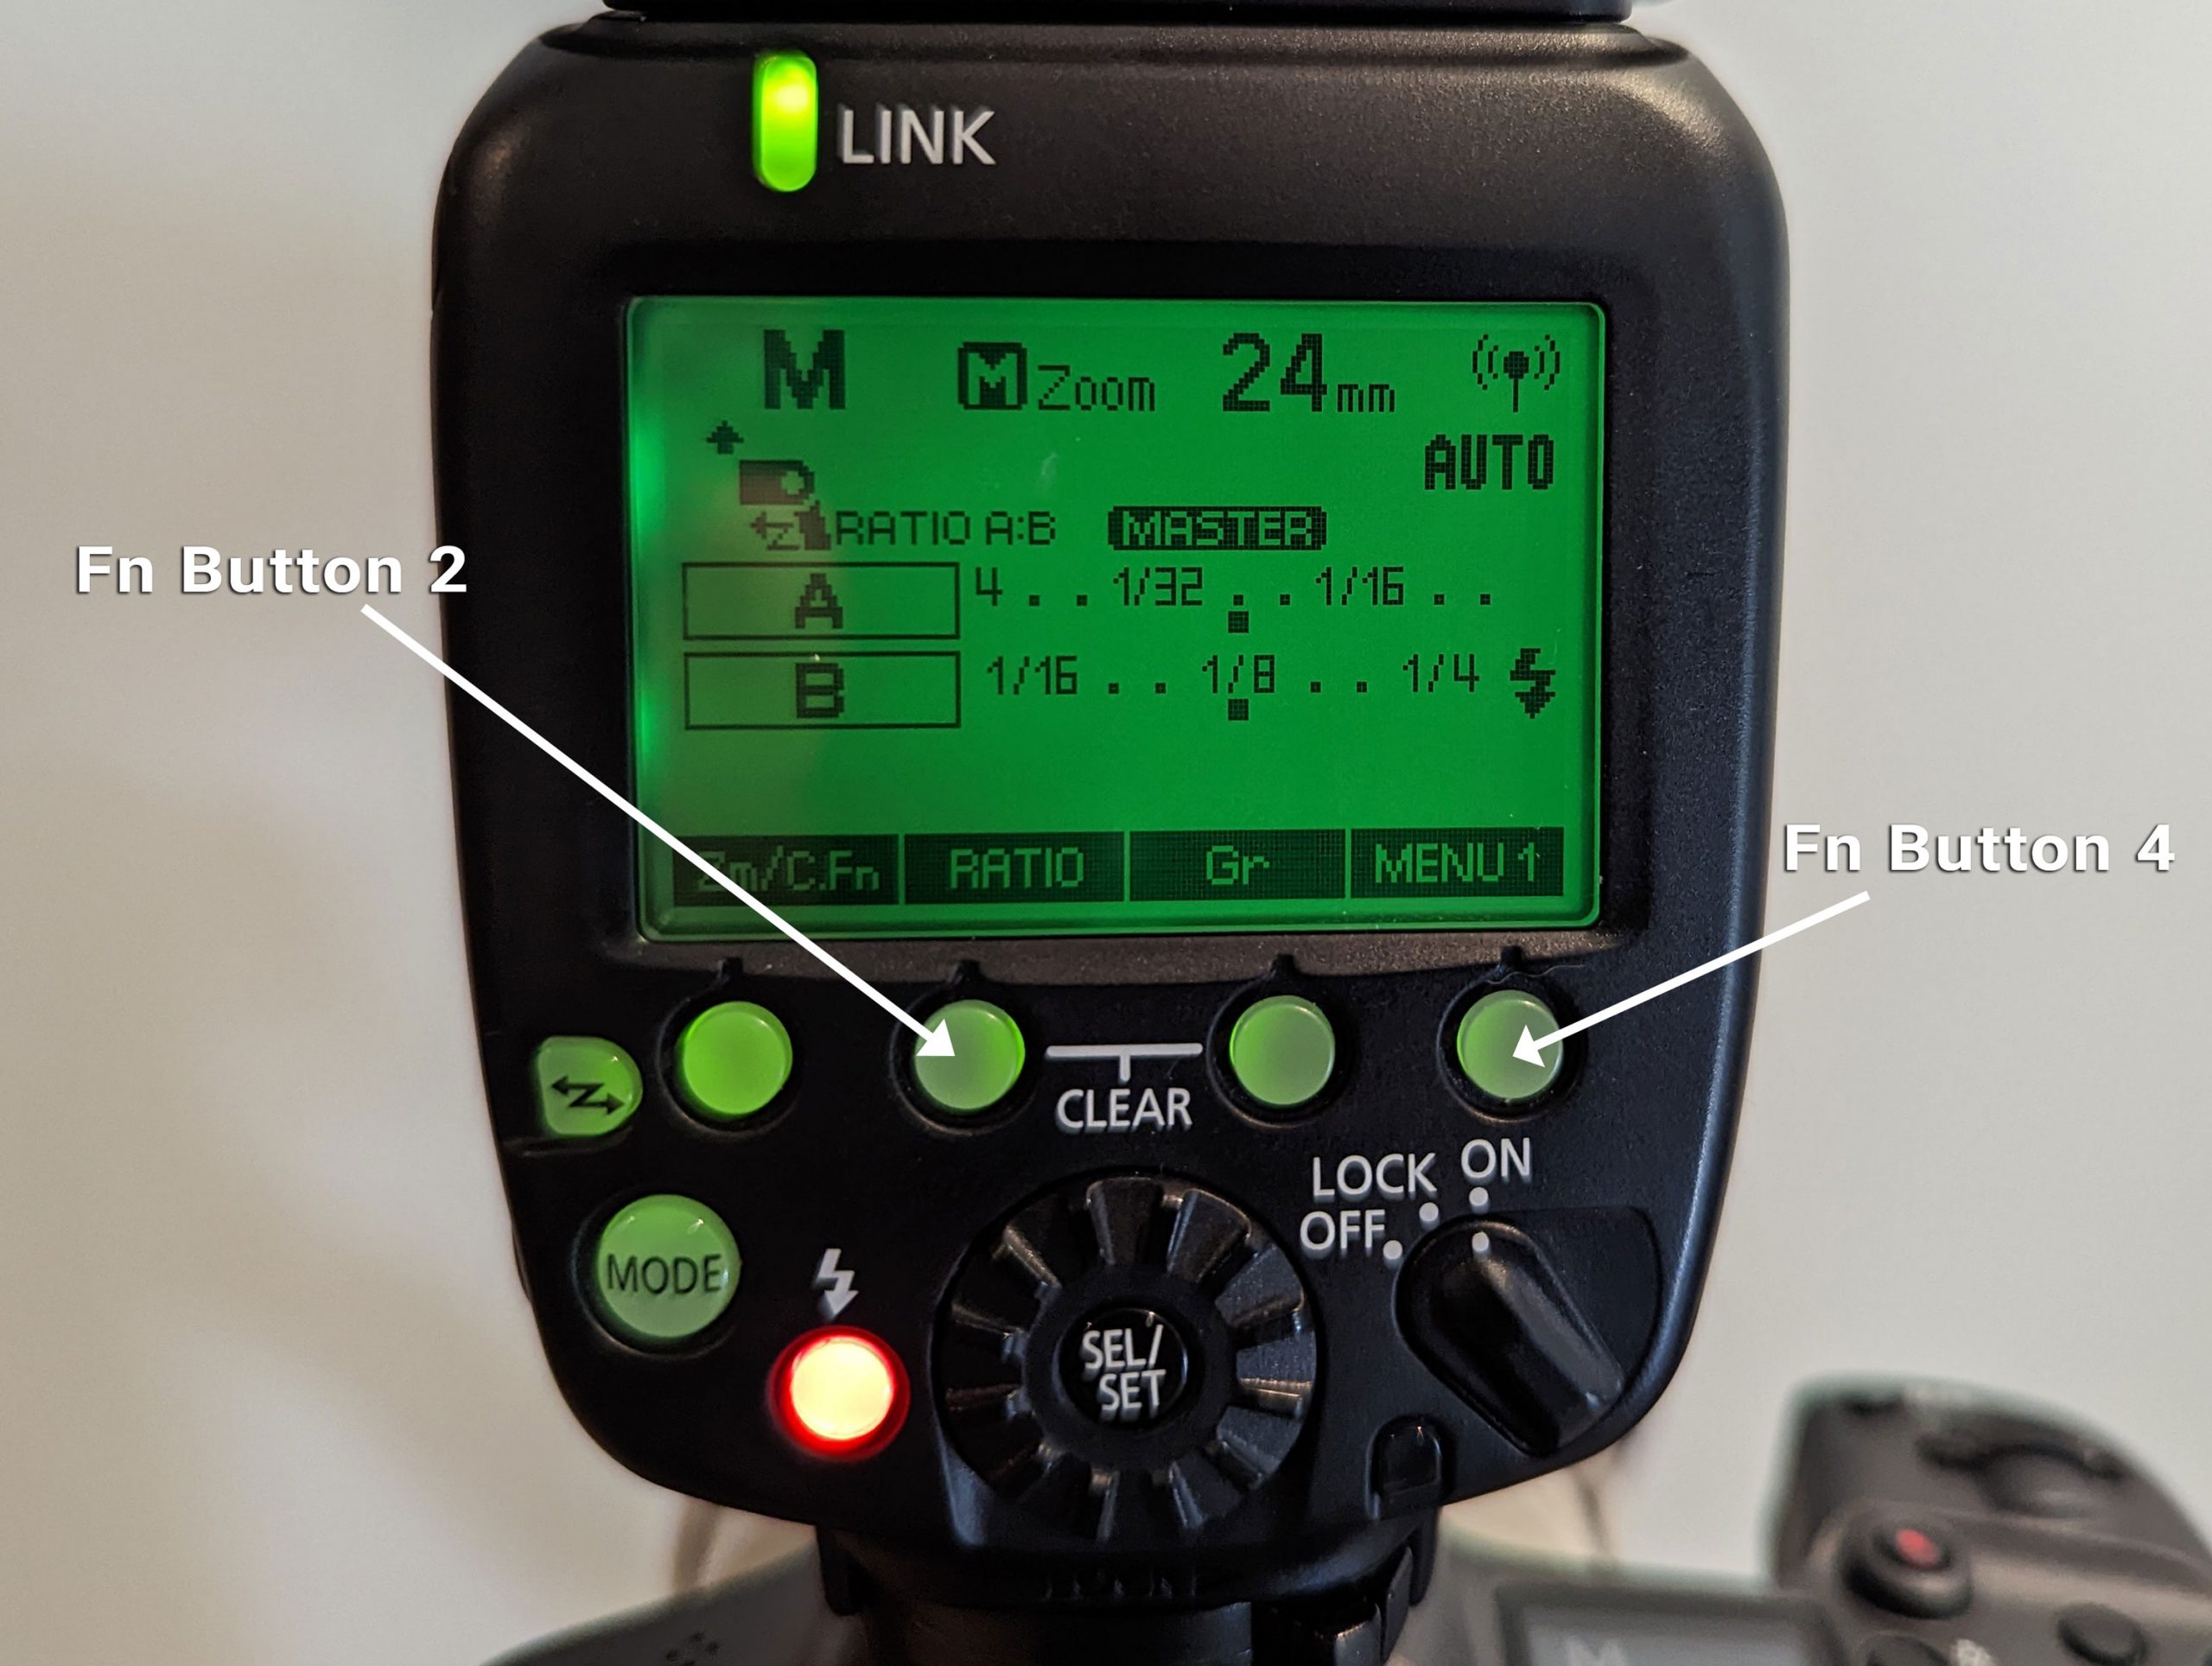
2. To set the individual power for each flash, press Fn Button 3 under the “GR” icon to select the flash you want to adjust, then press it again to adjust the settings.
3. Turn the Select Dial to set the power. Once you’ve chosen the setting you want, press the Select/Set Button, then use the Select Dial to select flash B. Hit the Select/Set Button to set the power. Press Fn Button 4 to return to shoot-ready mode.
Setting and buttons shown below:
Note: Flash B (the Slave flash) won’t show the power settings you’ve chosen until you either take a photo or hit the “Test” button on the Master flash.
Camera Compatibility
Full functionality is achieved using EOS cameras released since 2012.
Canon cameras released prior to 2012 will still work but the functionality is limited to:
• Flash sync speed must be one stop slower than the maximum
• No high-speed sync shooting
• No group (GR mode) flash
Note: Full flash sync, including Hi-Speed Sync, is available with the 600EX-RT with all EOS SLRs when used in optical wireless ETTL control mode.
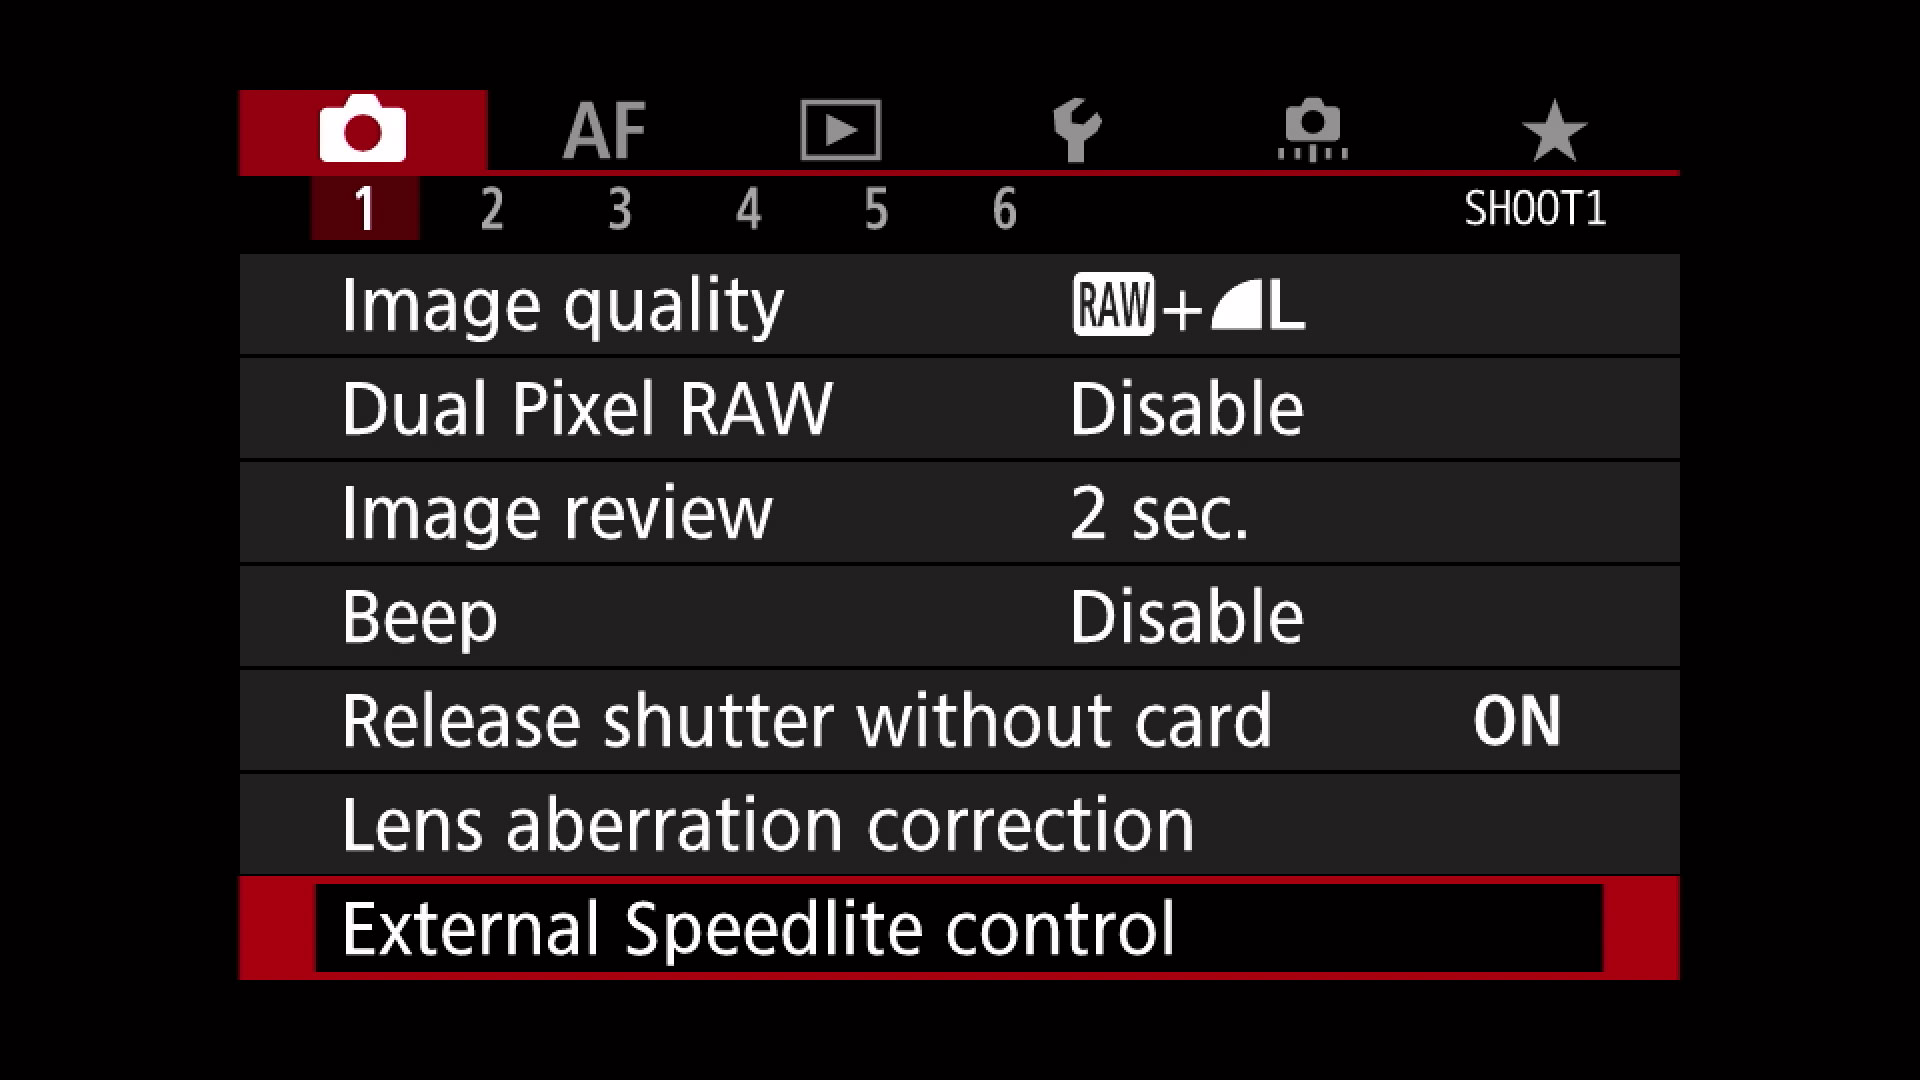
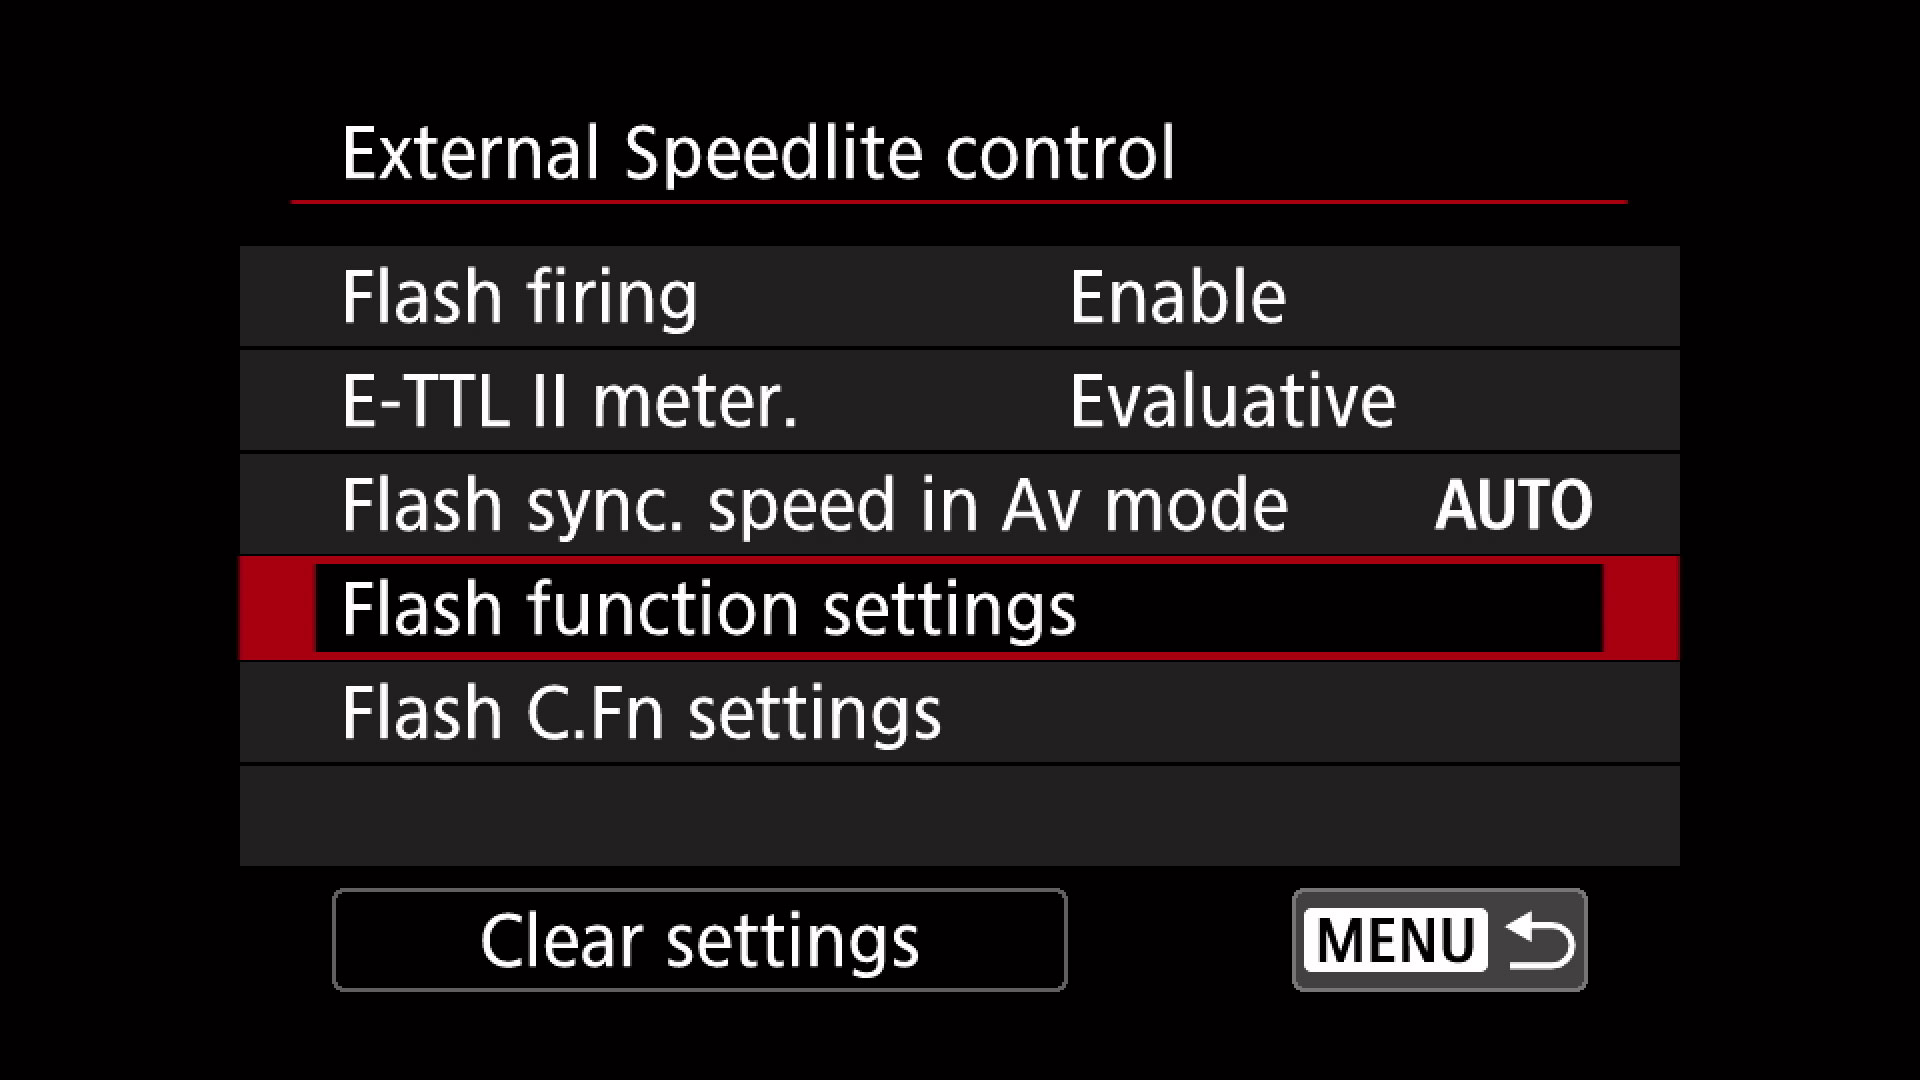
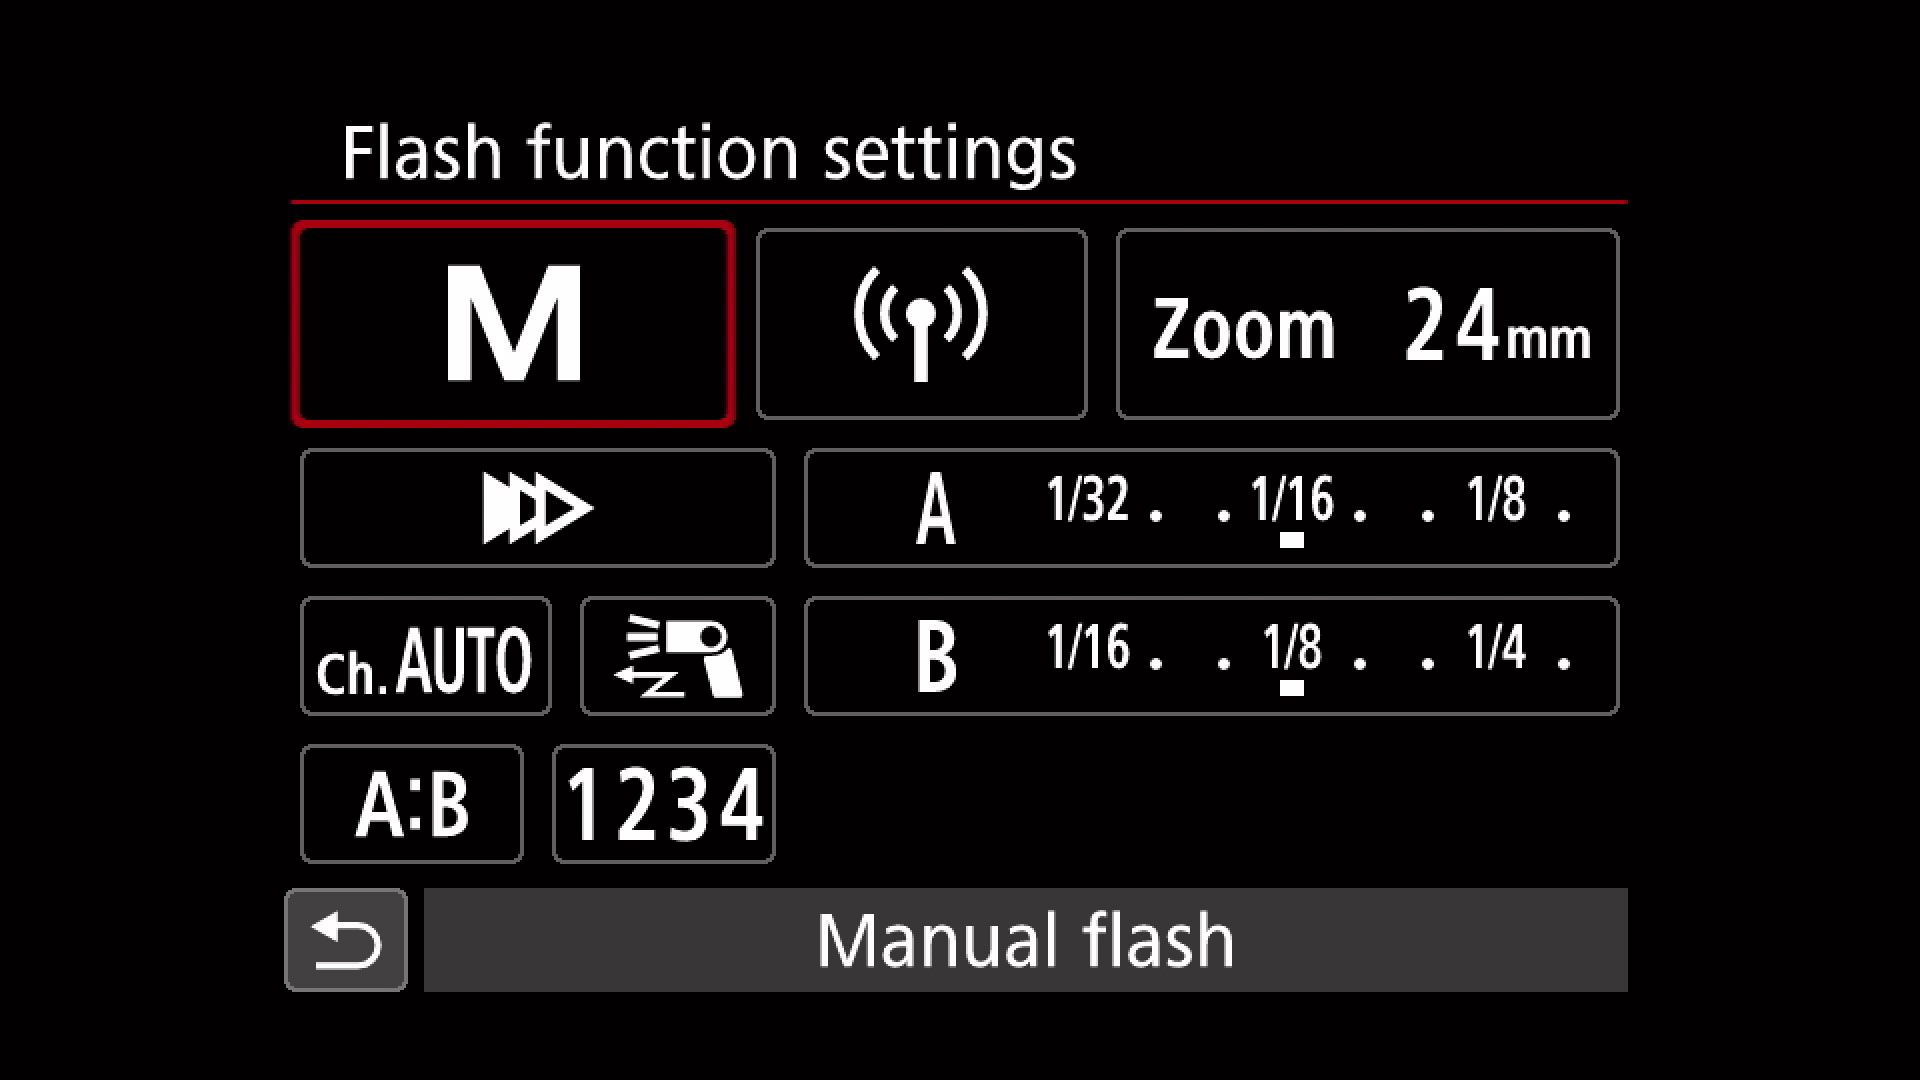
One thing to take note of is the fact that on many Canon cameras, all of the settings for the master flash that were discussed in this tutorial can be accessed via the camera’s Menu settings. Look for the “External Speedlite Control” setting, then the “Flash function settings.” The menus to look for on a Canon 5D Mark IV are shown below:
That’s it! Hopefully this helps anyone who is stuck trying to get their 600EX II flashes synced up. If you have any questions, feel free to leave a comment below.


