If you are wondering if you can use the original old Sony A7R (or A7) as a USB webcam, the answer is yes! You’ll just need a few pieces of hardware in order to get there. The original Sony A7R (and A7) are pushing ten years old at this point, but they still produce stellar image quality in both photos and videos. If you have one not being used after upgrading (like I did), why not repurpose it as a very high quality webcam? This post shows you how it all works!
UPDATE: Sony recently released the free Imaging Edge Webcam Utility, which, if nothing else, makes this process less expensive.
First things first, you’ll need a way to use an HDMI signal as a USB webcam. The product that I use is the Magewell USB Capture HDMI Gen 2, shown below:
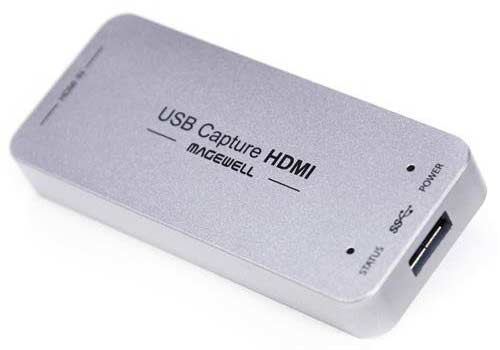
Magewell USB Capture HDMI Gen 2
The product is literally as plug and play as anything I’ve ever worked with. The only limitation with this particular device is input/output resolution, which only goes as high as 1080p 60fps (more on that in a bit). It’s also somewhat expensive at $299, so for a less expensive alternative you can take a look at either the MYPIN HDMI Game Capture Card ($49.99) or the Elgato Cam Link 4k ($99.99).
The Sony A7R does not come with an HDMI cable, so you’ll need to buy one. This one will work.
Setting up the Camera
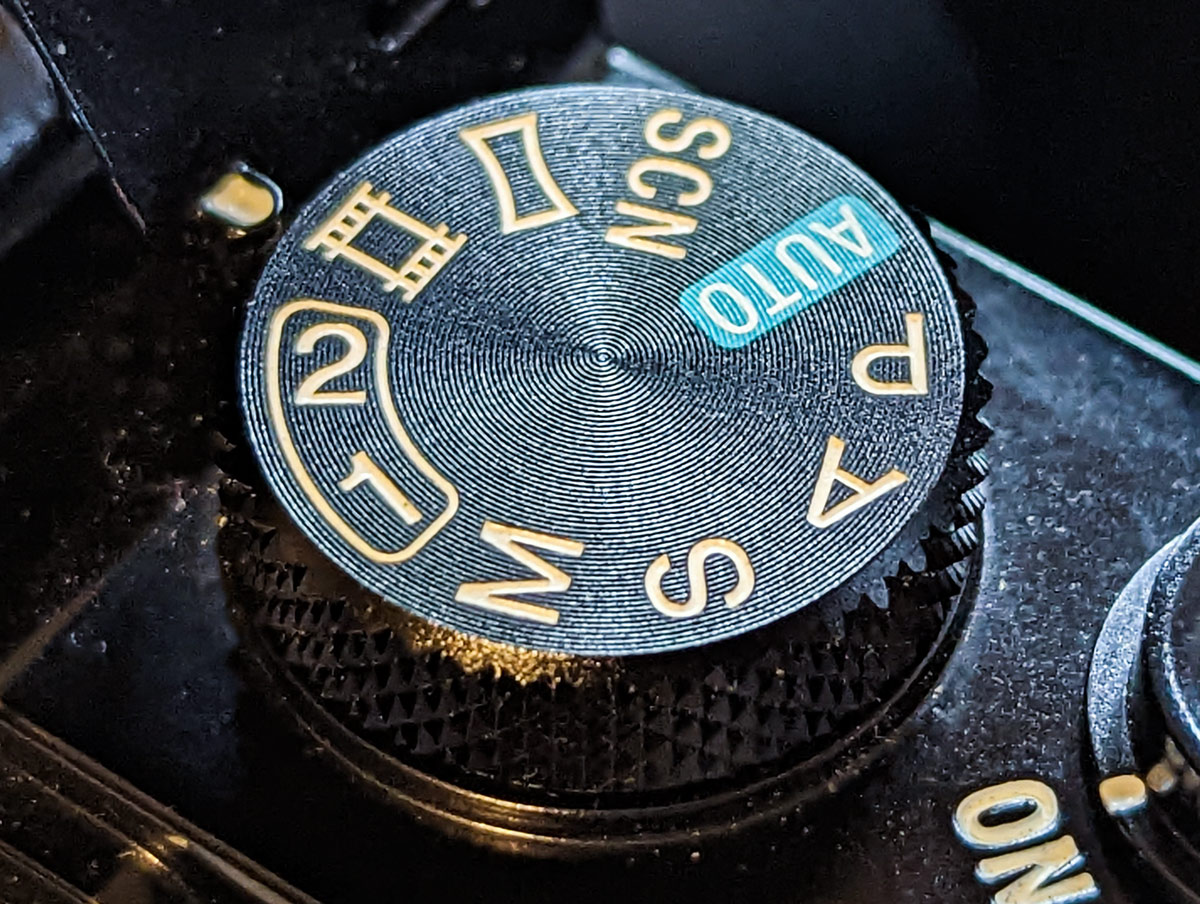
Turn the camera on and put it in video mode using the switch on the top of the camera, as shown below:
Once in movie mode, you can choose to use any of the shooting modes at your disposal by hitting either the “Fn” button on the back of the camera or by hitting the ‘Menu” button on the back of the camera and going into the “Movie” settings (page 6 on the first menu option). I tend to use the “Manual Exposure” setting, but no matter what I’d recommend that you get your settings dialed in to your liking before you start streaming or recording. NOTE: The only available shooting mode if using a Sony LA-EA4 A-Mount to E-Mount FF Lens Adapter is “Program Auto”. The settings for “Manual Exposure” are shown below:

The menu location to change shooting mode settings.
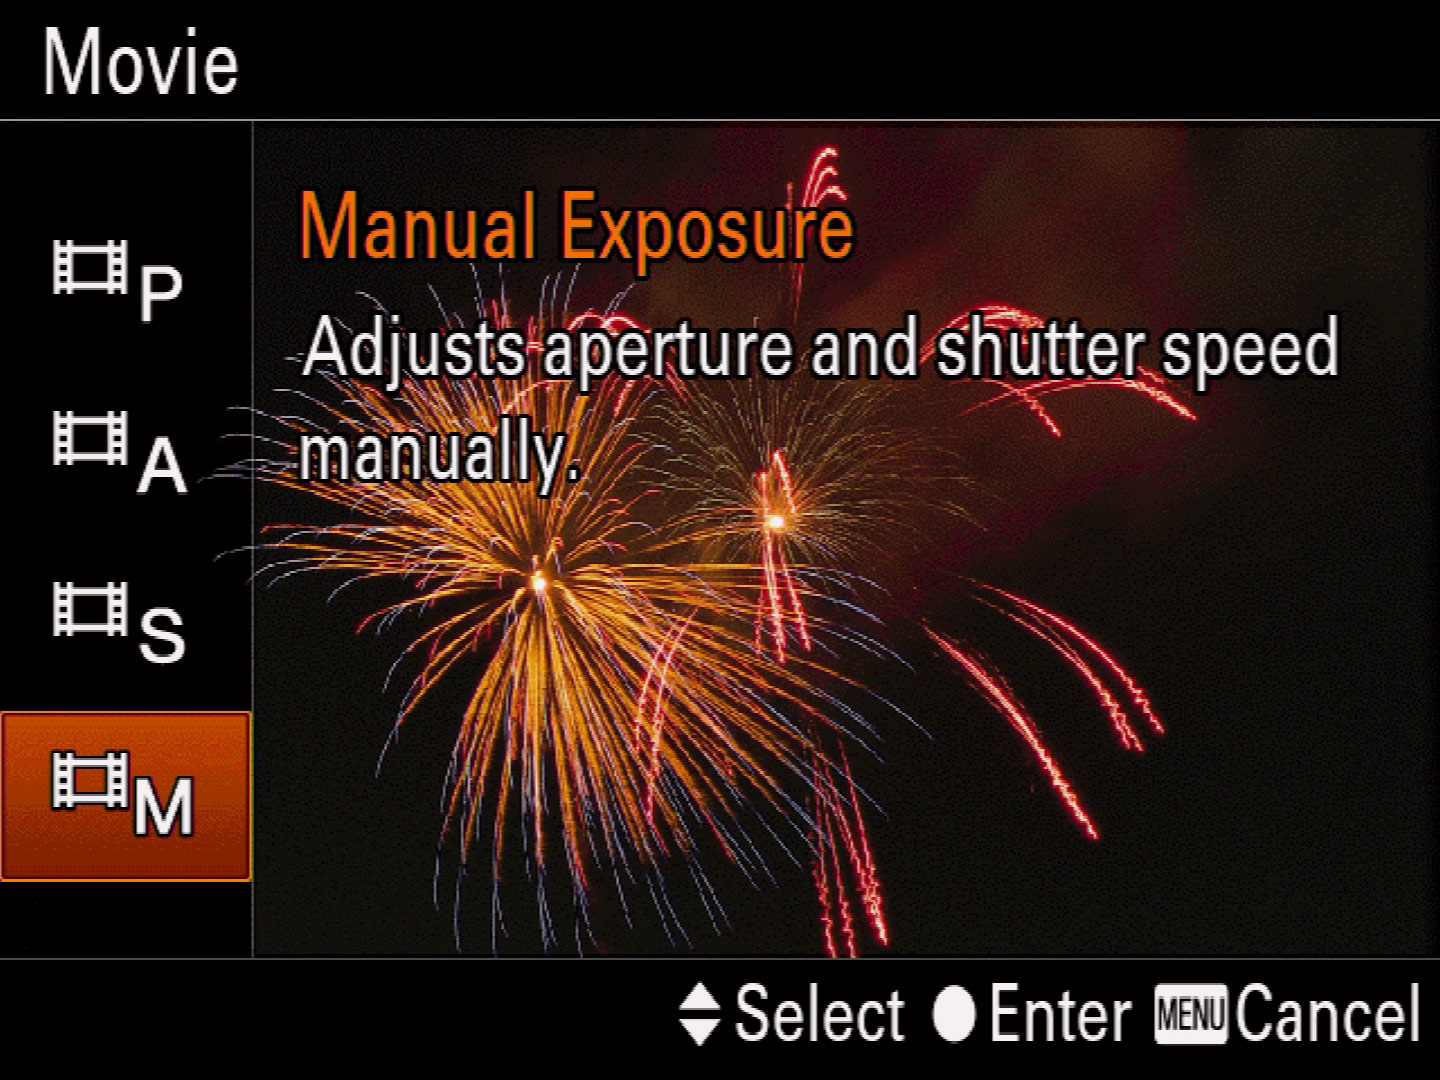
Manual Exposure selected.
HDMI Settings
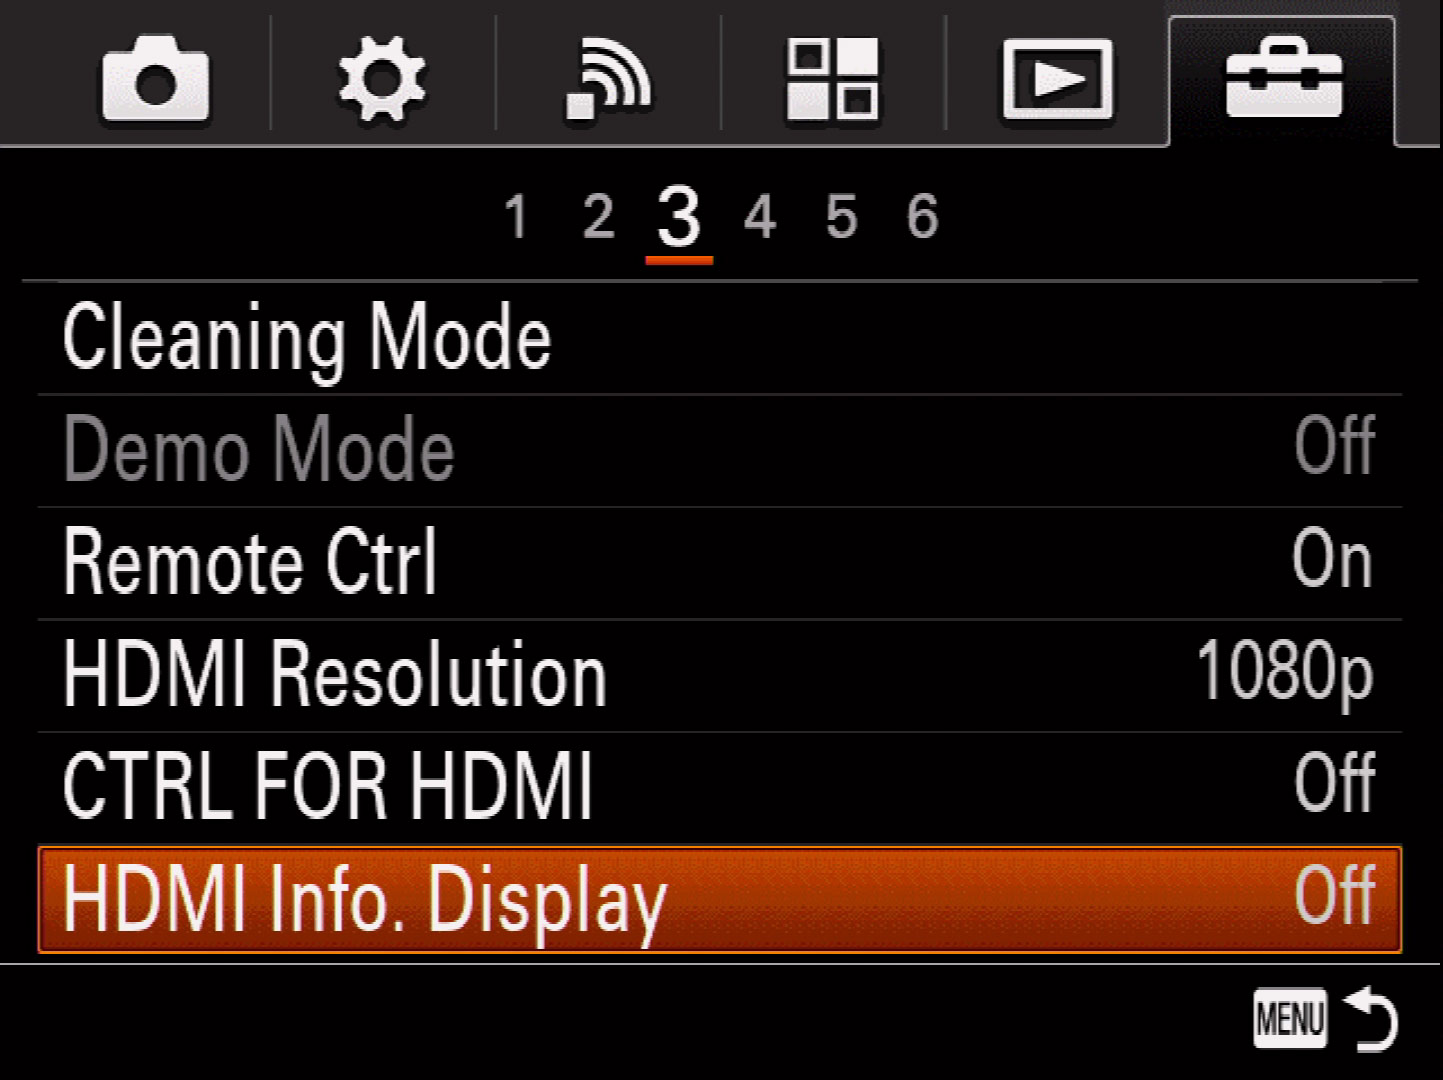
Hit the “Menu” button on the back of the camera, then highlight the little toolbox icon on the far right. Within this menu, go to page 3. There are two settings in here to change.
First is the “HDMI Resolution” setting, which should be set to “1080p” as shown below:

Menu for changing “HDMI Resolution”
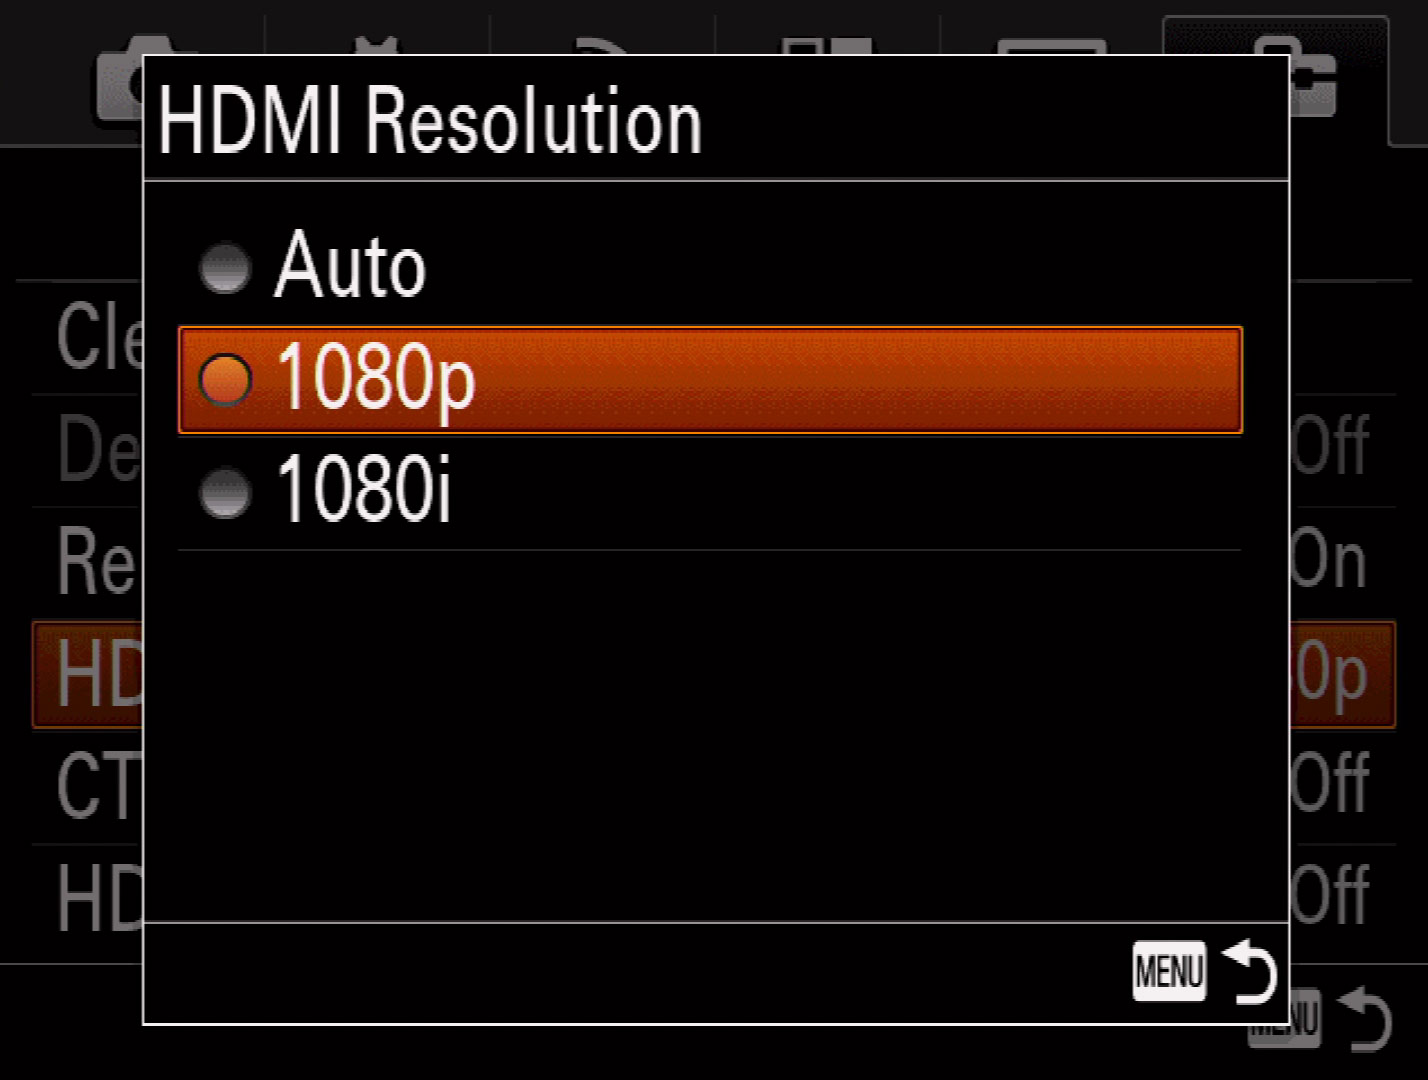
1080p selected.
Second, and this is a big one, be sure to set the “HDMI Info. Display” setting to “Off” as shown below:
The Menu for changing “HDMI Info. Display”
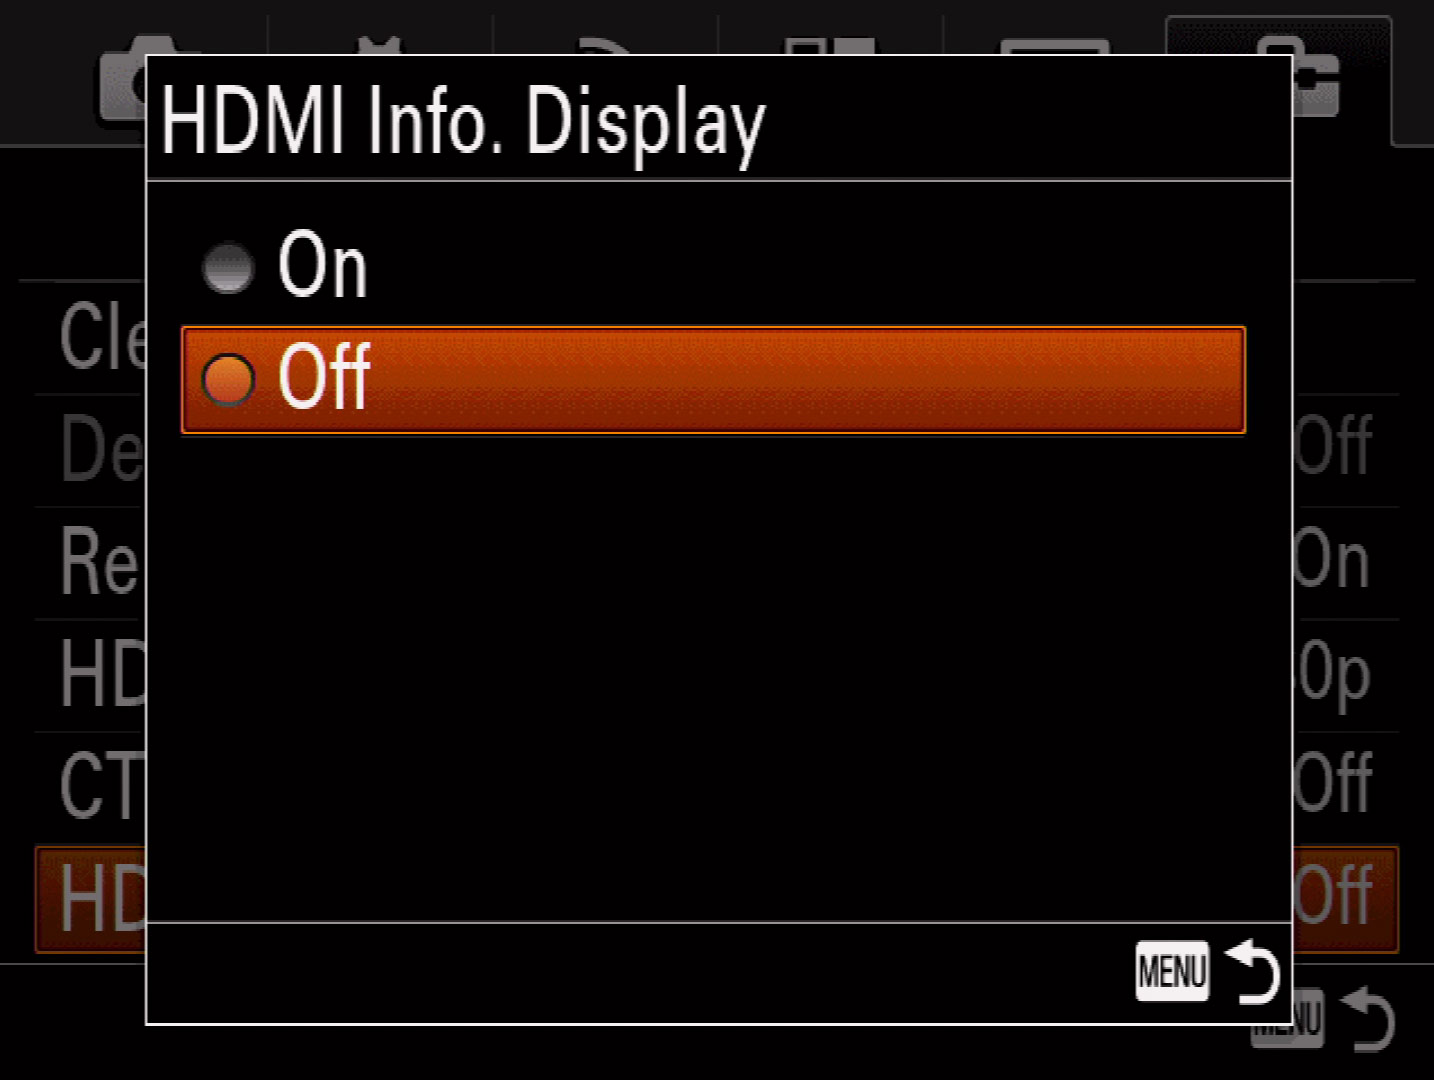
HDMI Info. Display set to “Off”.
Focus Settings on the Camera
For Focus Mode, you’ll want to use “AF-C” (continuous auto-focus). You can get to the focus mode settings either by hitting the “Fn” button on the back of the camera or by hitting the Menu button on the back of the camera and going to page 2 of the main camera settings (the setting furthest to the left). Select “AF-C” from the options as shown below:

Focus Mode settings in the menu.
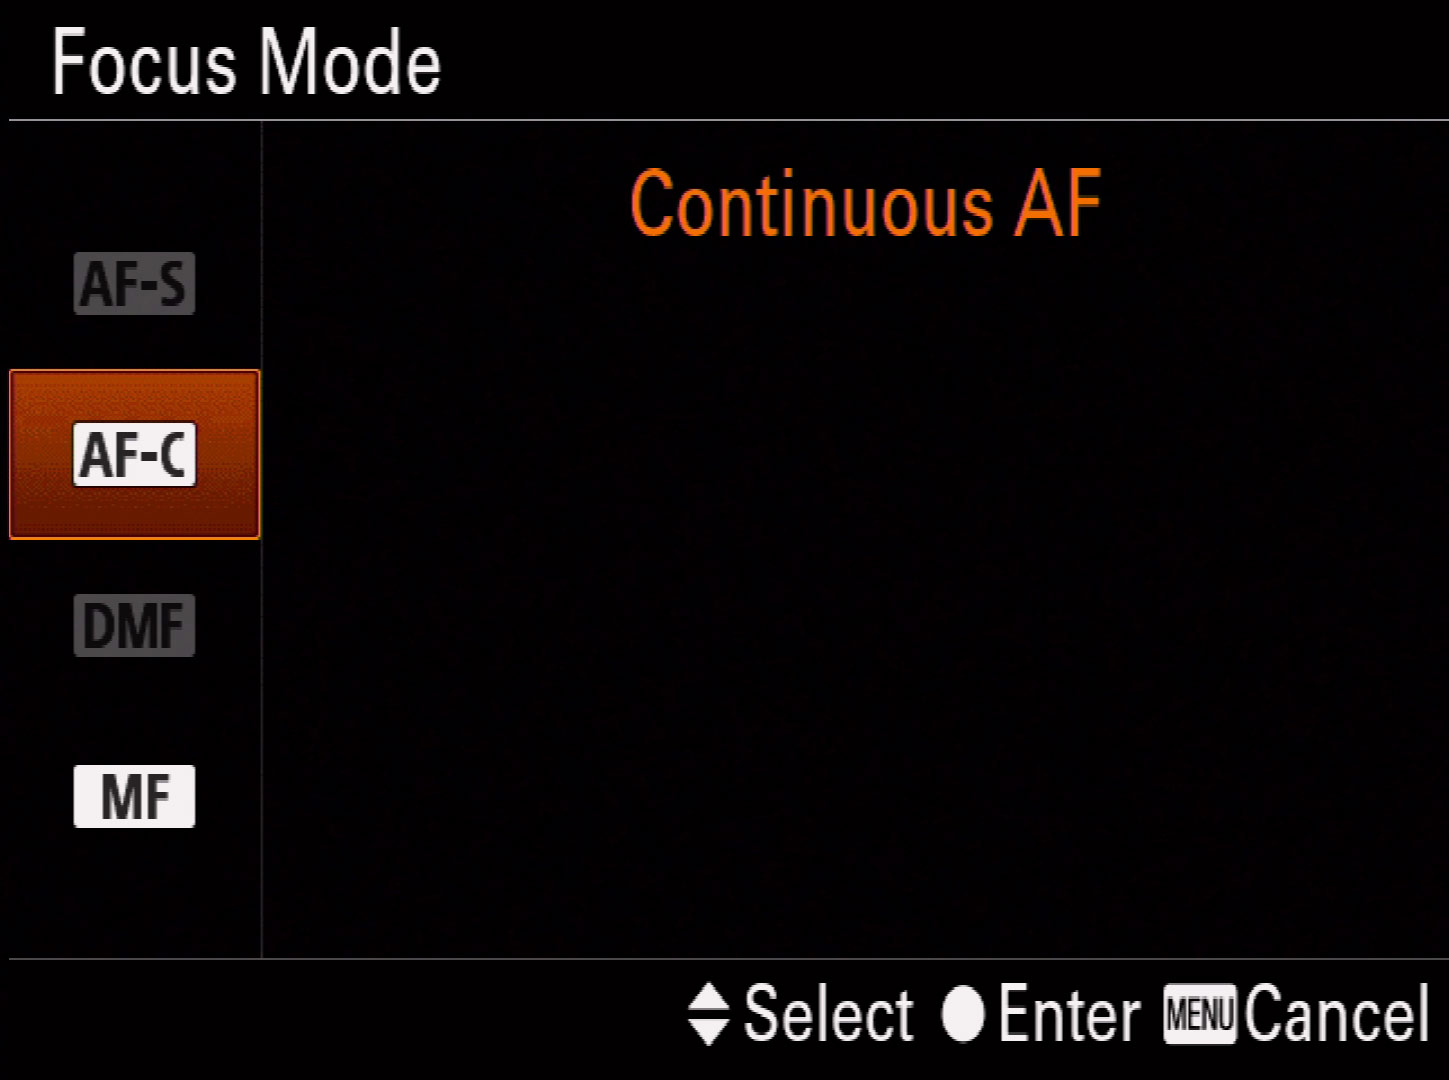
Focus Mode set to AF-C
For Focus Area, either by press the “Fn” button on the back of the camera or press the Menu button and go to page 3 of the main camera settings (the setting furthest to the left). The “Zone” setting worked well for me. This setting may depend on your specific application. Focus Mode settings in the menu are shown below:
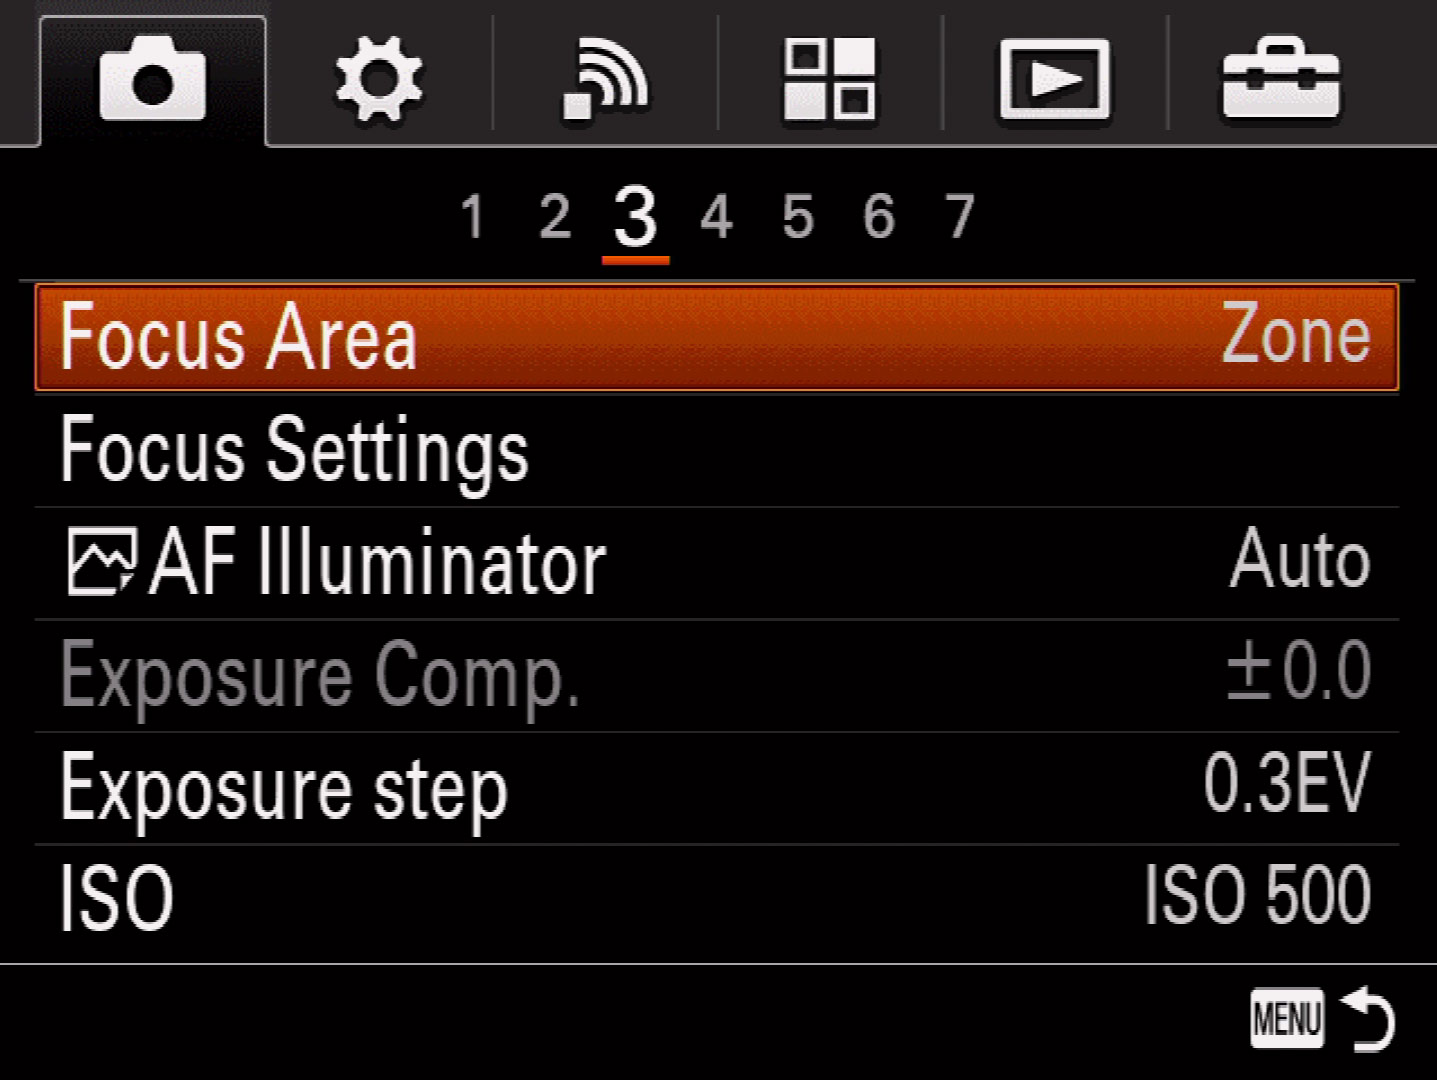
Focus Area settings in the menu
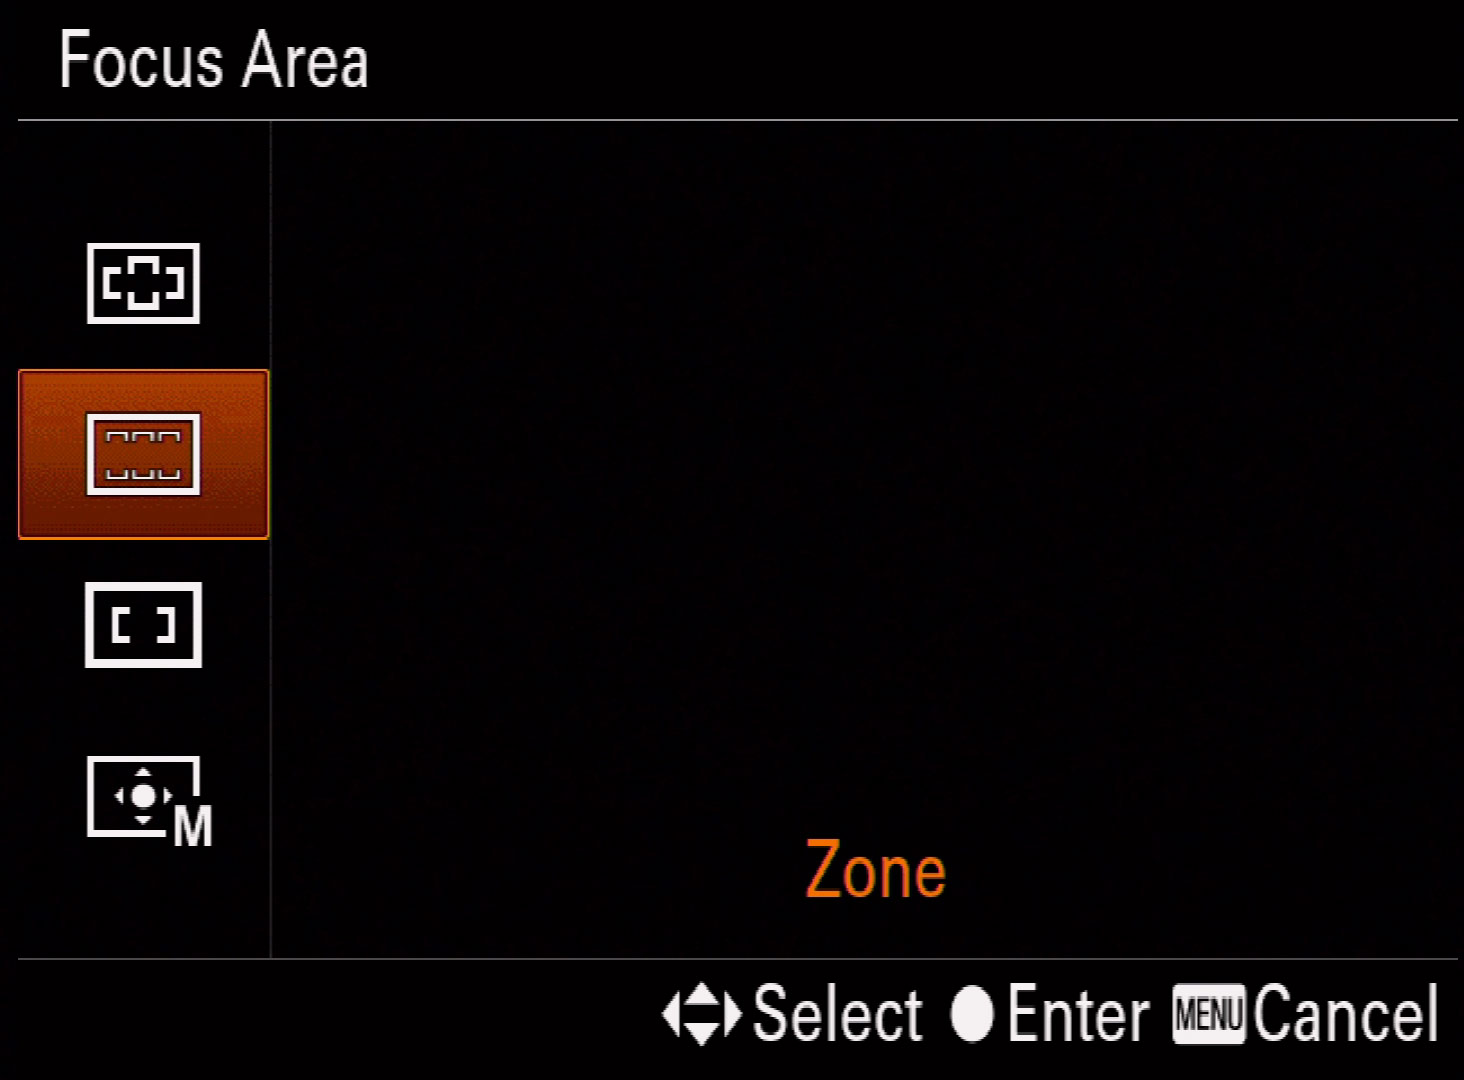
Focus Area set to “Zone”
Next, enable the “Smile/Face Detect” feature by hitting the Menu button and going to page 5 of the main camera settings (the setting furthest to the left) as shown below:
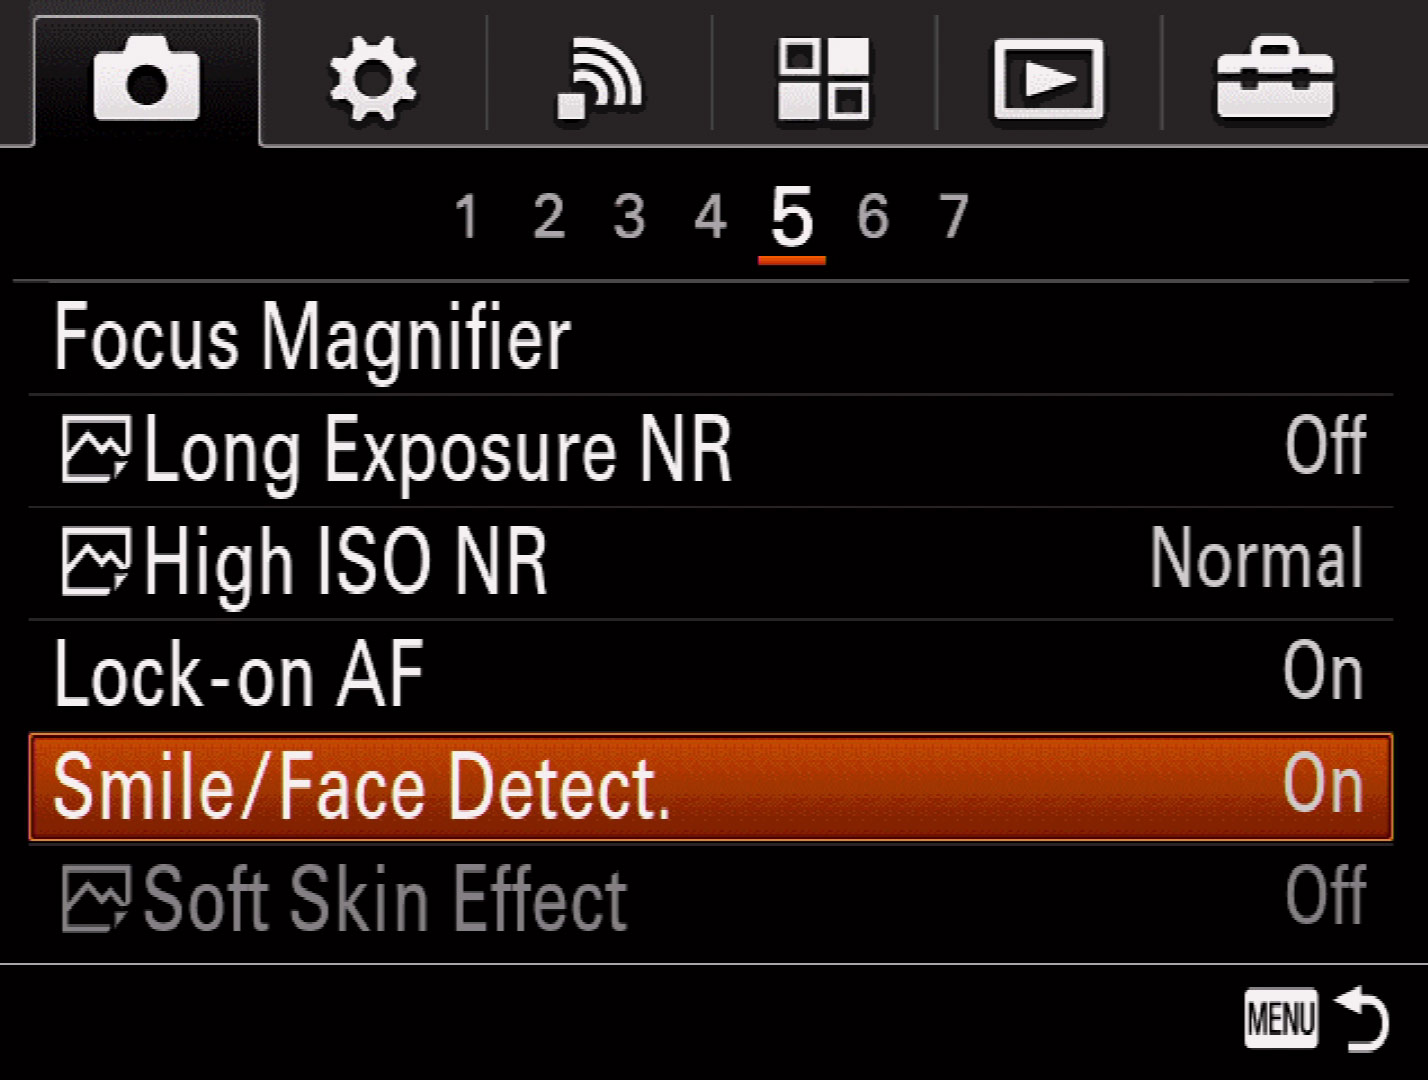
Menu settings for “Smile/Face Detect”
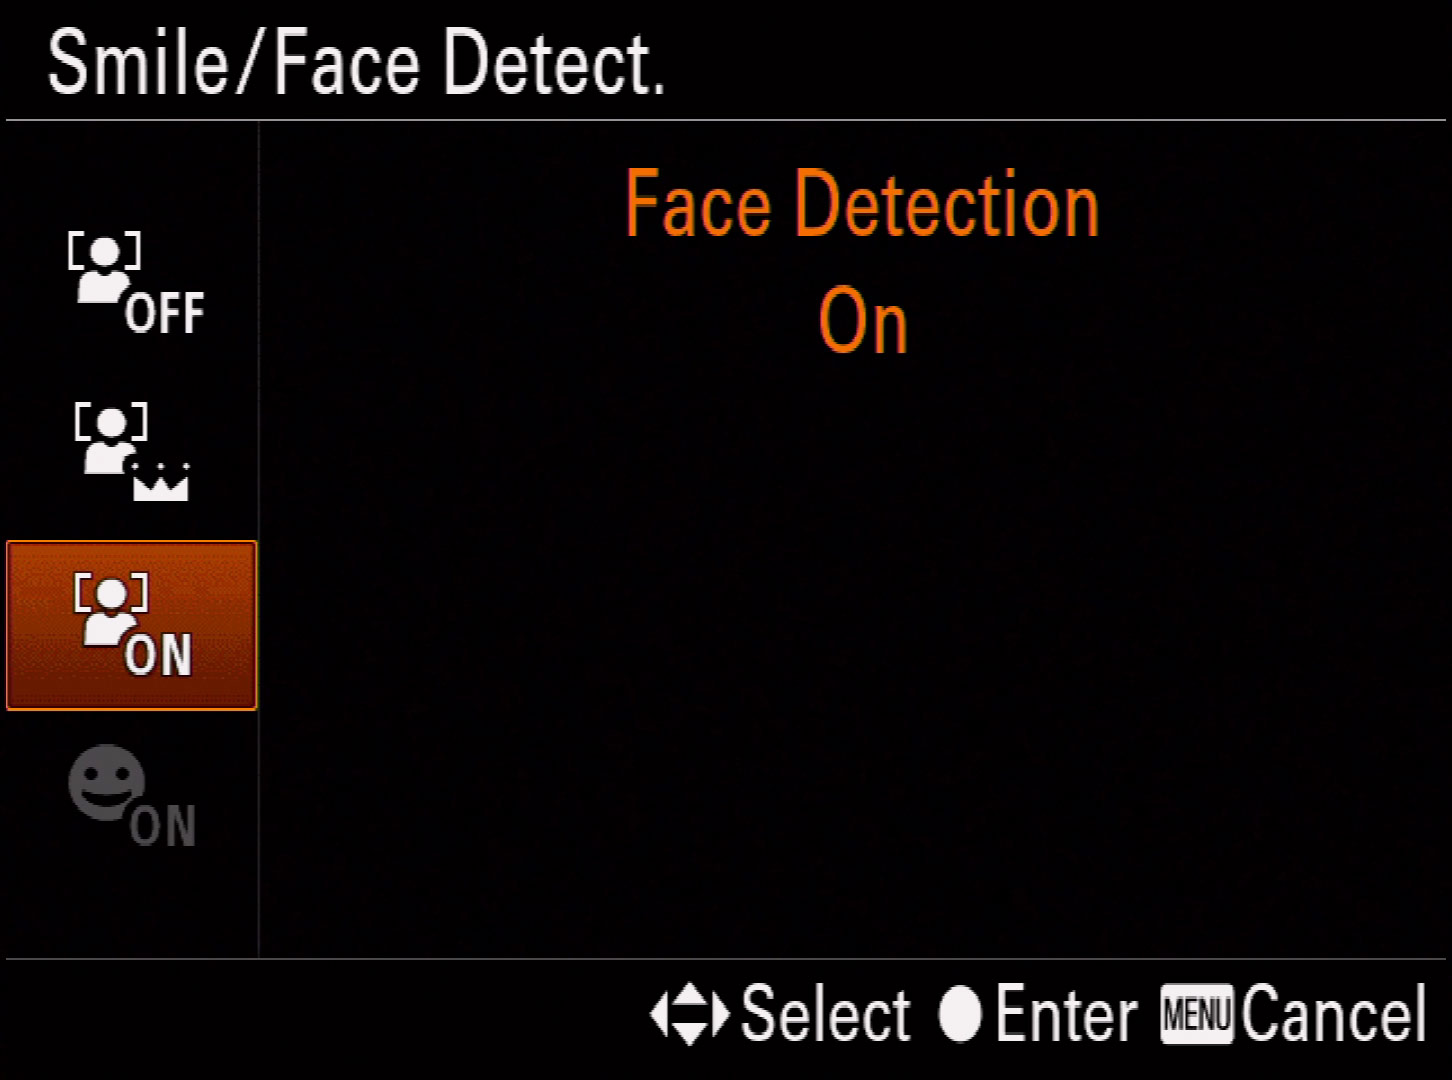
Face Detection Enabled
Those are the main settings you’ll need to set on the camera. The camera will not turn off if you have it connected to a device via HDMI, so no need to worry about any of the power settings.
Connect the Hardware
Go ahead and plug your HDMI cable into the HDMI port on the camera (it’s the port at the very bottom on the left side if looking at the back of the camera), as shown below:
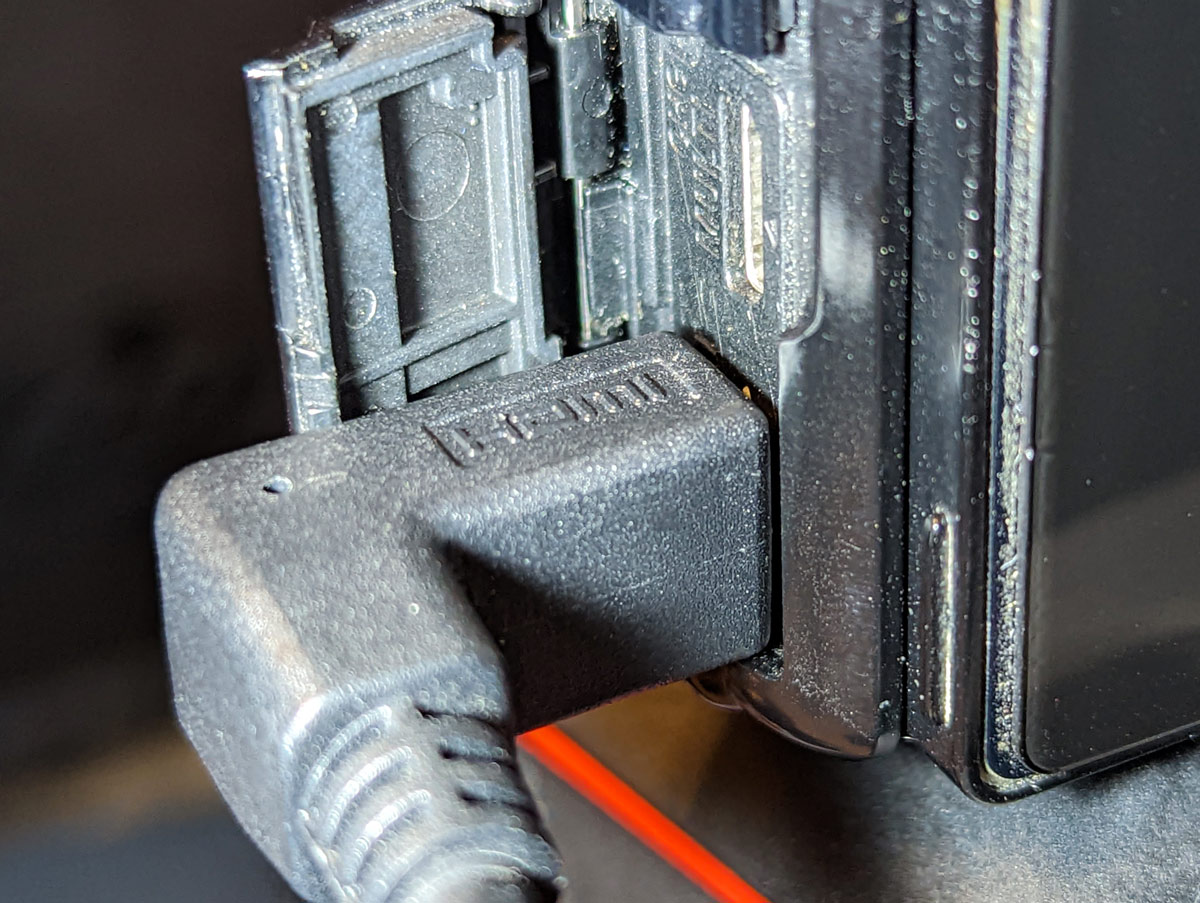
Attach the HDMI cable from the camera to the capture device

HDMI cable plugged into capture device
Plug the USB Cable from the Capture Device into the Computer
Doesn’t get much more simple than this. Just plug the USB cable from the capture device into your computer and the device automatically activates (the Magewell is pictured below). Windows 10 will recognize the device as “USB Capture HDMI” – essentially a HDMI to USB webcam.
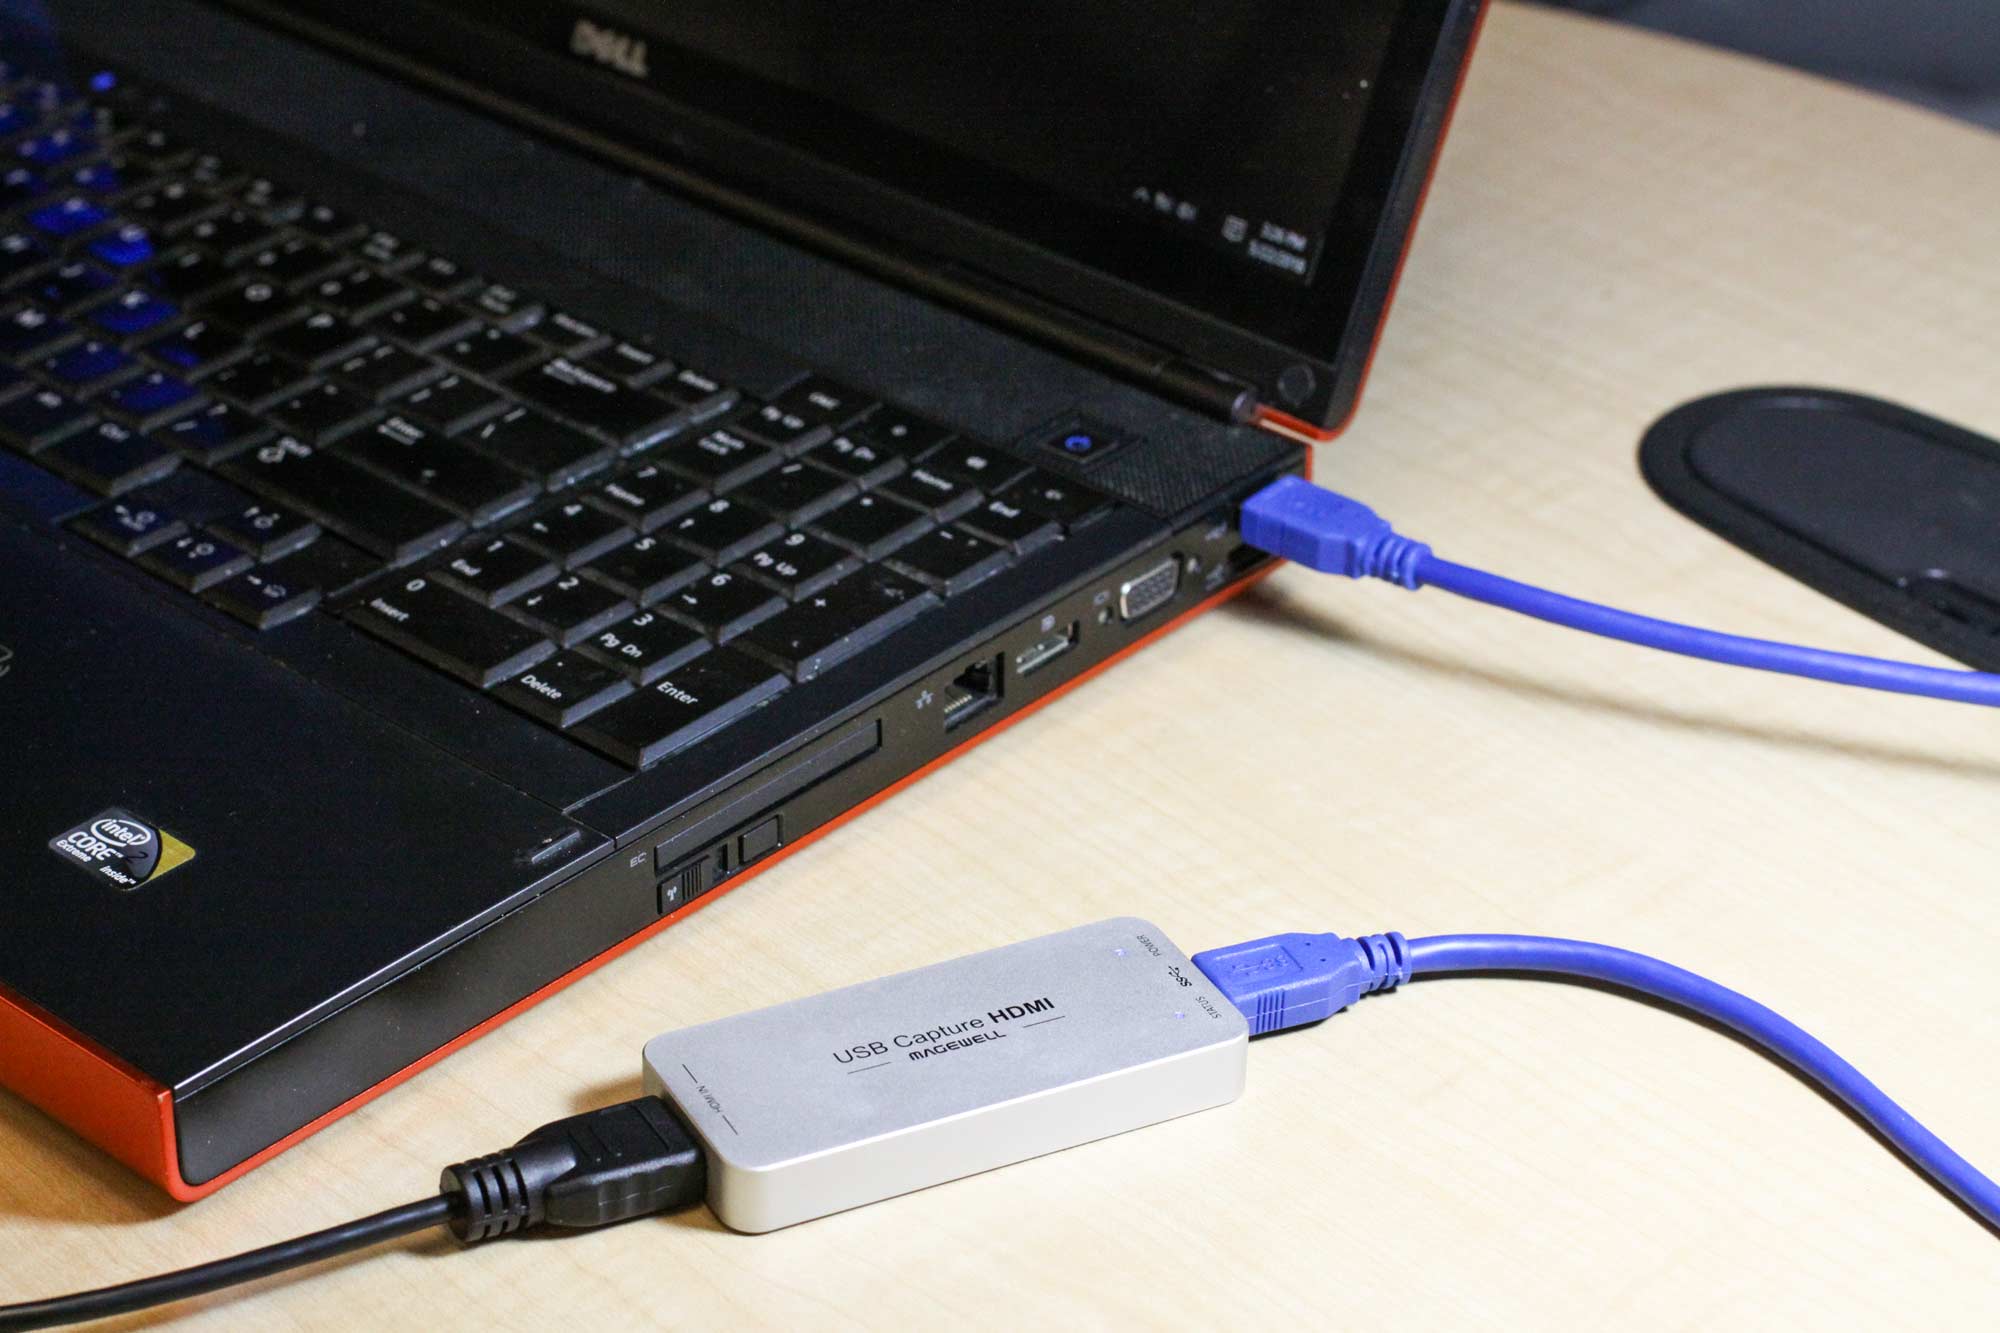
USB cable plugged into computer from capture device.
Mount the Camera to a Tripod
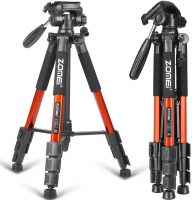
You’ll want to mount the camera to a tripod that’s capable of holding the weight of the camera/lens. There are a number of tripods available, but if you are looking for an inexpensive solution you can pick up the ZOMEI 58” Compact Light Weight tripod for around $50 from Amazon.
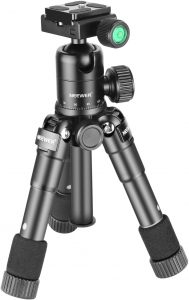
If you are looking for a tripod that will mount on your desk (and holds the weight of the 5D Mark IV), you can pick up the Neewer 20 inch desktop tripod from Amazon for $55.
Configuring Software
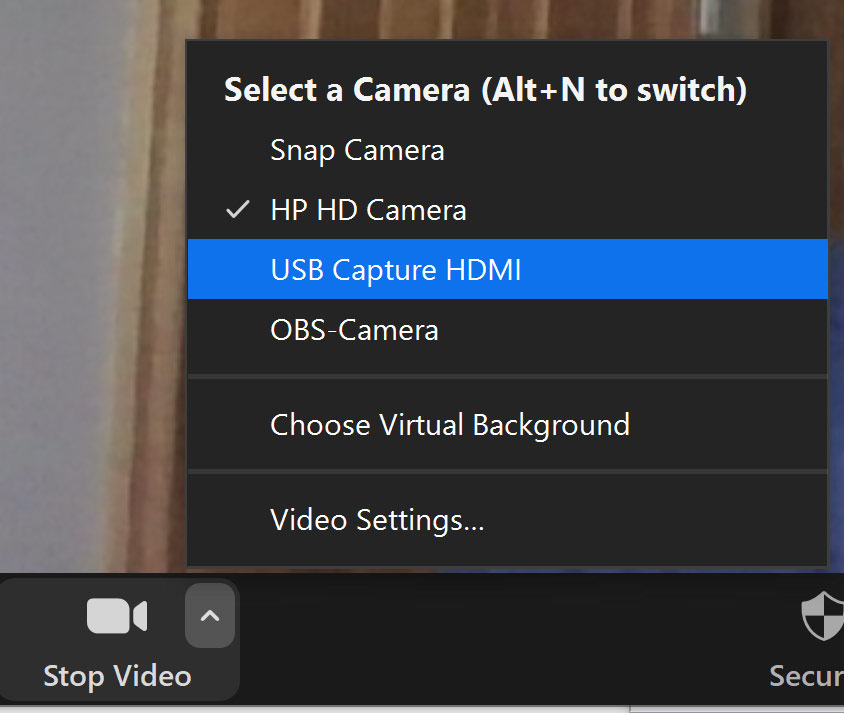
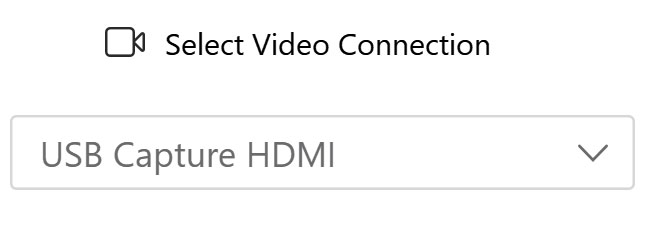
You’ll need to configure your software (such as the free OBS) to use your camera as a USB webcam. Settings will vary depending on the software you are using, but in general there should be a way to easily tell the software which device to use as a camera. If you are using the HDMI to USB adapter that I recommend in this article, the camera will show up in your devices as “USB Capture HDMI.”
Here’s what you’ll see in Zoom:
Here’s WebEx:
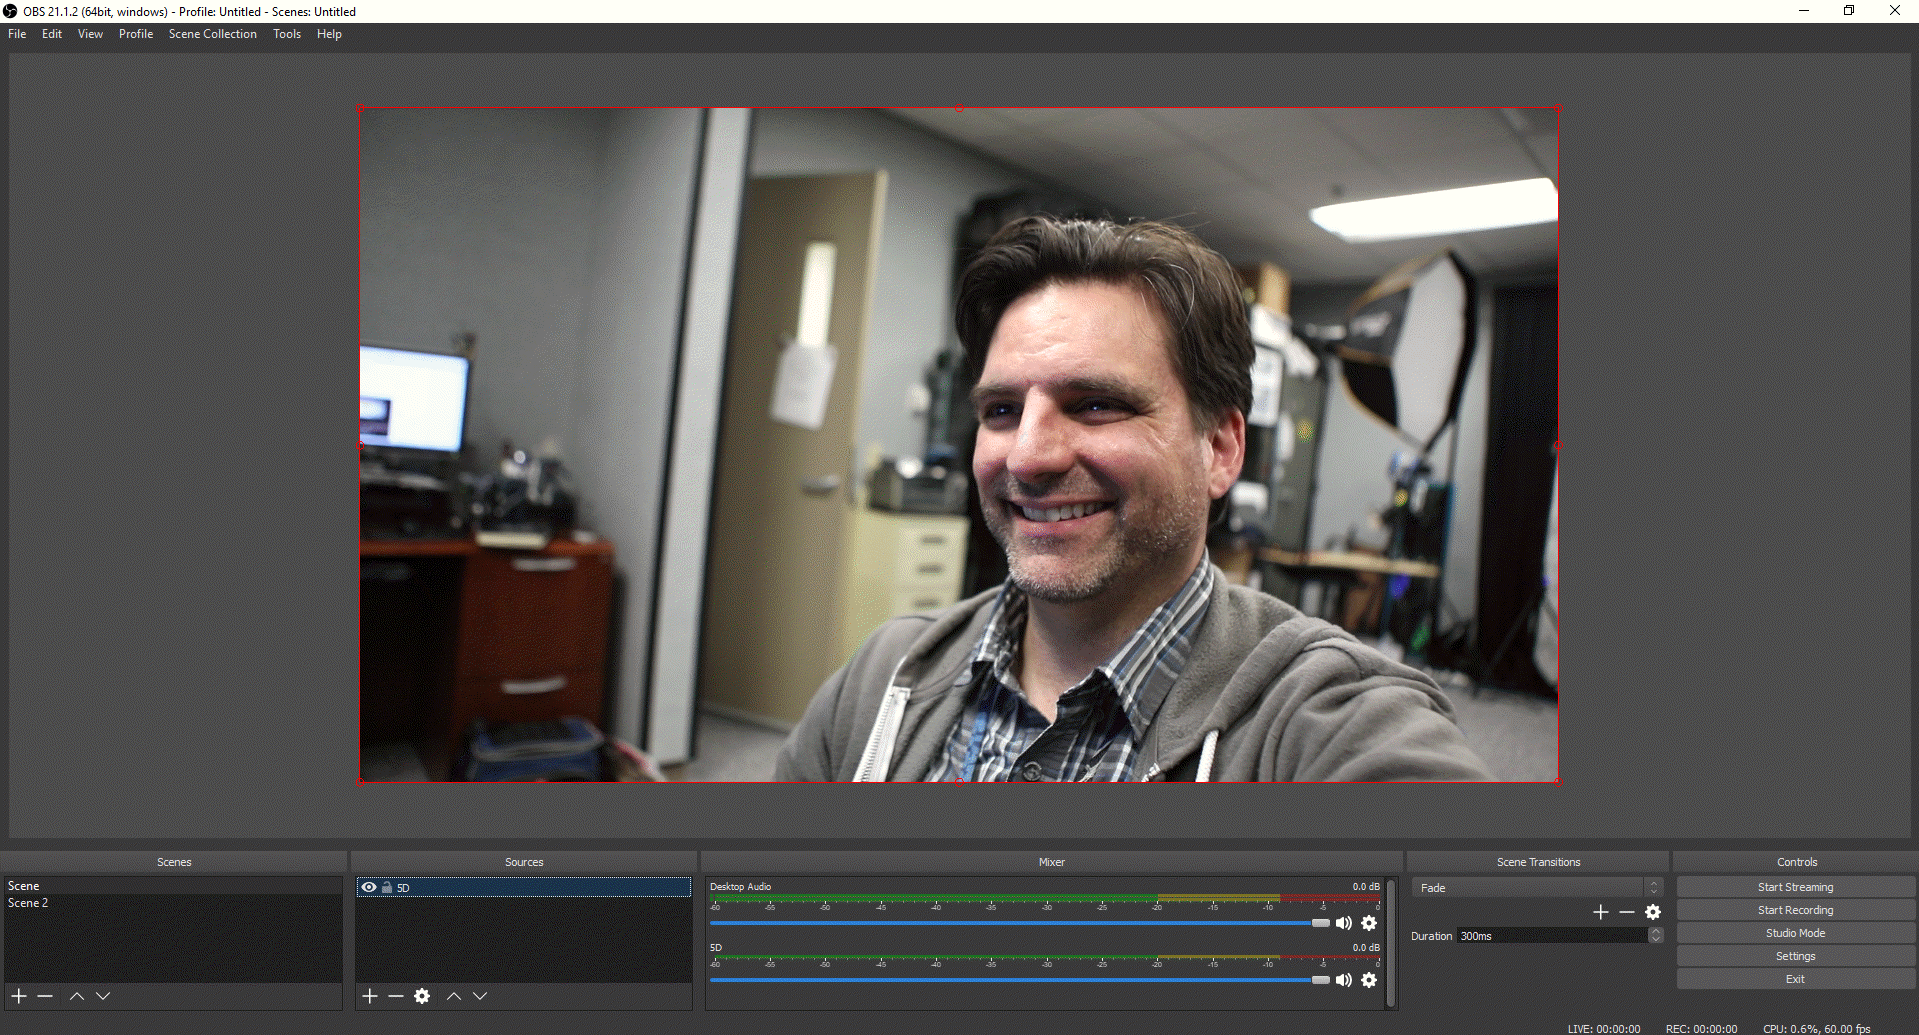
Here’s how to configure OBS on Windows 11:
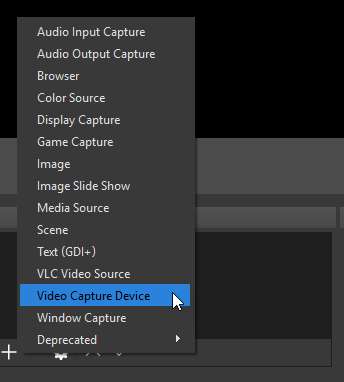
In the “Sources” window, click the plus icon to add a source and choose “Video Capture Device” as shown below:
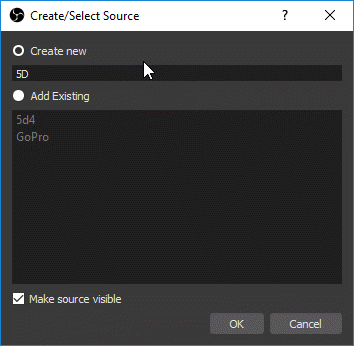
Choose “Create new” and type in a name, as shown below:
If you don’t see a preview from your camera, double-click on the source you just created to open the settings and make sure that “USB Capture HDMI” is chosen, as shown below:

Once that’s configured, the software should give you a preview of what the camera sees.
Audio Options
The A7R as well as the Magewell USB Capture HDMI Gen 2 device can output sound over HDMI, which makes setting up the audio that much easier. It’s up to you whether or not you want to plug in an external mic or use the camera’s built-in microphone, but either way you should be able to configure your capture software to use the “HDMI (USB Capture HDMI)” as the audio source. Here’s how to set it up in OBS on Windows 11:
Go to the “File” menu and choose “Settings” as shown below:
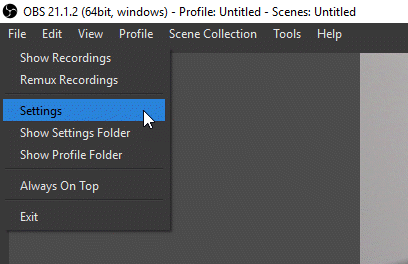
Click on “Audio” and for the “Mic/Auxiliary Audio Device” select “HDMI (USB Capture HDMI)” as shown below:

Select “HDMI (USB Capture HDMI)” from this menu.
You’ll see your audio levels active in the “Mic/Aux” section of the mixer in OBS as shown below:

Battery Life
Suppose you want to use your camera for a live stream that will run for hours? Sadly, the standard battery won’t last very long without a bit of help. Fortunately, there is a solution.
The setup that I put together utilizes these four pieces of equipment (around $210 total):
- CONXWAN 22.5W PD Fast Charging Battery Pack ($35.99) – this is your “battery”
- Tether Tools Case Relay Camera Power System ($119.95)
- Tether Tools Relay Camera Coupler ($34.99)
- Tether Tools StrapMoore ($18.95)
Here’s how it works:
If you are using a tripod, the first thing to do is attach the Tether Tools StrapMoore to a leg on your tripod, as shown below:
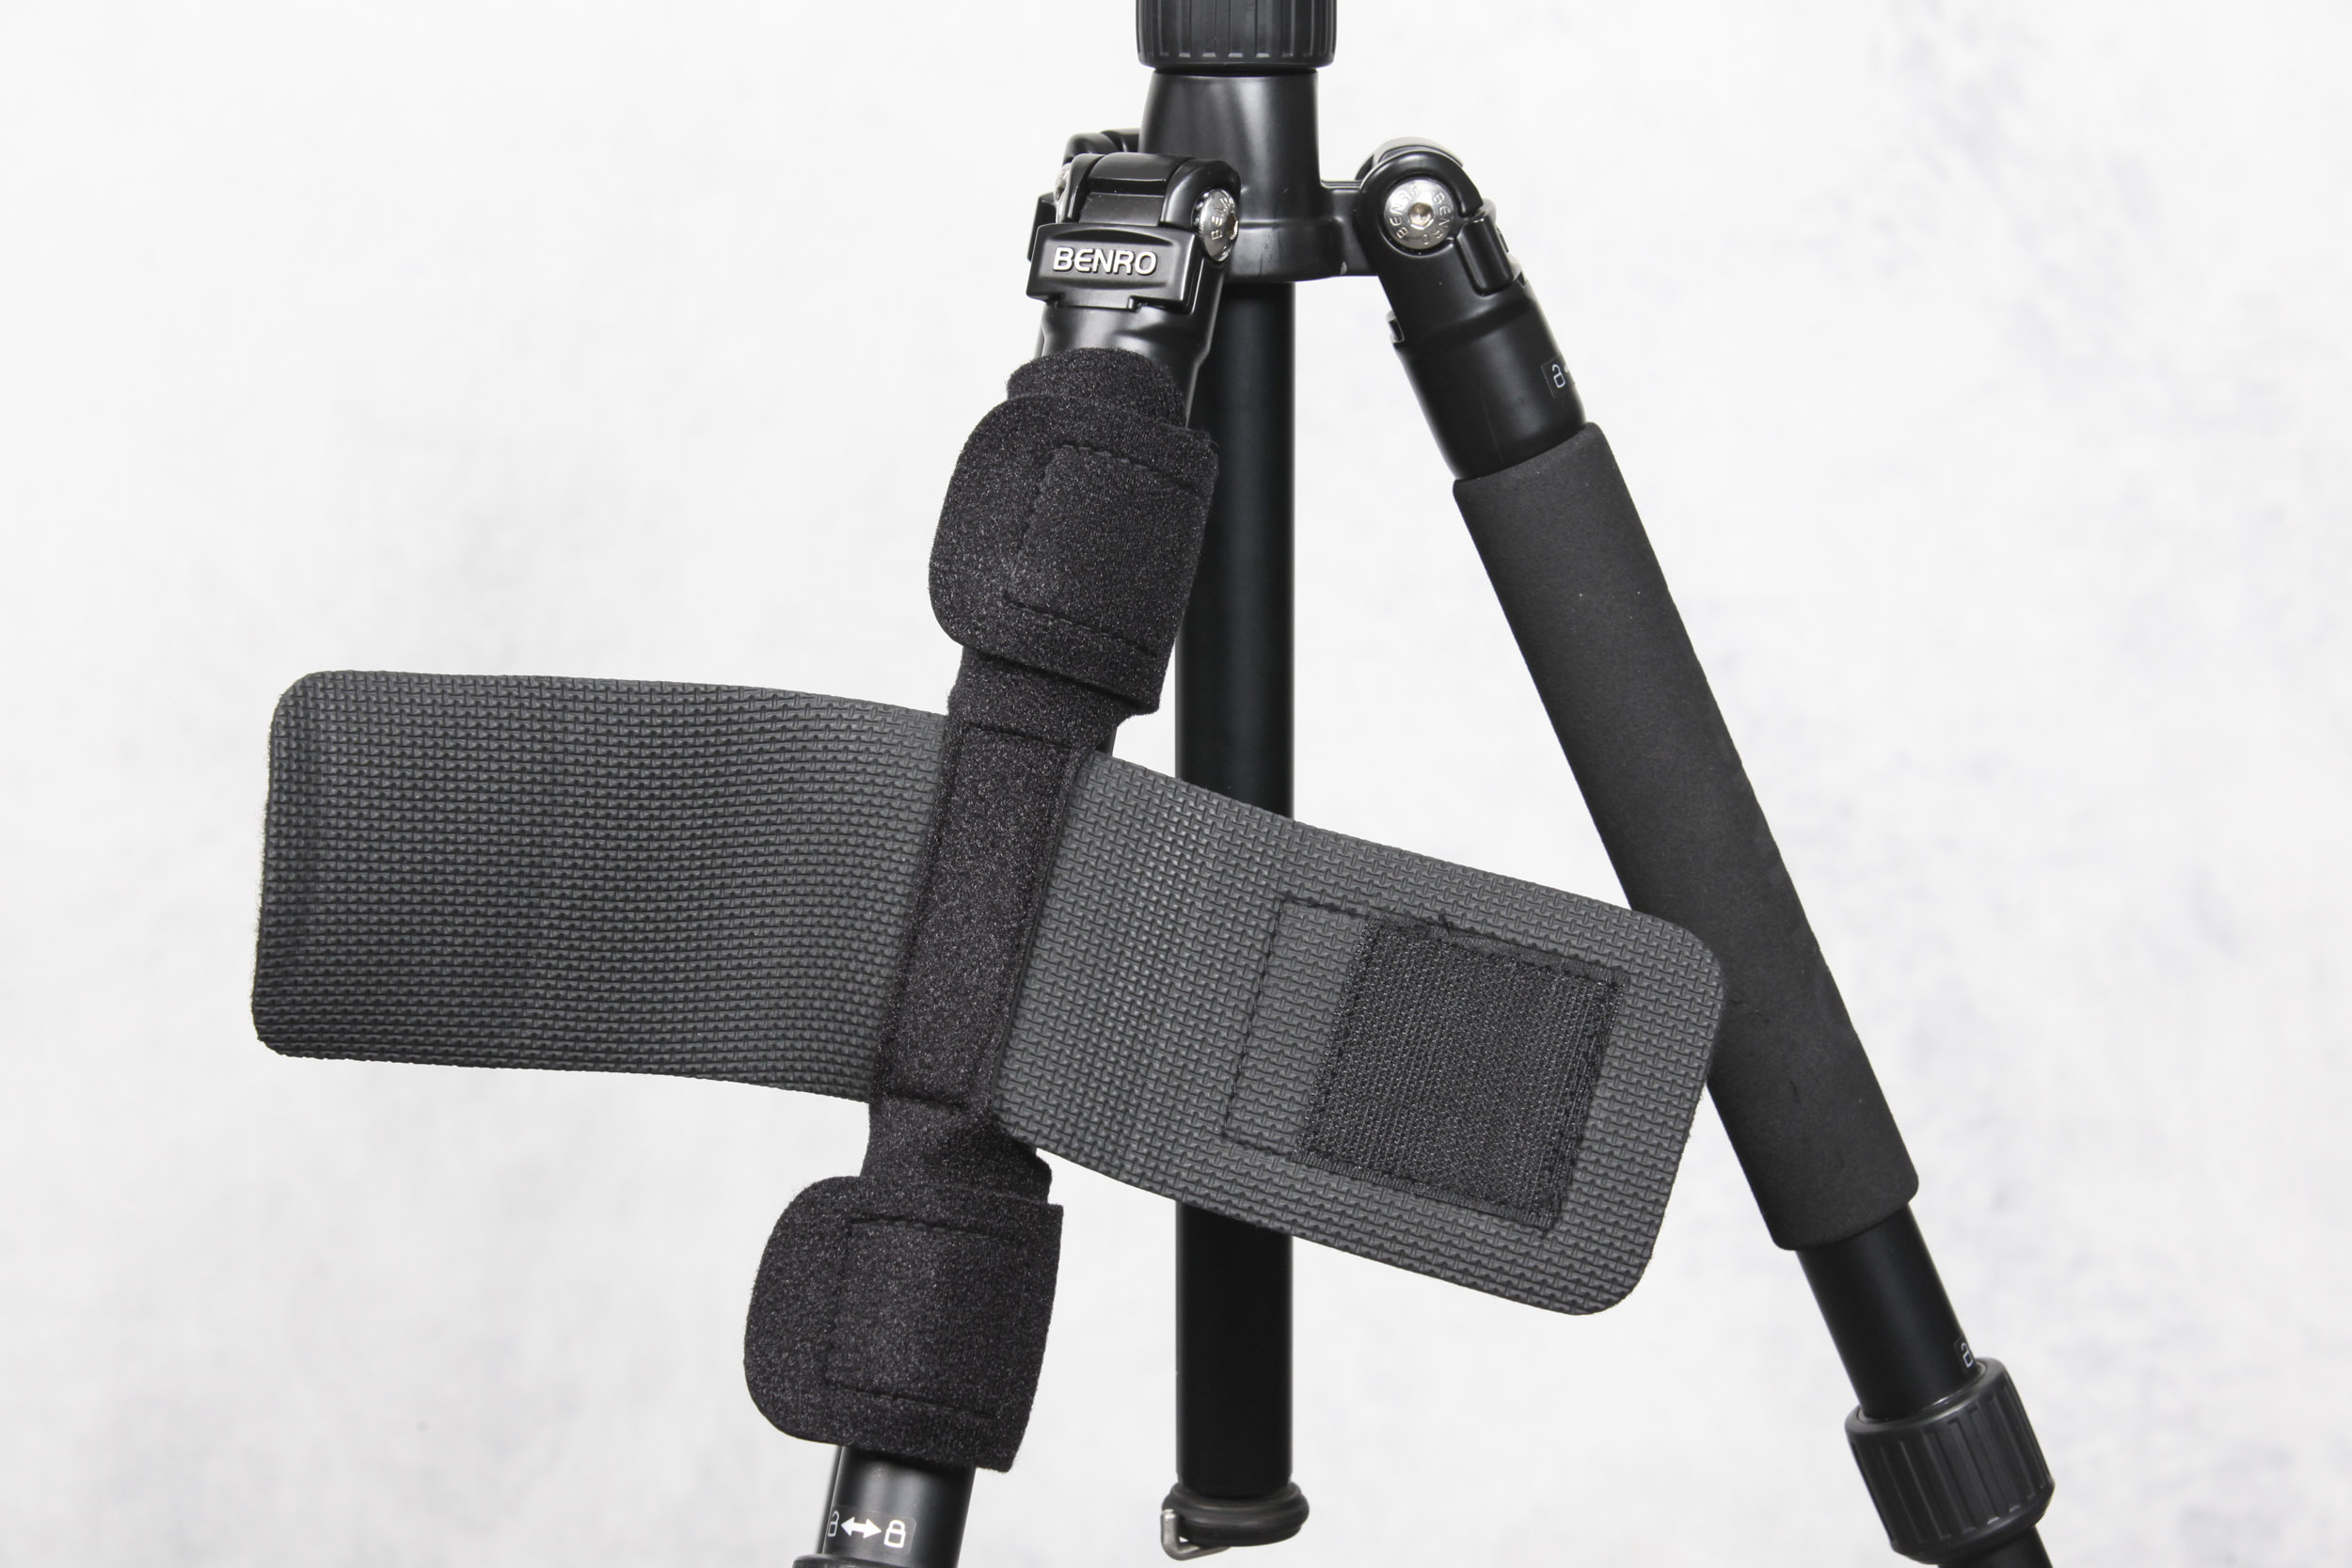
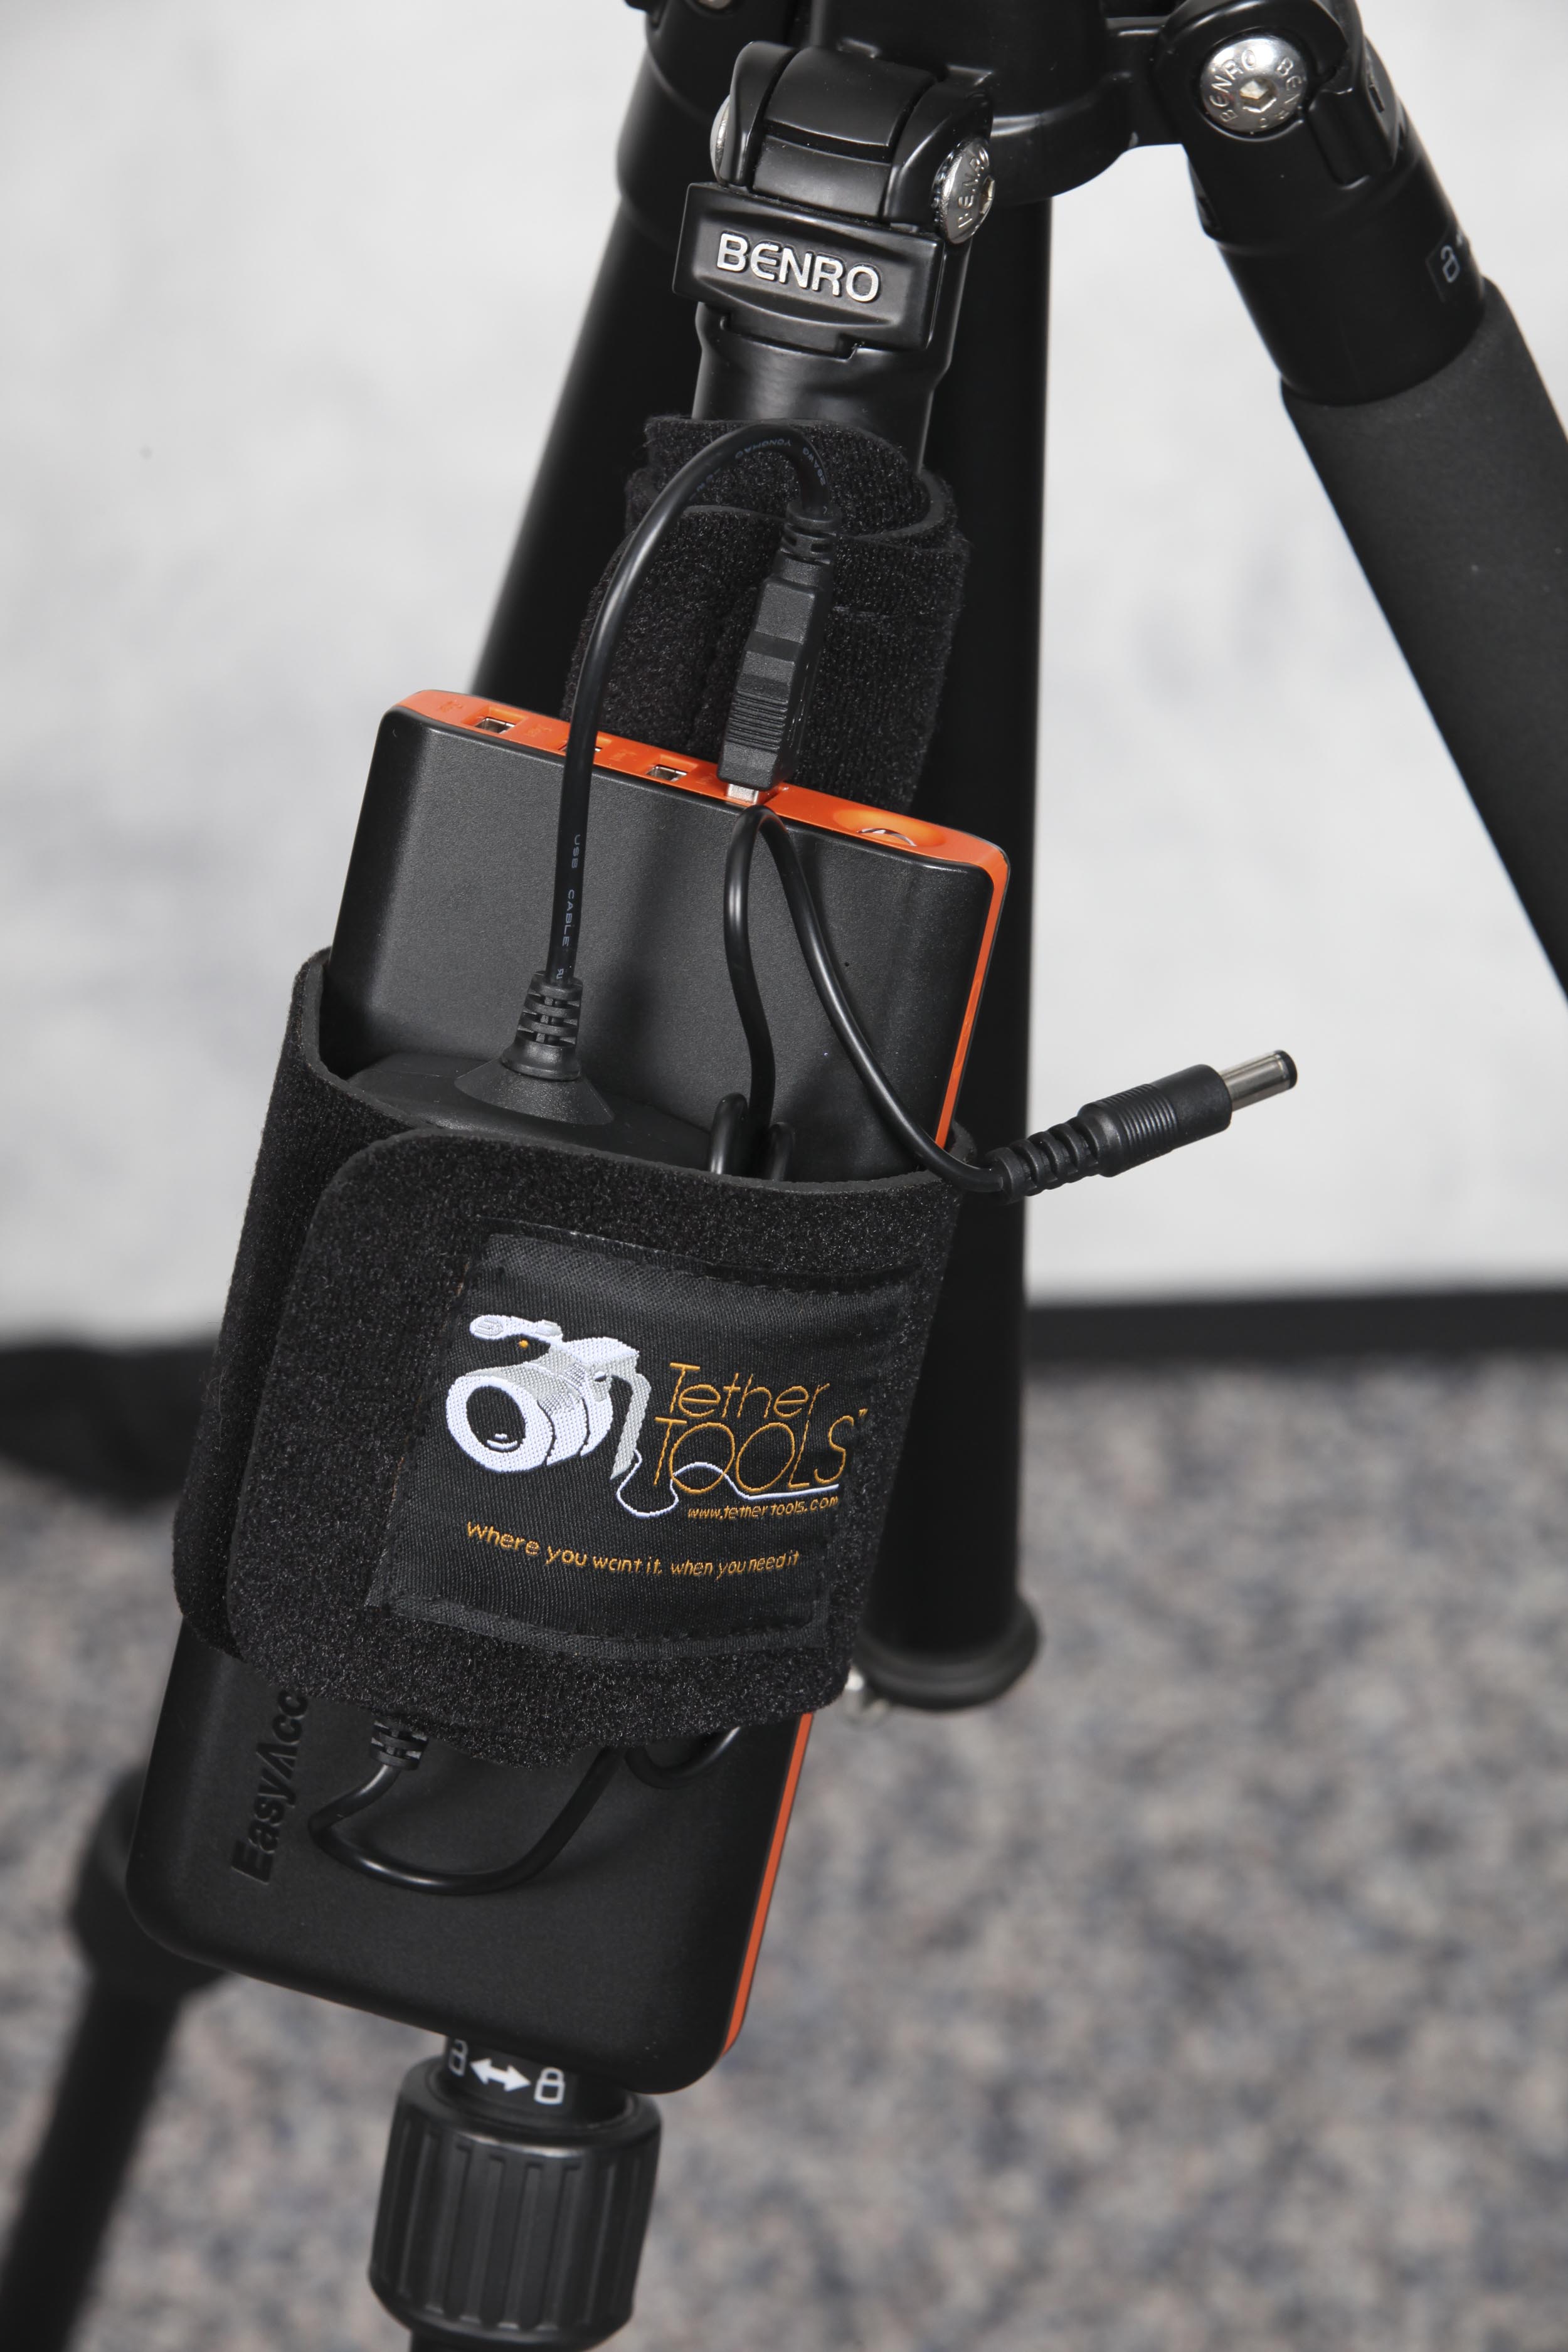
Next, grab the power bank and the Case Relay Camera Power System. For my setup, I stacked the Power System on top of the power bank (in the middle), then holding both together, wrapped the TetherTool’s StrapMoore’s strap around them. The power bank and Power System are held in place both by the StrapMoore’s strap as well as the heavy-duty GripperElastic that the StrapMoore is lined with on the inside. The StrapMoore can hold up to two pounds without a problem.
Once attached, you’ll have both the power bank and the Case Relay Power System fitted snugly to your tripod leg via the StrapMoore. Go ahead and plug the USB cable from the Case Relay Camera Power System into any of the available USB ports on the power bank. Once that’s done, your setup should look similar to what’s shown below:
The only thing left to do now is attach the Tether Tools Relay Camera Coupler and plug it into your camera where your original battery was. Keep in mind that in order for this to work on the Sony A7R (or A7), you’ll need to use the little hidden “trap door” and run the cable from the Camera Coupler through it. Shown below are some shots of how the hidden door works along with both ends of the Camera Coupler plugged in:

The “trap door” on the bottom of the A7R
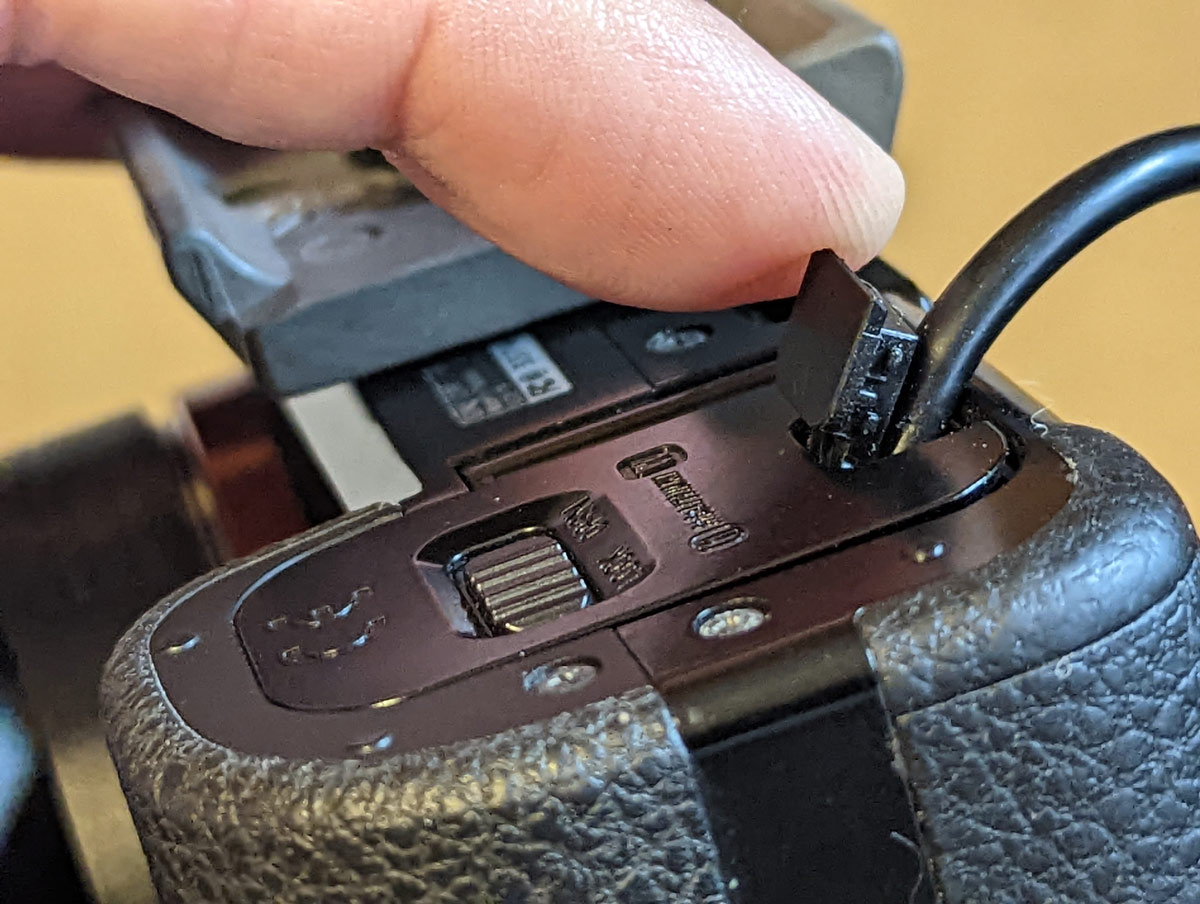
Battery “trap door” in use
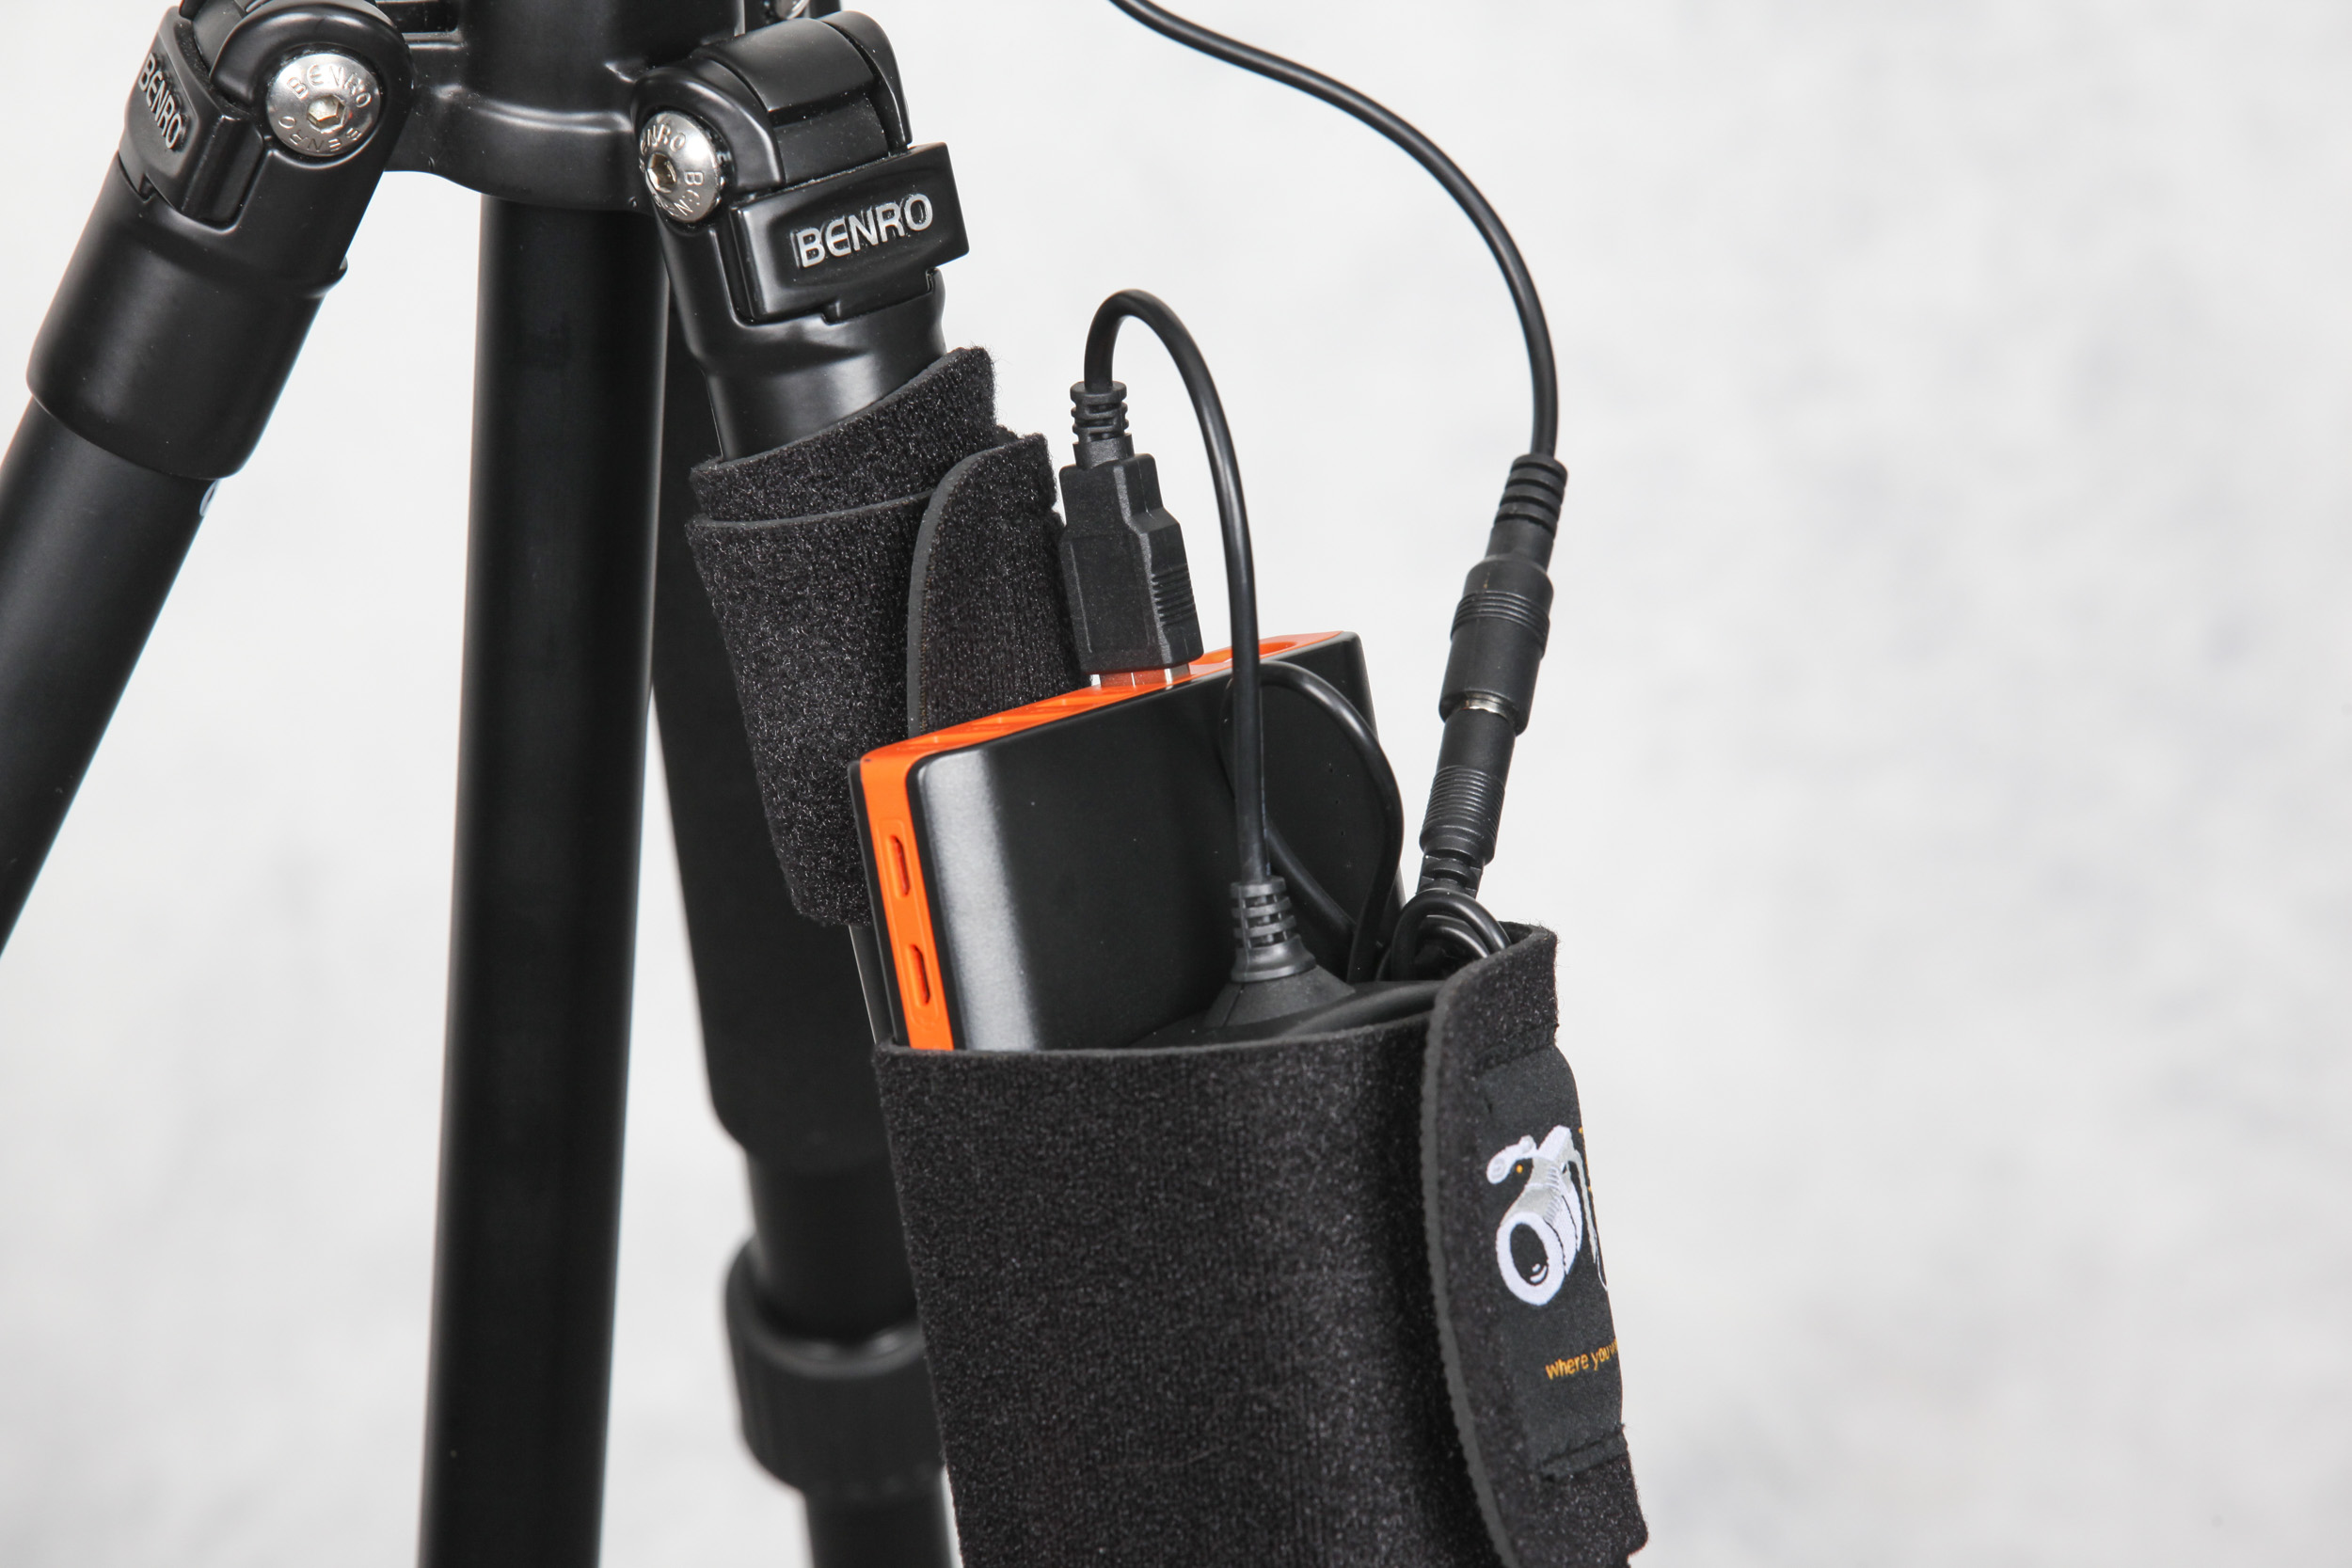
The StrapMoore and the Case Relay Power System working together!
Once the Camera Coupler is attached, you can turn your camera on and enjoy hours of hot-swappable battery life!
If you need a continuous power source for a long video shoot, that can be done as well. You can pick up a power supply that simply plugs into a wall and powers your camera via a “dummy” battery. This one will do the job. ($23)

If you need a portable, hot-show mountable, rechargeable lighting solution that also works when plugged in via USB, I recommend the LumeCube 2.0, which I reviewed right here.
That’s it! Let me know if you have any questions in the comments below!


