I finally got my hands on a piece of equipment that I’ve needed in my arsenal for quite some time – a slider! I chose the Imorden 40″ Carbon Fiber Slider, which at time of writing you can purchase for $75.95 on Amazon. I imagine you already know the capabilities of a slider (which is why you are reading this) but for those who might not know, a slider is used in videography for all kinds of cool shots. Put simply, the camera sits on platform with wheels, which sits on a set of rails. Move the platform along the rails while shooting video, and you get some cool looking, dynamic movement in your shot. The slider can also create rack focus or push shots, and can be mounted vertically, giving you the ability to create shots where the camera can follow a subject in vertical space. A slider is an essential piece of equipment for any videographer.
My biggest reason for wanting a slider is because it will greatly enhance the b-roll that I constantly find myself shooting in my day-to-day work. It’s one thing to put a camera on a tripod and point it at a subject, shoot some video and move on. It’s something else entirely when you can smoothly pan across a subject, or easily create a rack focus shot – the dynamic movement is eye catching and looks professional. You can purchase sliders in various price ranges (some cost into the thousands) but I wasn’t looking to break the bank. I just needed something well built, inexpensive, light, and sturdy. Imorden checked off all of those boxes, so I went with their 40 inch carbon fiber variant. The slider is extremely light (just 2.7 pounds) and can handle up to 13 pounds without additional bracing (more info on bracing later in this post). The build on the slider is extremely good. The five wheels on the carriage (called the “Triangle Stabilization System” by Imorden) along with the carbon fiber tracks provide a nice, smooth surface for the camera to move along. I use the slider primarily with a Sony A7R and Sony 16-35mm lens.
What Ships with the Slider
The slider ships with a carrying bag (which can be slung over your shoulder), two allen wrenches, a micro fiber cleaning cloth, and a 3/8″ to 1/4″ adapter (which proved to be very handy).

The legs on either side can be easily folded up for putting the slider back in its carrying bag, or can be adjusted to raise or lower the slider. They can also be adjusted to work on uneven terrain.
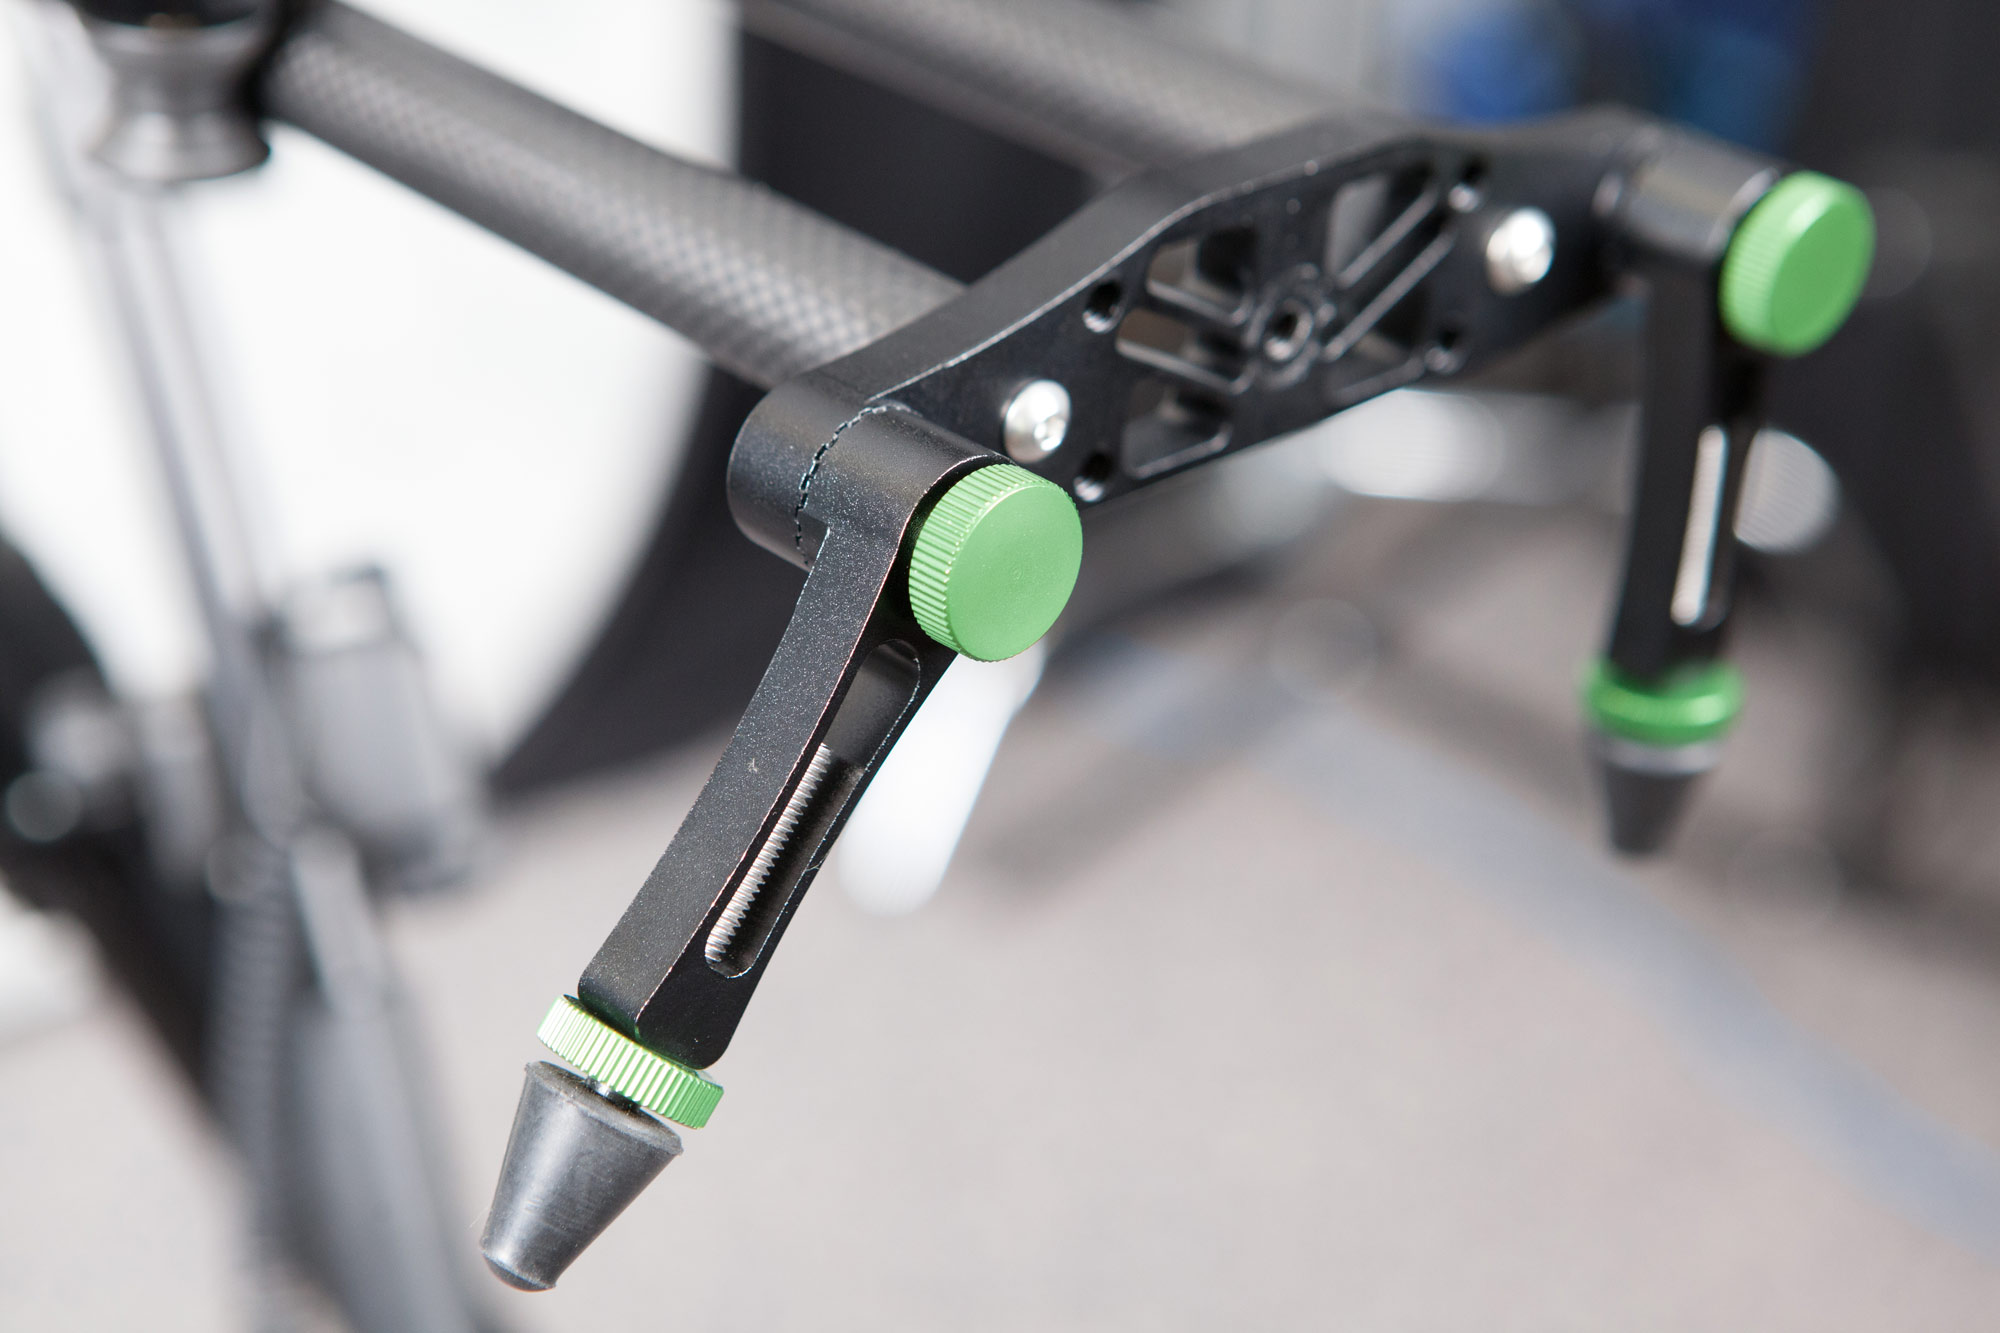
Imorden Carbon Fiber Slider Legs
The mounting plate has one 3/8″ mounting hole in the middle as well as two 3/8″ thread mounting holes and two 1/4″ thread mounting holes on either side.
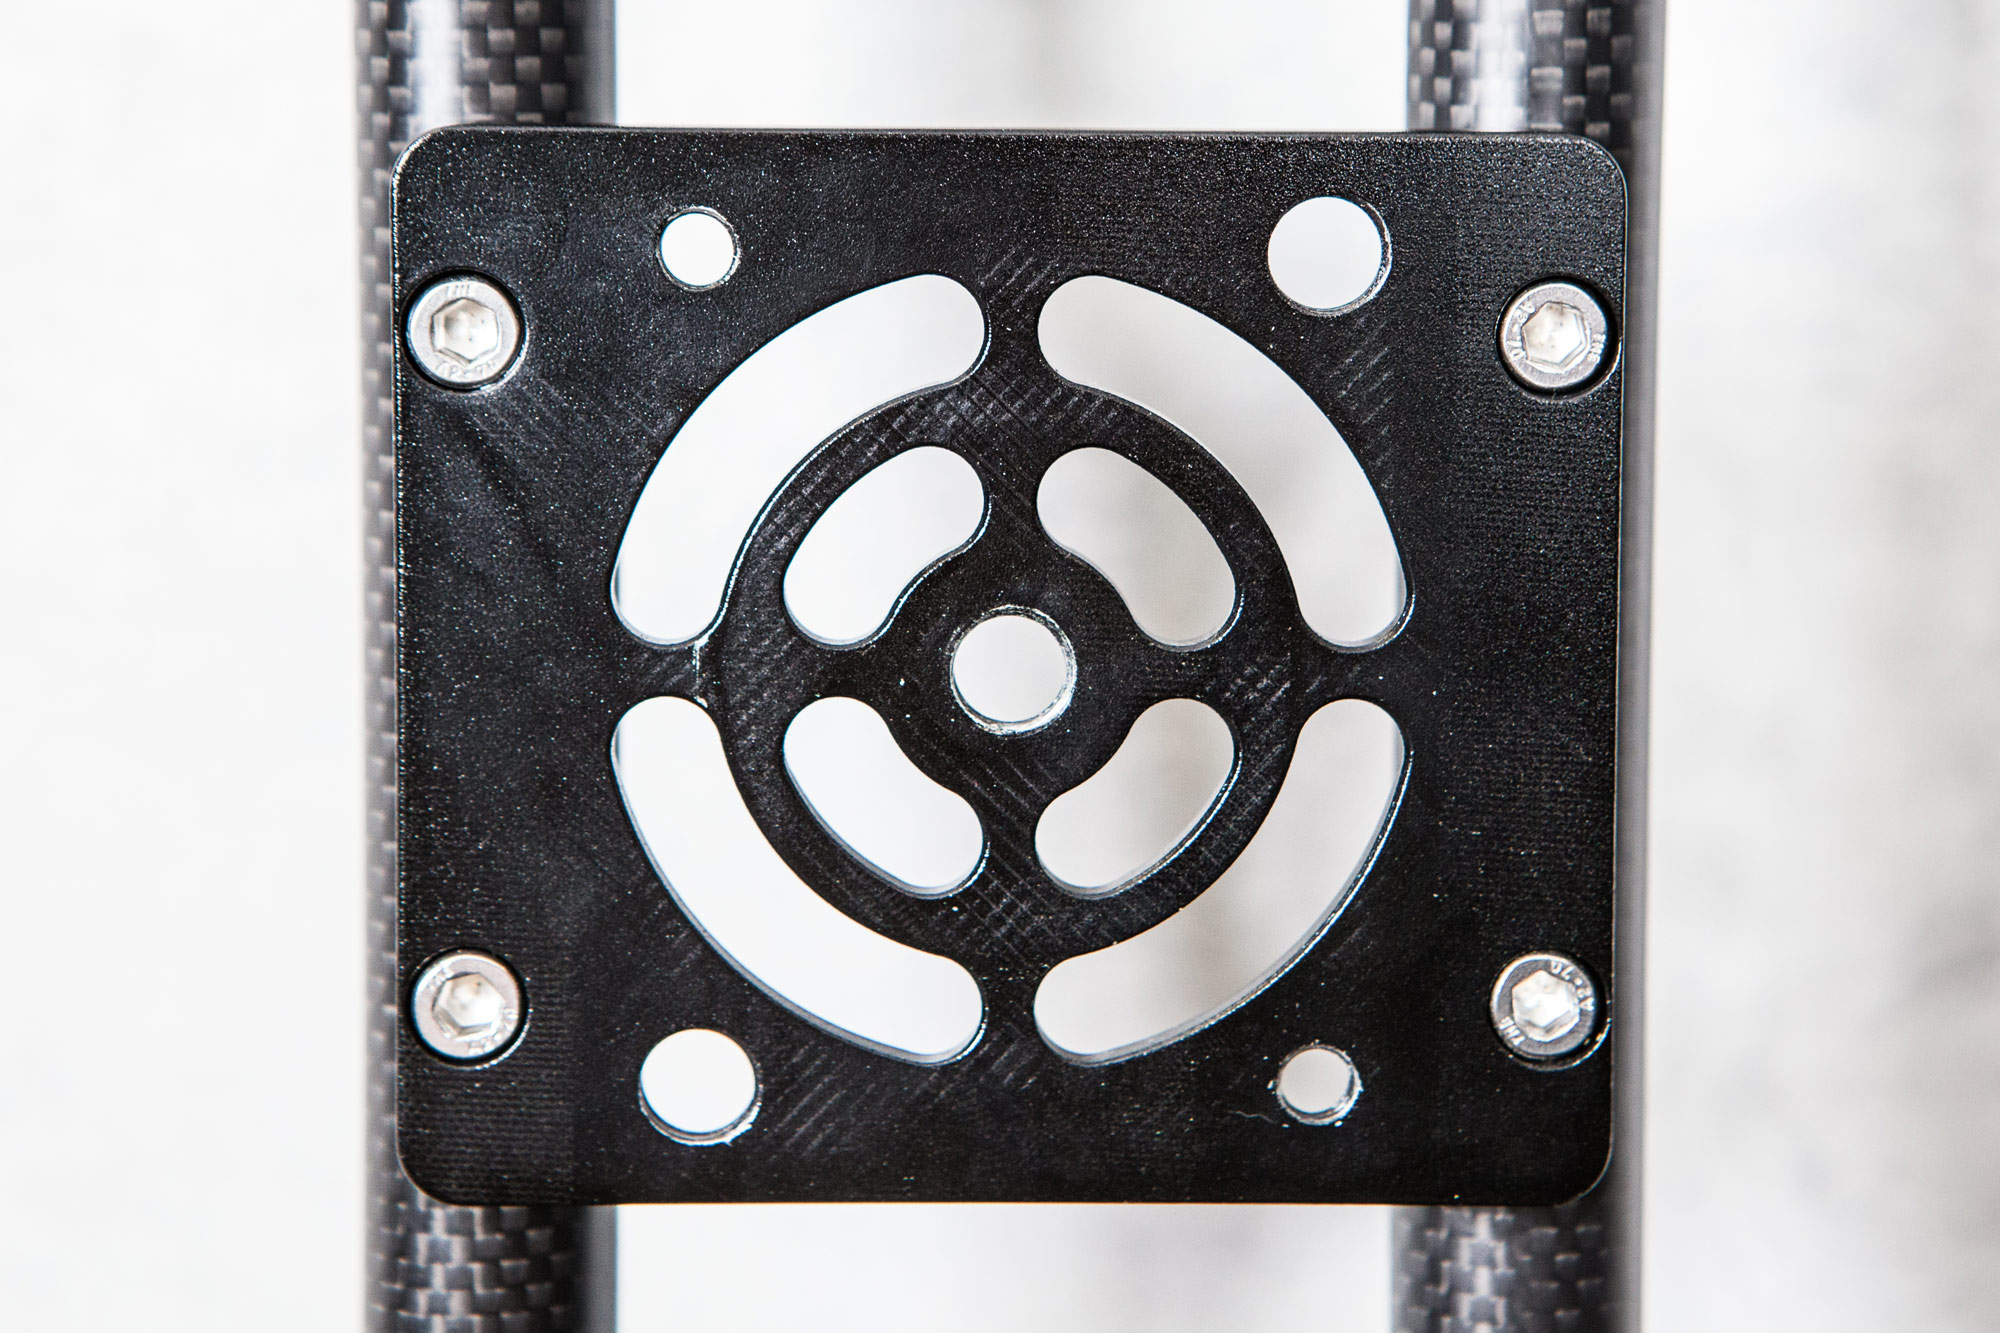
Imorden Carbon Fiber Slider Mounting Plate
The 5.5” x 5.5”carriage with 1/4” thread and rubber cushion supports a wide range of cameras or ball heads and will also support mounting accessories with its two 1/4″ and six 3/8″ thread holes. Example of other small accessories would be a friction arm (which would allow you to attach more devices, such as another camera, a microphone etc).

Imorden Carbon Fiber-Slider Carriage
The carriage also features a bubble level.

Slider carriage bubble level
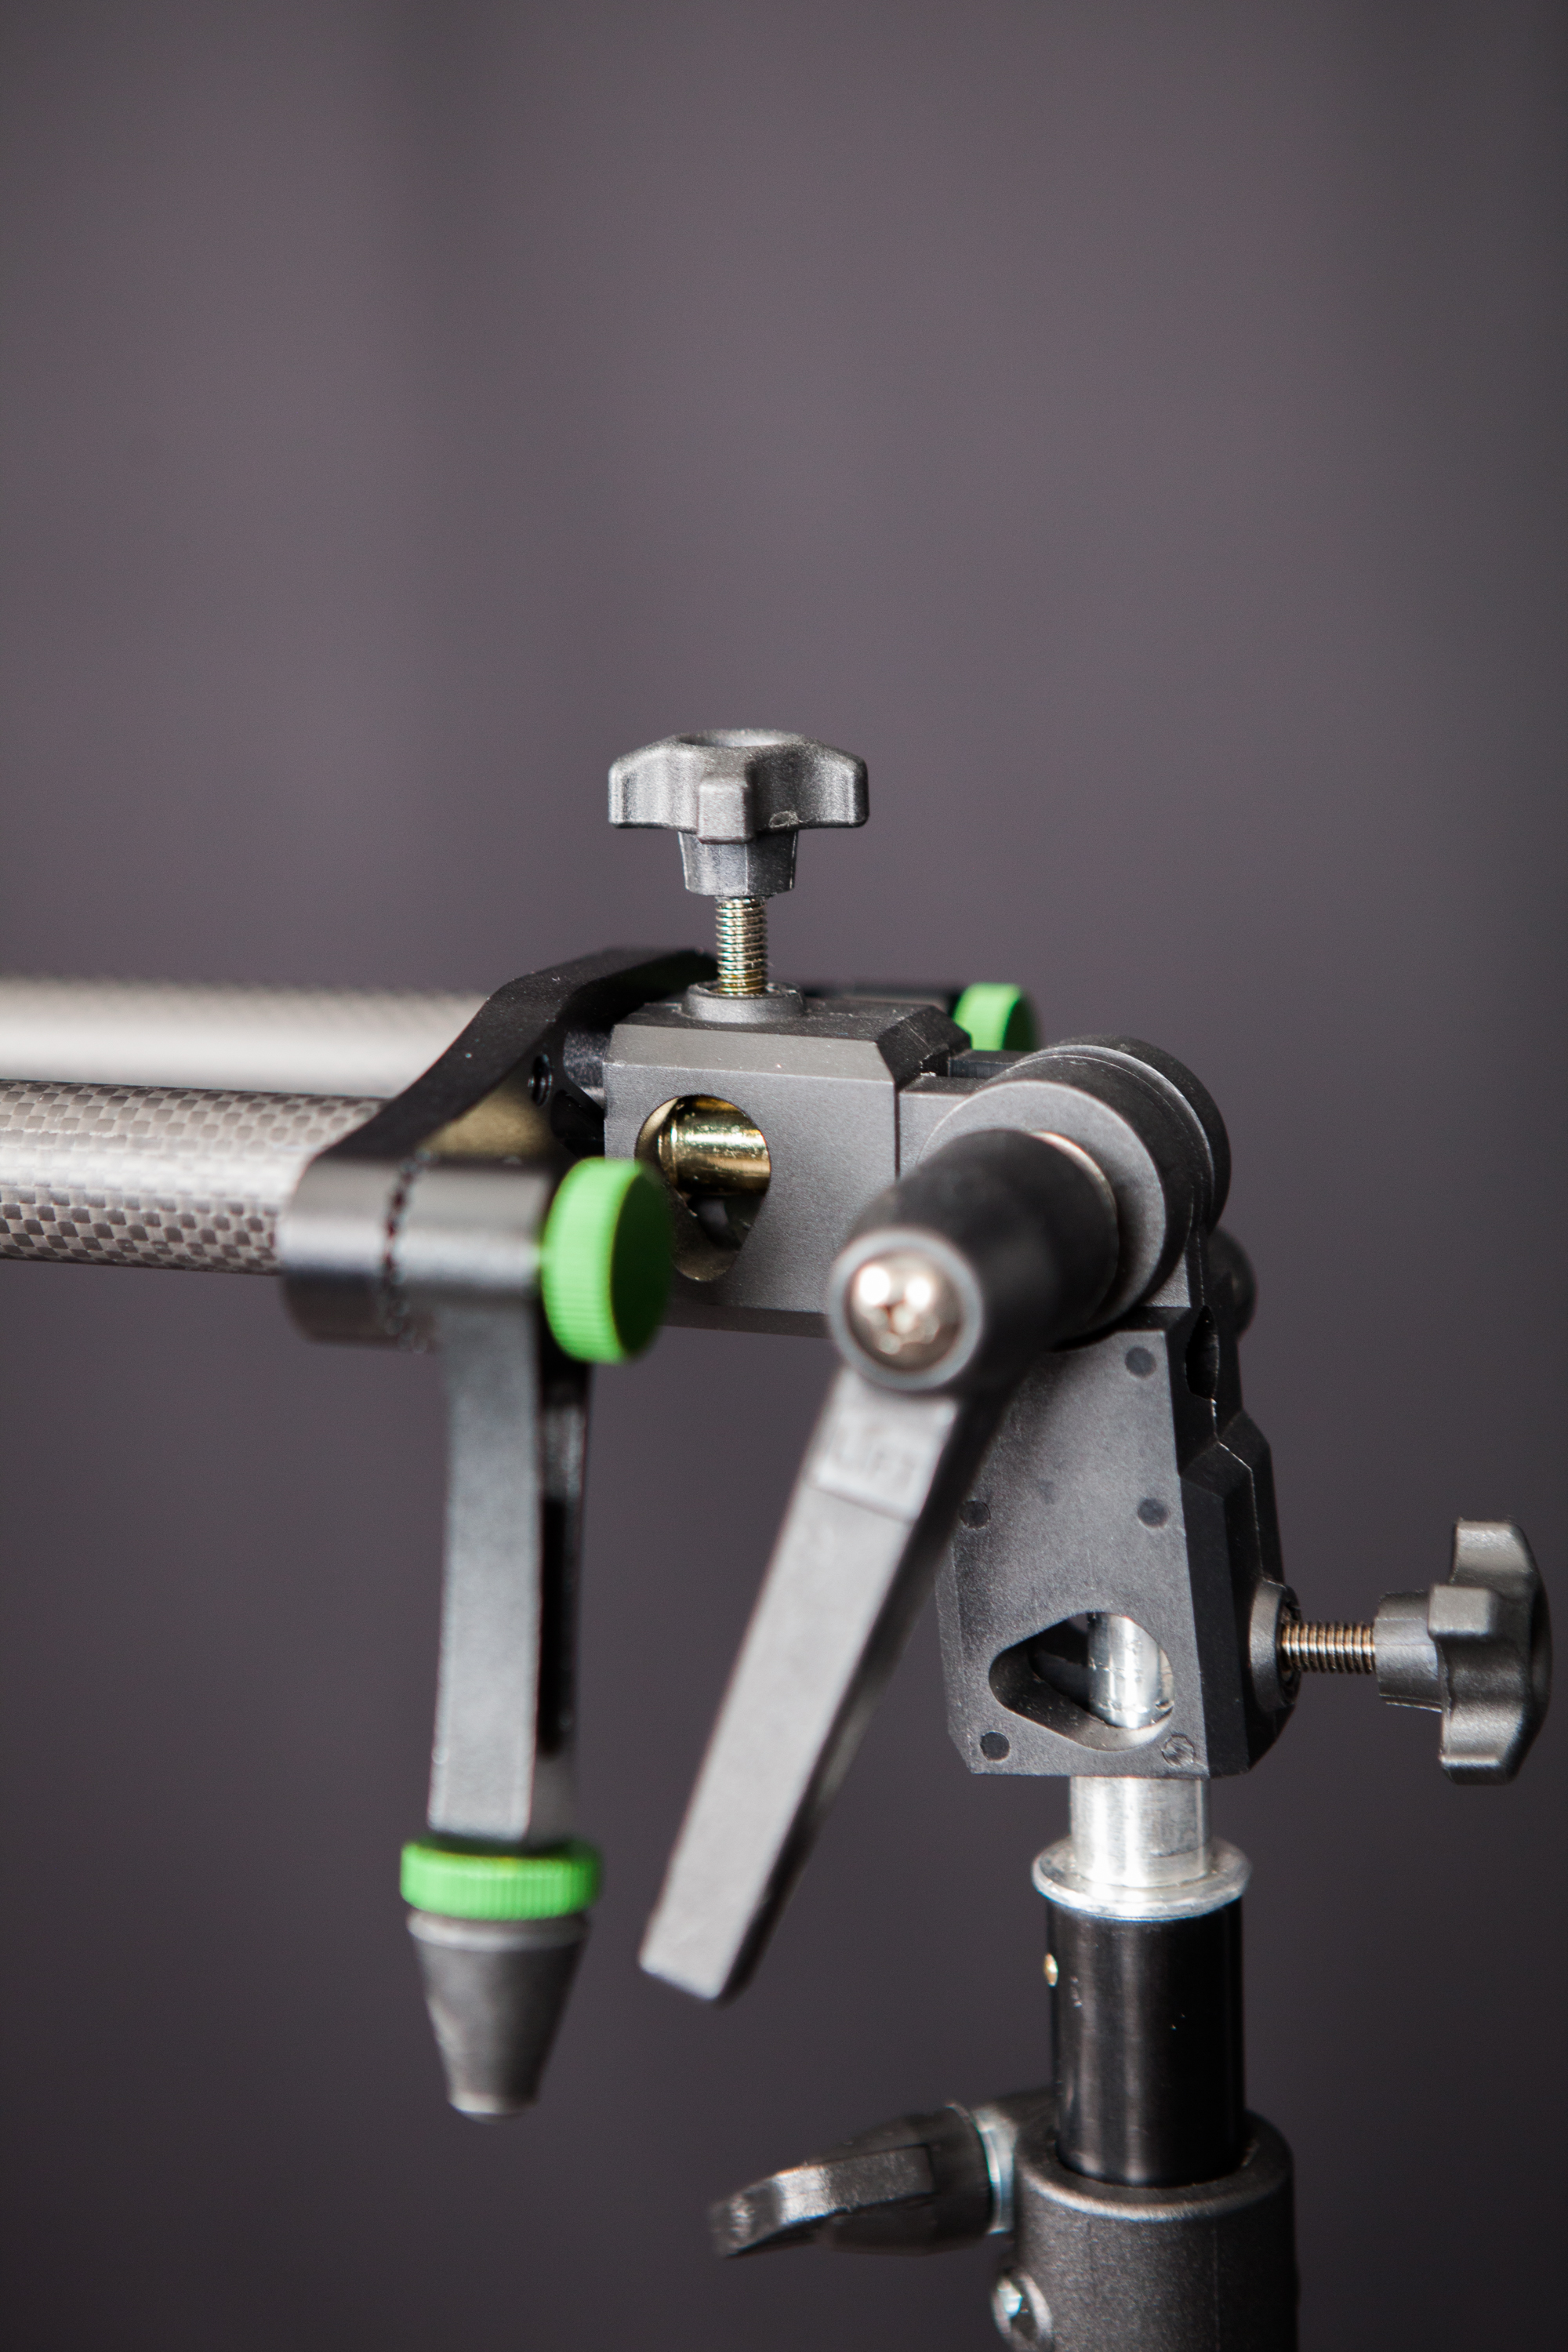
Also included is a tightening screw (basically a brake) with a rubber tip. Great for keeping the mounting plate from moving, but not so great as a tensioner.

Imorden Carbon Fiber Slider Tightening Screw
Setting up with a Tripod
The slider is easily mounted to a tripod. Simply attach the mounting plate to the tripod via either the 1/4″ or 3/8″ mounting hole, and you are good to go.
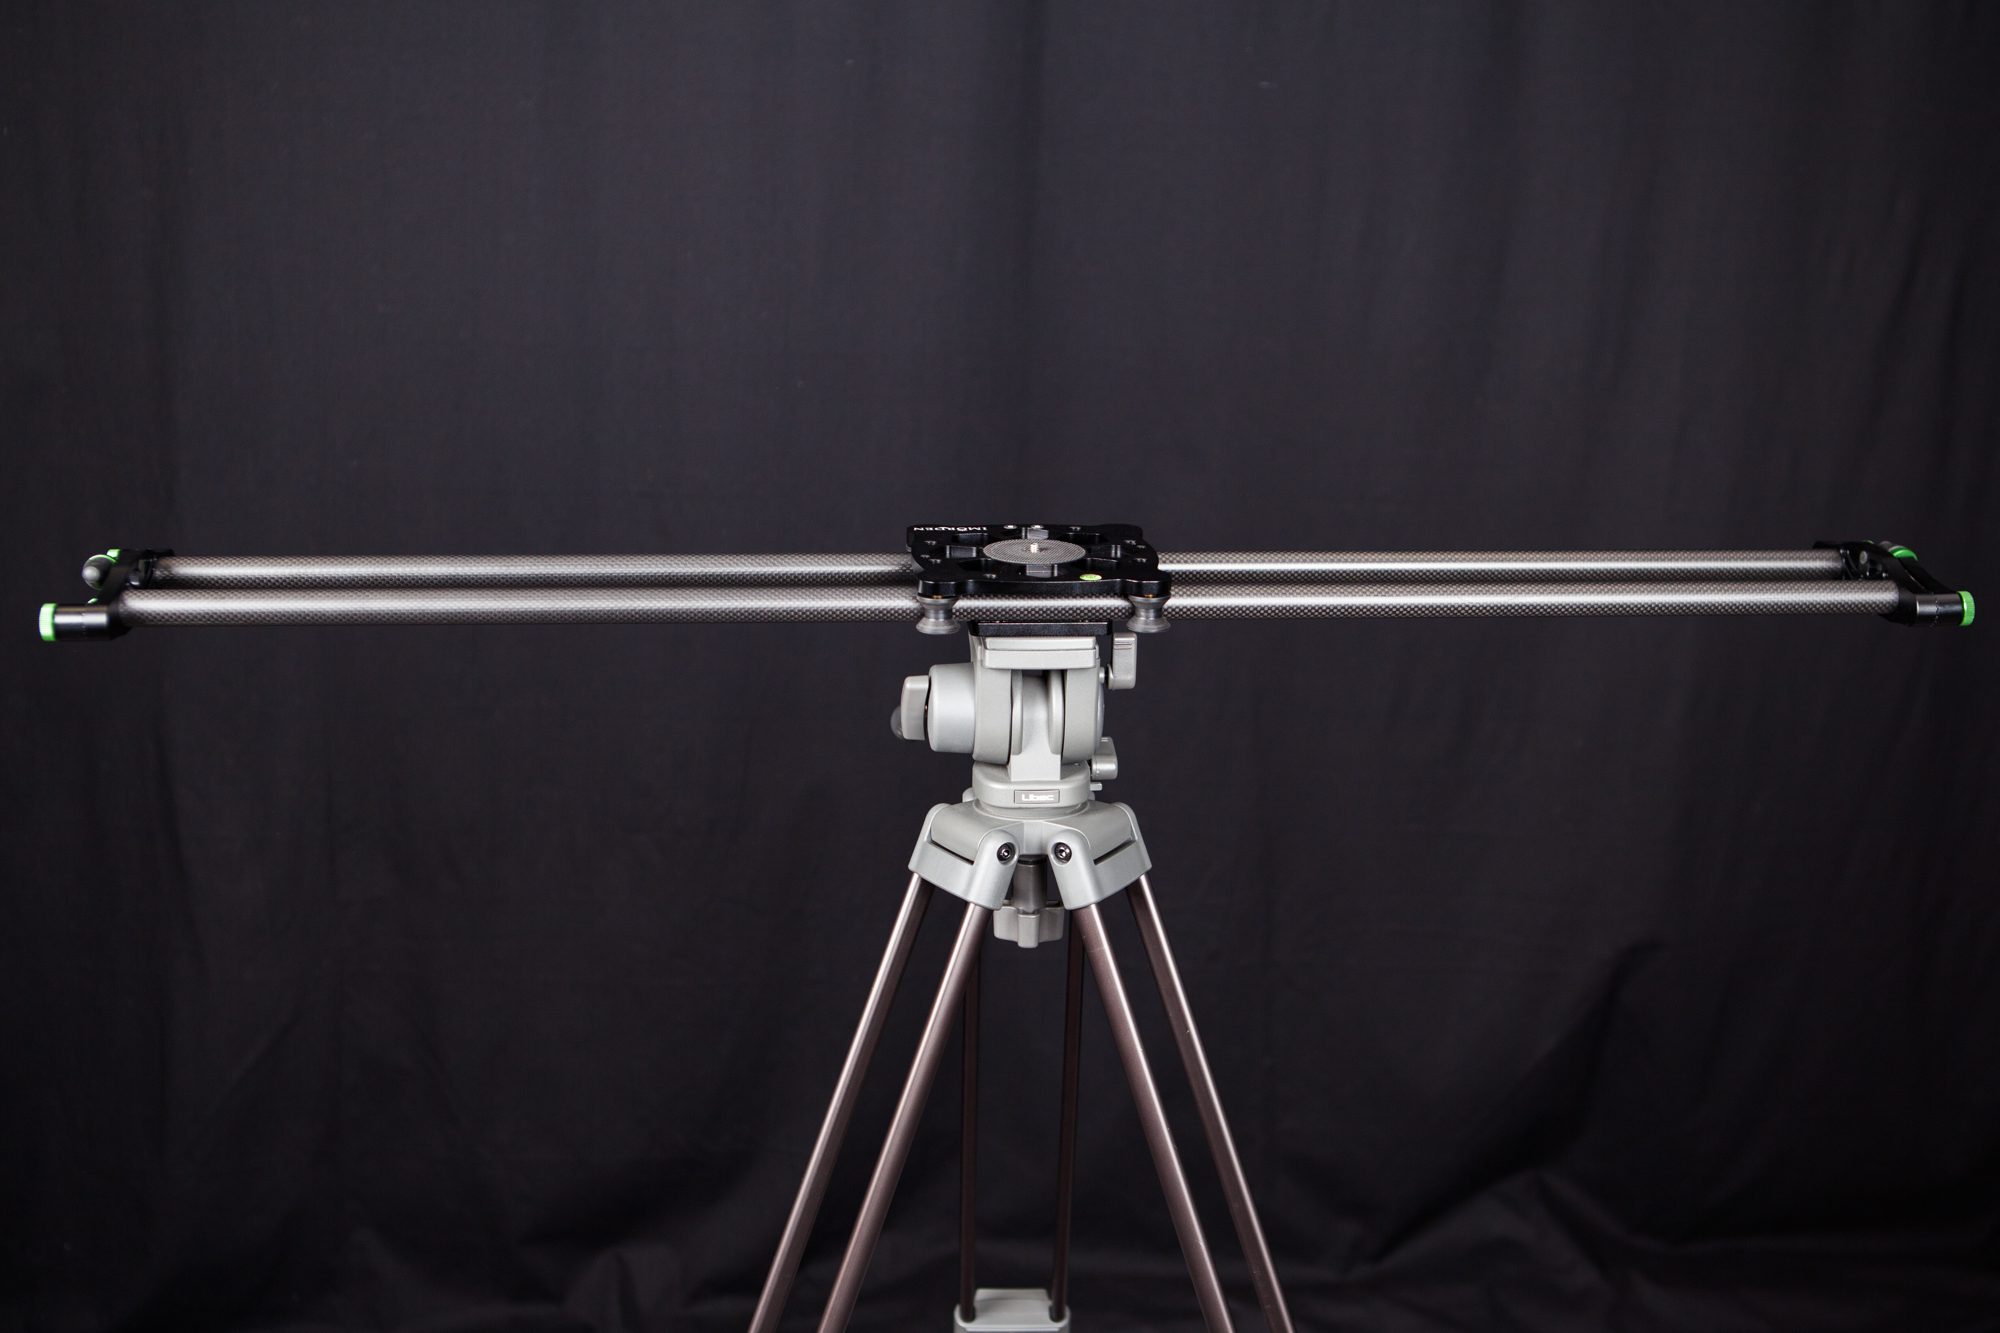
Imorden Carbon Fiber Slider on Tripod
A camera can be mounted directly to the slider’s carriage at this point. However, I’d recommend mounting your camera to the slider using a fluid head or a ball head. Shown below is a camera attached directly to the slider’s carriage.
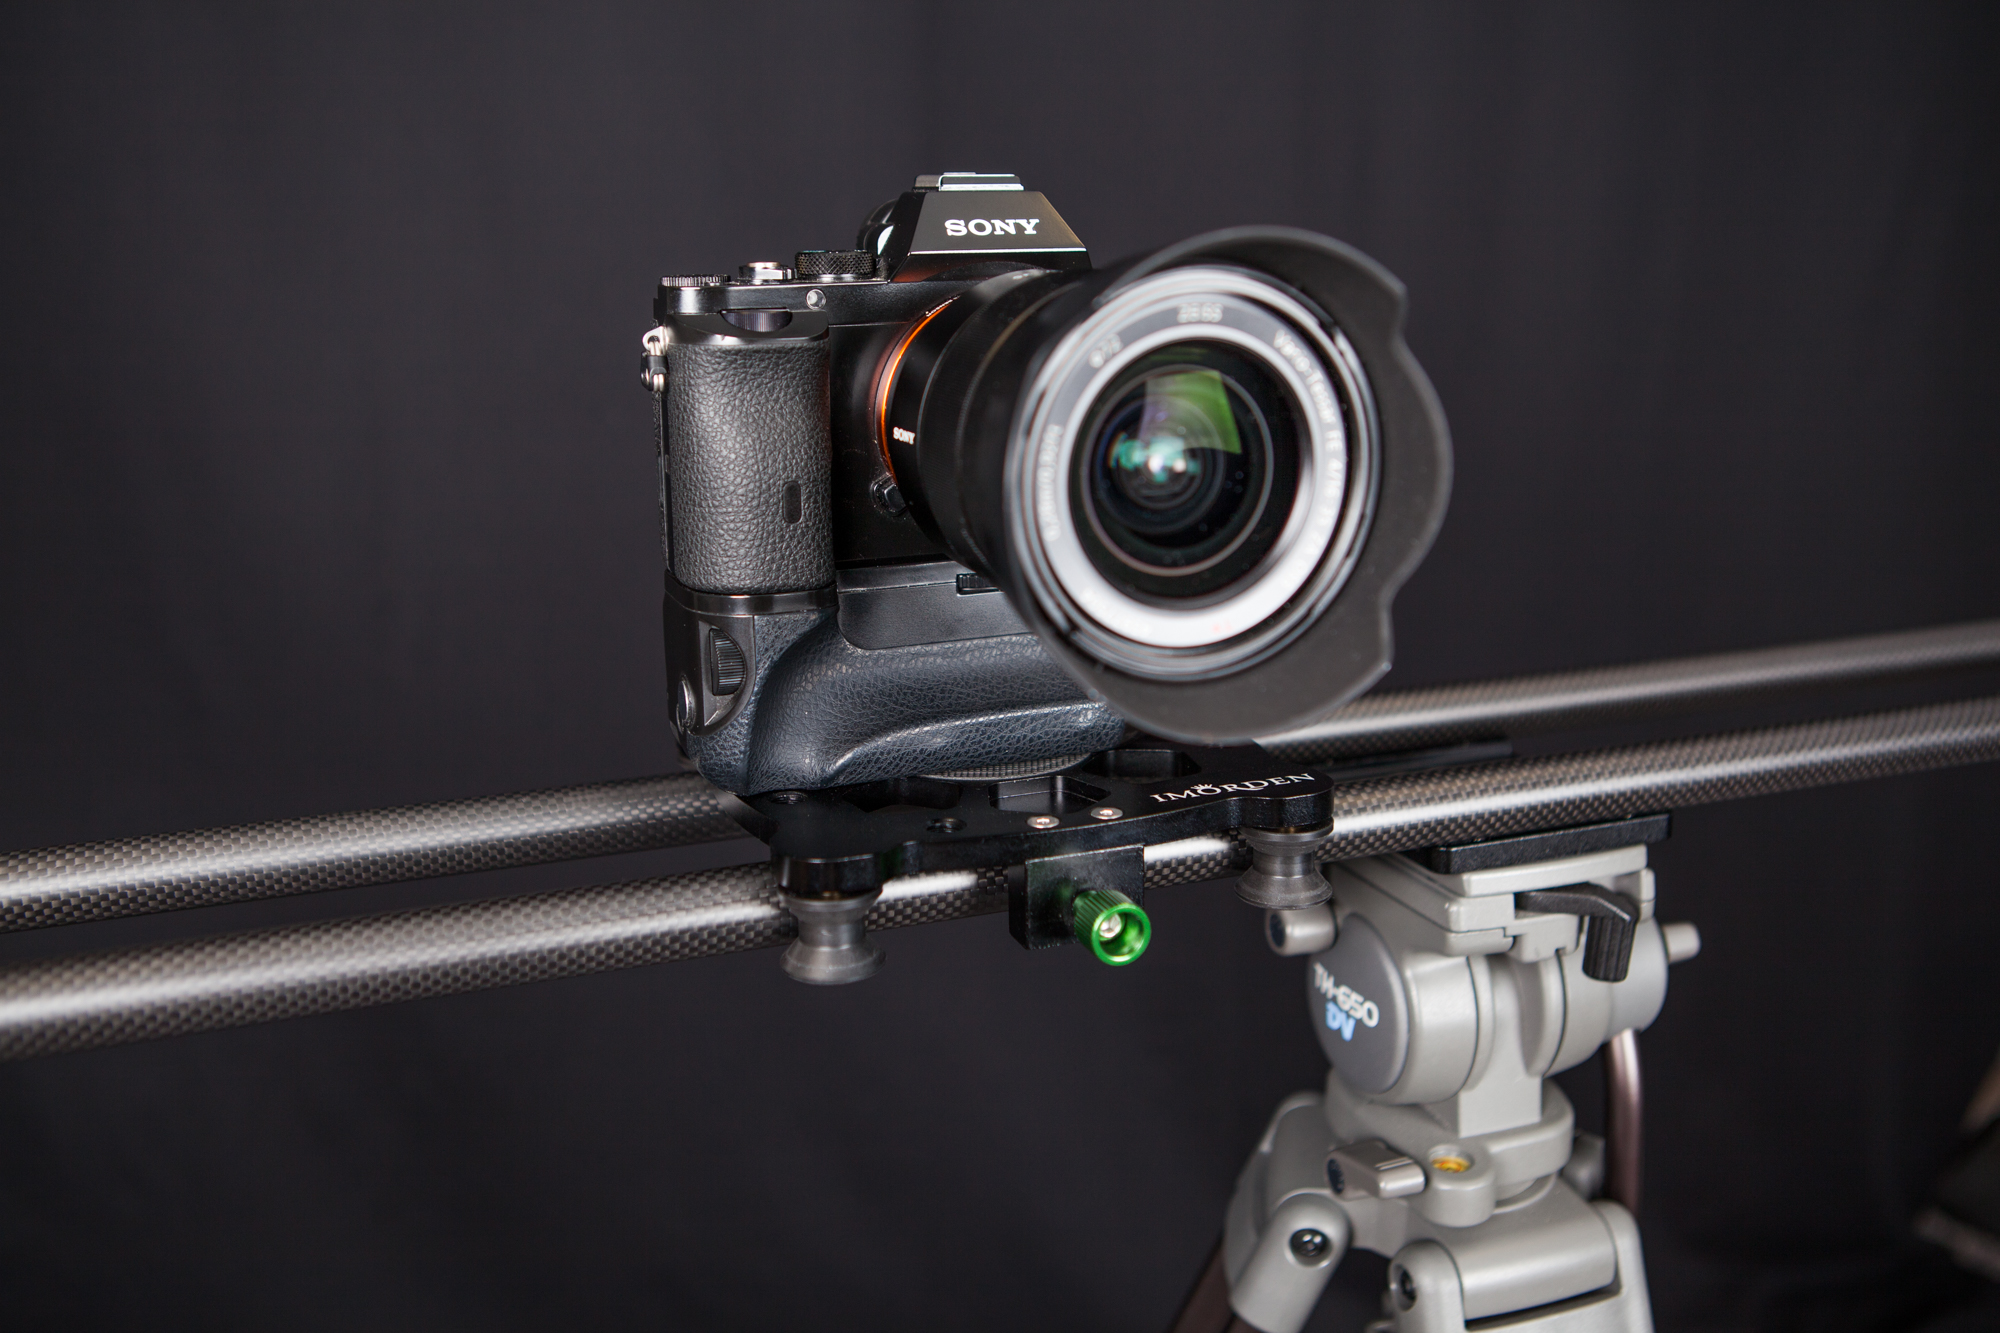
Imorden Carbon Fiber Slider with camera directly attached
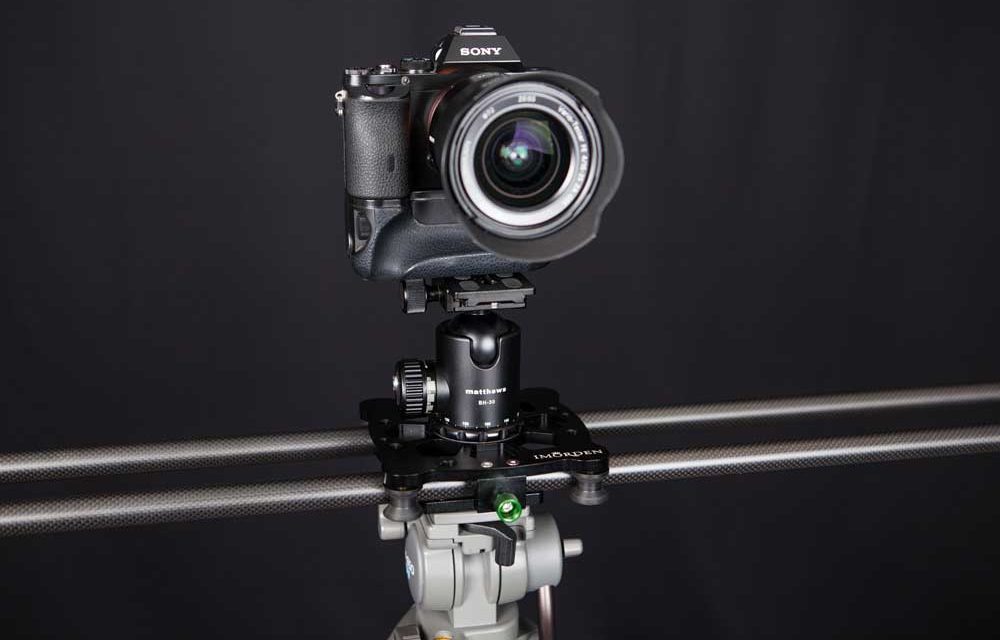
I used a ball head to attach my camera to the slider, and that’s where the provided 3/8″ to 1/4″ adapter can come into play. My ball head has a 3/8″ hole, but the screw on the mounting plate is 1/4″. Not a problem, just screw the adapter into the ball head, then screw the ball head onto the plate.
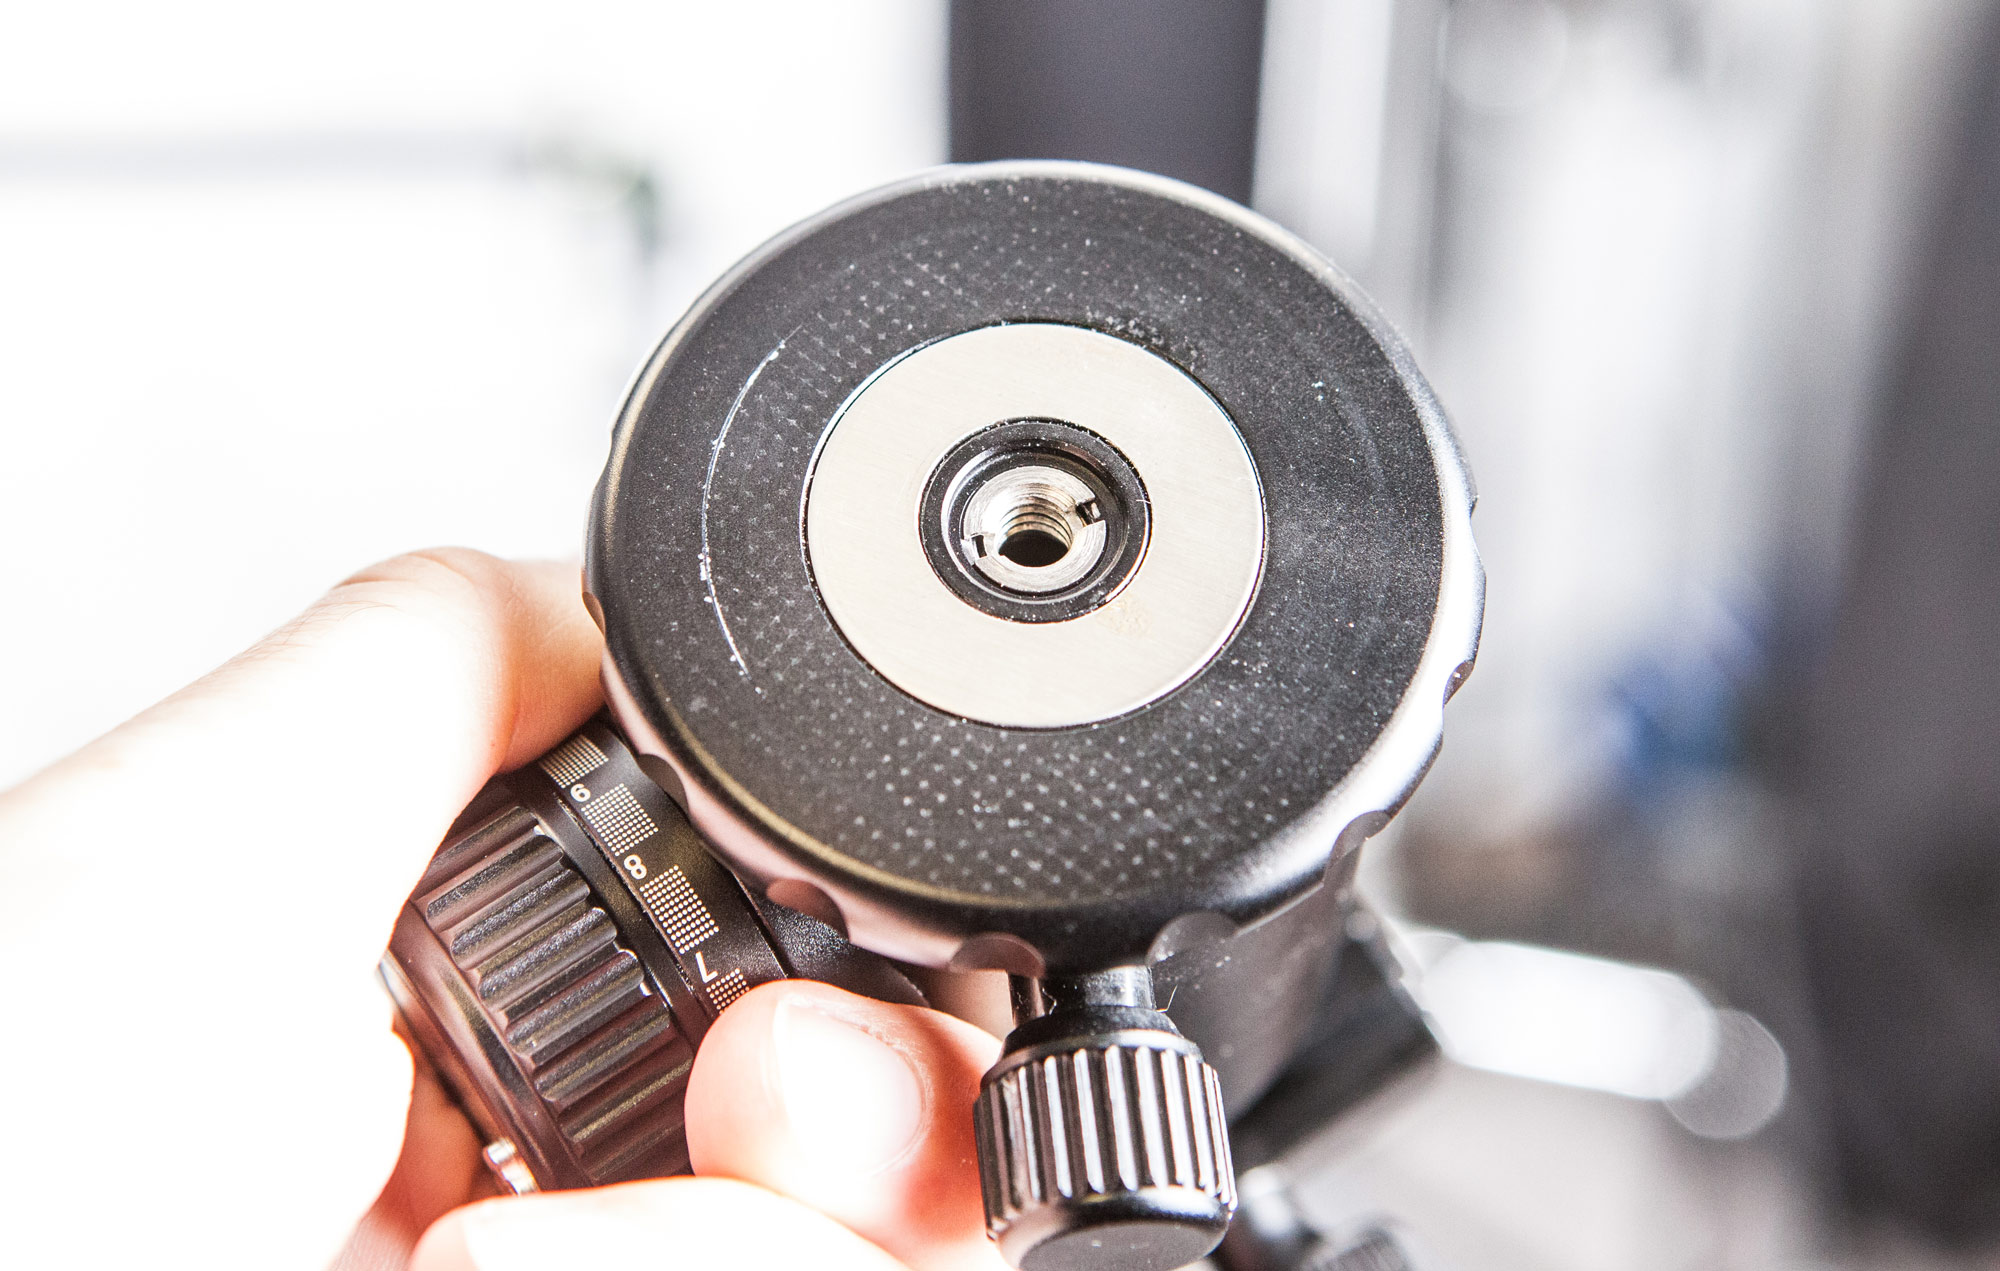
Provided 3/8″ to 1/4″ adapter used on a ball head
After that, just put the quick release plate from the ball head on your camera, and mount the camera to the head. In minutes, you’ll be up and running.
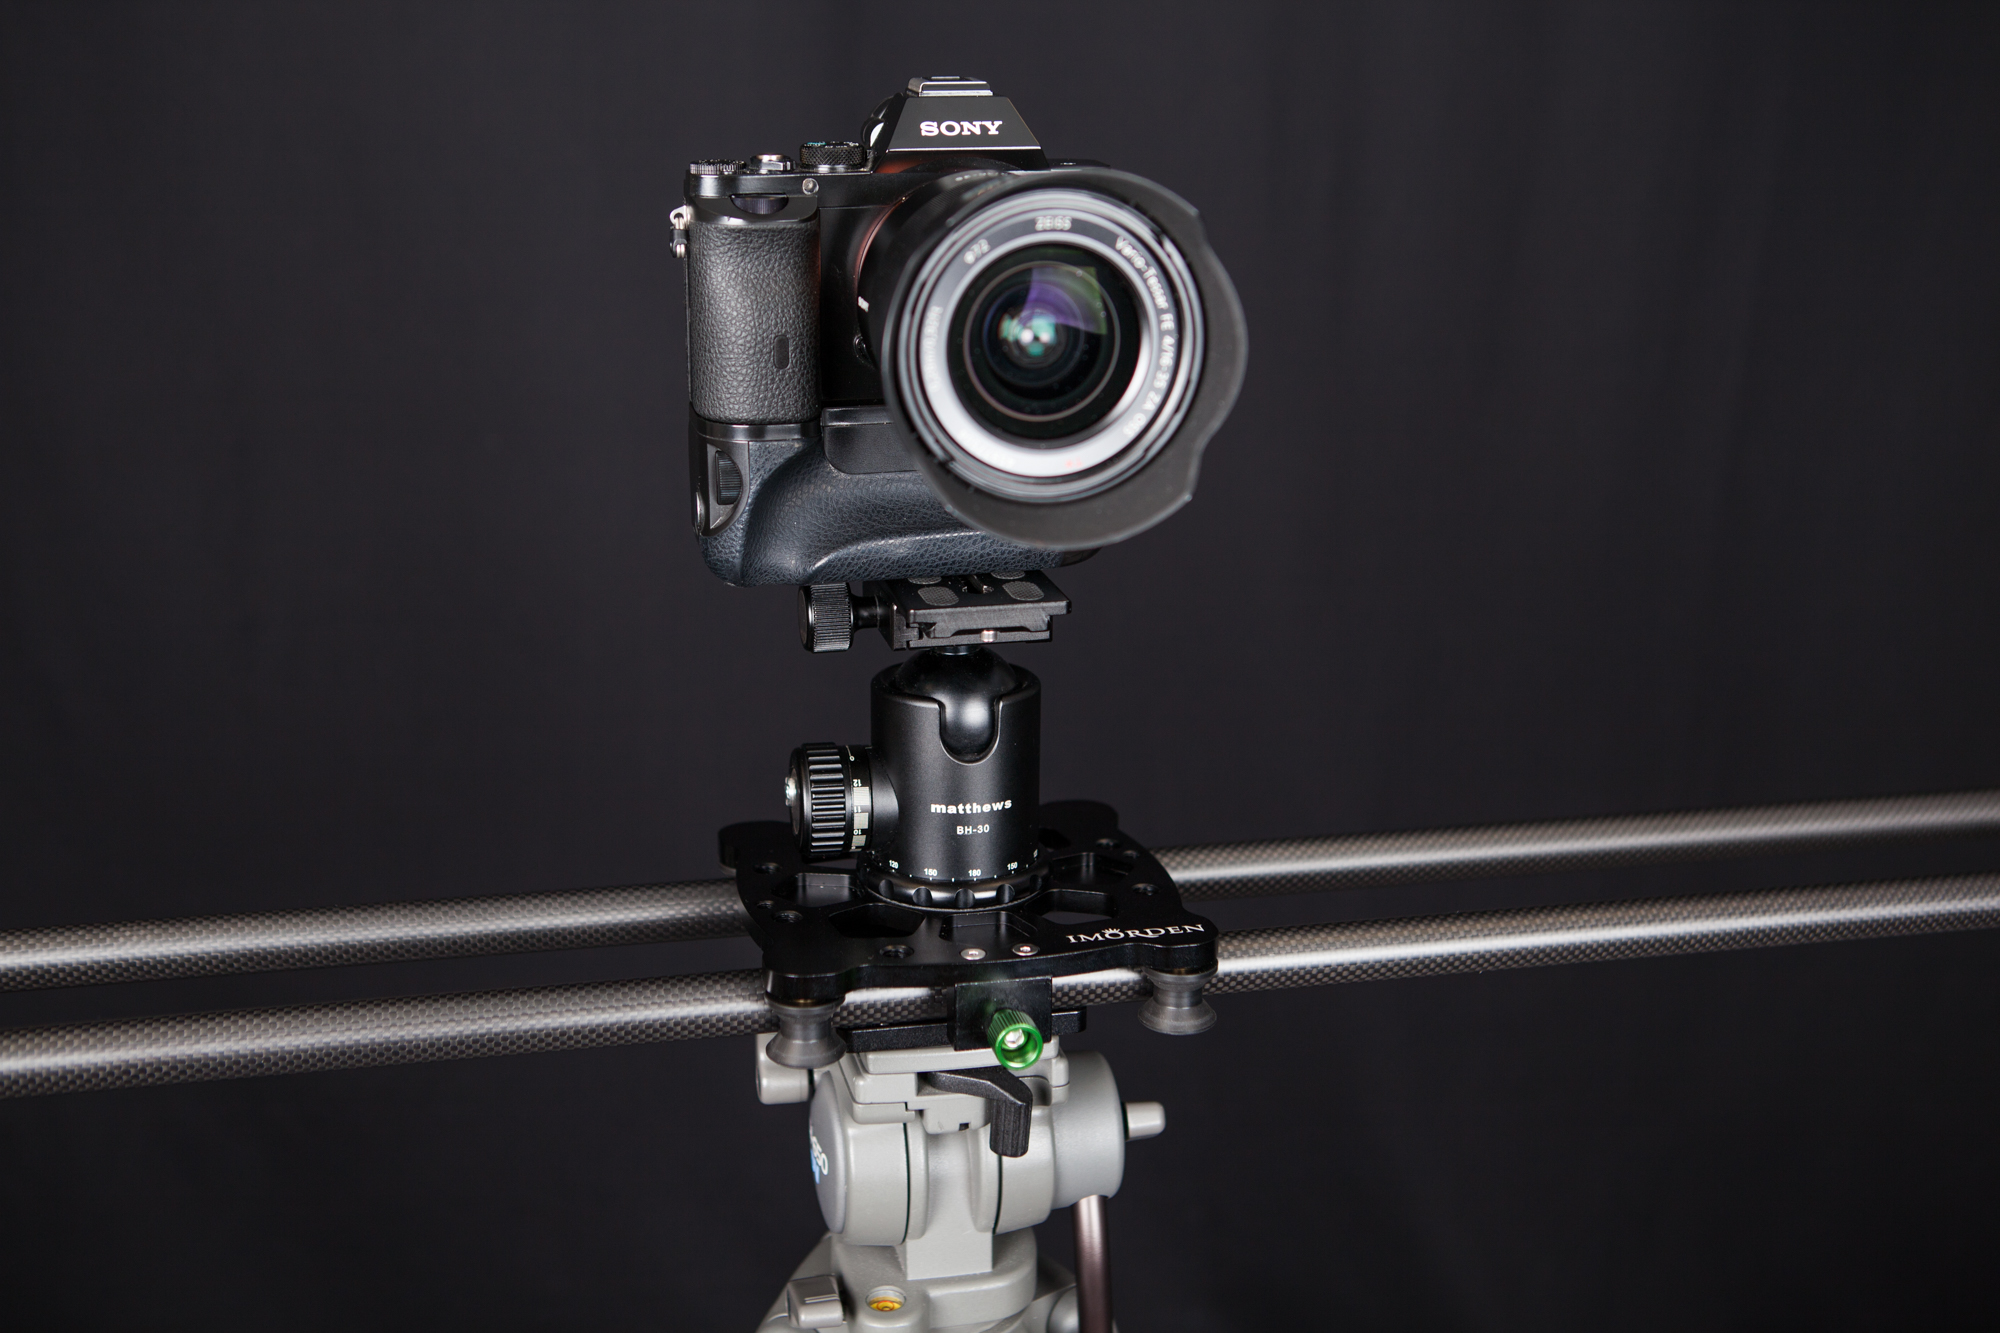
Imorden Carbon Fiber Slider with ball head and camera
One thing to note here is that if you attaching the slider to a tripod that uses a quick release plate, you may run into an issue where the slider isn’t entirely locked into place. If this happens, it’s recommended that you use two screws to attach the slider to the quick release plate.
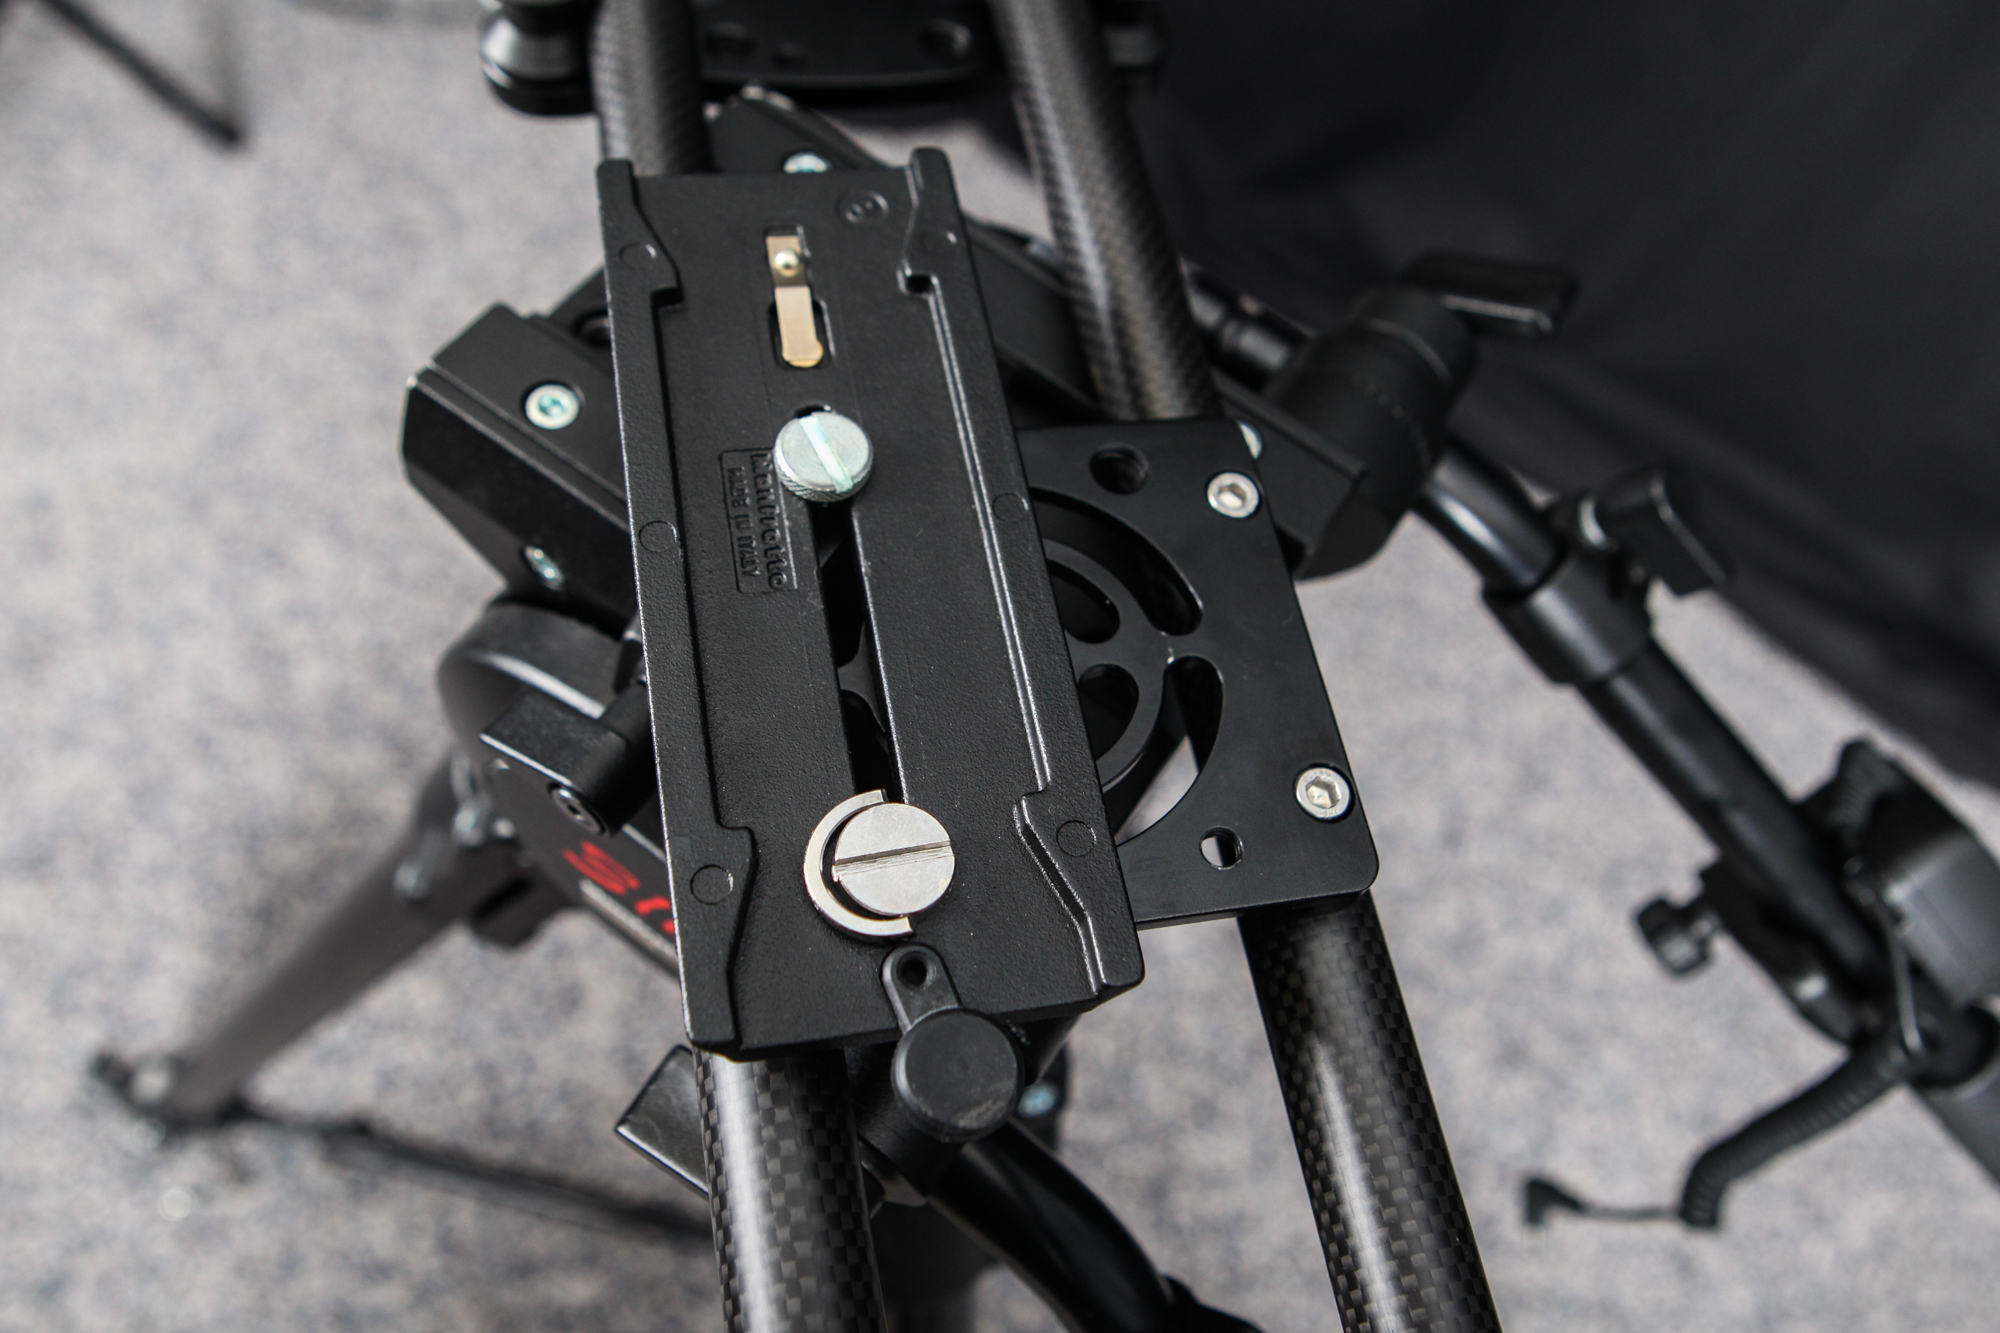
Slider with extra screws on QR plate
Adding Additional Bracing
Once the slider is setup on a tripod, you may notice that as your camera reaches either side, a slight bowing occurs (especially if you are using a heavy camera and/or a ball head). Fortunately this is easily and inexpensively dealt with. Just grab a couple of light stands (or buy a couple if you don’t have any) along with umbrella brackets. The brackets I linked to include two mounting studs, which can be screwed into either side of the slider. Once that’s done, put the brackets on the light stand and attach that setup to the studs. Do this on either side of the slider and just like that, no more bowing.
Add an umbrella bracket to each side of the slider for additional bracing
Mounting the Slider Vertically
The slider can also be mounted vertically to a tripod. The same holes on each side of the slider that I mentioned in the section about adding additional bracing can also be used to mount the slider to a tripod. Once the slider is attached, you’ll definitely need a ball head in order to get your camera in the correct position. This setup only takes a few minutes and you’ll get some really unique shots with it.
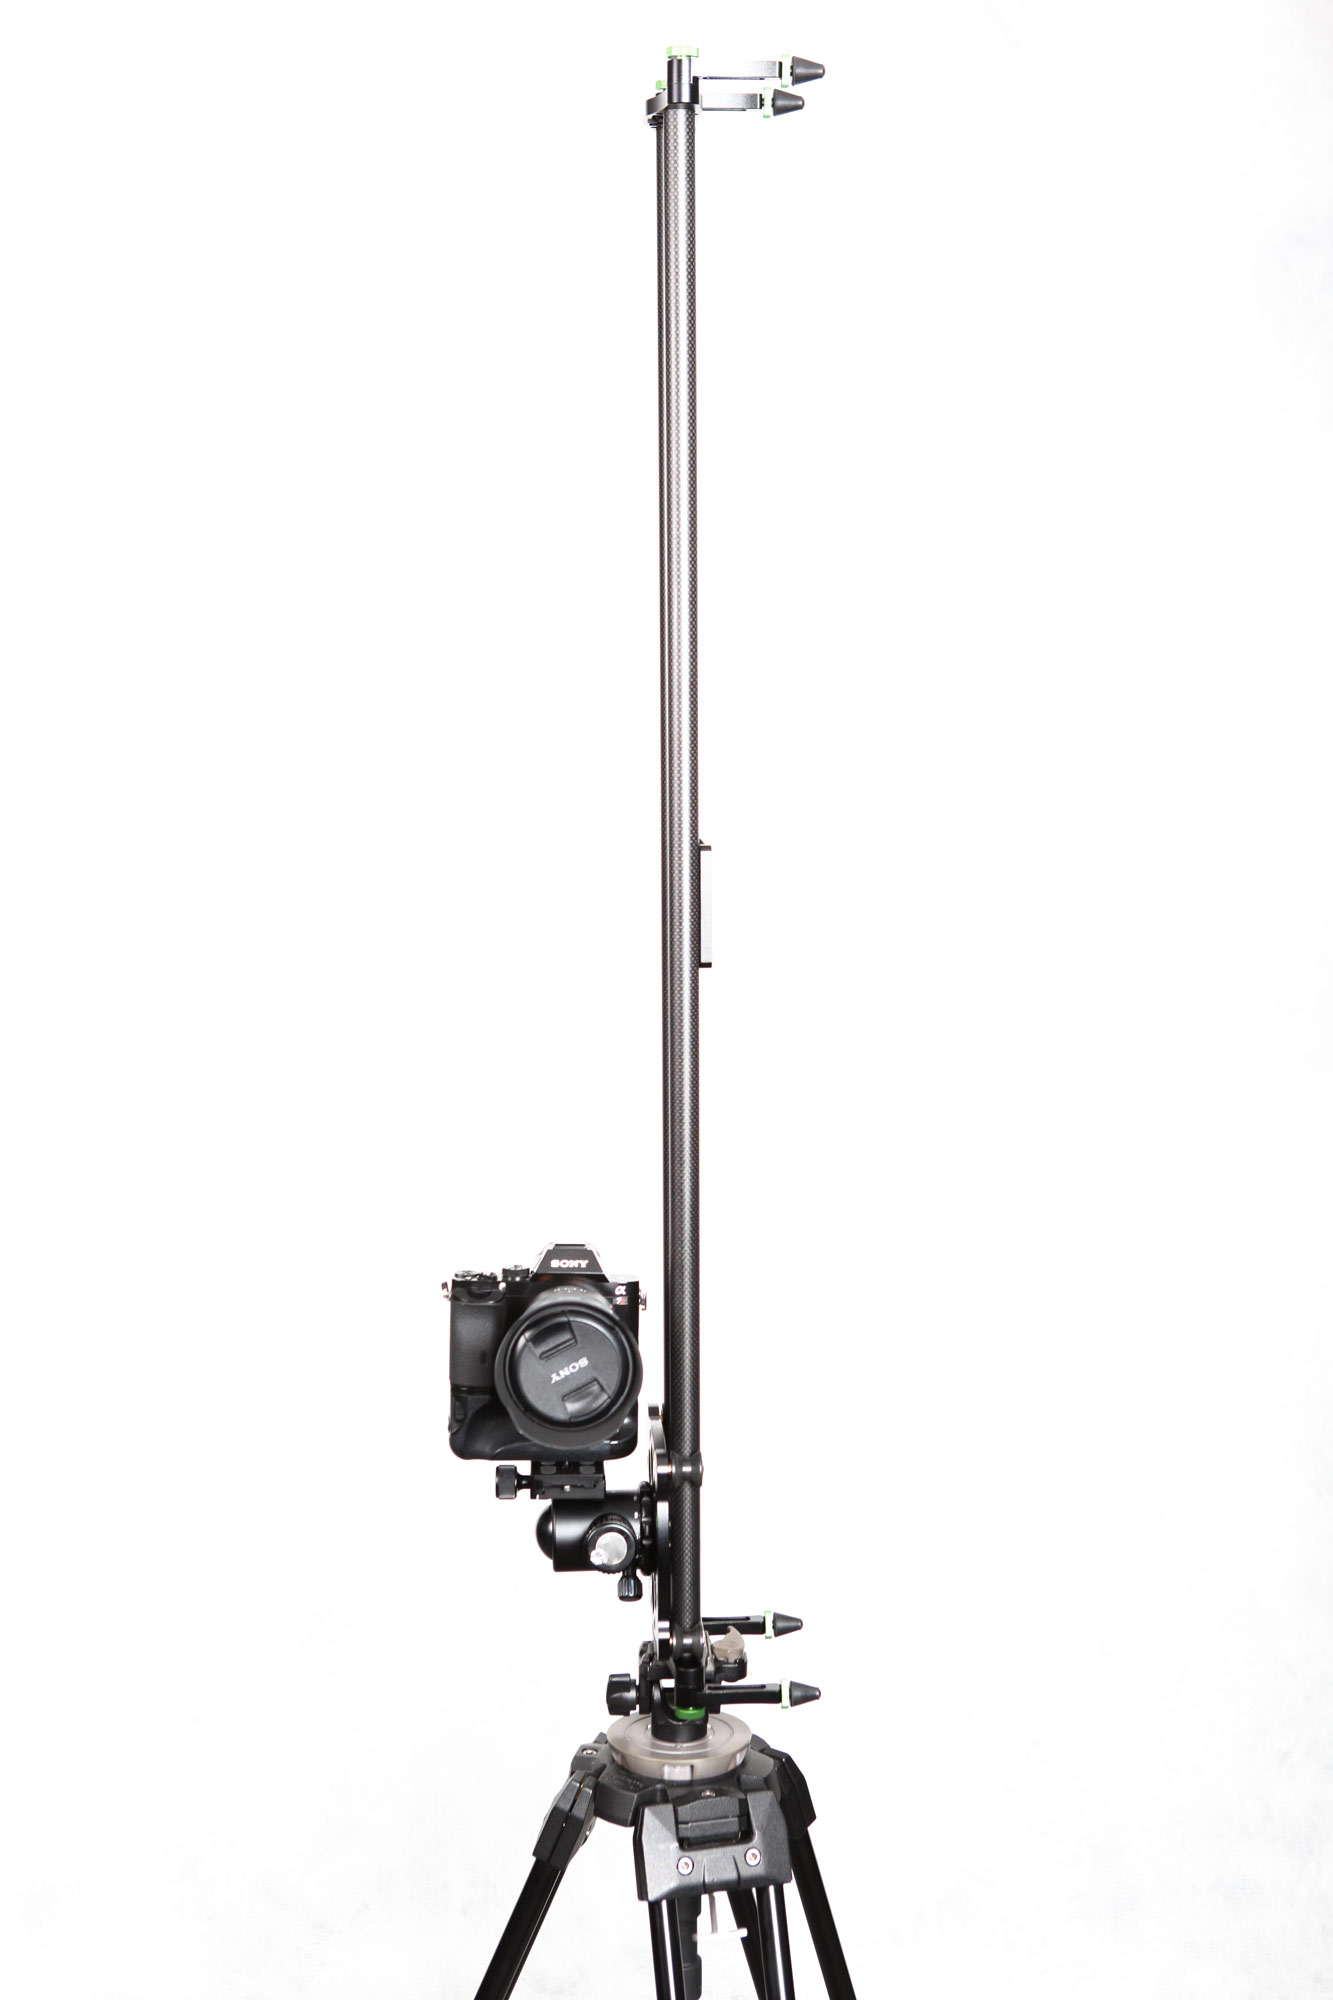
Mounting the slider vertically
Using the Slider with a Shoulder Rig Attached
My favorite setup is also the most involved, but it’s worth the extra time needed to set it up. In this setup, I use the Imorden IR-02 Shoulder Mount Rig along with a follow focus (although I use the follow focus to adjust zoom rather than focus). For this setup to work, you’ll need either a fluid head or a ball head, which the Shoulder Mount attaches to (I’d recommend a ball head). The Shoulder Mount Rig obviously doesn’t need the actual shoulder mount, so that can be removed. Once the rig is mounted to the ball head and the follow focus is attached, you not only have the smooth motion provided by the slider, but you also have a great deal of control over camera position and focus (or zoom). It’s a lot of fun to use! This setup also definitely requires additional bracing with two light stands and umbrella brackets, as shown below.
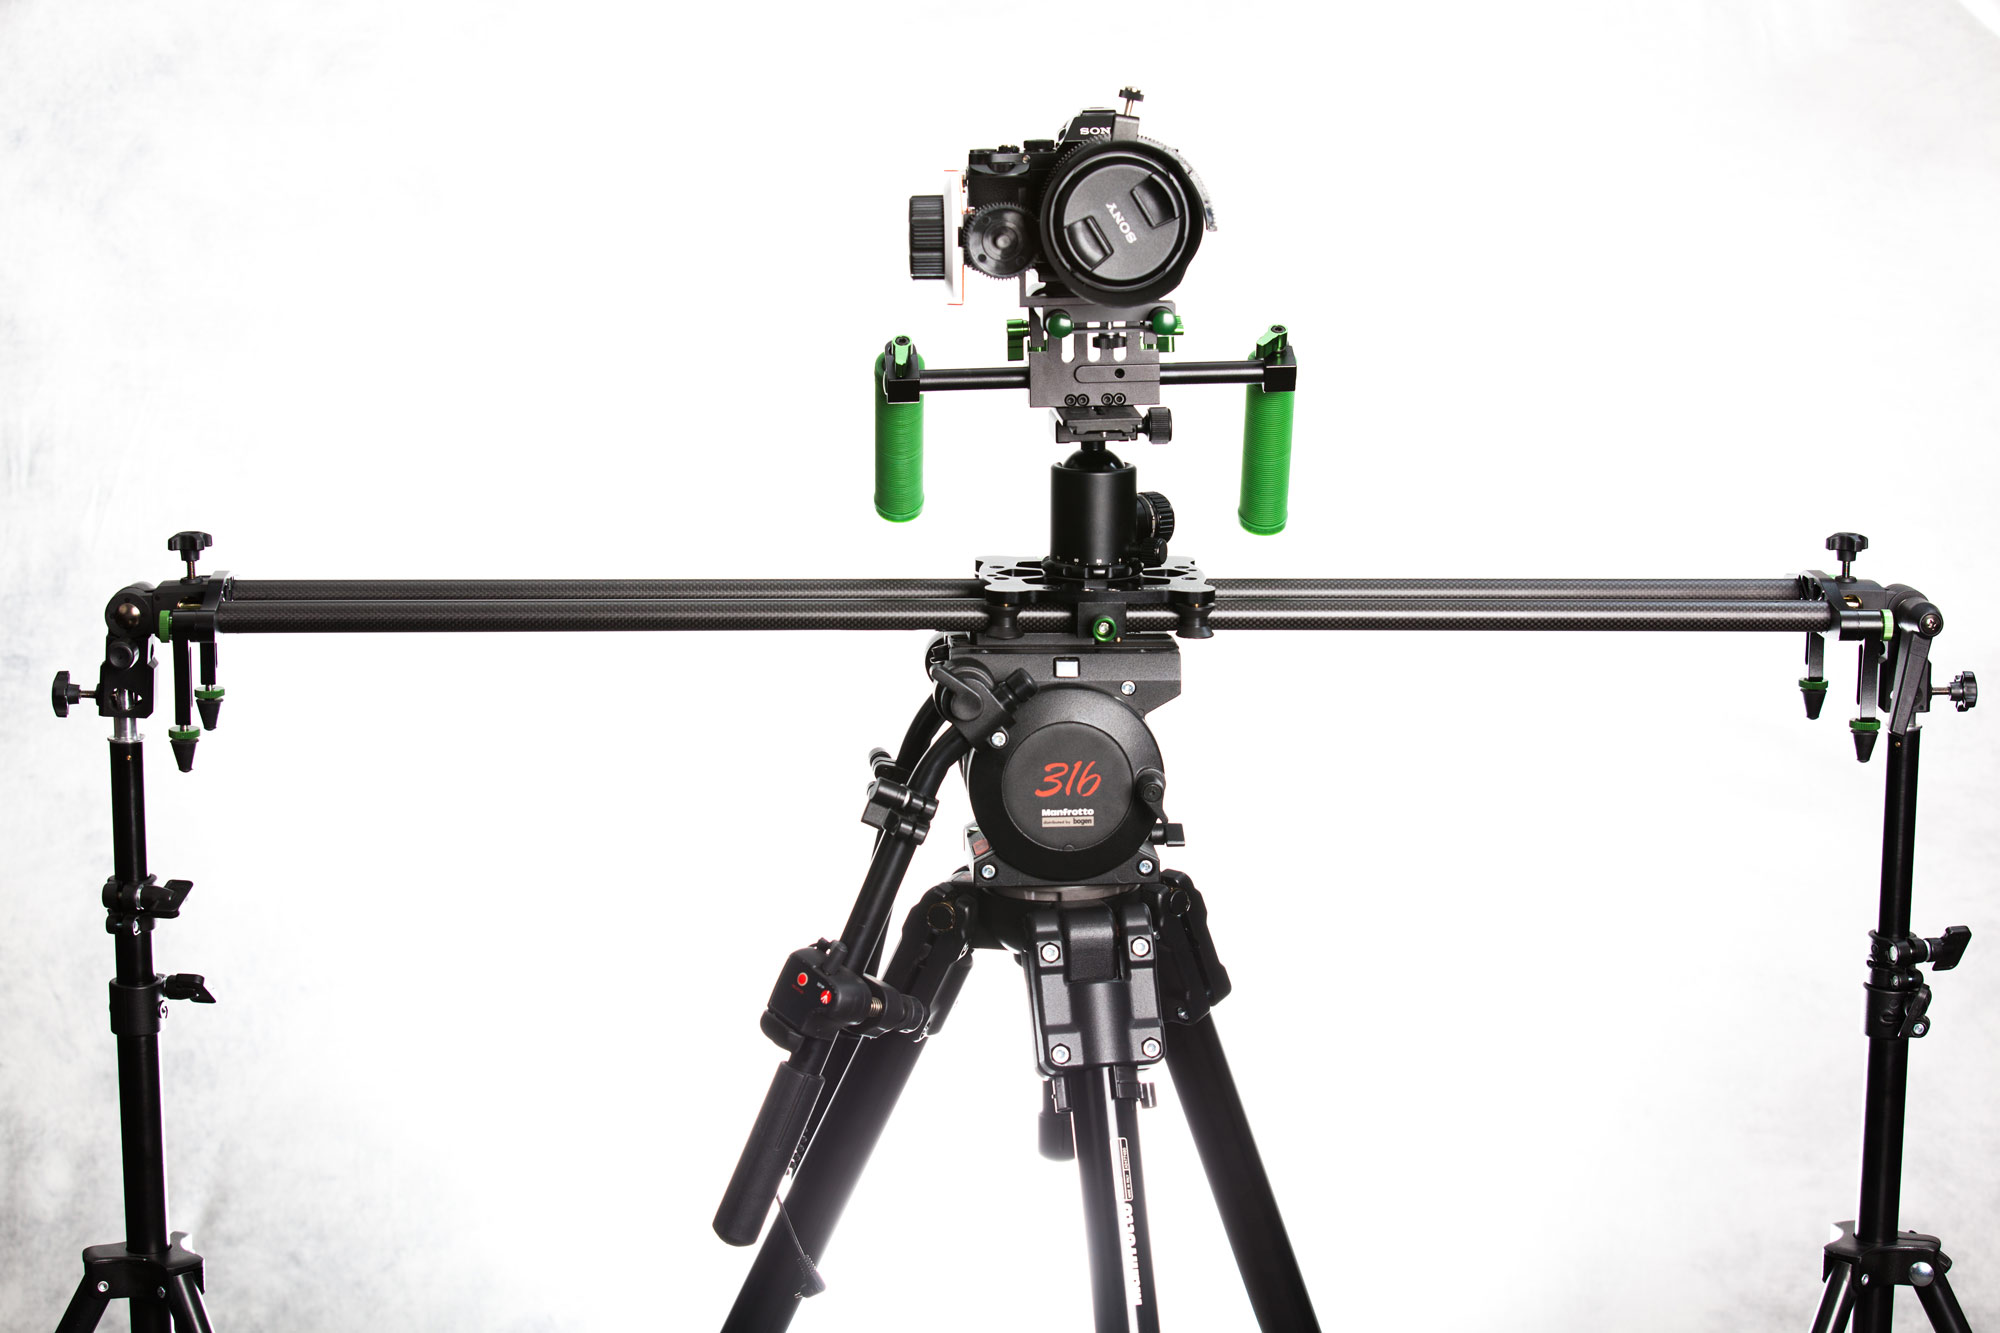
Imorden Carbon Fiber Slider with Imorden IR-02 Shoulder Mount Rig attached
Lens Choice
If you use the slider and move the camera left to right (or up and down), I’d recommend a wider angle lens. Similar to using a stabilizer, the wider the shot, the smoother the footage will appear. However, if you do push or rack focus shots (where you aim the camera down the rails of the slider) I’d recommend a longer lens such as an 85mm, unless you have a way to mount the camera fairly high. The issue is that the tracks will appear in the shot if you are using a wider angle lens, as shown below:

This is the view if you are attempting a rack focus shot using a wide angle lens on the slider
Final Thoughts
I’m happy to finally have a slider in my arsenal of photo tools. I’m expecting to bring it with me on just about all of my shoots at work, and I can see it being used for other applications such as real estate videos (which I dabble in from time to time).
Shown below is an example of some footage I’ve shot so far with the slider:


