You might have heard the term “spot metering” but had no idea what it was or how to use it. Admittedly it does have a very specific use, but it can be extremely helpful in the right situation. Ordinarily your camera is trying to find an nice, average exposure to cover the brightness level in whatever you are trying to shoot. This is especially true if you are shooting in a mode such as aperture priority. When shooting in aperture priority mode the camera is going to determine the best shutter speed based on the f-stop you have selected. It might also try to determine the best ISO setting if your ISO is set to auto. The bottom line is that while this works great for most situations, there are times when it will utterly fail. The most common situation where aperture priority fails (along with most “auto” modes) is when your subject is heavily backlit, such as a person standing in front of a bright window. Because the camera is looking at the overall brightness in the scene, your subject will almost always be underexposed. Enter Spot Metering. With Spot Metering, you can tell the camera to use a specific area in the subject you are shooting (between 1-5% of the viewfinder area) to determine the correct exposure settings.
For example, I shot the photo below using a Canon 5D Mark IV in aperture priority mode and used Evaluative Metering (also called “Multi” mode on Sony and “Matrix” mode on a Nikon). I focused on R2-D2’s eye and let the camera choose the shutter speed. You can clearly see what happened…

Backlit subject with Evaluative Metering mode turned on.
Because the overall lighting in the scene is very bright, my camera compensated and my shutter speed jumped up to 1/1000 sec. My subject ended up badly underexposed.
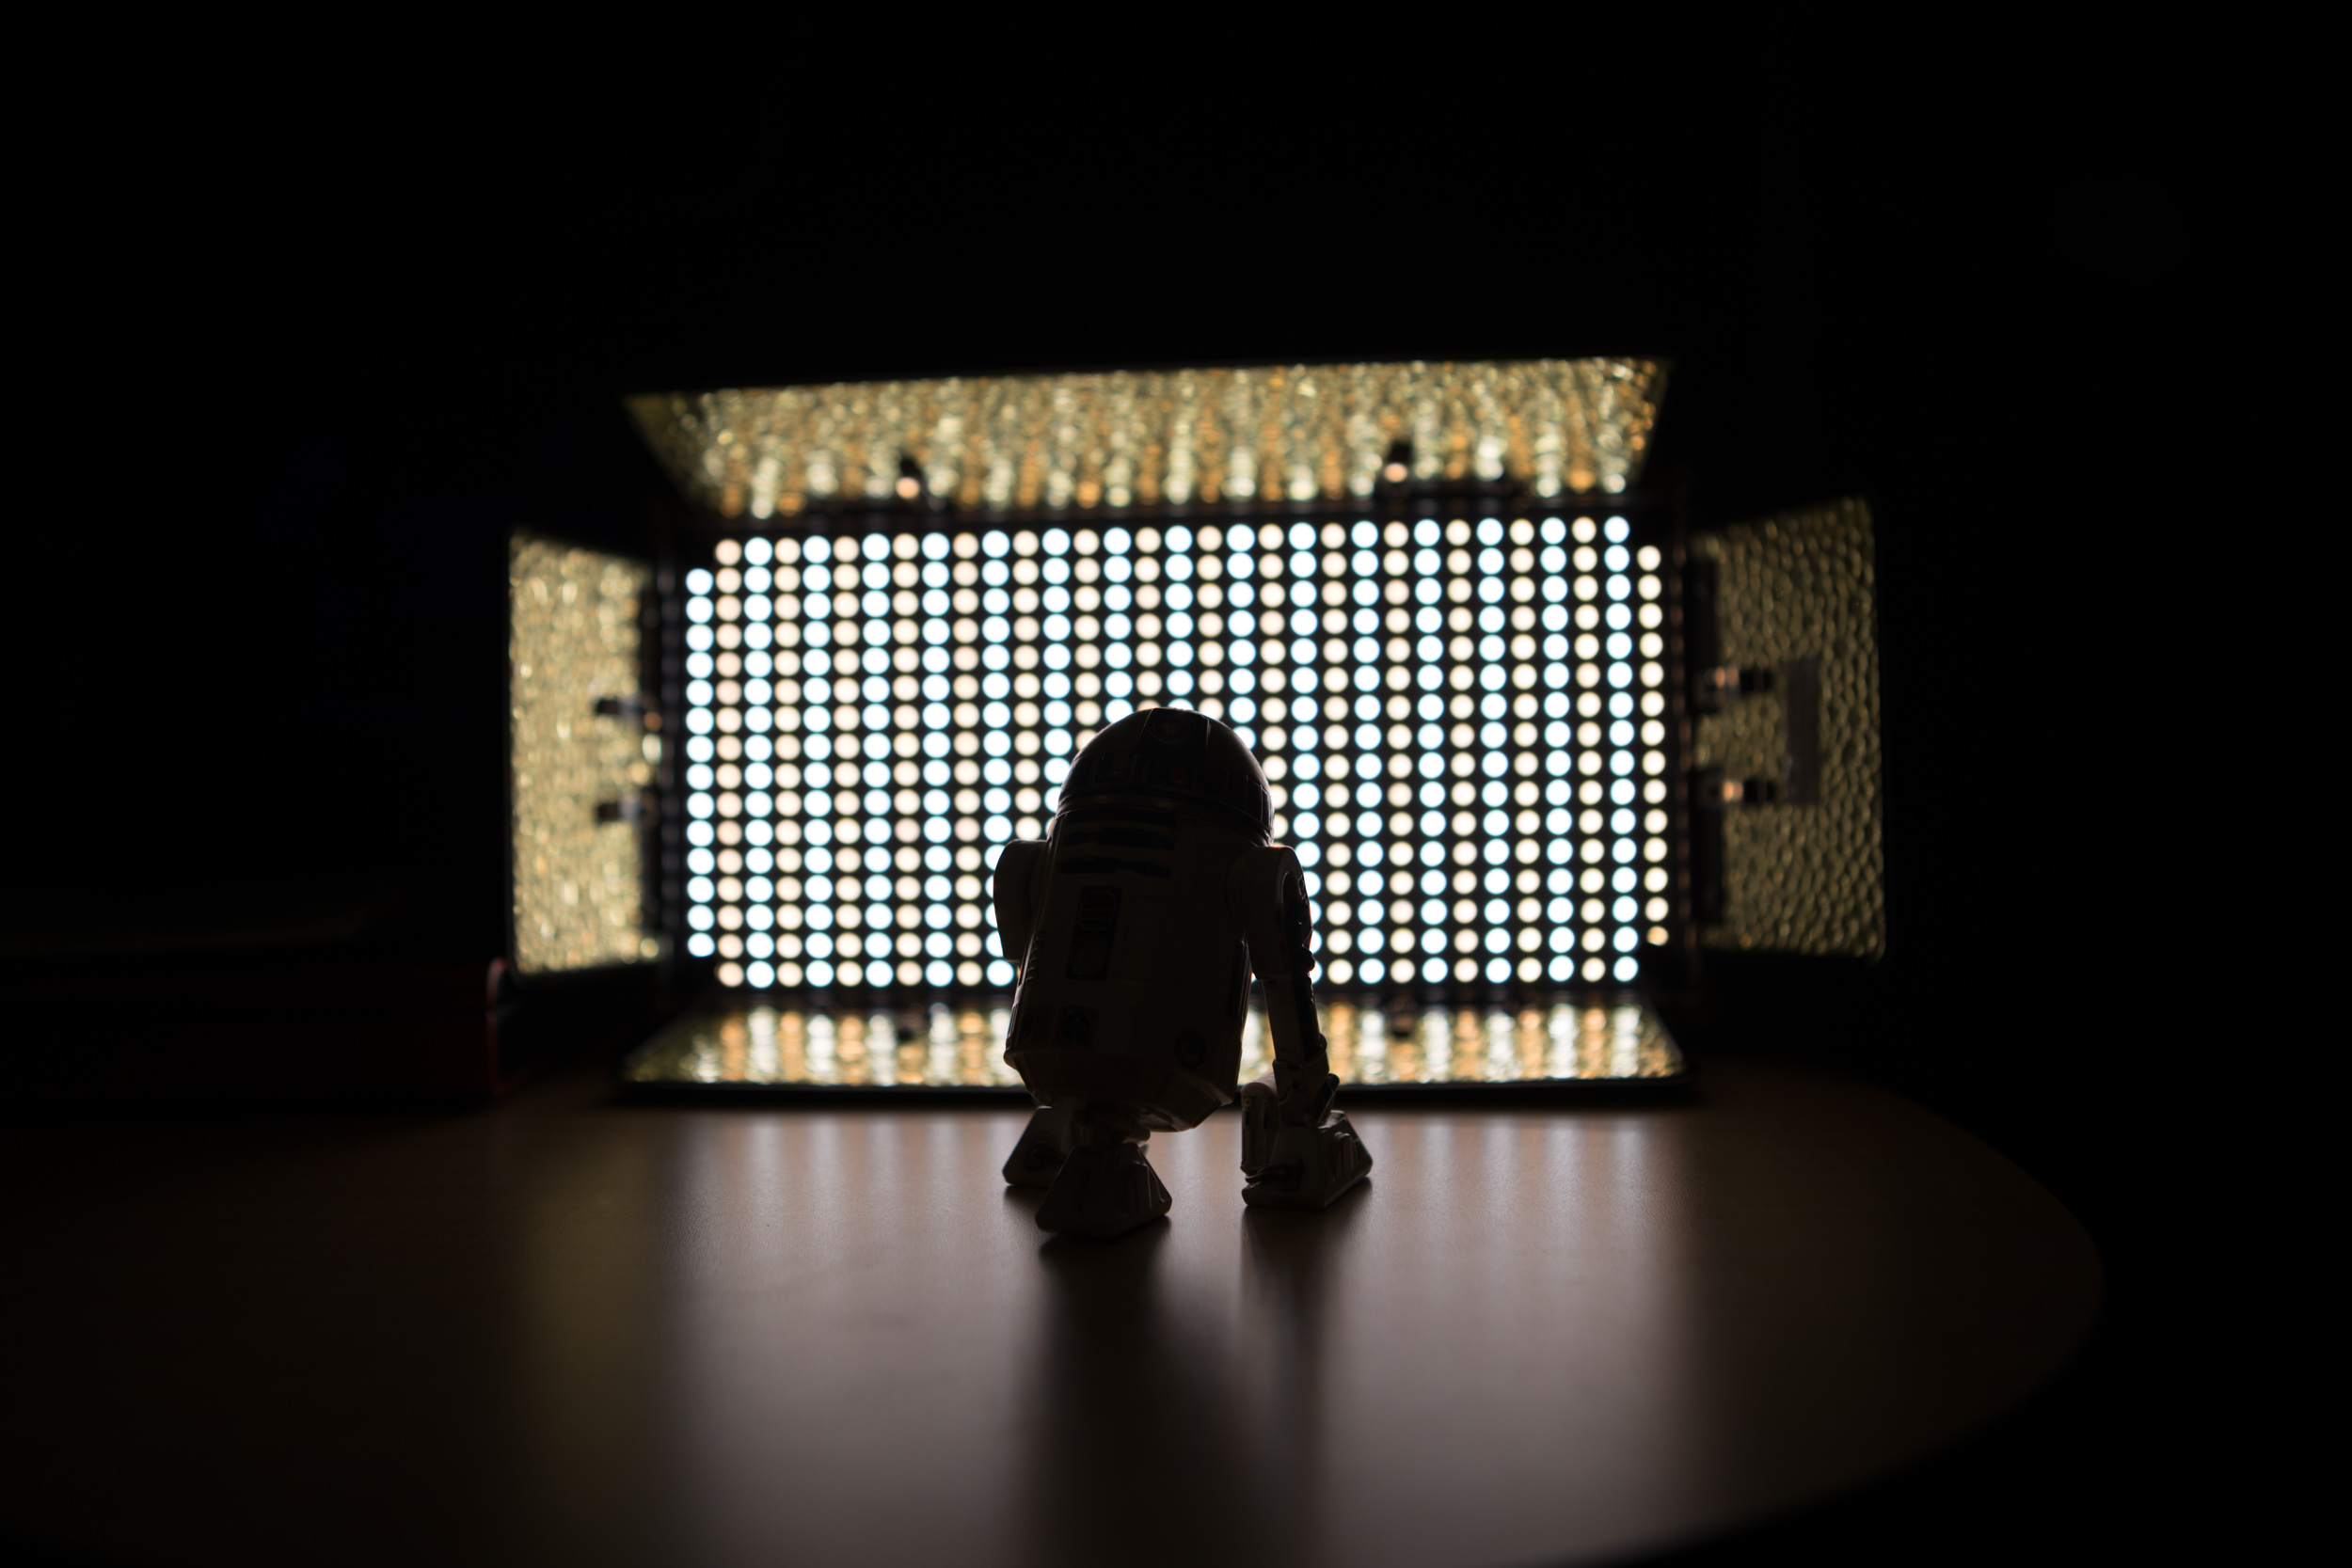
Now suppose I turn on Spot Metering mode and try the exact same shot again. Here’s what that looks like.

Backlit subject with Spot Metering mode turned on.
Hey, I can see R2-D2! Nice! The camera looked at how dark R2 was with all of that backlighting and adjusted the shutter speed accordingly. The shutter speed went from 1/1000 sec all the way down to 1/160 sec! Pretty crazy, but it’s obviously the correct setting.
So while this seems like the perfect solution to this type of lighting situation, there’s still a catch. On the shot of R2, I was zoomed in and I told the camera to base the exposure on his eye. But what happens if I zoom out? The further I zoom out, the brighter the area that I’m telling the camera to properly expose is getting, which is obviously not what you want. Take a look at the photo below to see what happens.
Backlit subject with spot metering on while zoomed out.
That obviously didn’t work. The area that I’m trying to correctly expose is too small and far away when I’m so far zoomed out. This is when you’ll want to hit the “AE Lock” button on your camera. AE Lock will lock the exposure settings into place even if you change where you point the camera. So in the R2 photo, all I need to do is zoom in on the subject, get my exposure settings correct, then hit the “AE Lock” button on the back of the camera and recompose the shot. AE Lock “freezes” the camera’s exposure settings, so that if I move the camera (or zoom out), the auto exposure system won’t change the shutter speed. Take a look at the photo below to see how that worked out.
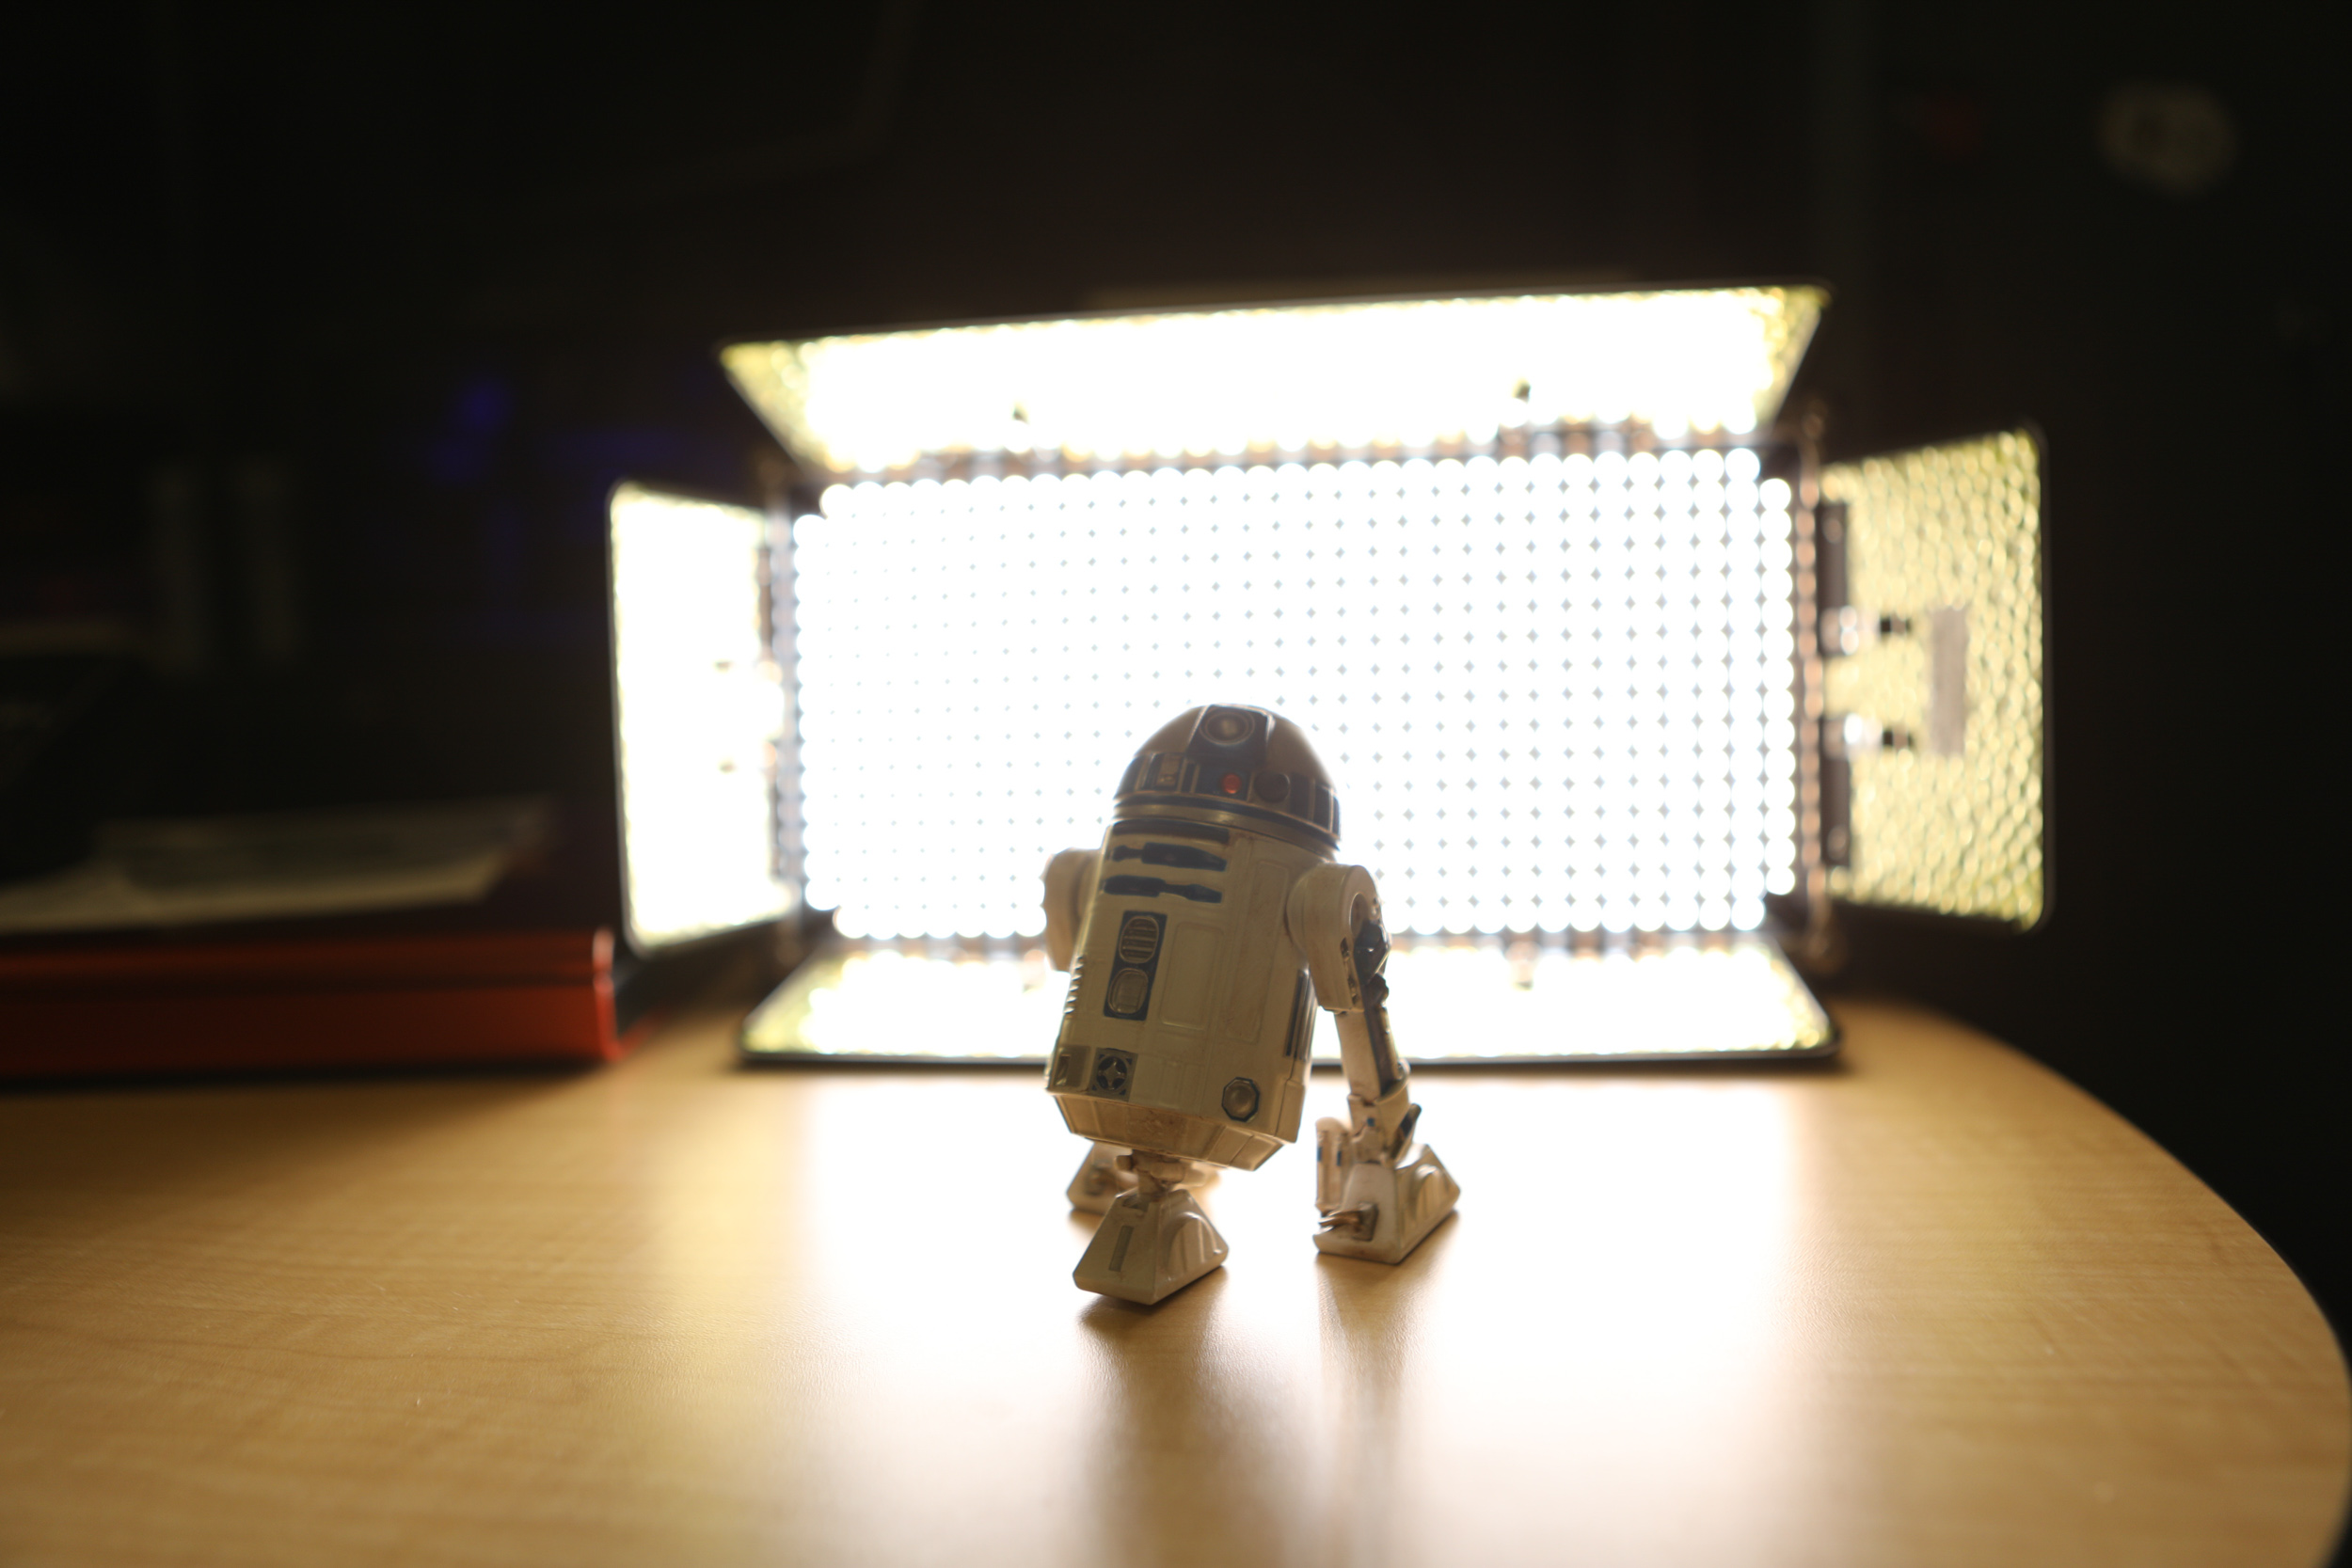
Backlit subject with spot metering and AE Lock on.
Much better! With AE Lock activated, the previously determined settings that the camera used with spot metering while zoomed in on the subject remain locked in, and the exposure is correct.
Activating Spot Metering
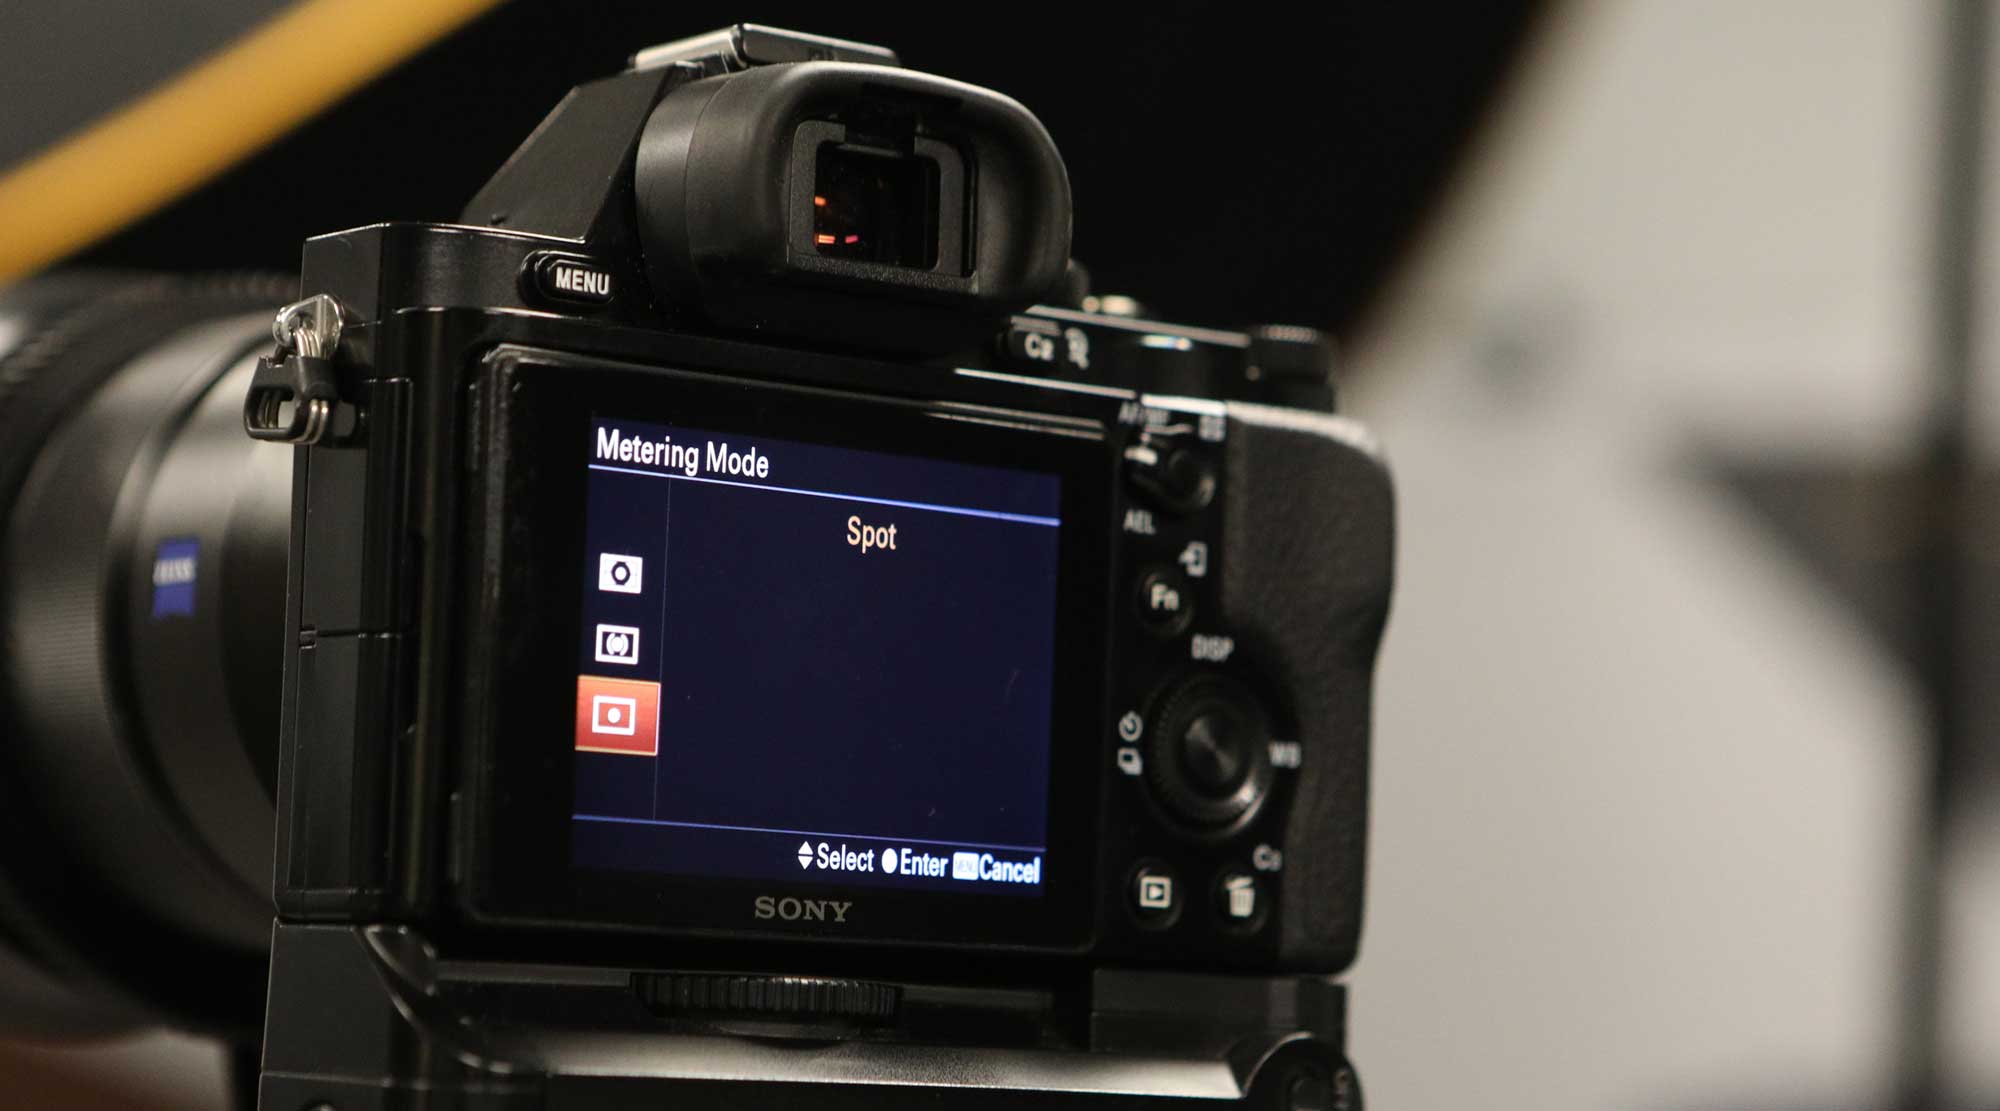
So where exactly is Spot Metering? It depends on the make and model, although in most cases it’s easily accessible from the rear of the camera and/or in the menu system.
Here’s how to turn on Spot Metering using the back controls on a Canon 5D Mark II:
Here’s how to turn on Spot Metering using the back controls on a Canon 5D Mark IV:
And here’s how to turn on Spot Metering on the Sony A7R:
Obviously I can’t show every camera make and model, but you get the idea.
Activating AE Lock
What about AE Lock, where can you find that on your camera? Once again, it depends on the make and model. However, you are almost guaranteed to find the AE lock in an area that’s very easily found on the back of most modern cameras. On Canon cameras, it’s the little “star” or “asterisk” looking button on the back of the camera, as shown below:
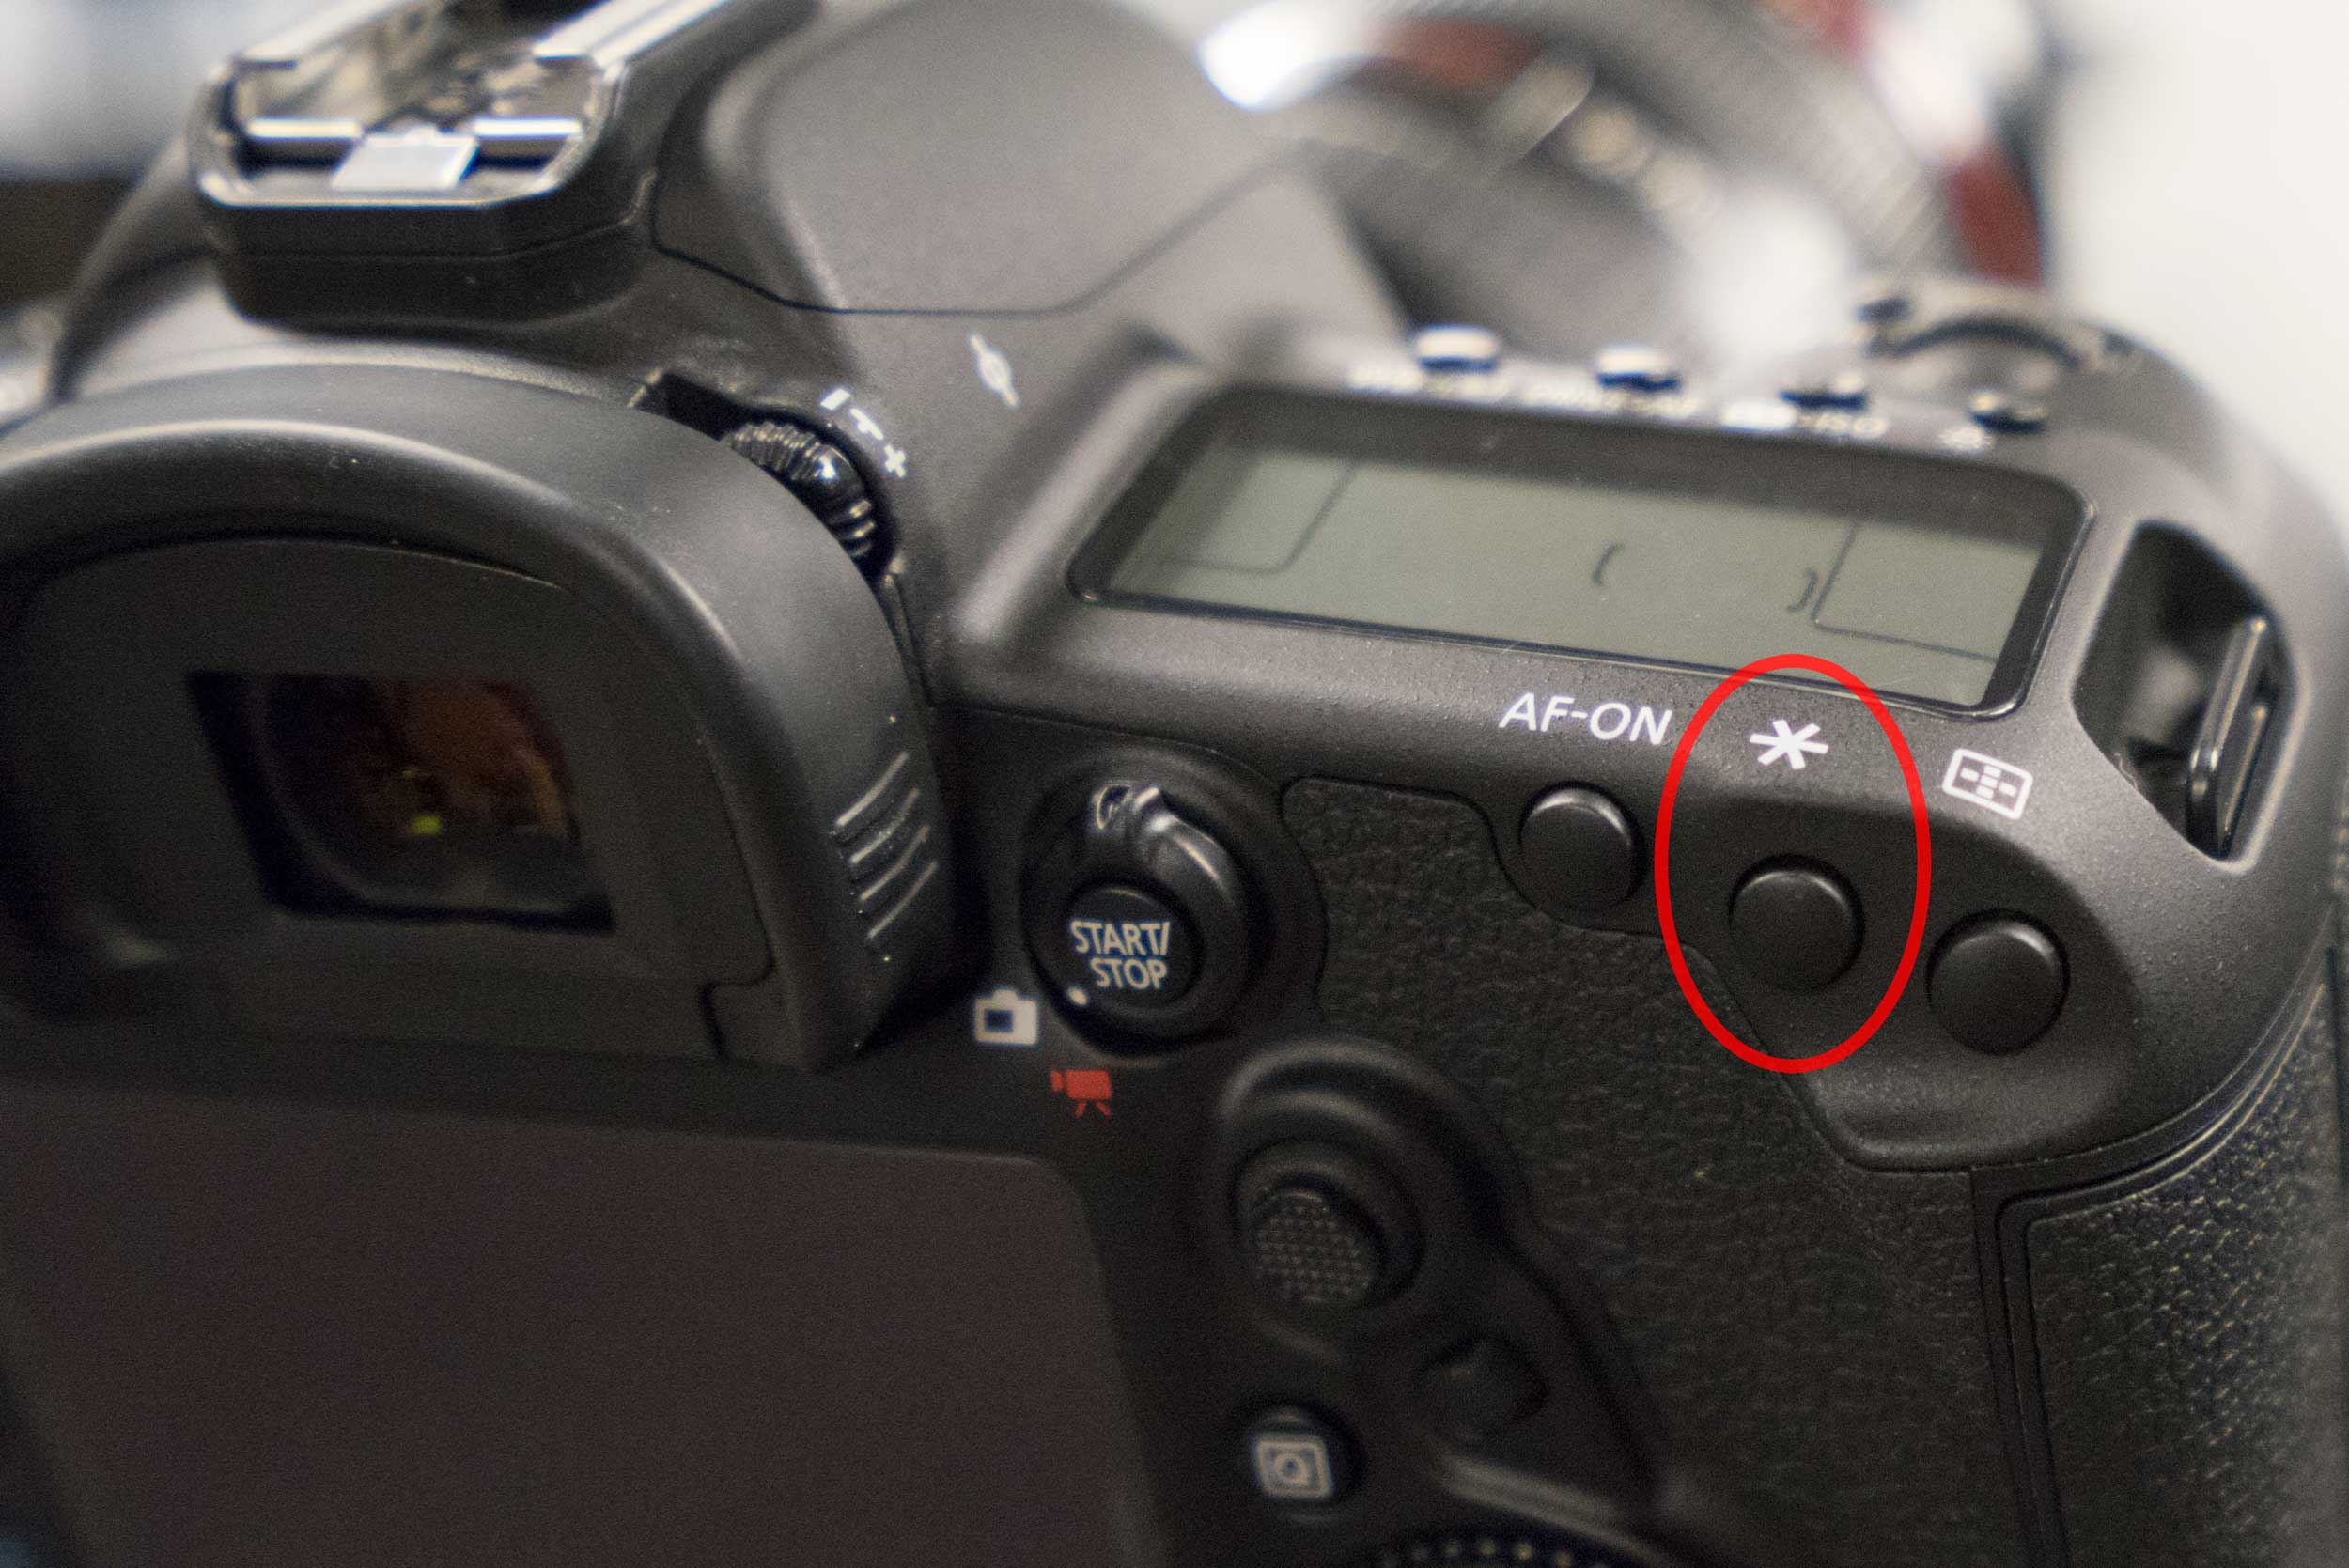
The AE Lock button on the back of most Canon SLR cameras
On the Sony A7/A7R/A7S I and II line of cameras, AE Lock is an actual toggle switch that’s labeled as “AEL”, as shown below:
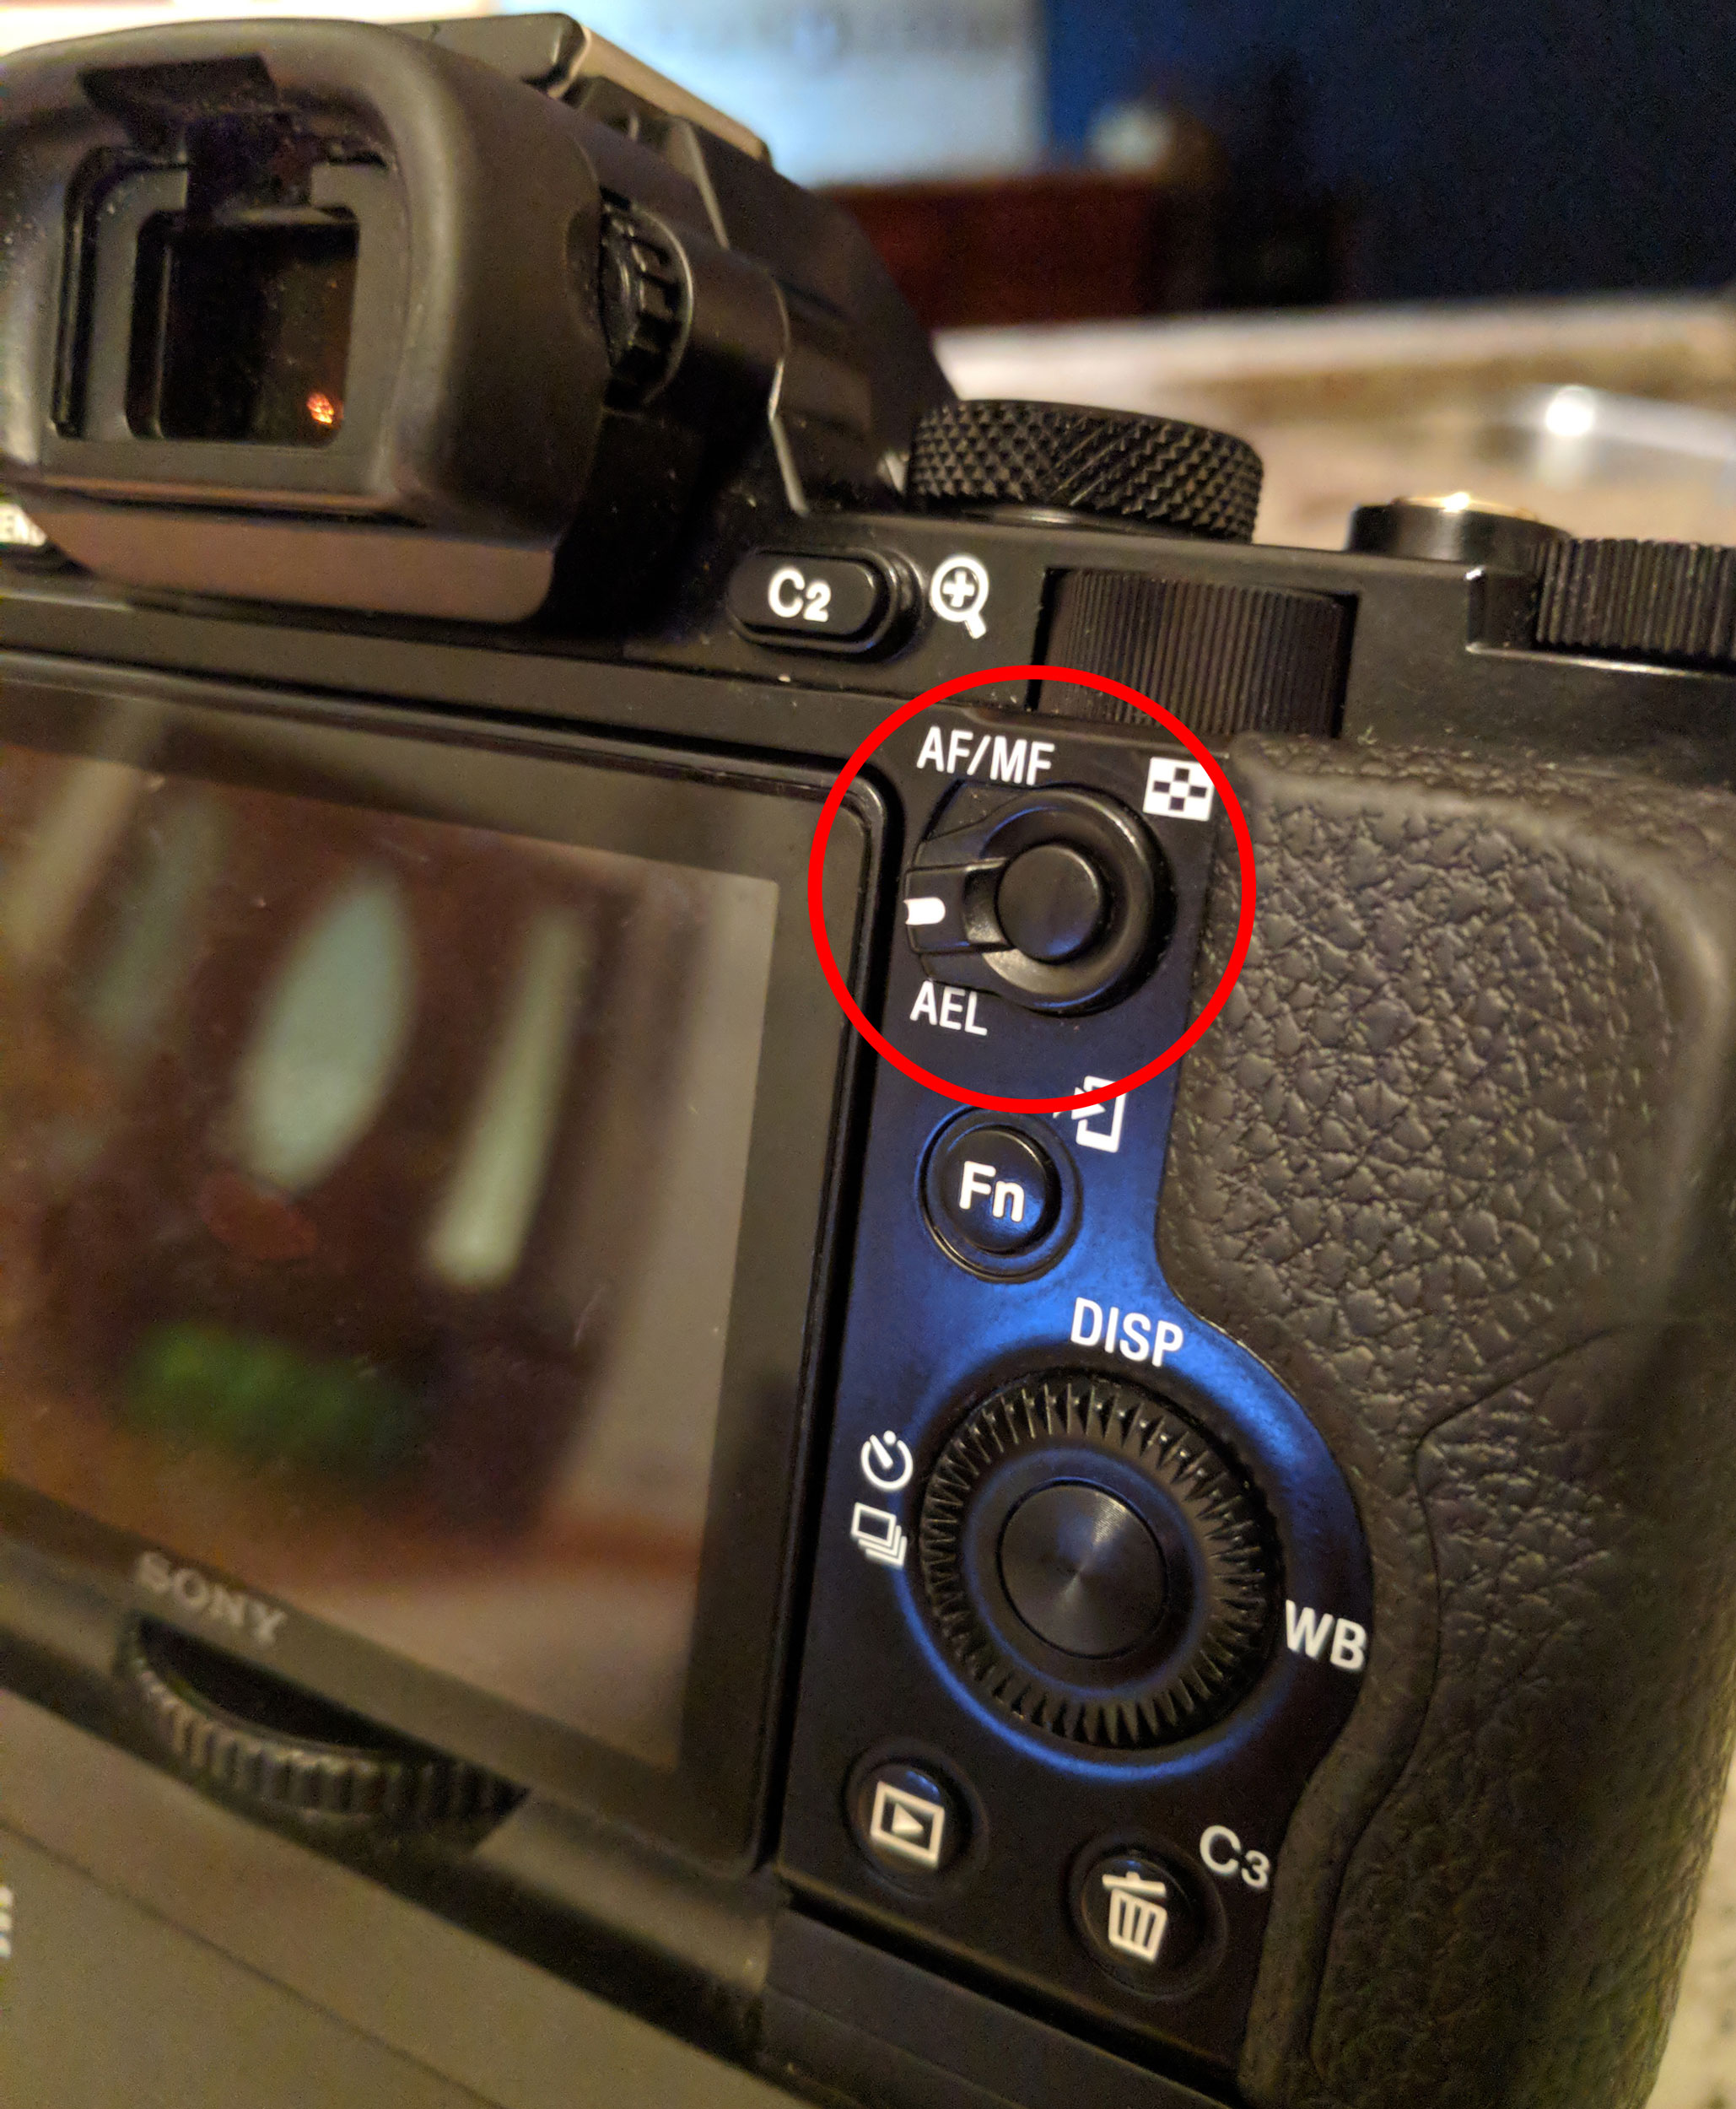
Circled in this photo is the AE Lock toggle on the back of a Sony A7R.
On these Sony cameras, you can actually have the camera default to AE Lock whether or not it’s actually switched on (it actually defaults to this setting). This is activated in the menu system, by going to MENU →  (Custom Settings) → [
 AEL w/ shutter] → desired setting.

- Auto (default setting):
- Fixes the exposure after adjusting the focus automatically when you press the shutter button halfway down when [Focus Mode] is set to [Single-shot AF] Exposure remains locked in until you let up on the shutter button.
- On:
- Fixes the exposure when you press the shutter button halfway down.
- Off:
- Does not fix the exposure when you press the shutter button halfway down.
On the Sony A7R III, they’ve made AE Lock an actual button, shown below:
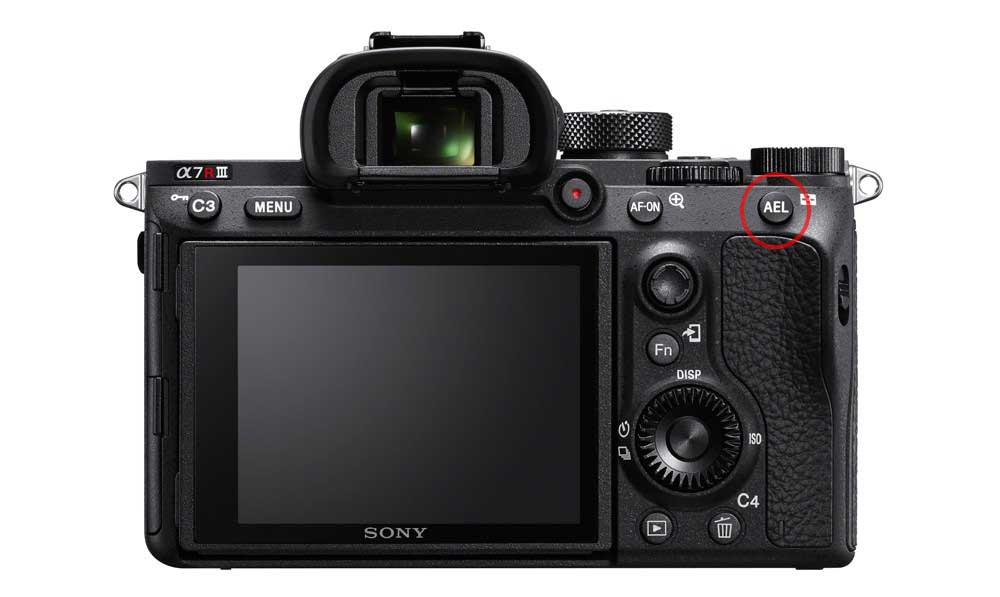
The AE Lock button on the back of the Sony A7R III
So there you have it, Spot Metering and AE Lock explained. Hopefully this post helps you if you’ve struggled when shooting backlit subjects while in one of your camera’s auto modes!


