So one of the biggest announcements surrounding the release of Photoshop CC was the new “Camera Shake” filter, which promises to fix photos that would have otherwise been lost due to excessive blur associated with a shaky camera operator. Sounds amazing! When I first heard about this, I thought, “this is the Content Aware of 2013” – I expected to be as blown away by this new technology as I was with Content Aware. So the obvious question, does it really work? Well, yes and no…read on….
My first thought (and probably yours too) was a “shaky” photo involves a lot of motion blur – so much that the photo is ruined. I thought it would be “Photoshop CC to the rescue!” Not so much. If your photo has camera shake that’s so bad that whatever you shot is nearly unrecognizable, don’t hesitate to hit that delete key. Nothing is going to save you. However, if there’s only a small amount of visible camera shake, you might be in luck.
The “Camera Shake” filter is really designed to snap photos back into focus that have a marginal amount of camera shake. For example, you are shooting on a tripod at a shutter speed of 1/50 and you didn’t use self timer or an external trigger. Your finger pushing that shutter caused just a little bit of movement and when you open the photo for processing you say, “oh no, it’s blurry!” That’s where this new Camera Shake filter really shines.
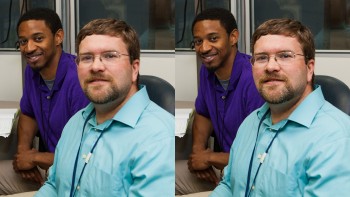
Take a look at the photo below (click on it to enlarge it). You can see that it’s a little bit out of focus. I shot this at a shutter speed of 1/60 and didn’t use self timer or an external trigger, so it’s a little blurry.
Now take a look at the image after I applied the new Camera Shake filter (click to enlarge). Notice that it’s much sharper – look at his eyes and the lines of his tie.
Here they are side by side so you can really see the difference – before on the left, after on the right (click to enlarge):
Not bad at all. The Shake Reduction filter is also very useful in addressing depth of field issues. I had a shoot recently where I was using f-stops around 3.5 and I knew that the person in the foreground wouldn’t be as sharp as the person in the background (I had focused on the person in the background’s eyes). When I processed the photo, sure enough, there was a focus issue. In this case though, I really only wanted to fix one section of the photo. No problem there, I just duplicated the layer and applied Shake Reduction, then painted out the areas I didn’t want to keep.
Here’s the photo with nothing applied (click to enlarge):
Notice the person in the foreground is a little blurry. I applied the Camera Shake filter, which of course affected the entire image. But with a little masking I was able to keep most of the photo untouched and only fix the focus of the person in the foreground. Here’s the end result (click to enlarge):
And here’s a side by side comparison of both – before on the left, after on the right (click to enlarge):
So for these minor issues, Camera Shake pretty much rocks. So where does it fail? Well, anything with significant camera shake isn’t about to get fixed by this. If you take a photo with excessive amounts of blur, especially with a lower quality camera, don’t expect miracles.
Here’s a shot I took with a Canon Elph (a little point and shoot camera). I disabled the flash on the camera and deliberately shook it when I took this photo. Here’s my masterpiece (click to enlarge):
Great photo, eh? So after running it through the new Camera Shake filter, here’s what it looks like (click to enlarge):
Not a very dramatic difference. I spent about an hour or so trying to tweak the various settings in the Camera Shake plugin, but nothing could save this particular photo.
So in short, does it work? Yes – but only in the right scenario. Have any photos you’d like to have me test out? Throw a link my way in the comments below and I’ll give it a quick run-through.


