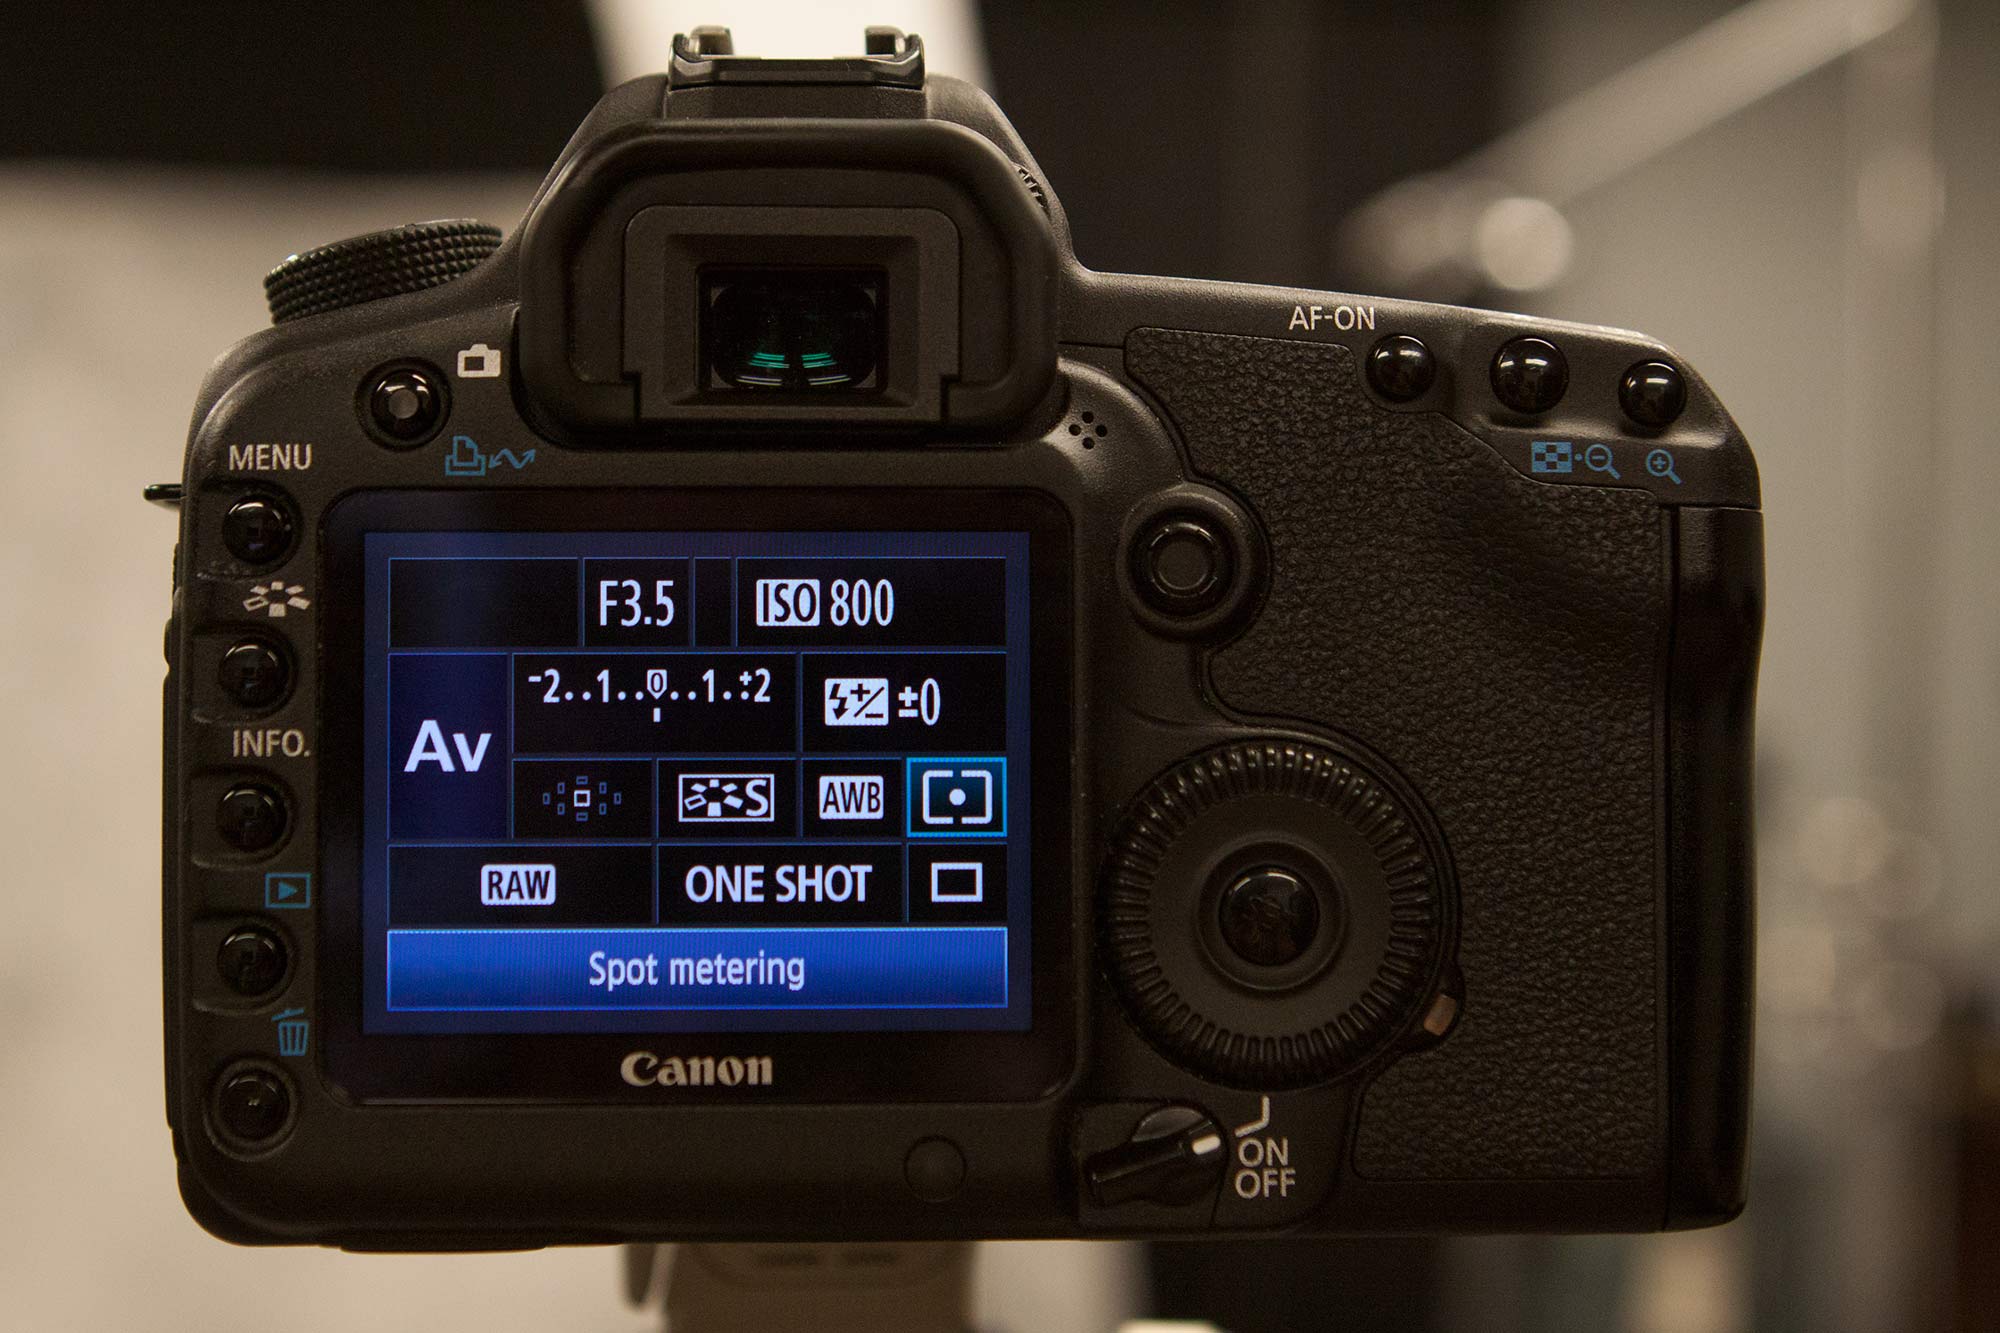
You might have noticed that your DSLR has something called Metering Modes, but without understanding what they were for, it’s possible you’ve never used them. I try to keep this blog from getting too over-the-top technical, so basically Metering Modes are a way to more easily achieve correct exposure in a tricky lighting situation. This post focuses on the Spot Metering mode.
Spot Metering is used in situations where there is a dramatic amount of difference in the lighting of your subject and the light surrounding it, such as a bright moon in a pitch black sky. Most cameras default to looking at the overall amount of light in whatever you are trying to shoot, then essentially playing a game of averages in order to achieve correct exposure. So by default, if you point your camera up at the moon, which is surrounded by nothing but blackness, the camera says, “oh, there’s a TON of black in this scene, and one bright object as well” (I’m assuming you aren’t using a massive telephoto in this example). So in order to compensate for all of that darkness, the camera adjusts the exposure according to what it thinks is best and the moon ends up super bright and way overexposed. That metering mode is called Evaluative Metering on a Canon, and Matrix Metering on a Nikon.
Is there a way to tell the camera not to do that? You could just put it in manual mode, of course. But if you want to remain in a mode such as Aperture Priority, it’s time to start messing around with Metering Modes, and this is the perfect use for Spot Metering! Here’s how to set it up on a Canon 5D Mark II using the joystick:
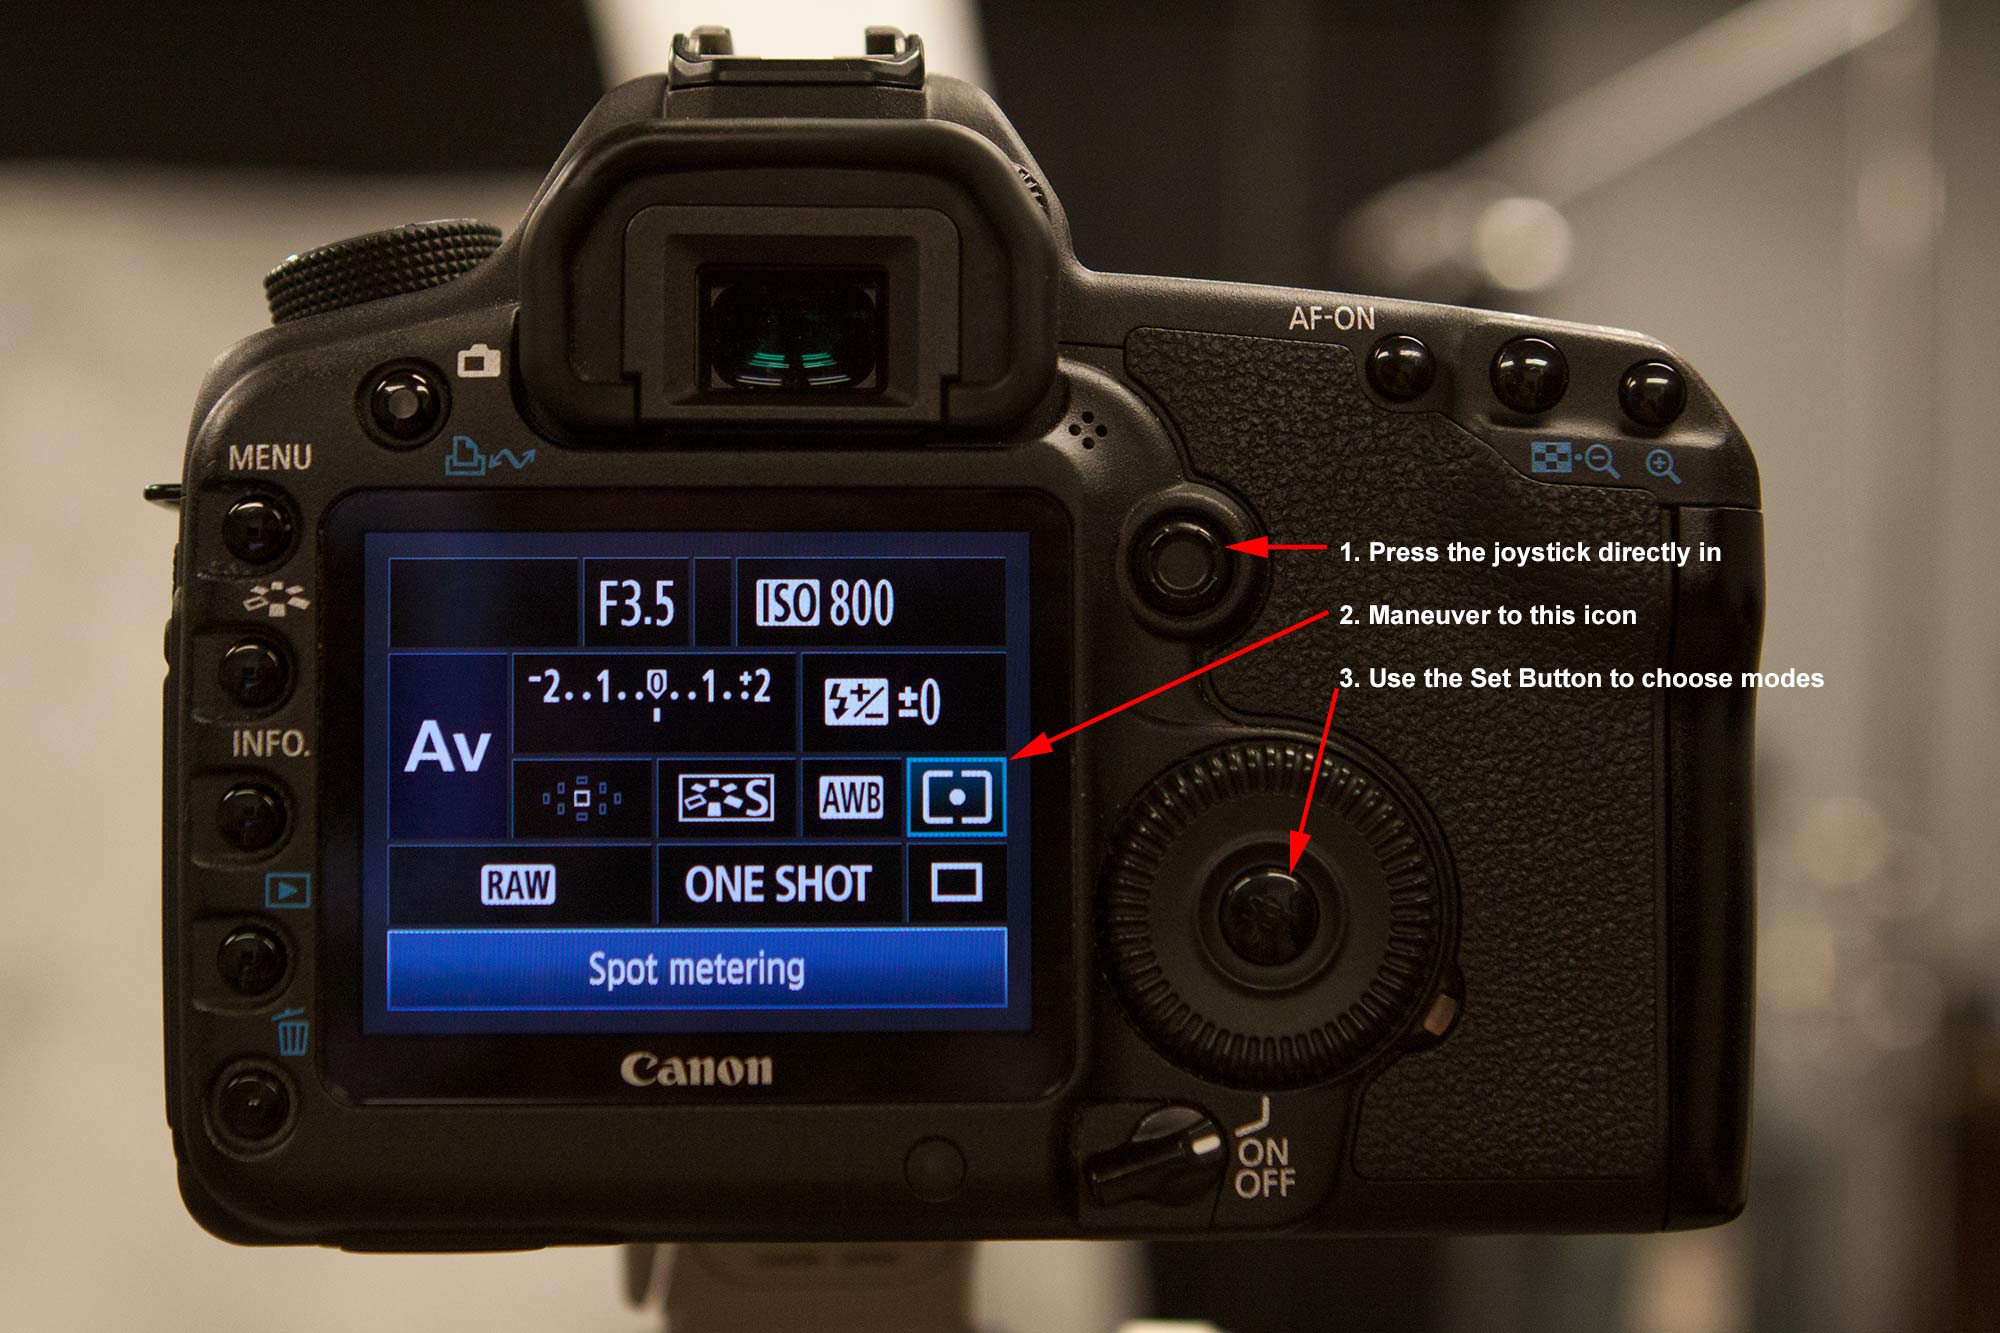
Use the joystick to maneuver to the metering modes icon, hit the “Set” button to choose modes.

Use the wheel to make your selection. Hit “Set” again to lock the selection.

Press the “WB” button, then use the scroll wheel to choose a metering mode (do NOT use the wheel on the back of the camera, as that will change white balance settings). Scroll to the icon that looks like a dot.
Here’s a couple of shots showing the same photo taken with Evaluative Metering used first, then switching to Spot Metering.
The first example shows Evaluative Metering (Matrix Metering on a Nikon). I’m at f/3.5 and 800 ISO. I focused on the figure’s head and let the camera choose the shutter speed settings. The camera went with a shutter speed of 1/400 sec, and here’s what happened:

What happens when you shoot a dark object against a bright background in Evaluative Metering mode (using Aperture Priority)
Here’s the same photo using the same aperture and ISO, only this time I switched to Spot Metering. I focused on the same area of the figure and let the camera do the rest. It recognized that even though the overall scene was very bright, the subject was actually very dark. So the camera chose 1/60 sec as a shutter speed, and here’s how that one turned out :

What happens when you shoot a dark object against a bright background in Spot Metering mode (using Aperture Priority)
In Spot Metering mode, the camera understands that it needs to use a much smaller area to determine the proper exposure. In fact, it’s only utilizing between 2 and 3% of the frame to select the exposure settings!
One very important thing to remember in this mode is that the “spot” the camera is using in Spot Metering is dead center in the frame. So before you take your final image, you’ll want to put your subject matter dead center in the frame and lock in the focus/exposure settings. Then quickly recompose and shoot.
That’s about it for this week. Thanks for stopping by!


