This week’s tip is a video tutorial all about audio! Specifically, how to clean up noisy audio using the Adaptive Noise Reduction effect in Adobe Audition, then I spend some time talking about the September 19th Tip of the Week where I discussed Adobe’s Media Cache settings, and finally I show how you can use Adobe Premiere Pro to split left and right audio (recorded from two different mics) into individual tracks on the timeline. I also dive into a little bit of audio keyframing. Here’s the video:
The splitting of stereo audio tracks into individual channels is one that might be very useful to you if you’ve experienced this issue in Premiere, so I put together a quick visual tutorial on how to get around it (this is in the video above as well). Here’s a typical scenario: You record some video using both a wireless microphone as well as a shotgun microphone. The wireless mic is plugged into “Input 1” on your camera while the shotgun mic is plugged into “Input 2”. The camera interprets this as stereo audio, putting the wireless mic on the left channel and the shotgun mic on the right channel. So far, so good. When you are ready to edit, you bring your footage into Adobe Premiere Pro, drop it on your timeline, and Premiere has lumped both the wireless audio as well as the shotgun audio onto one track (A1). Here’s what it looks like:
Ugh, that’s not at all what you want to see! With the audio stuck in one track on the timeline, there’s no way to isolate either the left or right channel. Now what? Fortunately, the fix is easy (but somewhat hidden). Here’s what to do:
- Delete the clip from the timeline
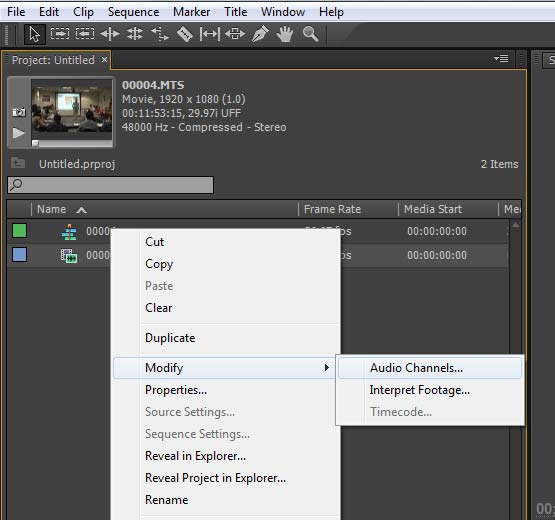
- Right click the clip in your bin, then choose “Modify” and then “Audio Channels”

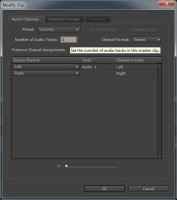
- Premiere will show your audio as only having one stereo track. You actually want this to be two stereo tracks, so change the “Number of Audio Tracks” to “2” and keep the “Channel Format” set to “Stereo” (see the screen shot below)

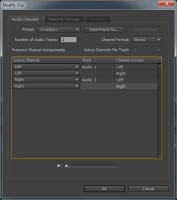
- Now you need to tell Premiere to put the left channel of your source audio into both channels on audio track 1 on the timeline, and the right channel into both channels on audio track 2 on the timeline (see the screenshot below)

- Now try dropping your clip into your timeline again. This time, you’ll see that you have two channels of audio in A1 that consist of one microphone’s audio, while A2 contains two channels of audio from your other mic. This is a much easier way to work, as you have both sources of audio isolated into their own tracks on the timeline. I usually only use the shotgun mic as a backup if I’m using a wireless mic. so I could either mute or just entirely delete that audio from the timeline if necessary. Here’s what your timeline looks like with the audio separated:

I hope these tips help anyone out there who might have struggled with some of this stuff in Premiere or Audition!


