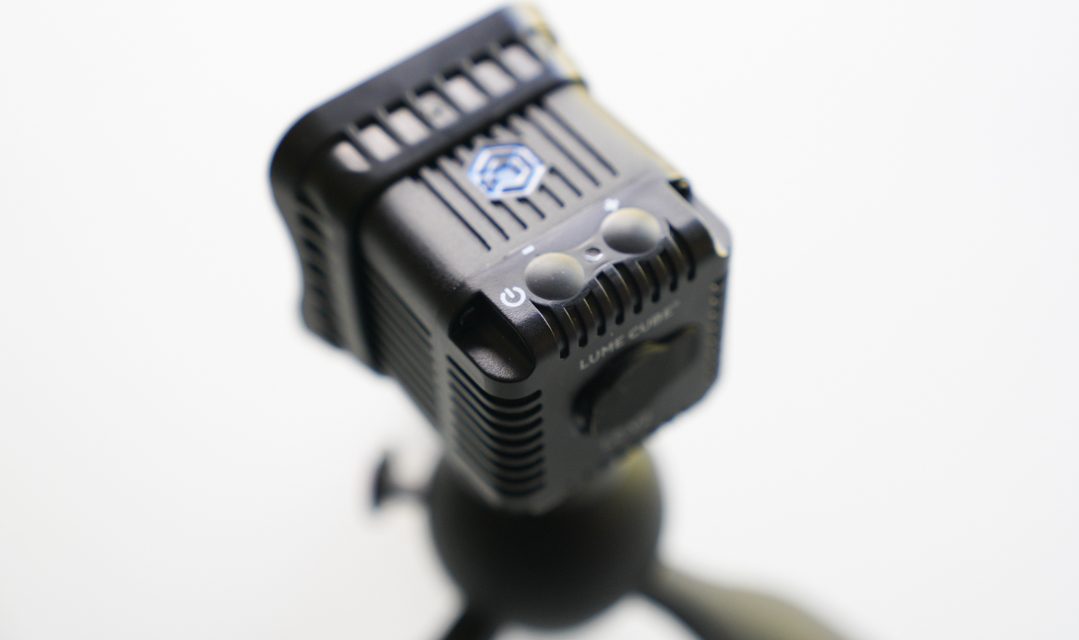
I finally got my hands on a Lume Cube 2.0 and I thought I’d do a quick review on it. This is my first Lume Cube so I don’t have an older model to compare it to, although I have used other small, portable lighting systems.
I was a bit skeptical about this little light going into buying it. I’ve been doing a lot of toy photography lately (I’m on Instagram as @SkywalkerToys) and I needed something a bit more flexible than a flash or the old AA battery powered LED light that I had been using. Many posts on IG mentioned (or hashtagged) the Lume Cube, so I decided to pick one up.
Also, with the current need for video conferencing (this post is being written during the Coronavirus pandemic in 2020), the need for good lighting for webcams is suddenly a priority, and the Lume Cube delivers.
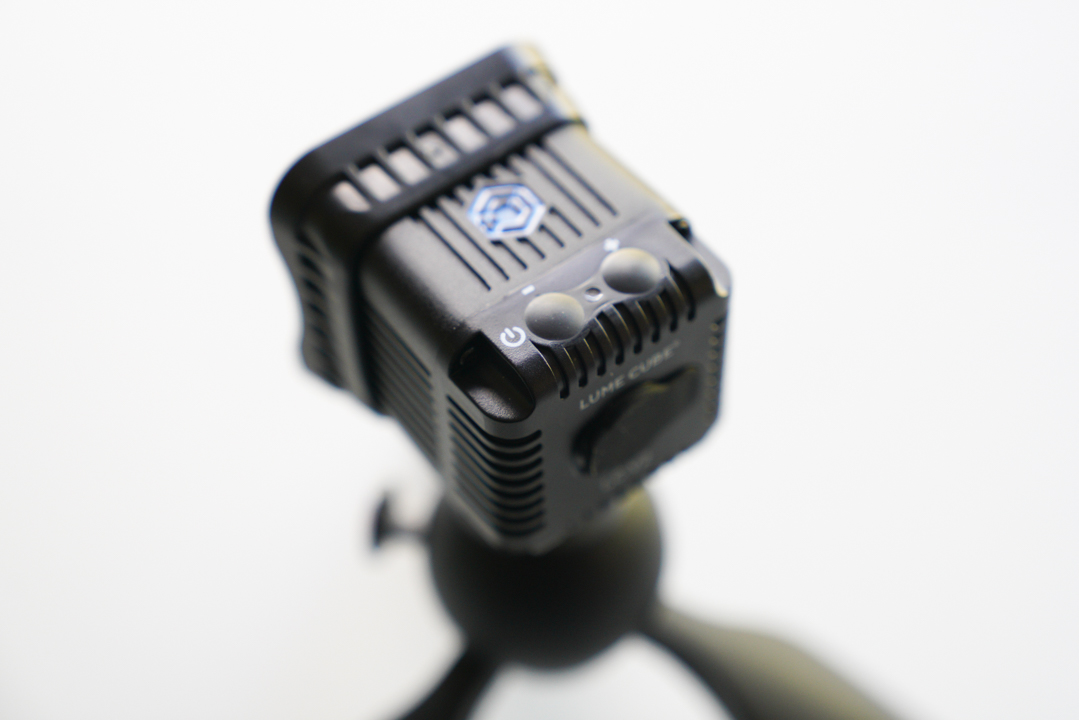
This little light packs a ton of features into a tiny package! It’s waterproof, the brightness is easily adjustable, you can attach various light modifiers magnetically, and you can even use the Lume Cube as a slave for your camera’s flash! It also works with the Lume-X app, which allows you to connect to the Lume Cube via Bluetooth for various functions like adjusting brightness, checking the battery level, and even using the Lume Cube as a flash for your mobile device. I’ll dig into the functions of the app, as well as the functions of the Lume Cube 2.0 throughout this post.
Bottom line: the Lume Cube is great for use as a smaller light source for anything ranging from a light source for your video conference call to using it as an external flash for your cell phone. It’s certainly not going to replace your speedlites, and it’s not going to work as a full blown lighting kit for something like a corporate video shoot, but when using it for what it was intended to do it’s fantastic.
What’s included
I bought the Lume Cube 2.0 Single Pack from Amazon ($89.95), which includes:
- 1 Lume Cube 2.0: Daylight Balanced 5600K, 95+ CRI, diffused beam angle of 80º
- Accessories: DSLR hot shoe mount, modification frame (for attaching light modifiers), USB cable, warming gel, softening diffuser
When you get your Lume Cube 2.0 box, be sure to remove the plastic insert – the USB-C cable is hidden underneath.
Setting up the Cube
Firing up the Lume Cube is easy, just press and hold the power button on the top. The Lume Cube will turn on to its default brightness.
To adjust the brightness, use the + or – buttons on the top of the cube. The brightness will increase or decrease in 10% increments.
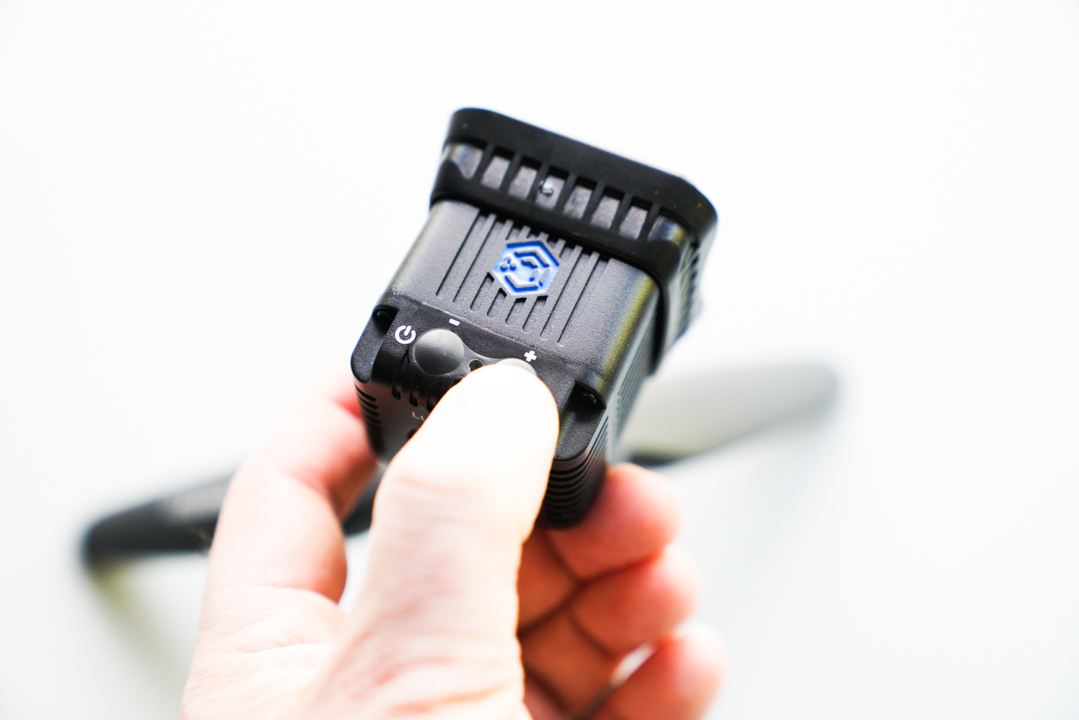
If you want finite control of lower amounts of light, press and hold the + and – keys together for five seconds. The Lume Cube will turn off, then when you hit the + button the light will be in an extremely low power mode which can be made incrementally brighter or darker, though it never gets quite as bright as the “normal” mode. This mode is useful for applications like long exposure photography. To get out of the “low light” mode, press and hold the + and – keys again for five seconds.
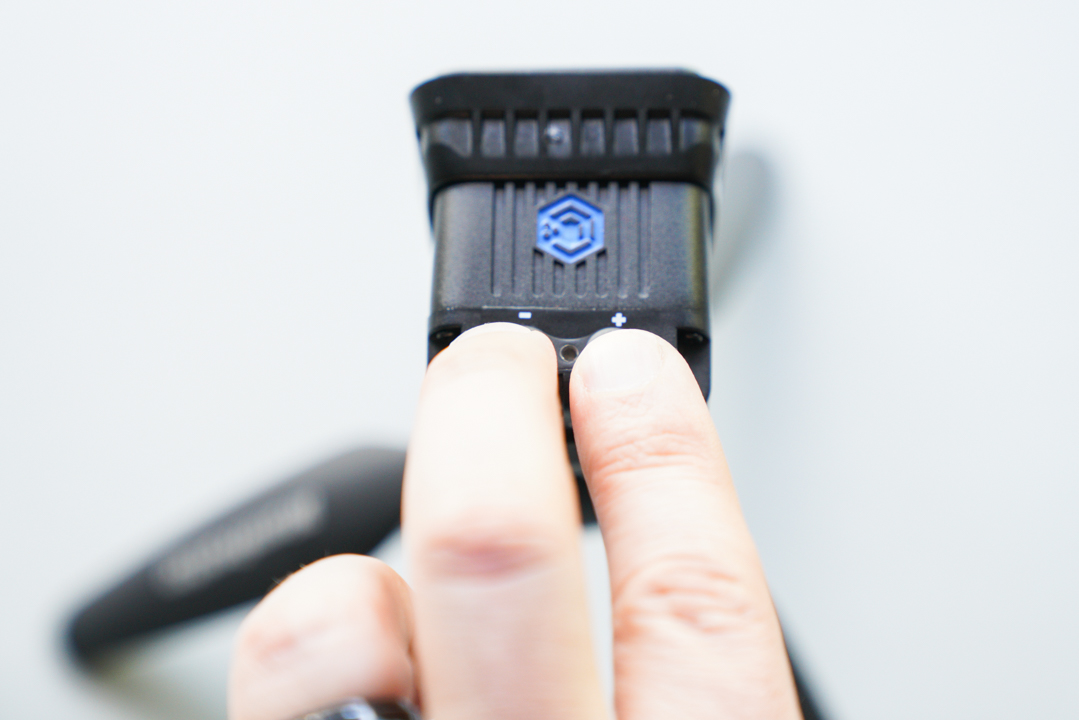
While the Lume Cube doesn’t work as a flash for a regular camera (for that, you’d be better off using it as a continuous light), it does include an optical sensor to act as a slave flash. To enable the slave mode, turn the cube on, then press and hold the + button for five seconds. The cube’s light will turn off, then it will “fire” a burst of light anytime it detects a change in ambient lighting conditions. You can test that it’s working by holding your hand over the top of the cube, then quickly pulling it away. The cube should fire in the same way a flash would. The Lume Cube WILL work as an individual “flash” for your phone’s camera when it’s connected to your phone via Bluetooth, just not as a “hotshoe” flash on your standard camera.
Enable “slave” mode by pressing and holding the + button for five seconds.
The kit that I purchased included two light modifiers, along with the modification frame for magnetically attaching the modifiers.

If you buy the same bundle that I bought, the modification frame will need to be installed. It might take a bit of force to get it to attach, but give it a firm push and the frame will be installed.
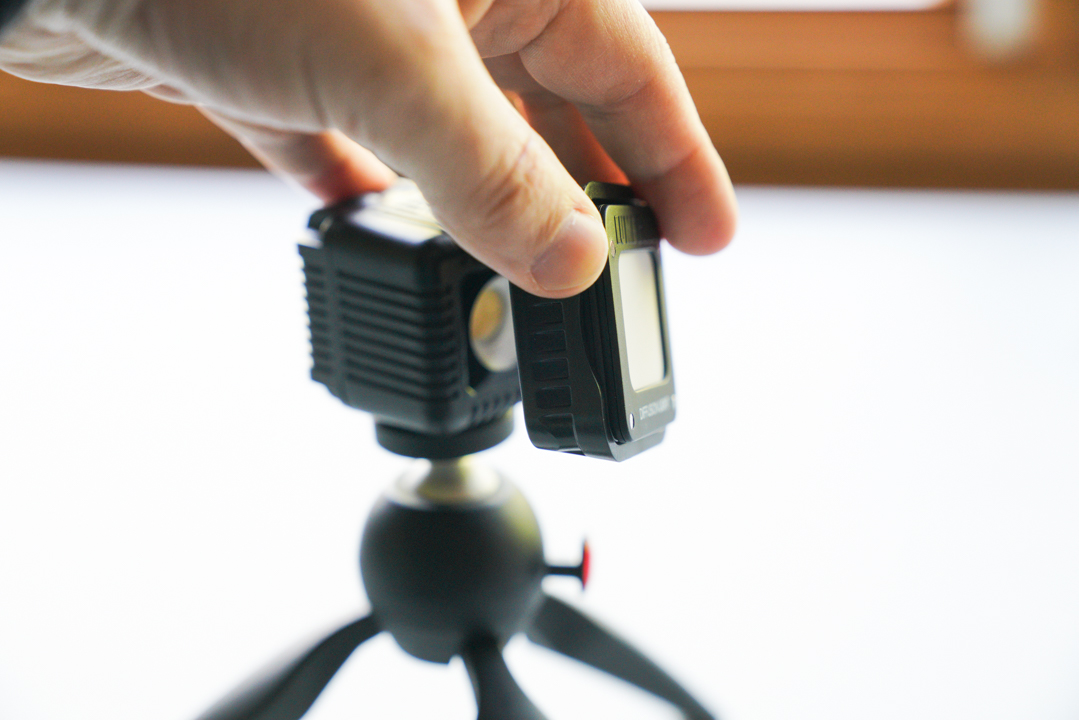
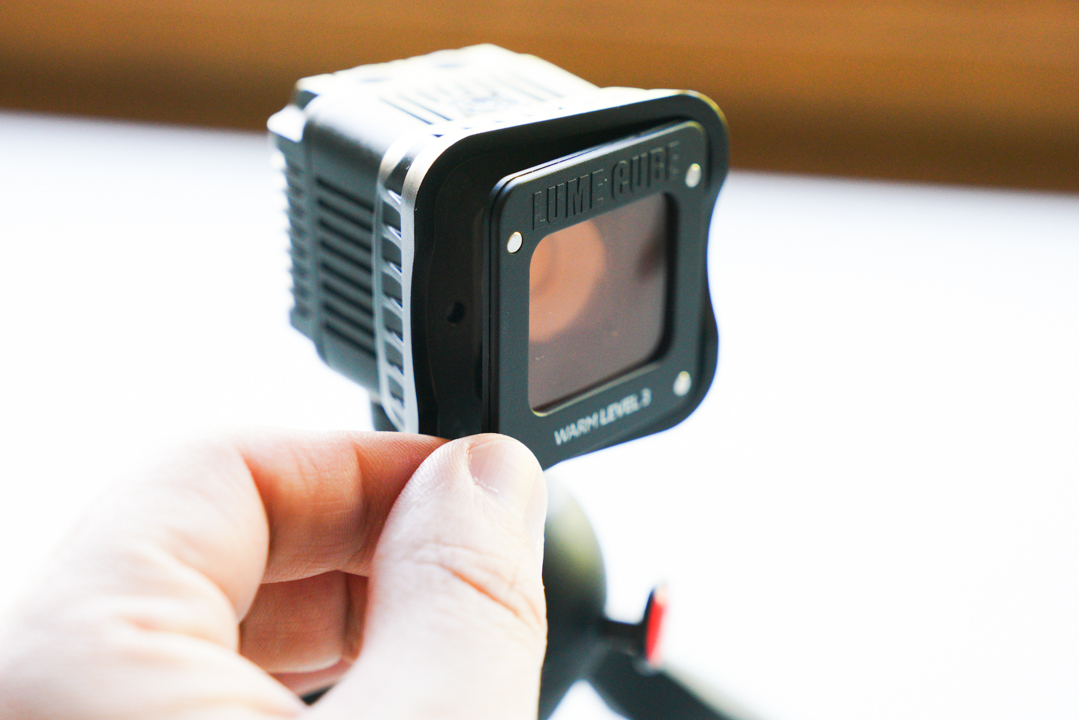
While it’s attached, you can quickly and easily add the included light modifiers which attach magnetically. They are able to be stacked, so you can add the diffuser, then add the warm level three modifier on top of that (or vice versa). Those modifiers stay put too, the magnets are surprisingly strong!
The kit also includes a hot shoe mount, which does exactly what it says. I attached mine easily to my Sony A7R, as seen below.
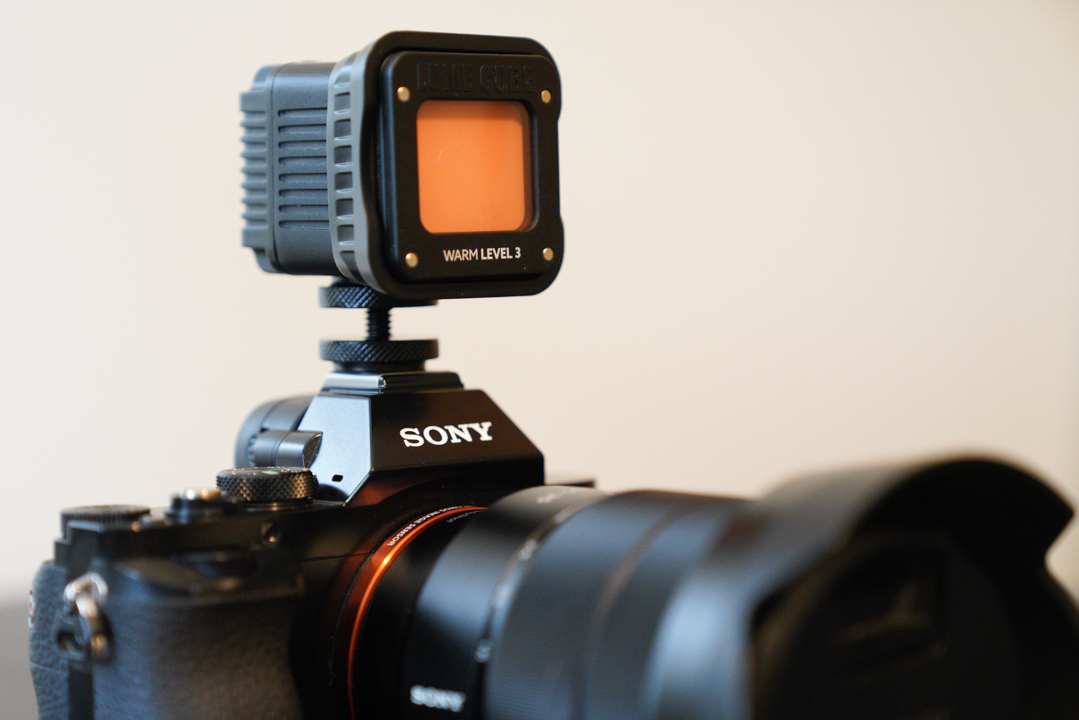
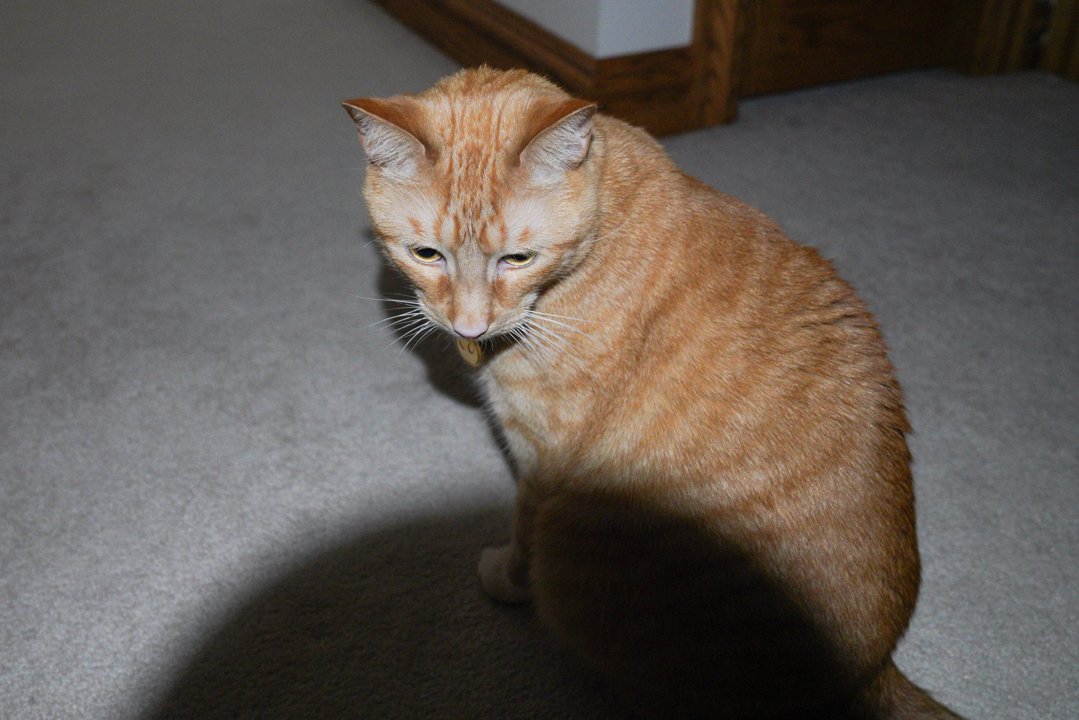
A word of caution, however – if your lens is slightly long you may end up with a lens shaped shadow. Shown below is a photo I tried to take of one of my cats with the Lume Cube as the light source. You can see how the shadow from the lens ruined the shot.
Better off to purchase a hot shoe mount with a ball head. which is taller and allows you to angle the light as necessary.
Using the Cube
The Lume Cube has a number of uses for both video and photography. I recently used mine as a fill light while using my webcam on a Zoom call. By default, my lighting situation looked like this:

Not a great look there. Very “interrogation” type of lighting. My initial thought was to just use the Lume Cube as a primary light source, but this was not the best idea. I wound up feeling like I was being blinded since I had to aim the light directly at my face, plus my webcam doesn’t really understand spot metering, so my face was way too bright since the webcam was trying to accommodate for the dark room.

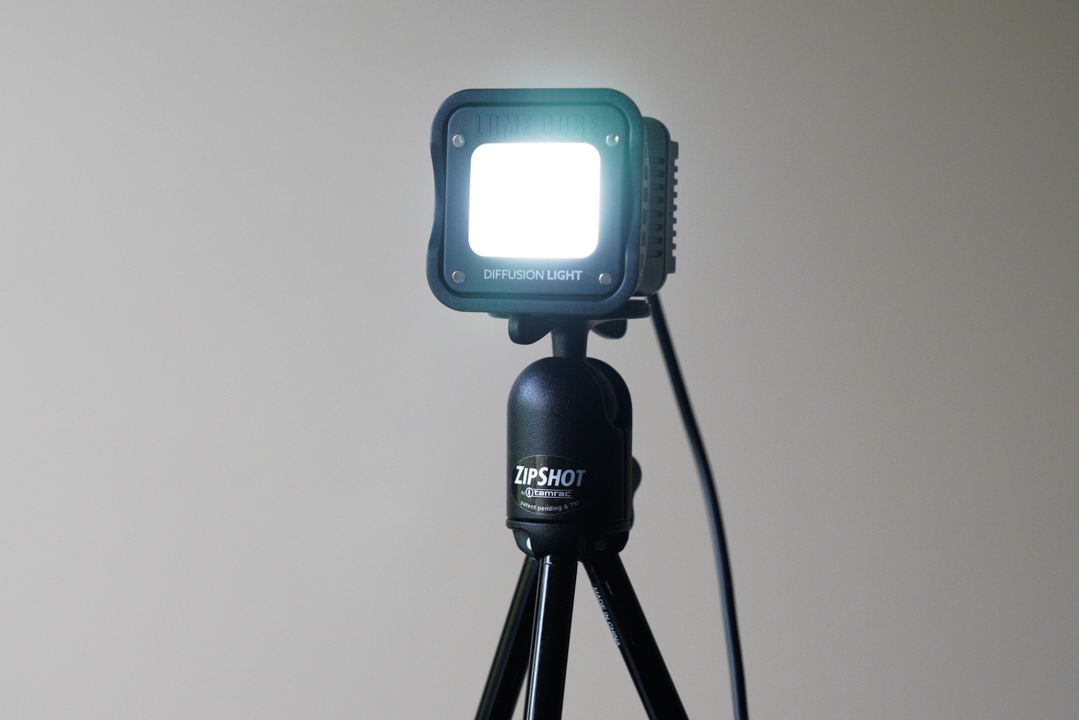
The better way to get this to work was to keep the room lights turned on, then use the Lume Cube as a fill light. I used the diffusion light modifier and kept the power on the Lume Cube around 50%. This worked well. I could probably stand to use two lights, but it was still a dramatic improvement.

I used a Zipshot to mount the Lume Cube, although really any tripod would do. I just happened to have a Zipshot handy, and it was a quick and simple solution.
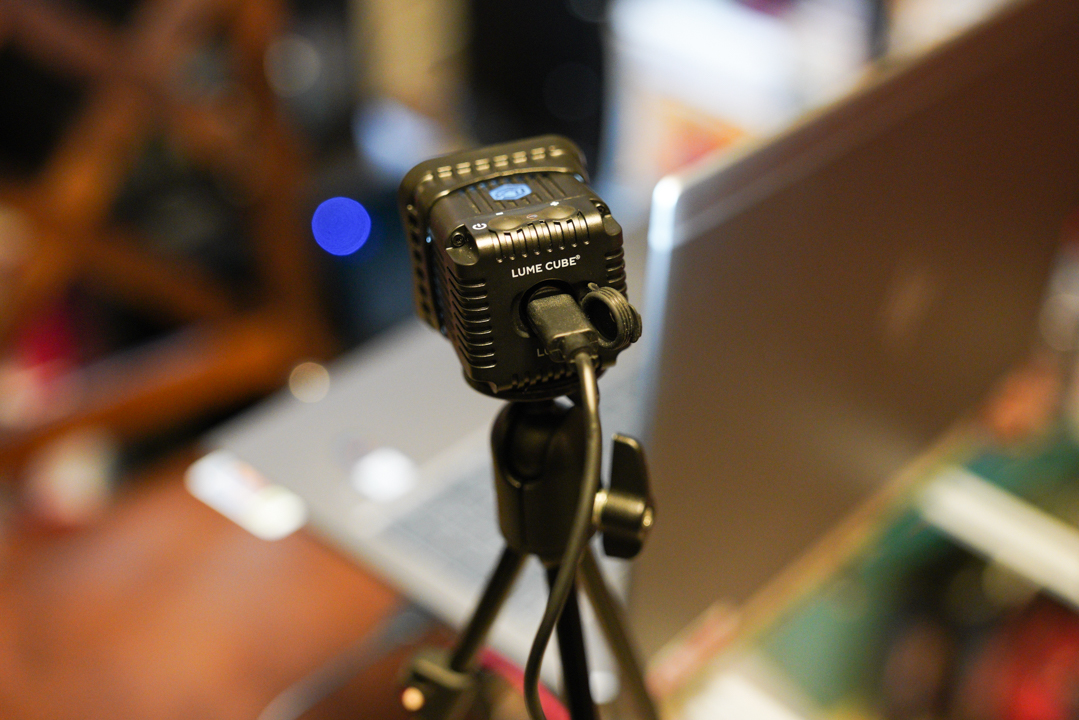
I also kept the Lume Cube plugged into my computer so that it was given a constant power source (pro tip – you can use the Lume Cube while it’s plugged in).
Lume Cube actually sells a kit for video conferencing but I didn’t buy it yet since I already have one of their lights and plenty of tripods. Their solution does include the Diffusion Bulb Pack, which I’d like to try. If I do get that kit, I’ll update this post.
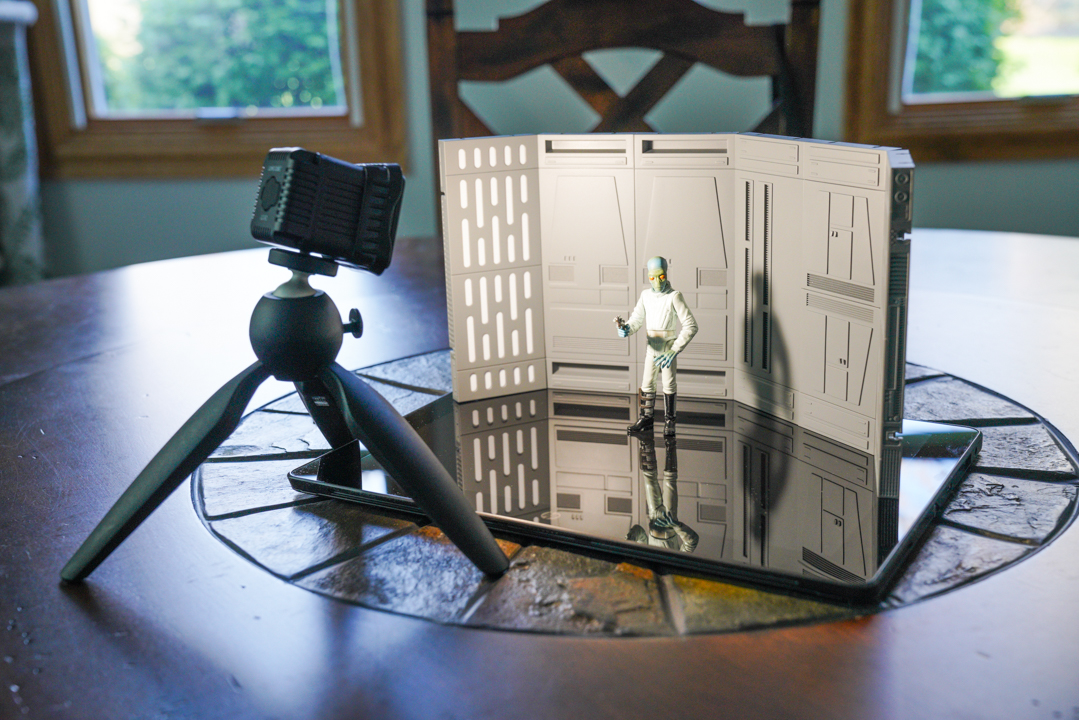
I’ve also used the Lume Cube for photography, specifically to take photos of action figures. The Lume Cube absolutely rocks for this purpose and it’s actually a ton of fun trying out different lighting combos to see what works best. I did find that adding a tiny tripod, like the Manfrotto Pixi Mini Tripod, is an absolutely essential piece of equipment to have for this kind of photography. It allows me to easily place the Lume Cube wherever I want for these smaller scenes while I focus on the camera angle that I want.
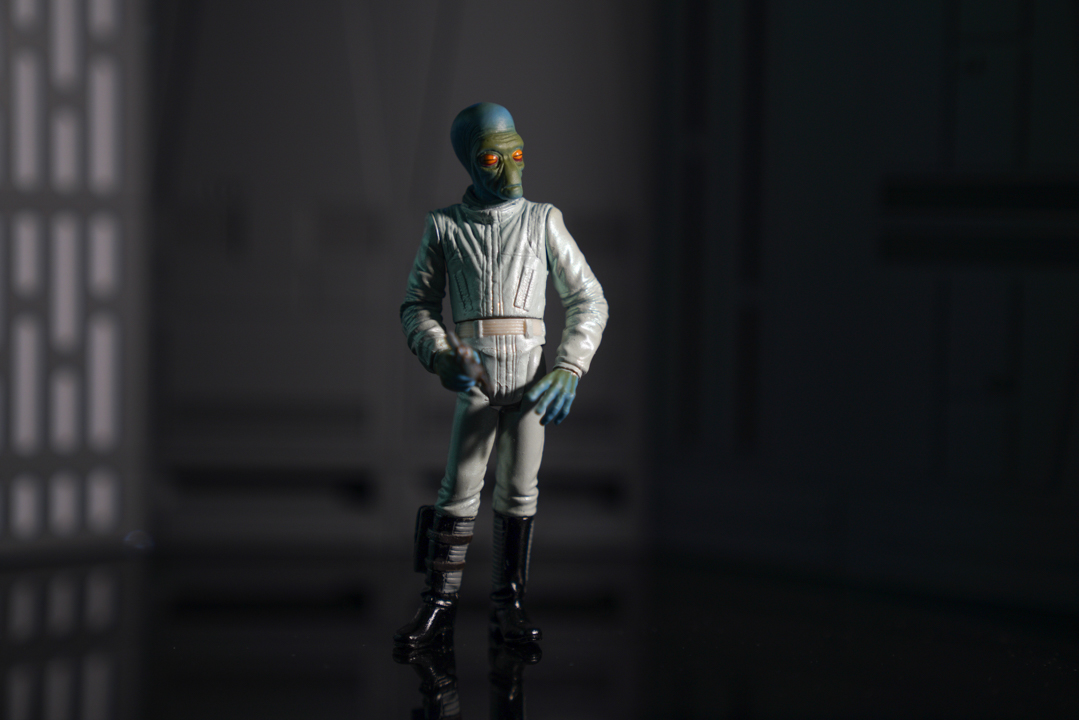
Shot using one Lume Cube
Battery Life and Charging Time
Battery life is impressive, especially if you avoid using the Bluetooth functions. At 50% power, the Lume Cube gave me right around three hours of use. At full power, you can expect around 90 minutes of use, though any use of the Bluetooth functions will drain the battery more rapidly. As mentioned above though, you can use the Lume Cube while it’s being charged.
Charging does take a while, generally you can expect at least a couple of hours for a full charge. Although, as mentioned, you can use the cube while it’s being charged, and you could even plug it into an external power bank.
Using the Lume-X App
You can download the Lume-X app for free for Apple or Android devices. The app connects to your Lume Cube(s) via Bluetooth.
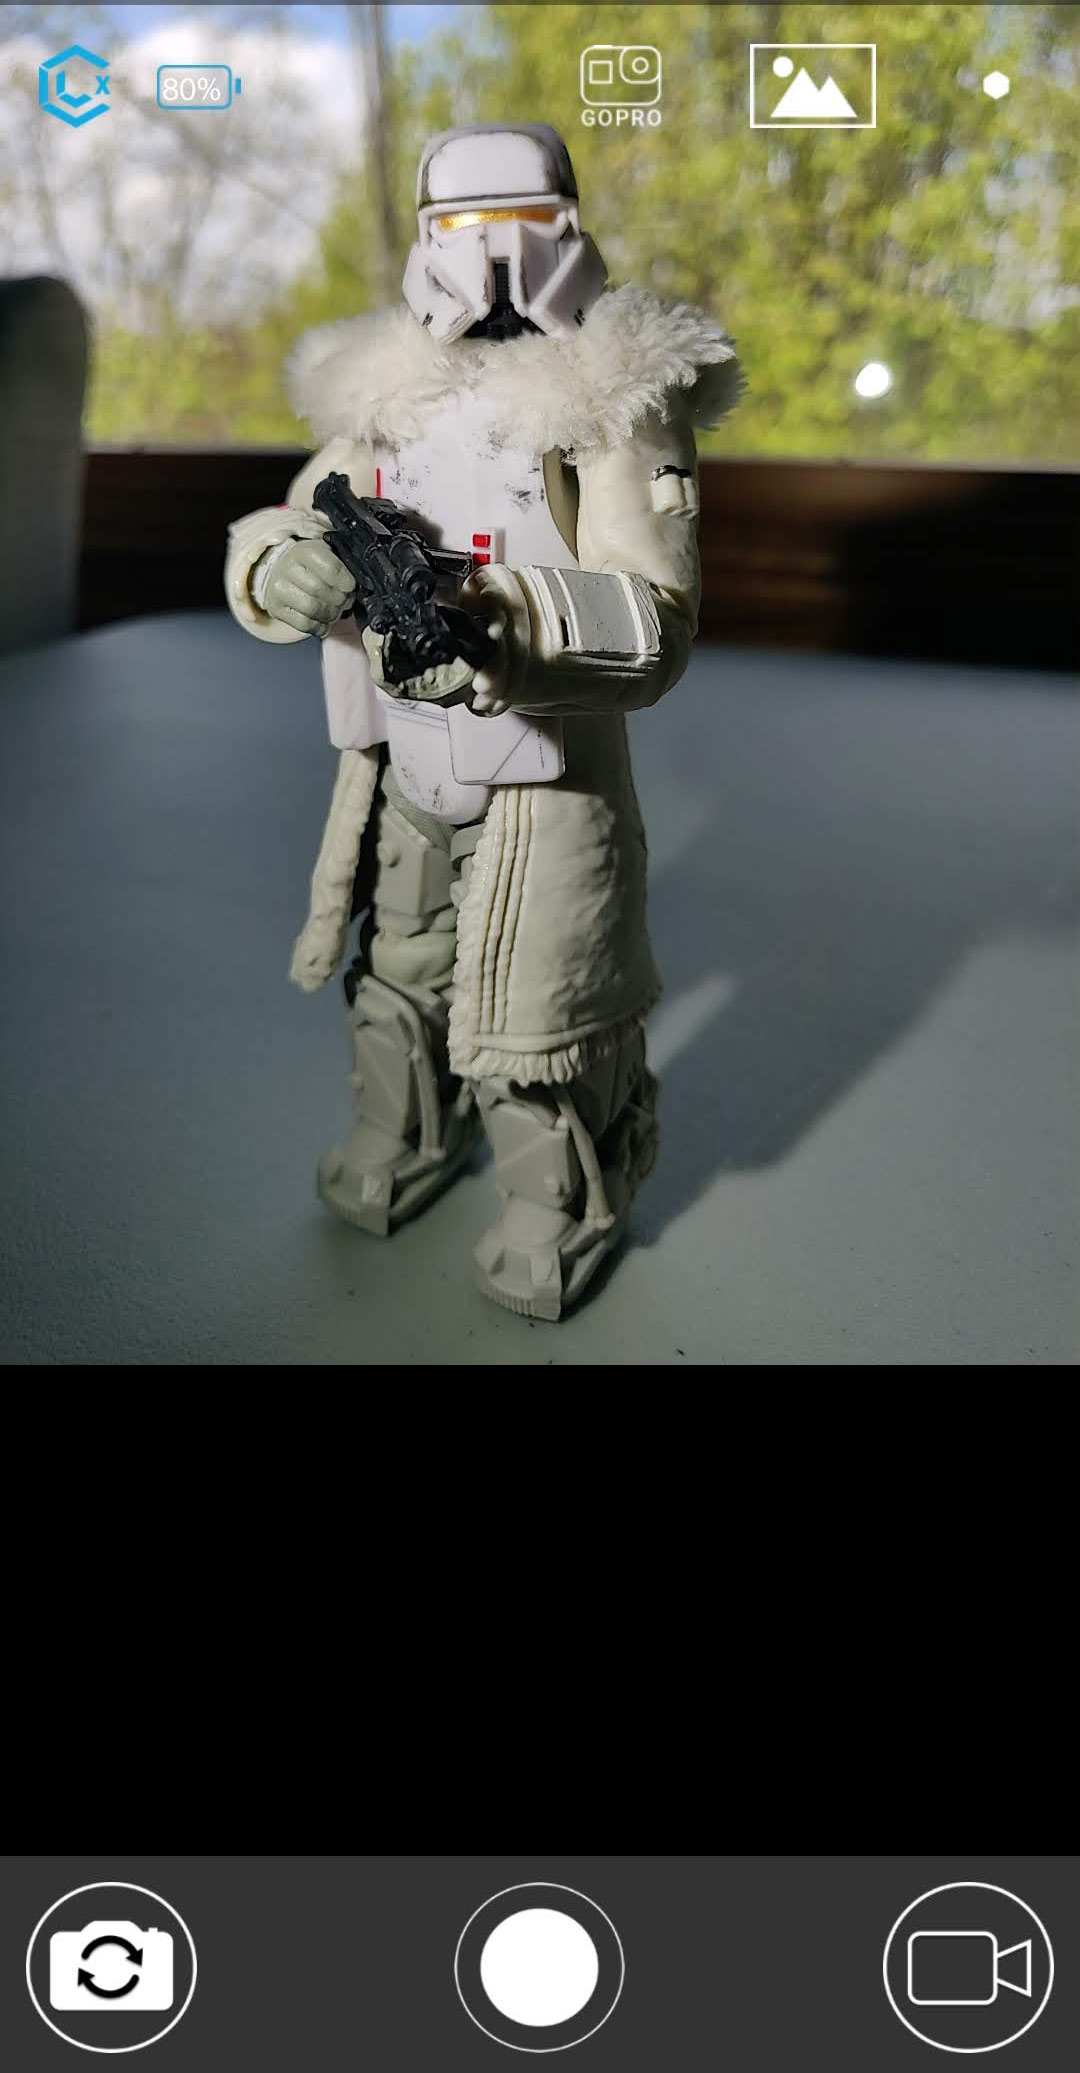
The Lume Cube has Bluetooth built in, and it turns out automatically when the cube is powered on (it eventually turns Bluetooth off if it doesn’t detect a connection). Once you pair your Lume Cube with the app, it should have your phone’s camera displaying immediately in the app, along with a few simple camera control buttons along the bottom and some not so obvious controls at the top. Shown below is how the app looks when you first launch it (excluding the Range Trooper).
The bottom buttons are somewhat self explanatory: there’s an obvious shutter in the middle, then the standard button for swapping between front and back camera on the left, and finally the option to swap between photo and video mode on the right.

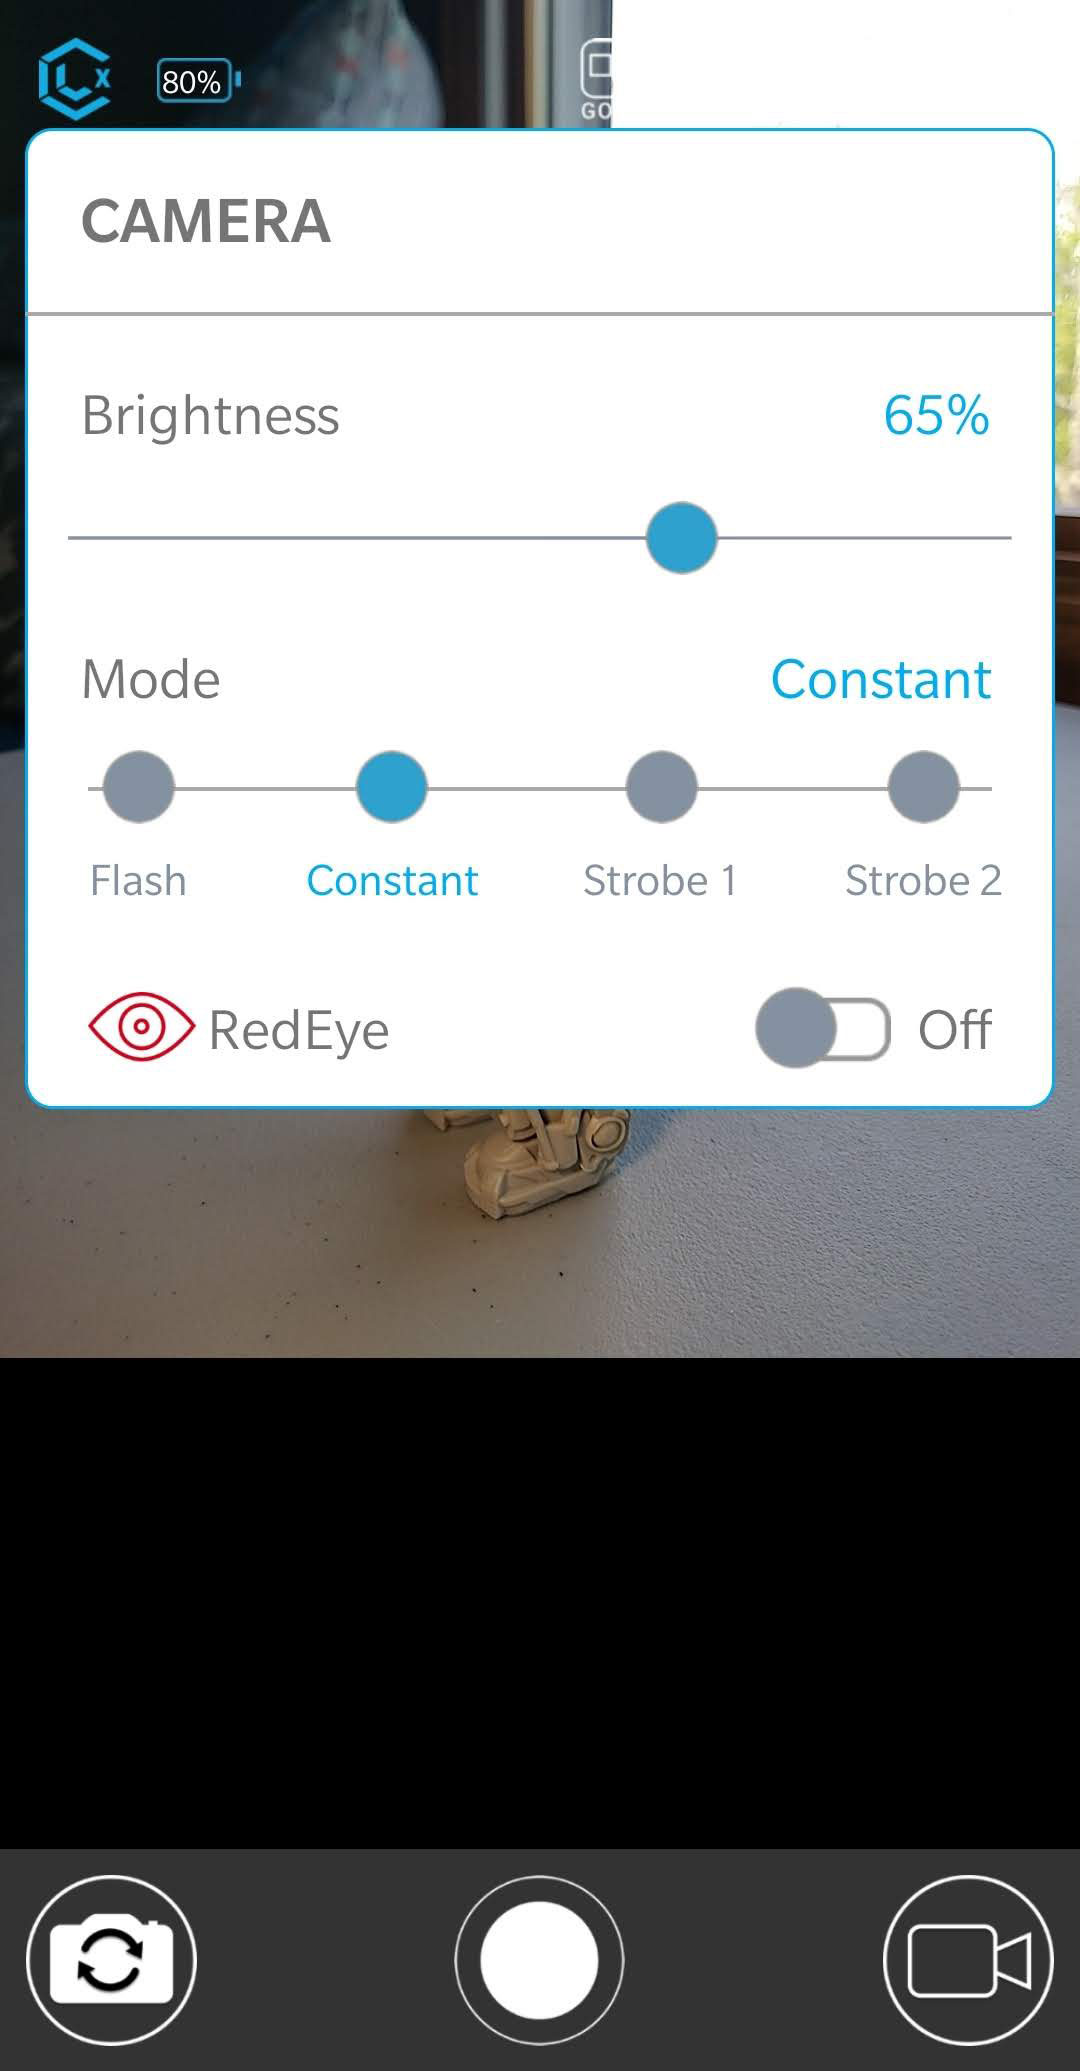
Along the top, things are a little bit less obvious. On the left, there’s a battery indicator, which is the battery life remaining on your Lume Cube (and not your phone). There’s another button (the blue Lume Cube icon) on the far left which, when pushed, opens up various controls for your Lume Cube.

The section that opens up when you hit the blue Lume Cube icon, shown below, includes settings for brightness, whether or not to use the cube as a flash or if you’d like a strobe effect.
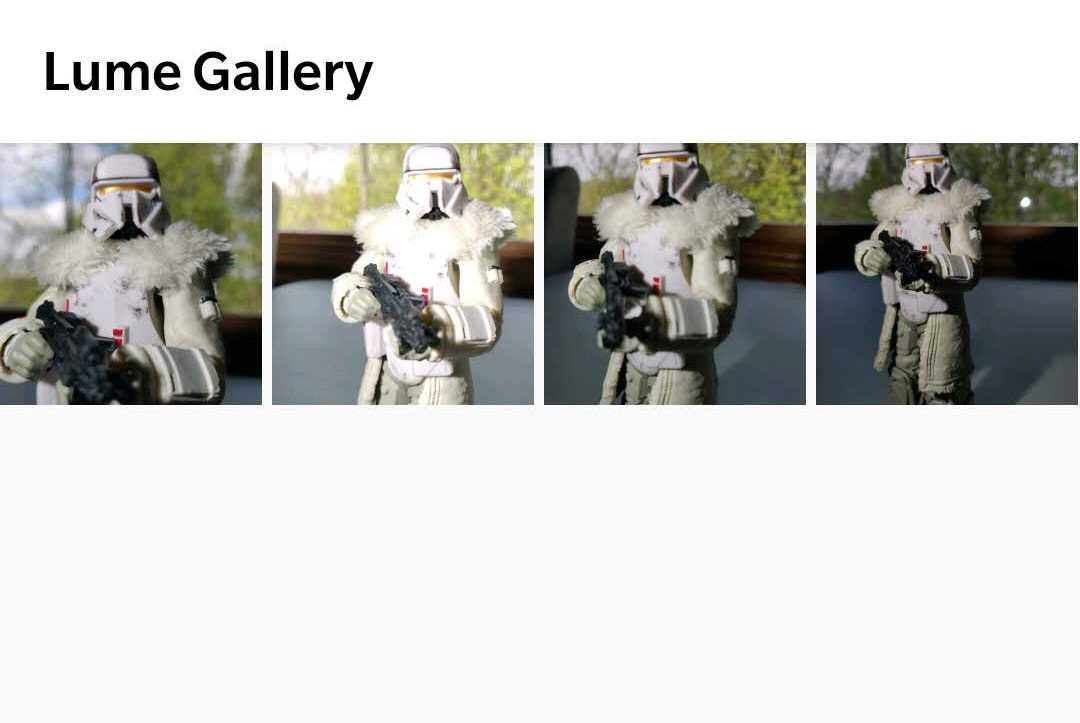
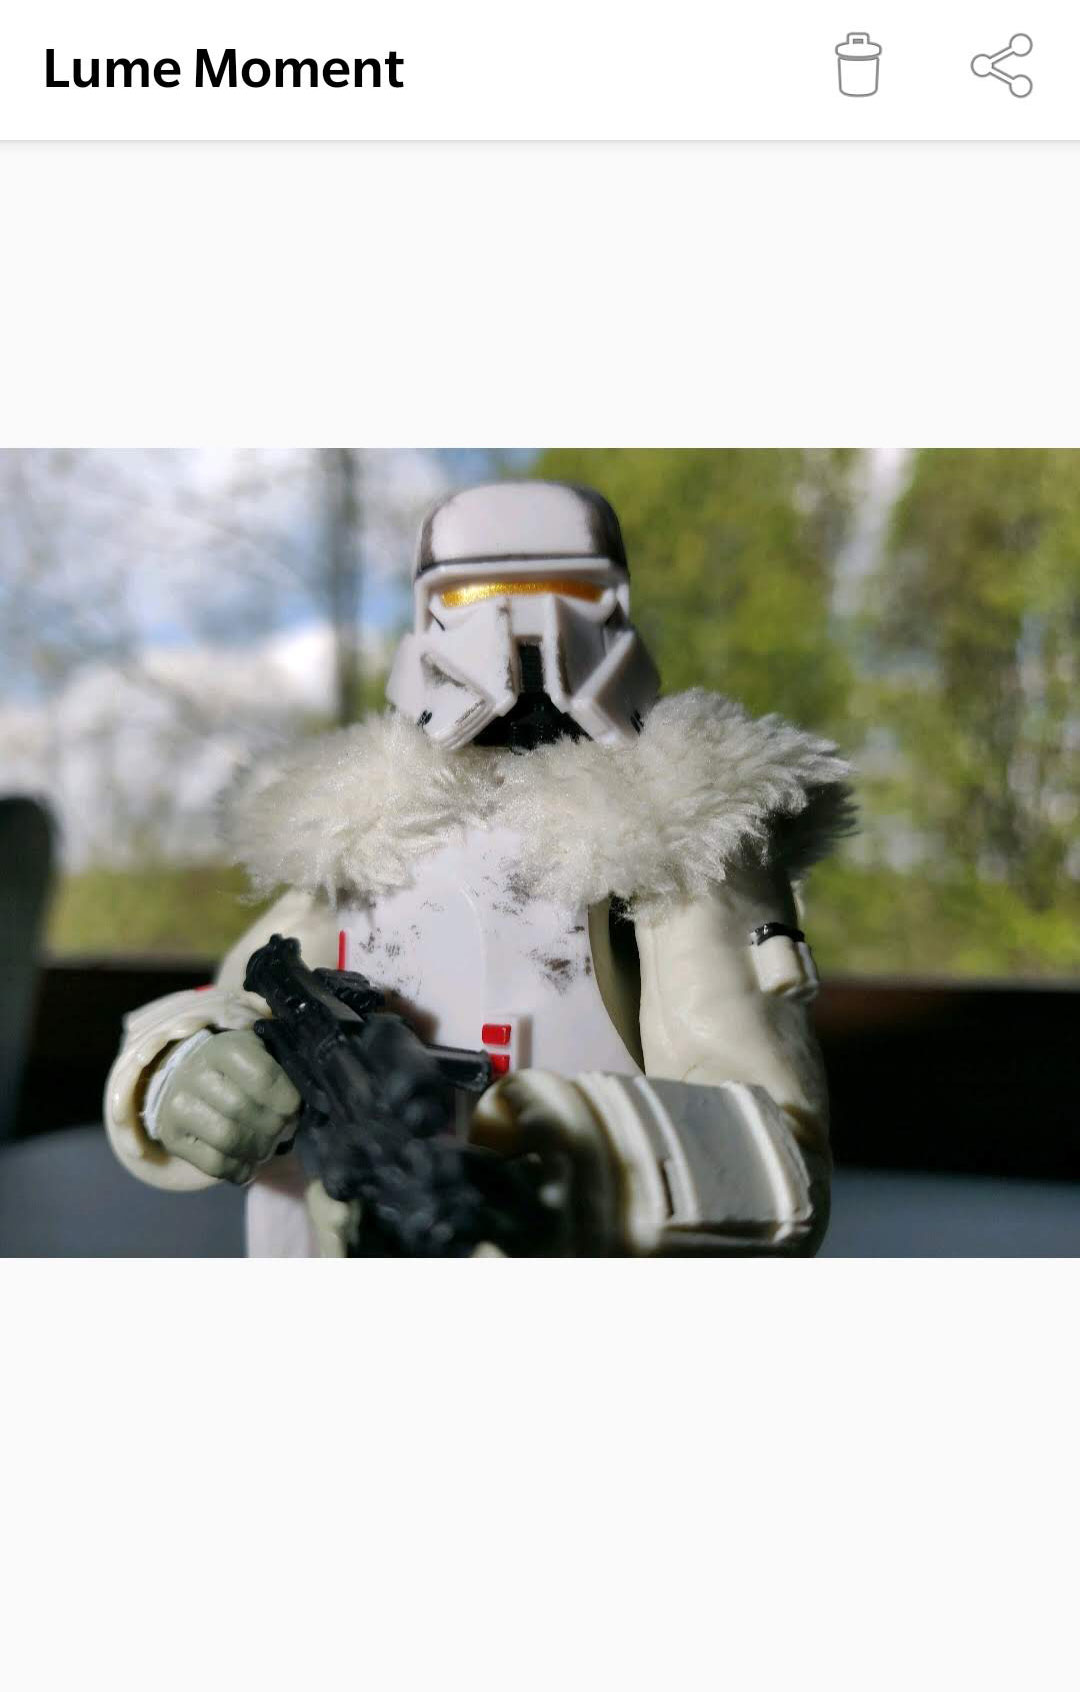
The built in camera app is pretty limited. You can adjust the camera’s exposure and choose what to focus on, but that’s about it. The real benefit that the app gives you is the ability to quickly change settings on the Lume Cube and see the effects of those changes without having to switch between the Lume-X app and your device’s camera app. You can also see your photos from within the app by pressing the little “photo” icon along the top right (to the right of the GoPro button), which will open the “Lume Gallery.” The Lume Gallery lets view your photos/videos (called “Lume Moments”) and from there, you can delete or share them. Shown below is the Lume Gallery along with one of my “Lume Moments.”
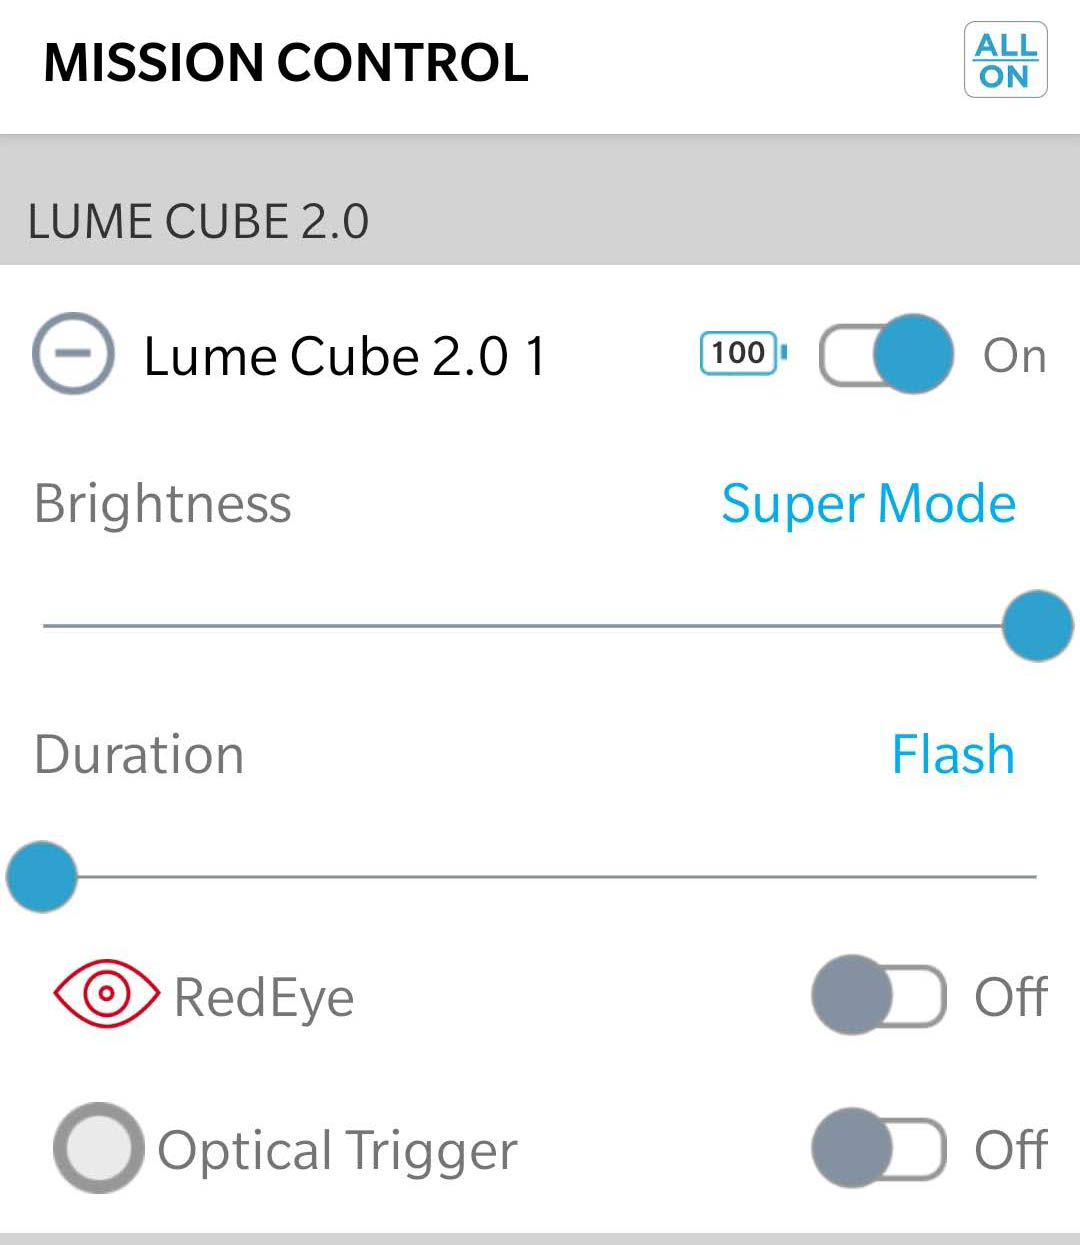
To return to the main shooting screen, click anywhere on the screen (not on the controls). Looking again at the top menu items (shown below), on the right, you have a button for connecting a GoPro (I could not get my GoPro 6 to work with the app), the “Lume Gallery” button, and finally an odd dot looking button which is actually how you get into the “Mission Control” section of the app.
Mission Control is where you can control more than one Lume Cube. Controls include enabling or disabling one or more lights, renaming your lights, and it allows you to choose between flash or strobe modes on an individual basis. I only have one light to test with, so I wasn’t able to fully utilize this section of the app. This is also the only section of the app that allows you to completely turn off the Lume Cube’s light (there’s an “on/off” switch next to each of your Lume Cubes – mine is called “Lume Cube 2.01” below).
Final Thoughts
All in all, I’m happy with the Lume Cube. It’s small enough to just throw into a bag (or even your pocket) for a quick lighting solution on the go. It’s made my toy photography a lot more fun, and it’s been a surprising benefit when being used for lighting during a video conference. That might have been the reason that you ran across this post in the first place, and I can say that yes, it does work for that purpose!


