Amazon Photos/Amazon Drive finally ups its game and gives users a reliable backup system with unlimited photo storage capacity.
I recently revisited the Amazon Photos service after bailing on it out of frustration a few years ago. I’m happy to say that Amazon has addressed the bulk of the glaring issues that the service had in the past and now provides users with a solid system once you get everything set up to your liking. This article covers how to set everything up so your files are automatically and reliably backed up. Also worth noting, in the screenshots you’ll see my wife’s name shown (Pam). We share her Amazon Prime account.
If you are like me, you are in a constant battle to manage hard drive utilization. Shooting in RAW format is the preferred method when it comes to taking photos, but as I’m sure you are well aware, these files eat up drive space quickly. At some point you are going to need to either buy more drive space or start backing up all those massive RAW files. What if there was a place to back up all of those photo online, and it had unlimited storage capability? Turns out, there is. It’s called Amazon Photos/Amazon Drive, and it’s included with an Amazon Prime membership.
If you are wondering if Amazon’s service will allow you to back up huge PSD files or other formats like DNG, rest assured, it does. I’ve already uploaded gigs of files to the service, including a 2.3 GB layered PSD file (which means it also handles files that are over 2 GB). You can upload entire folders, keeping their folder structure intact. If you are a Prime member, it’s a no-brainer to use the service. And if you were on the fence about going with Amazon Prime, this might be a good reason to go ahead and sign up for it.
Also worth noting before I go any further, throughout this article I reference “Amazon Photos” and “Amazon Drive” – in this instance, they are essentially the same thing. “Amazon Photos” backs everything up to your “Amazon Drive” so it can get confusing. Not only that, but there are two different web interfaces for viewing your photos. One is the “Amazon Photos” web interface, which is basically useless if all you are interested in is backups. I won’t be discussing its use in this article. The other one is the “Amazon Drive” web interface, which lets you see all of your images in an organized folder structure. To add to the confusion, as of this writing (June, 2020) when you install the software on your computer, the icon on your desktop is called “Amazon Backup.” Literally nowhere else is the software ever referred to as “Amazon Backup.” That’s not confusing at all, Amazon. Despite those hangups, I’m still happy with the software’s capability.
So how does it all work? Read on…
Using Amazon Photos for Backups
The best way to use Amazon Photos for backups is to install the desktop app and have a well organized structure on your hard drive before you start backing everything up. If you aren’t the most organized person, you can still reorganize everything using the Amazon Drive web interface once all your files are backed up (more on that in a bit).
You can also use the web based Amazon Drive interface for uploading, and there’s an app for your phone you can install that allows you to backup your cell phone photos (similar to Google Photos). You can find links to the apps here.
Using the computer based application
Once the computer based application is installed, you need to sign in with your Amazon Prime account. Once logged in, you are presented with a simple interface (shown below) that shows your photo stats, your recent uploads, and a box that says, “drag and drop your photos.” This drag-and-drop option can include entire folders, or you can browse to individual files if you wish. If you are just looking to quickly dump a bunch of photos, this is a perfectly fine way to use the software.
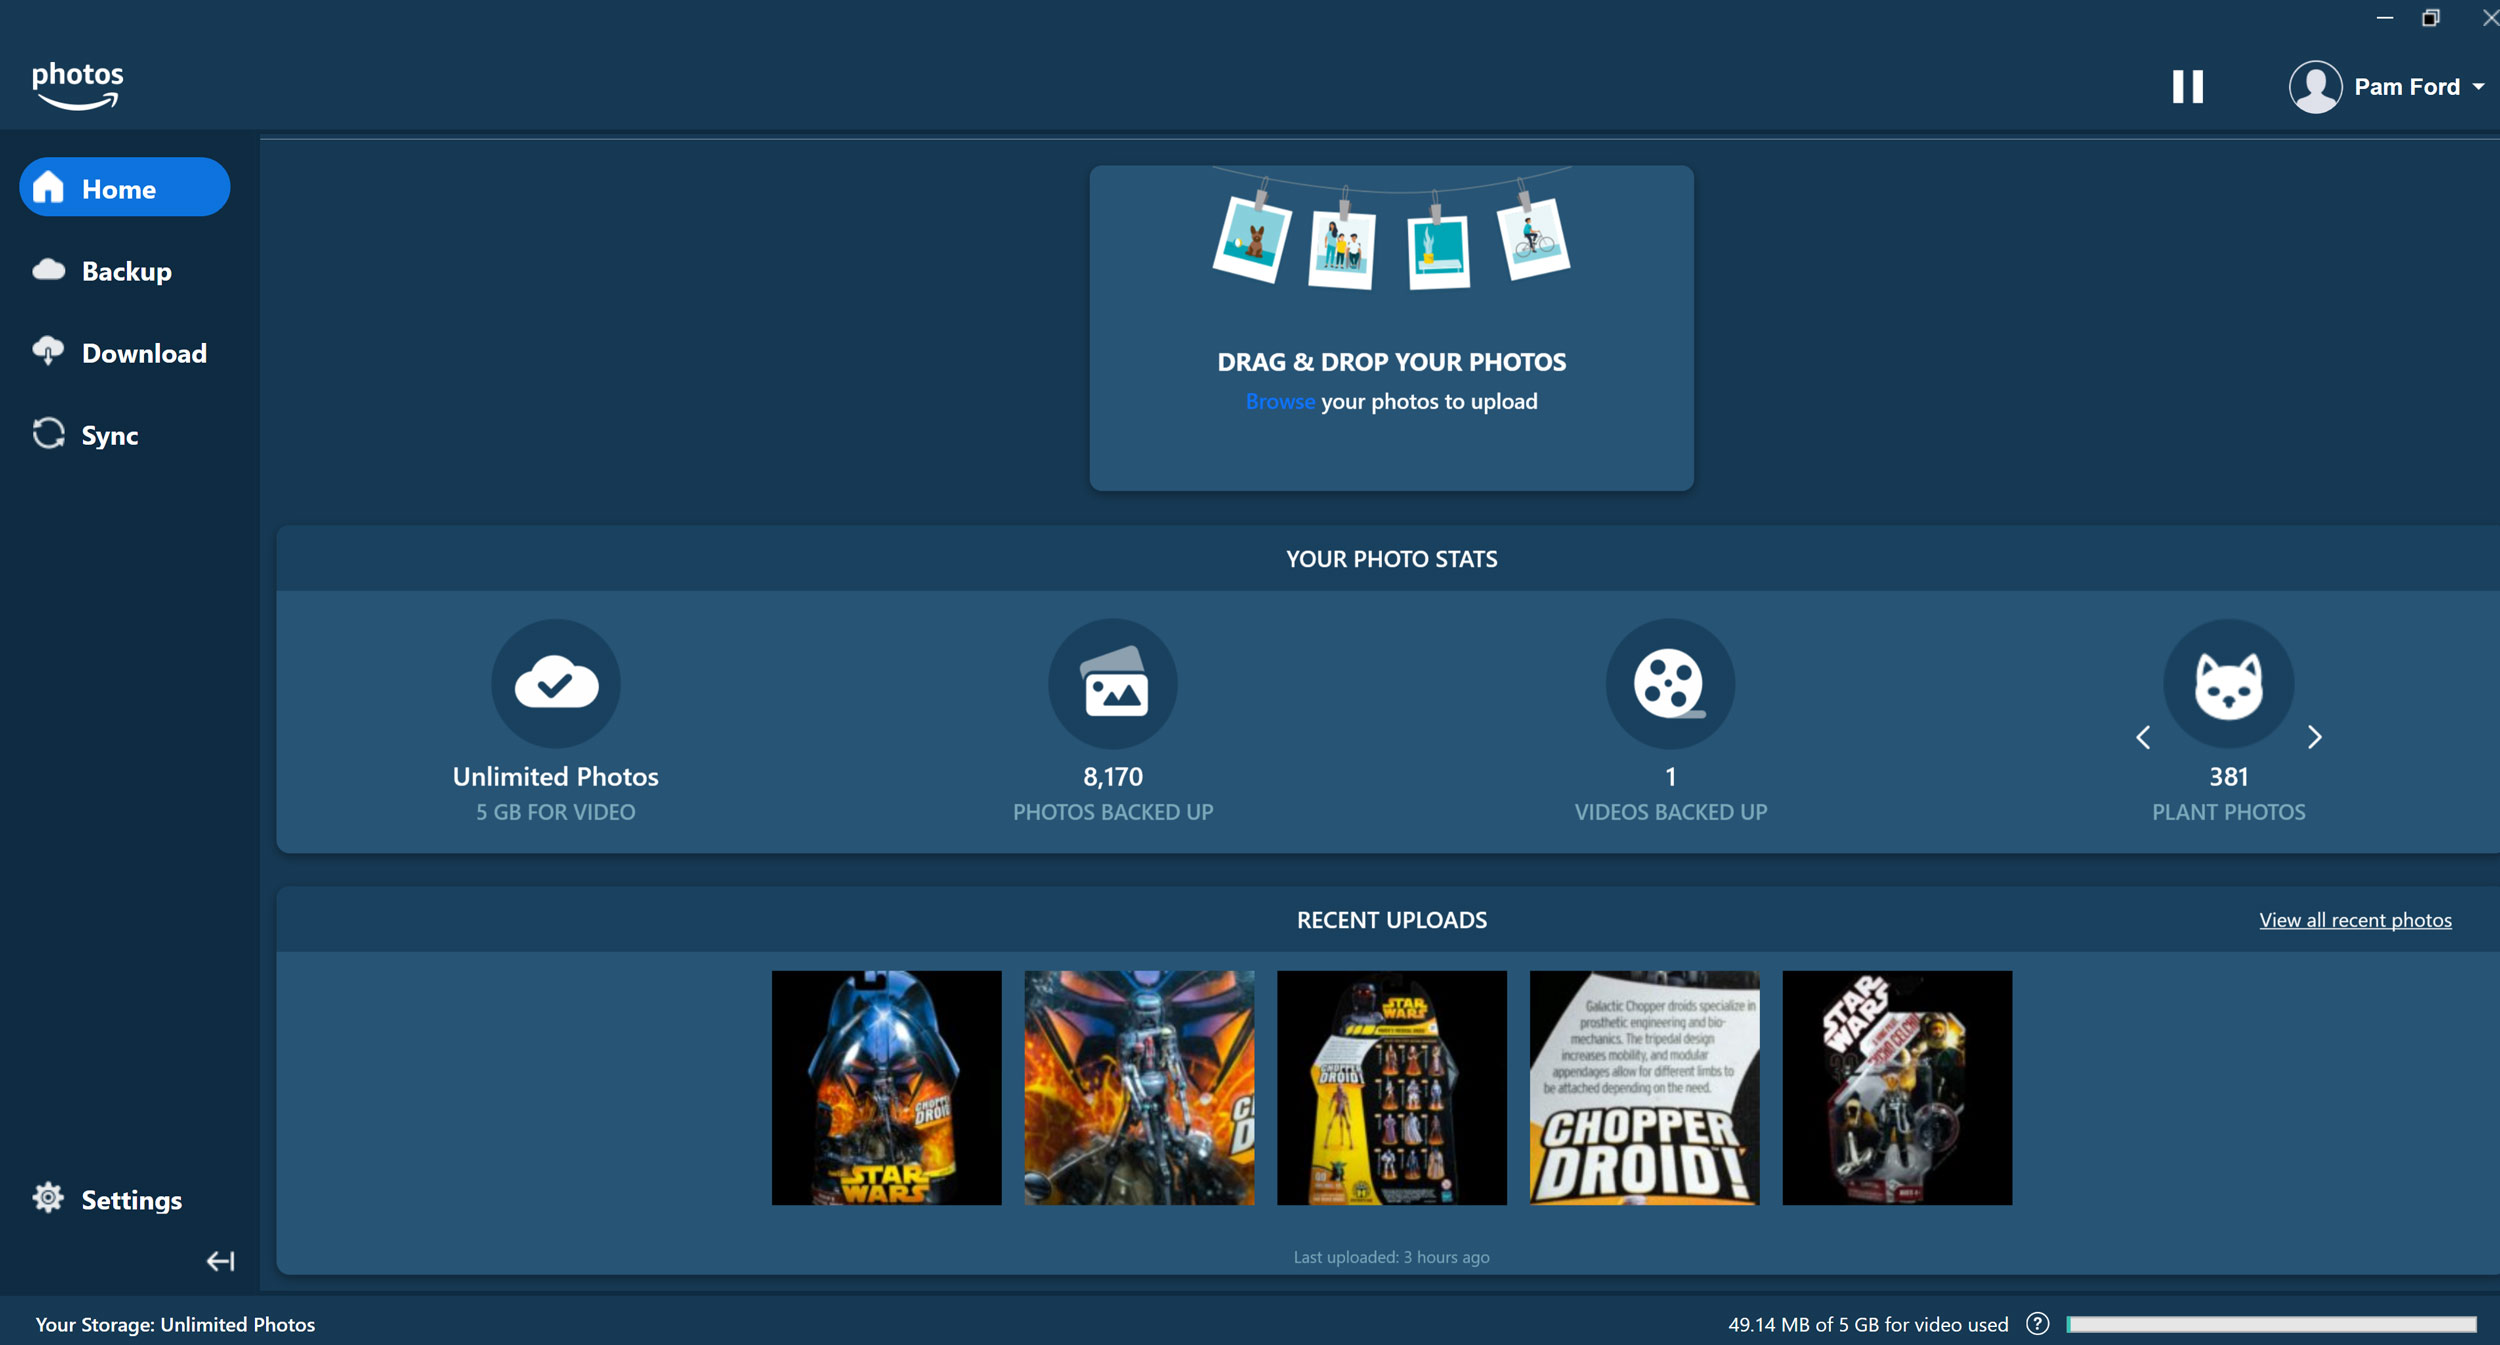
The Amazon Photos interface (on PC).
There are also more automated ways to use the software though, which I’ll get into later in this article. For now, here’s how to use the “drag-and-drop” functionality:
Open Windows Explorer and browse to a folder full of images that you’d like to upload. You can choose to upload individual files or an entire folder. Drag the directory (or selected images) directly on top of the Amazon Photos application, as shown below:

Drag and drop individual images or entire folders into the Amazon Photos app.
Amazon photos will then ask you which directory you’d like to upload your images into, or if you’d like to create a new directory. I uploaded an entire folder full of images from 2011 (called “2011”) so I simply chose to upload to the root (the root on Amazon Drive is called “All” and is shown in the screenshot below):

Select an existing directory (if you have any) or create a new one here. You can also just upload to the root.
Amazon Photos will notify you in the lower left corner that the photos are being uploaded.

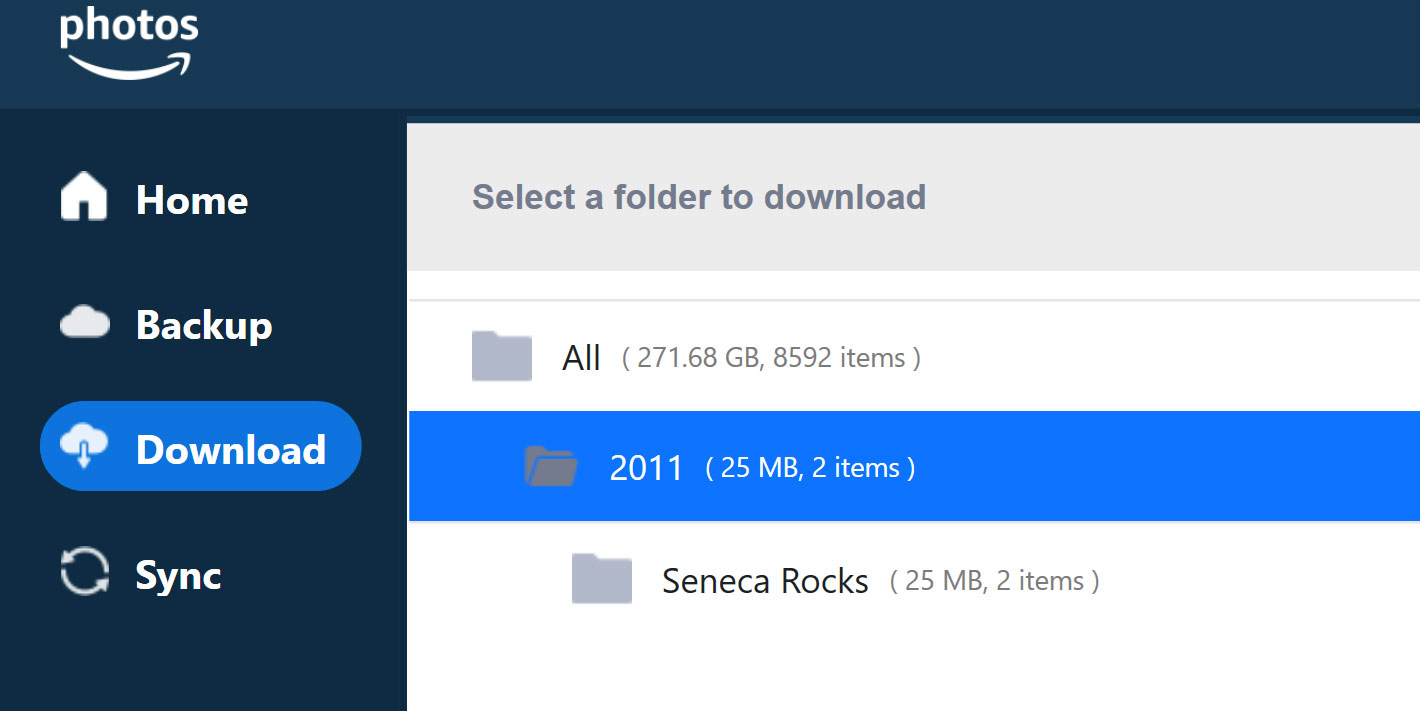
If you uploaded an entire directory, the upload can be verified by going to the “Download” section. Click the “Download” button and verify that the folder is indeed there. Shown below is my “2011” folder.
If you uploaded individual images, you’ll need to use the Amazon Drive web interface to verify that they are there. I’ll dig more into the web interface later in this article.
Setting Automatic Backups (Highly Recommended)
The most effective way to use the software is to allow it to dynamically sync the various folders that you use for your photos. You can choose multiple drives and multiple folders, and as long as the software is running your photos will be backed up automatically. Here’s how that works:
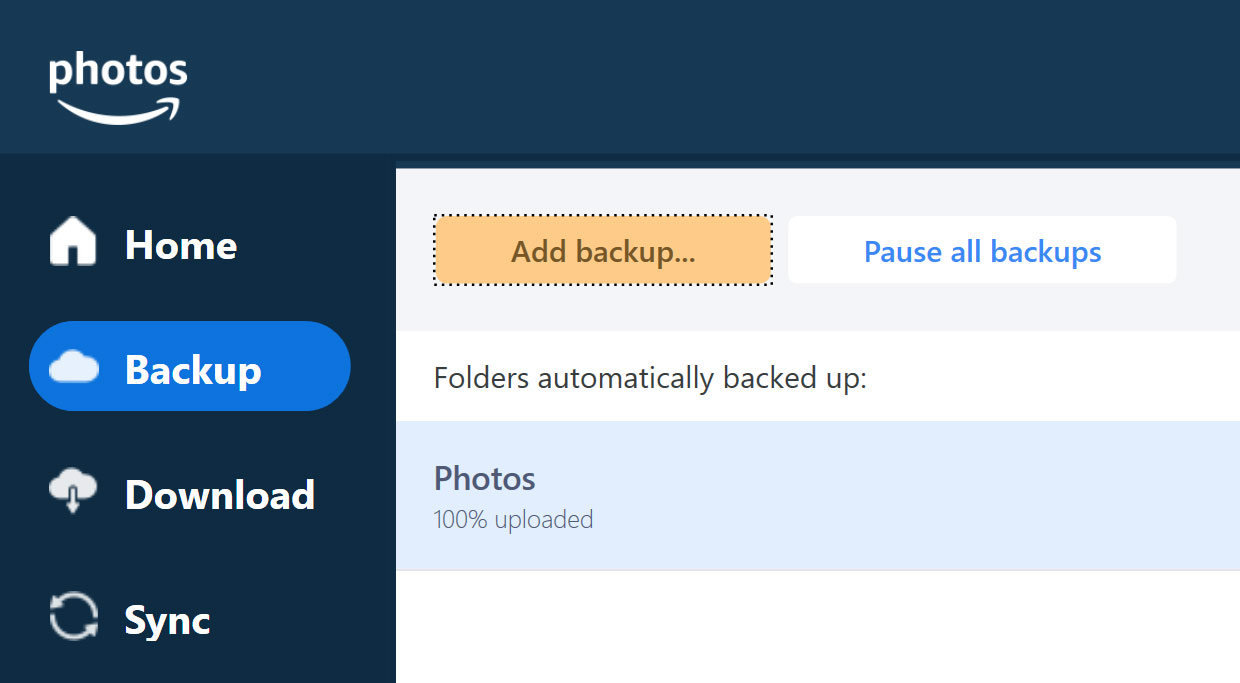
First, click the “Backup” button,

Next, select “Add backup” to select a folder that Amazon Photos will sync. You can add as many as you like from as many drives as you like. Install the software on another machine and that one will be backed up as well! The “Add backup” button is shown below:
Hit the “Add backup” button and browse to the directory you’d like to have Amazon backup. In this case, I grabbed a folder full of images on an external Seagate drive.
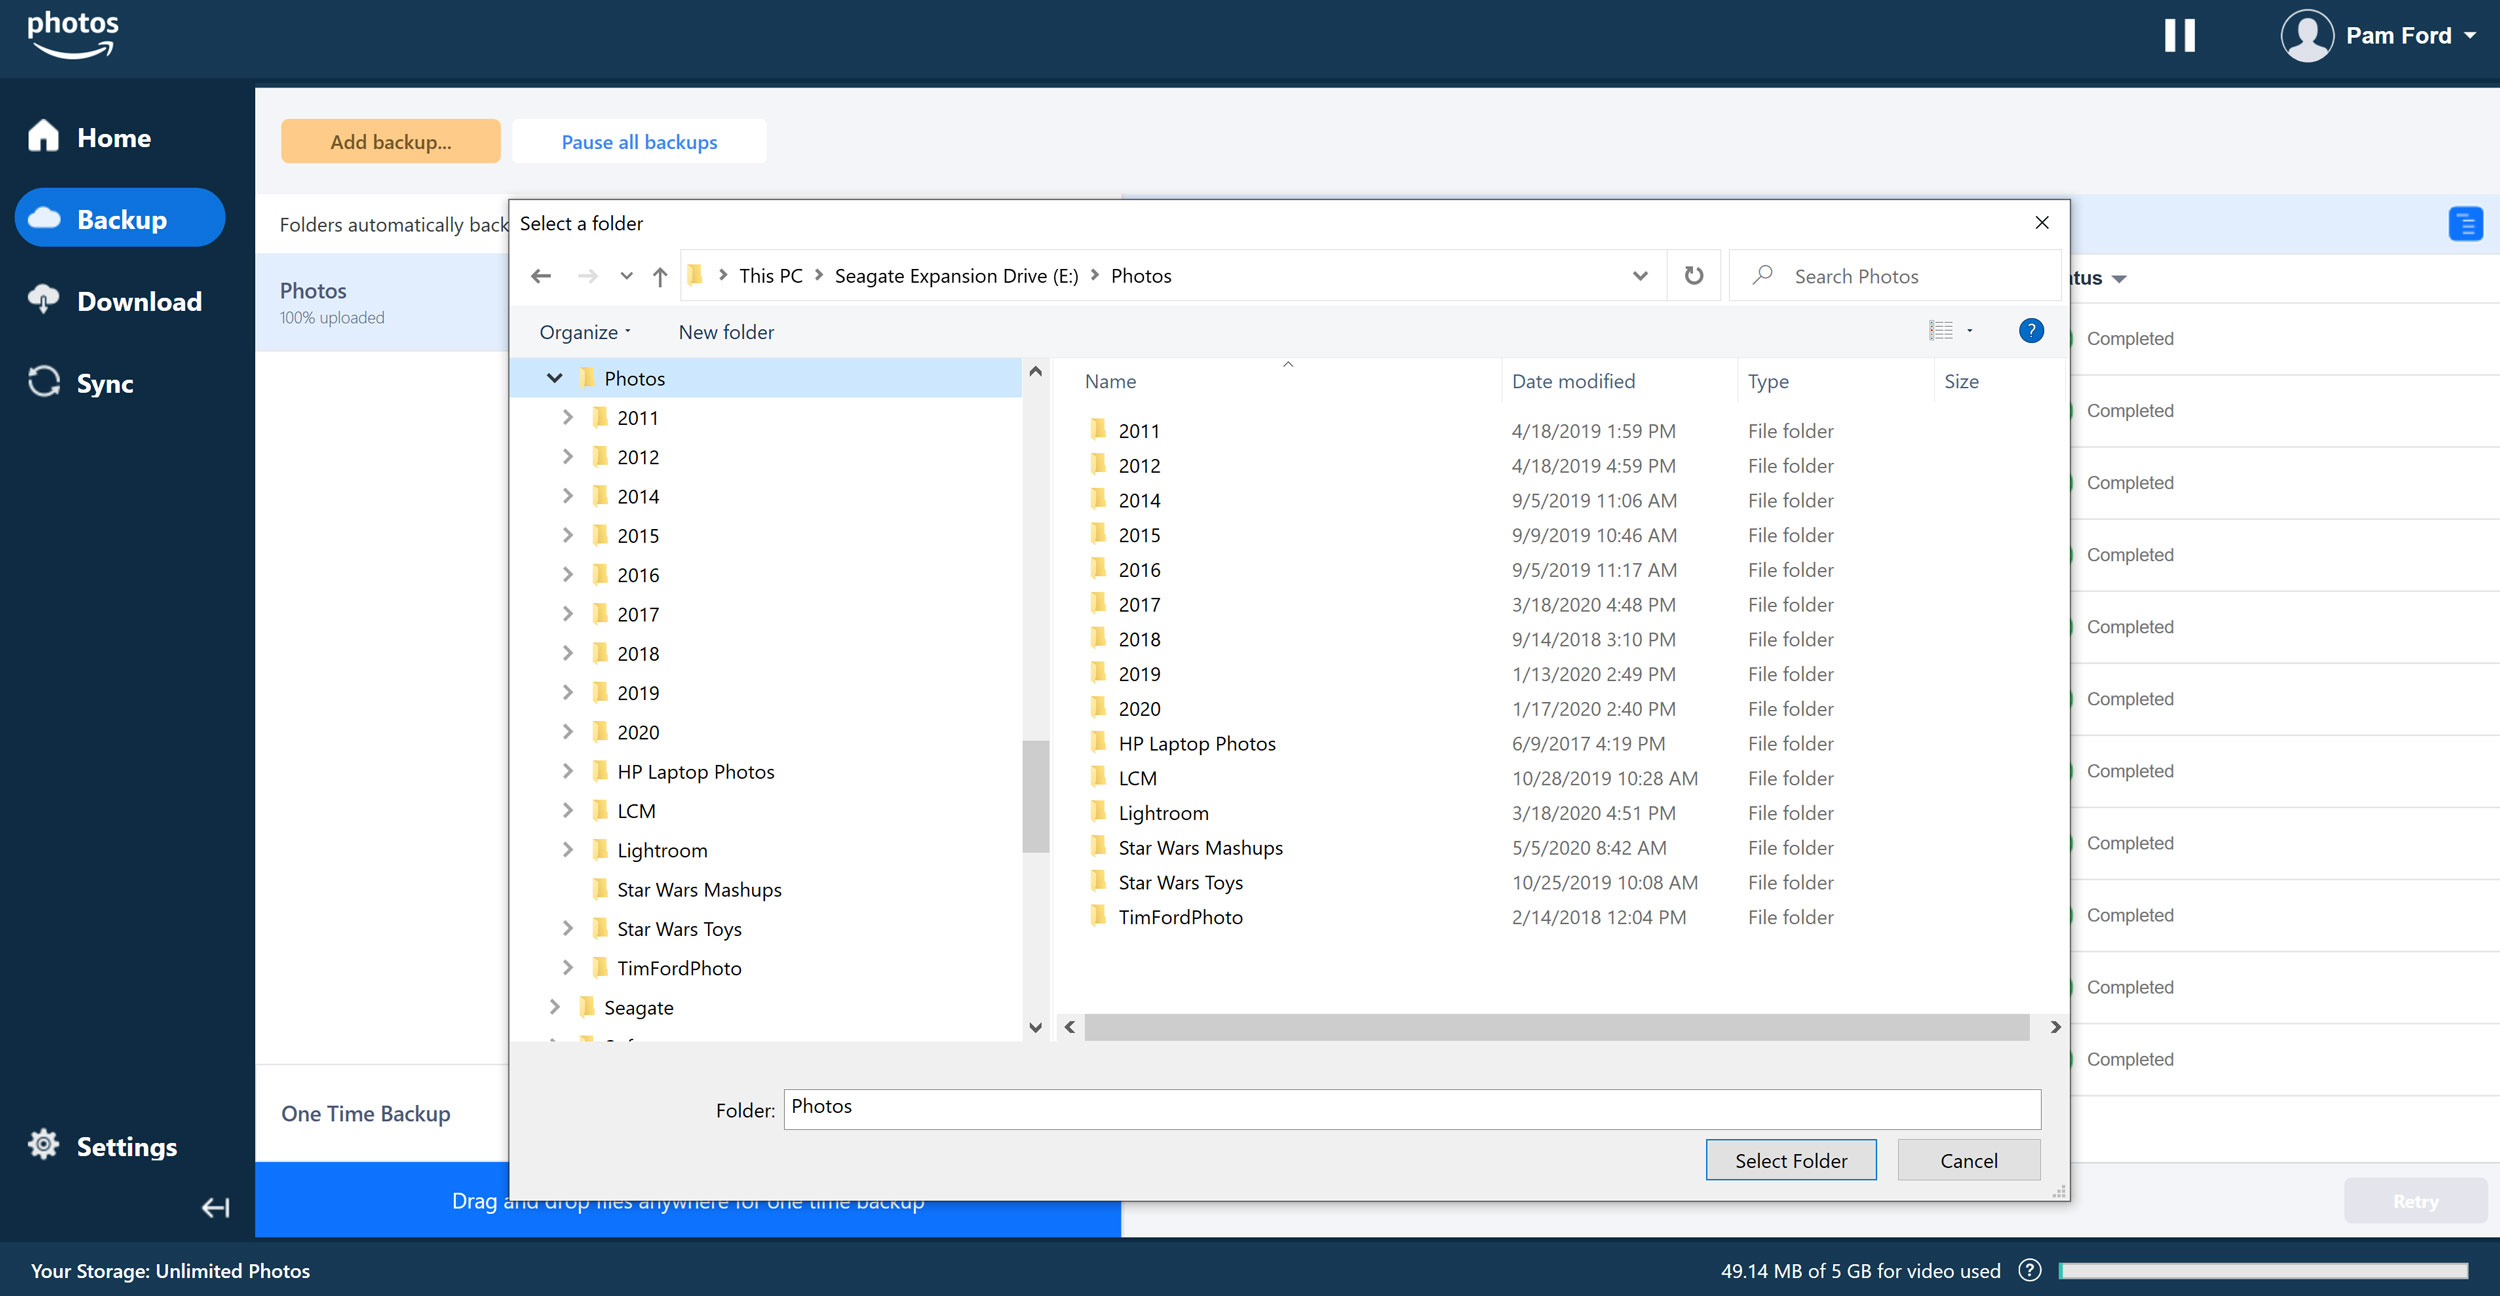
Select a directory to have Amazon Photos keep automatically backed up.
Next, Amazon Photos gives you the option to rename the backup destination (on Amazon Drive) and what exactly should be backed up from your computer. Since videos are not included in the “unlimited” aspect, it’s nice that they allow you to deselect them. You can also choose the frequency of the backup and whether or not duplicates should be avoided. Click the “Save” button when you are happy with your settings.
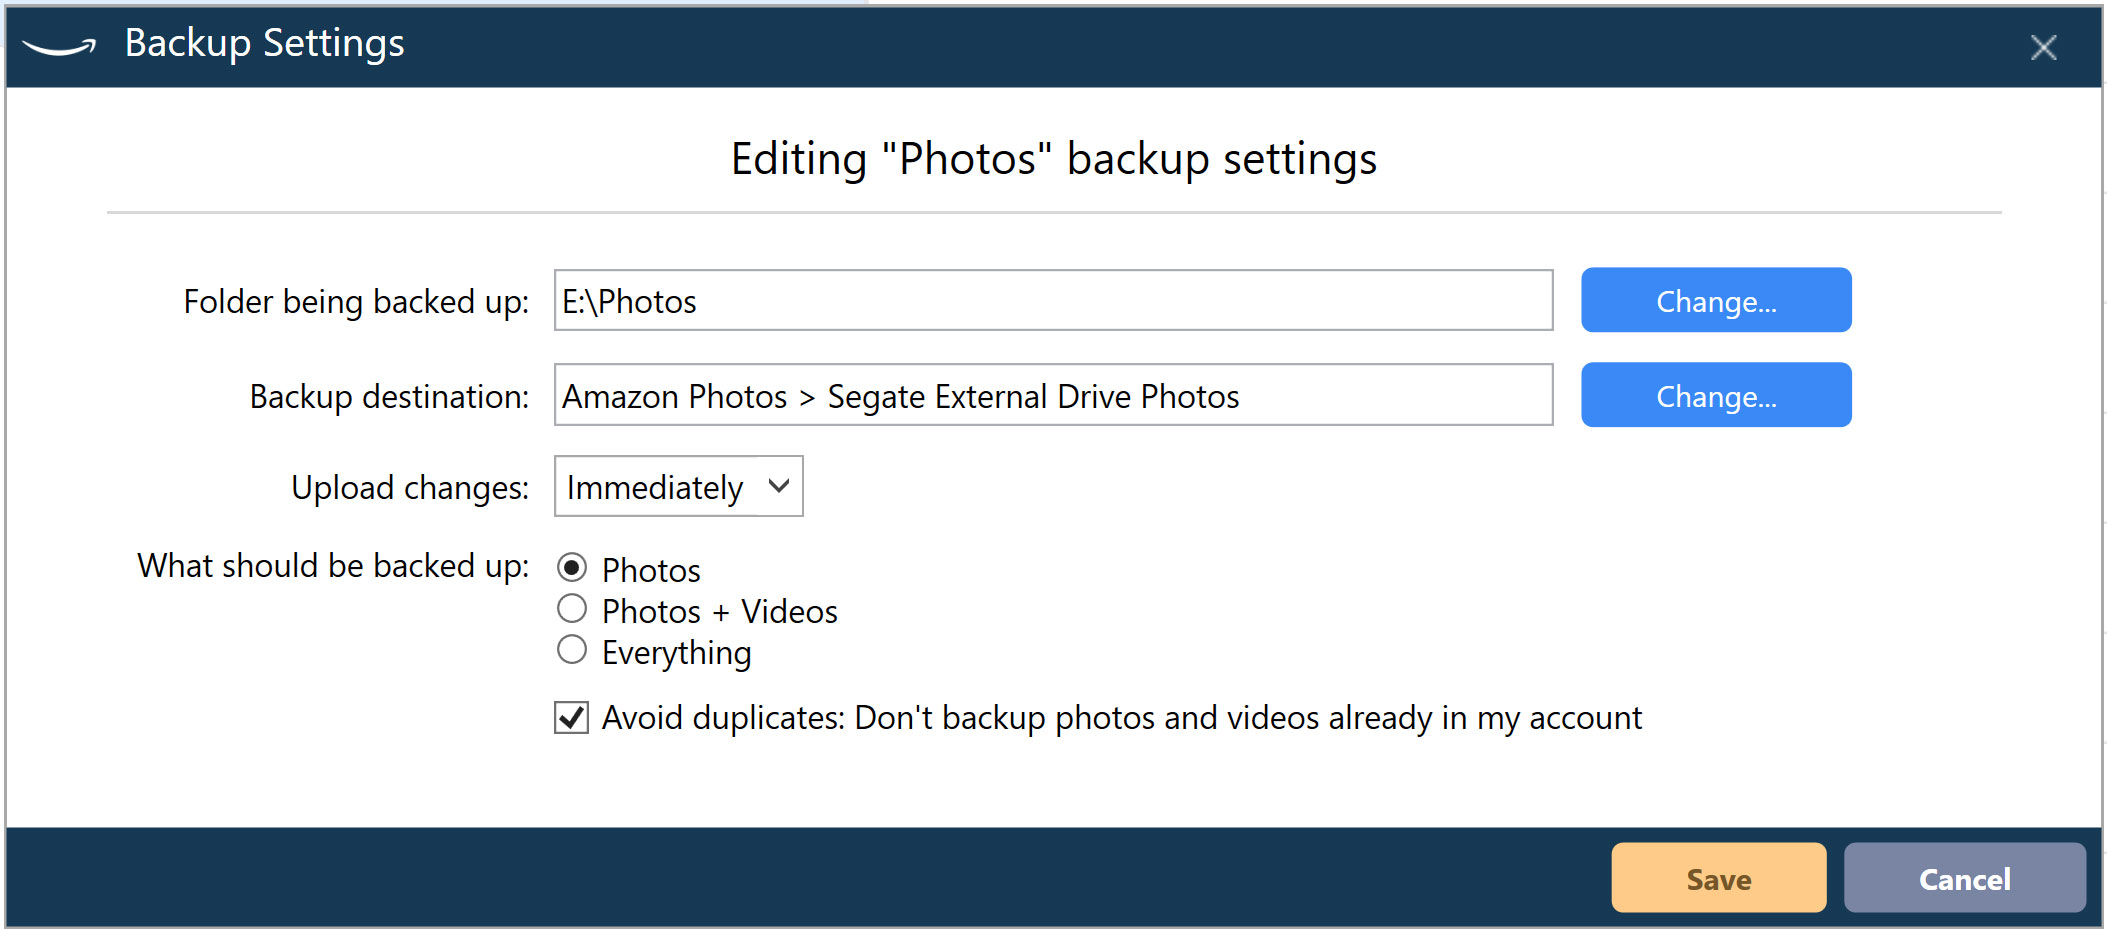
Select the options that you’d like for your backups.
When your backup begins, you’ll be shown your progress.
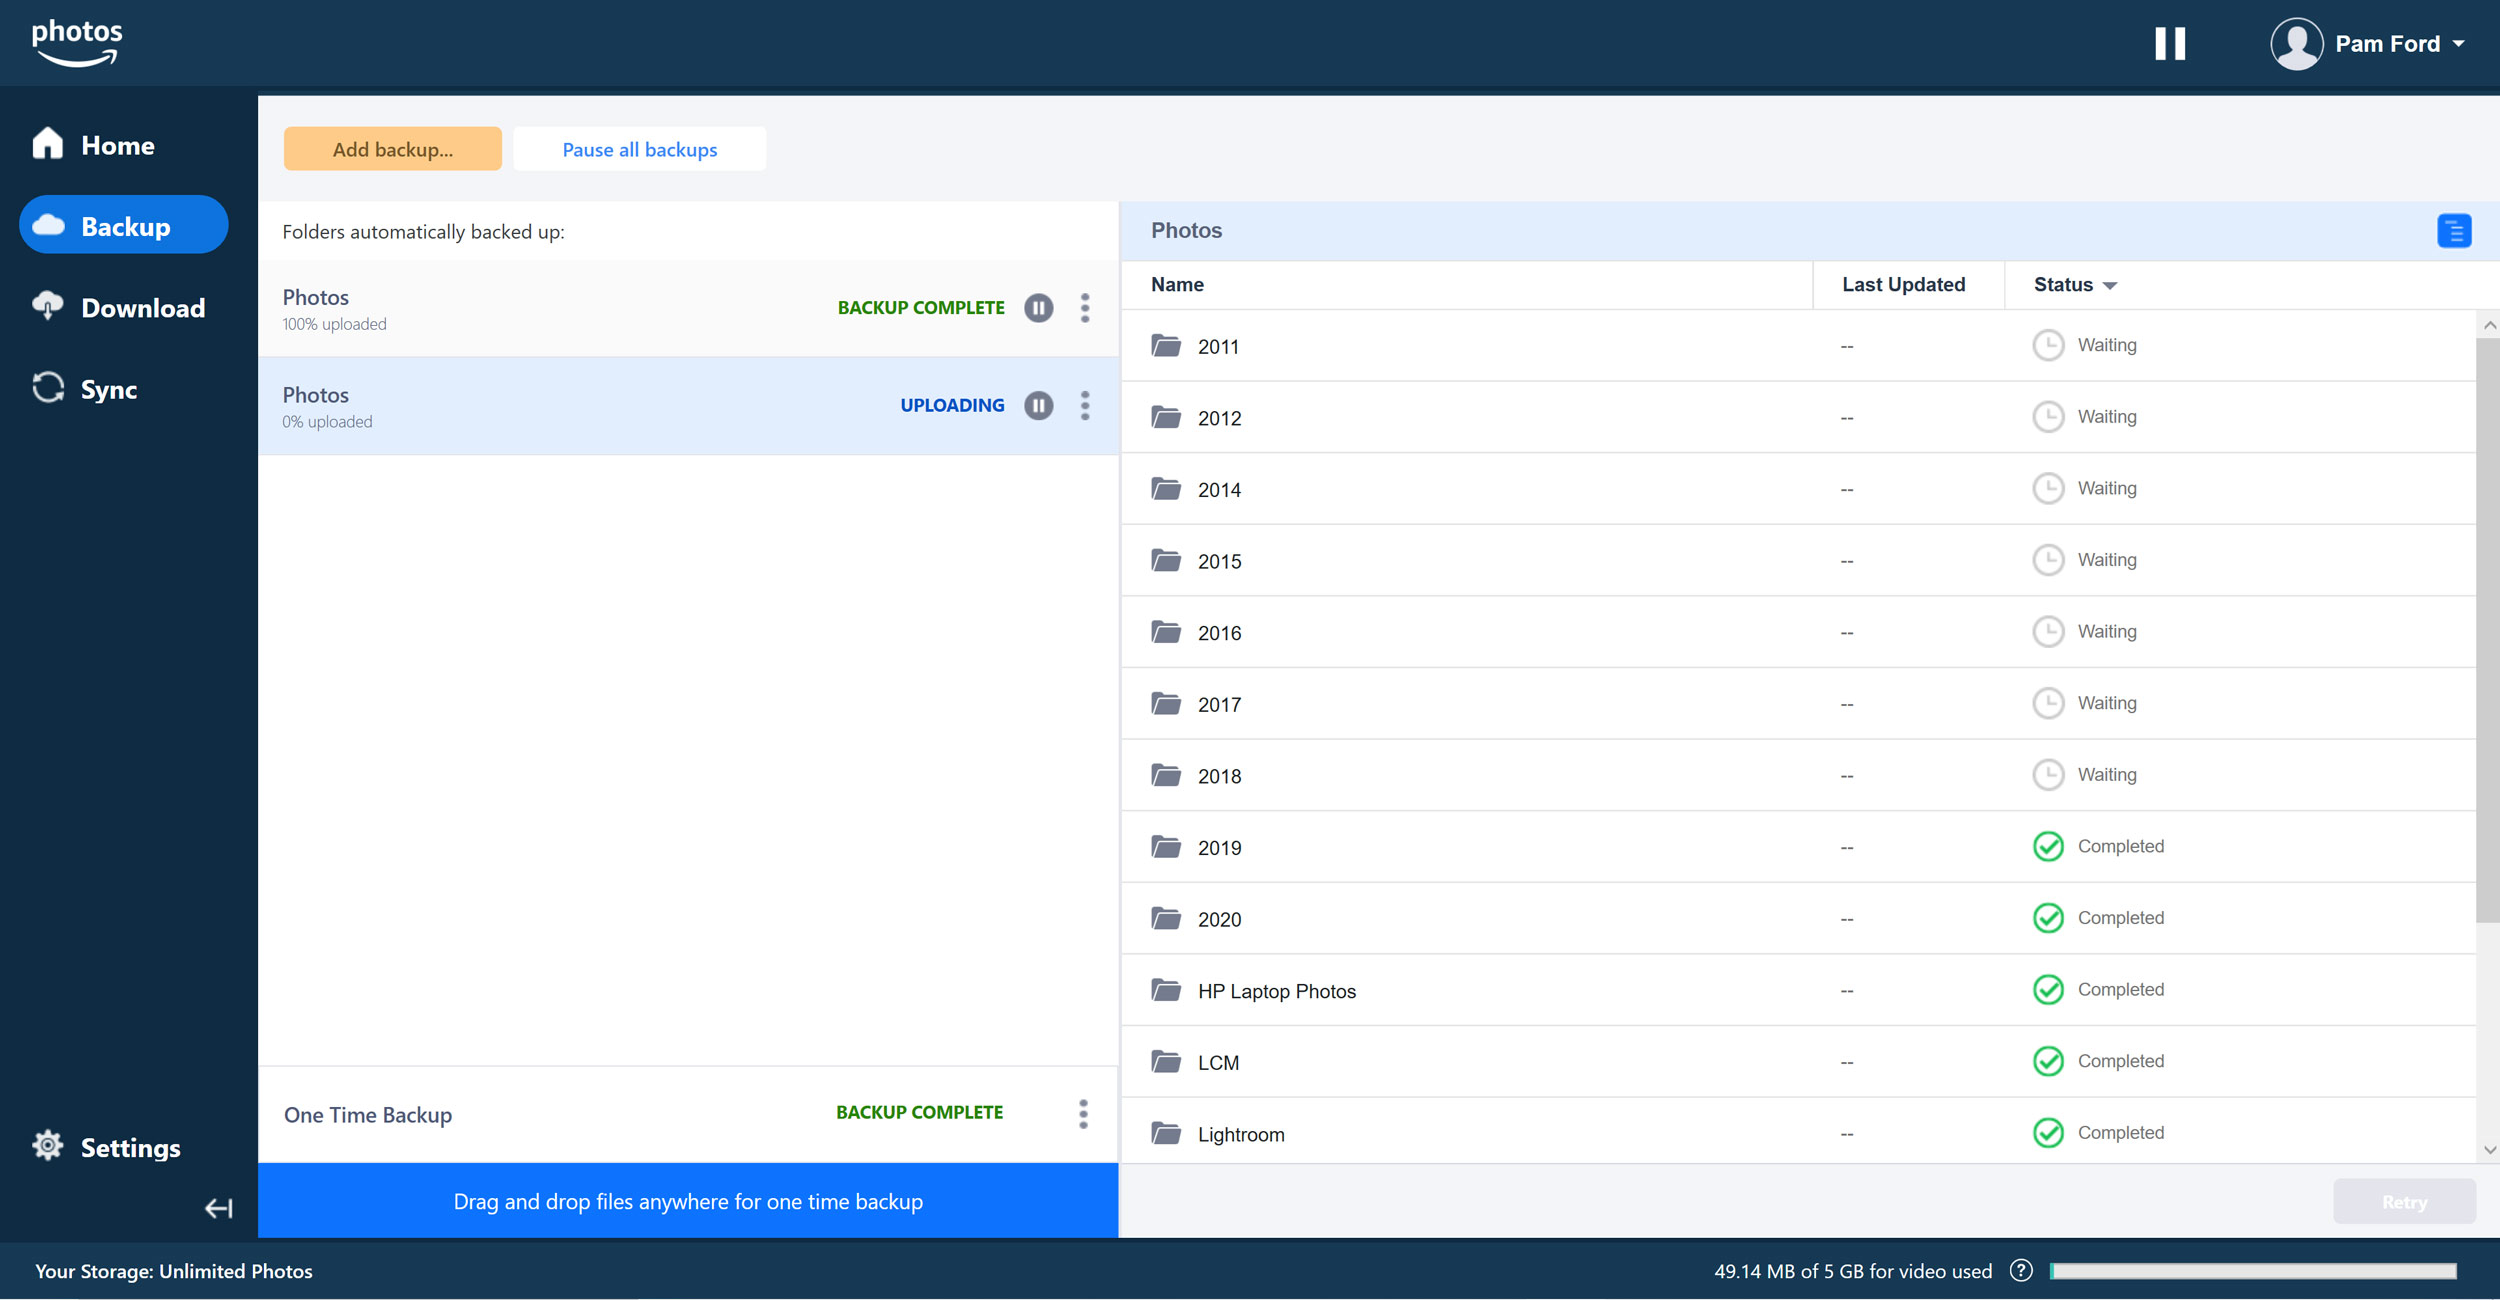
The photo upload progress in Amazon Photos.
Using the Amazon Drive interface
The Amazon Drive interface is the place to be for organization functionality. The interface presents you with folders, which you can rename, move, nest, etc. I should note at this point that the fact that you are now in a totally different interface with a totally different name (Amazon Drive vs Amazon Photos) is very confusing, especially considering they make it a point to tell you that your “Amazon Drive” only gives you 5 GB of space. Rest assured, however, that as long as the files being added to Amazon Drive are image files, they won’t count against your 5 GB quota. In fact, the image files in your Amazon Drive folder are the same files that are being backed up using the Amazon Photos application. Confused? Yeah, it makes no sense. I don’t know why they did it this way either. At any rate, here’s how to navigate the Amazon Drive web interface.
You can choose to manually upload files or entire folders directly to Amazon Drive.
To upload to your Amazon Drive, just hit the “Upload” button in the upper left corner, then select whether you want to upload an entire folder or individual images. You can also upload entire files or folders by dragging and dropping. You can also create a folder to upload the files to. See the screenshot below:
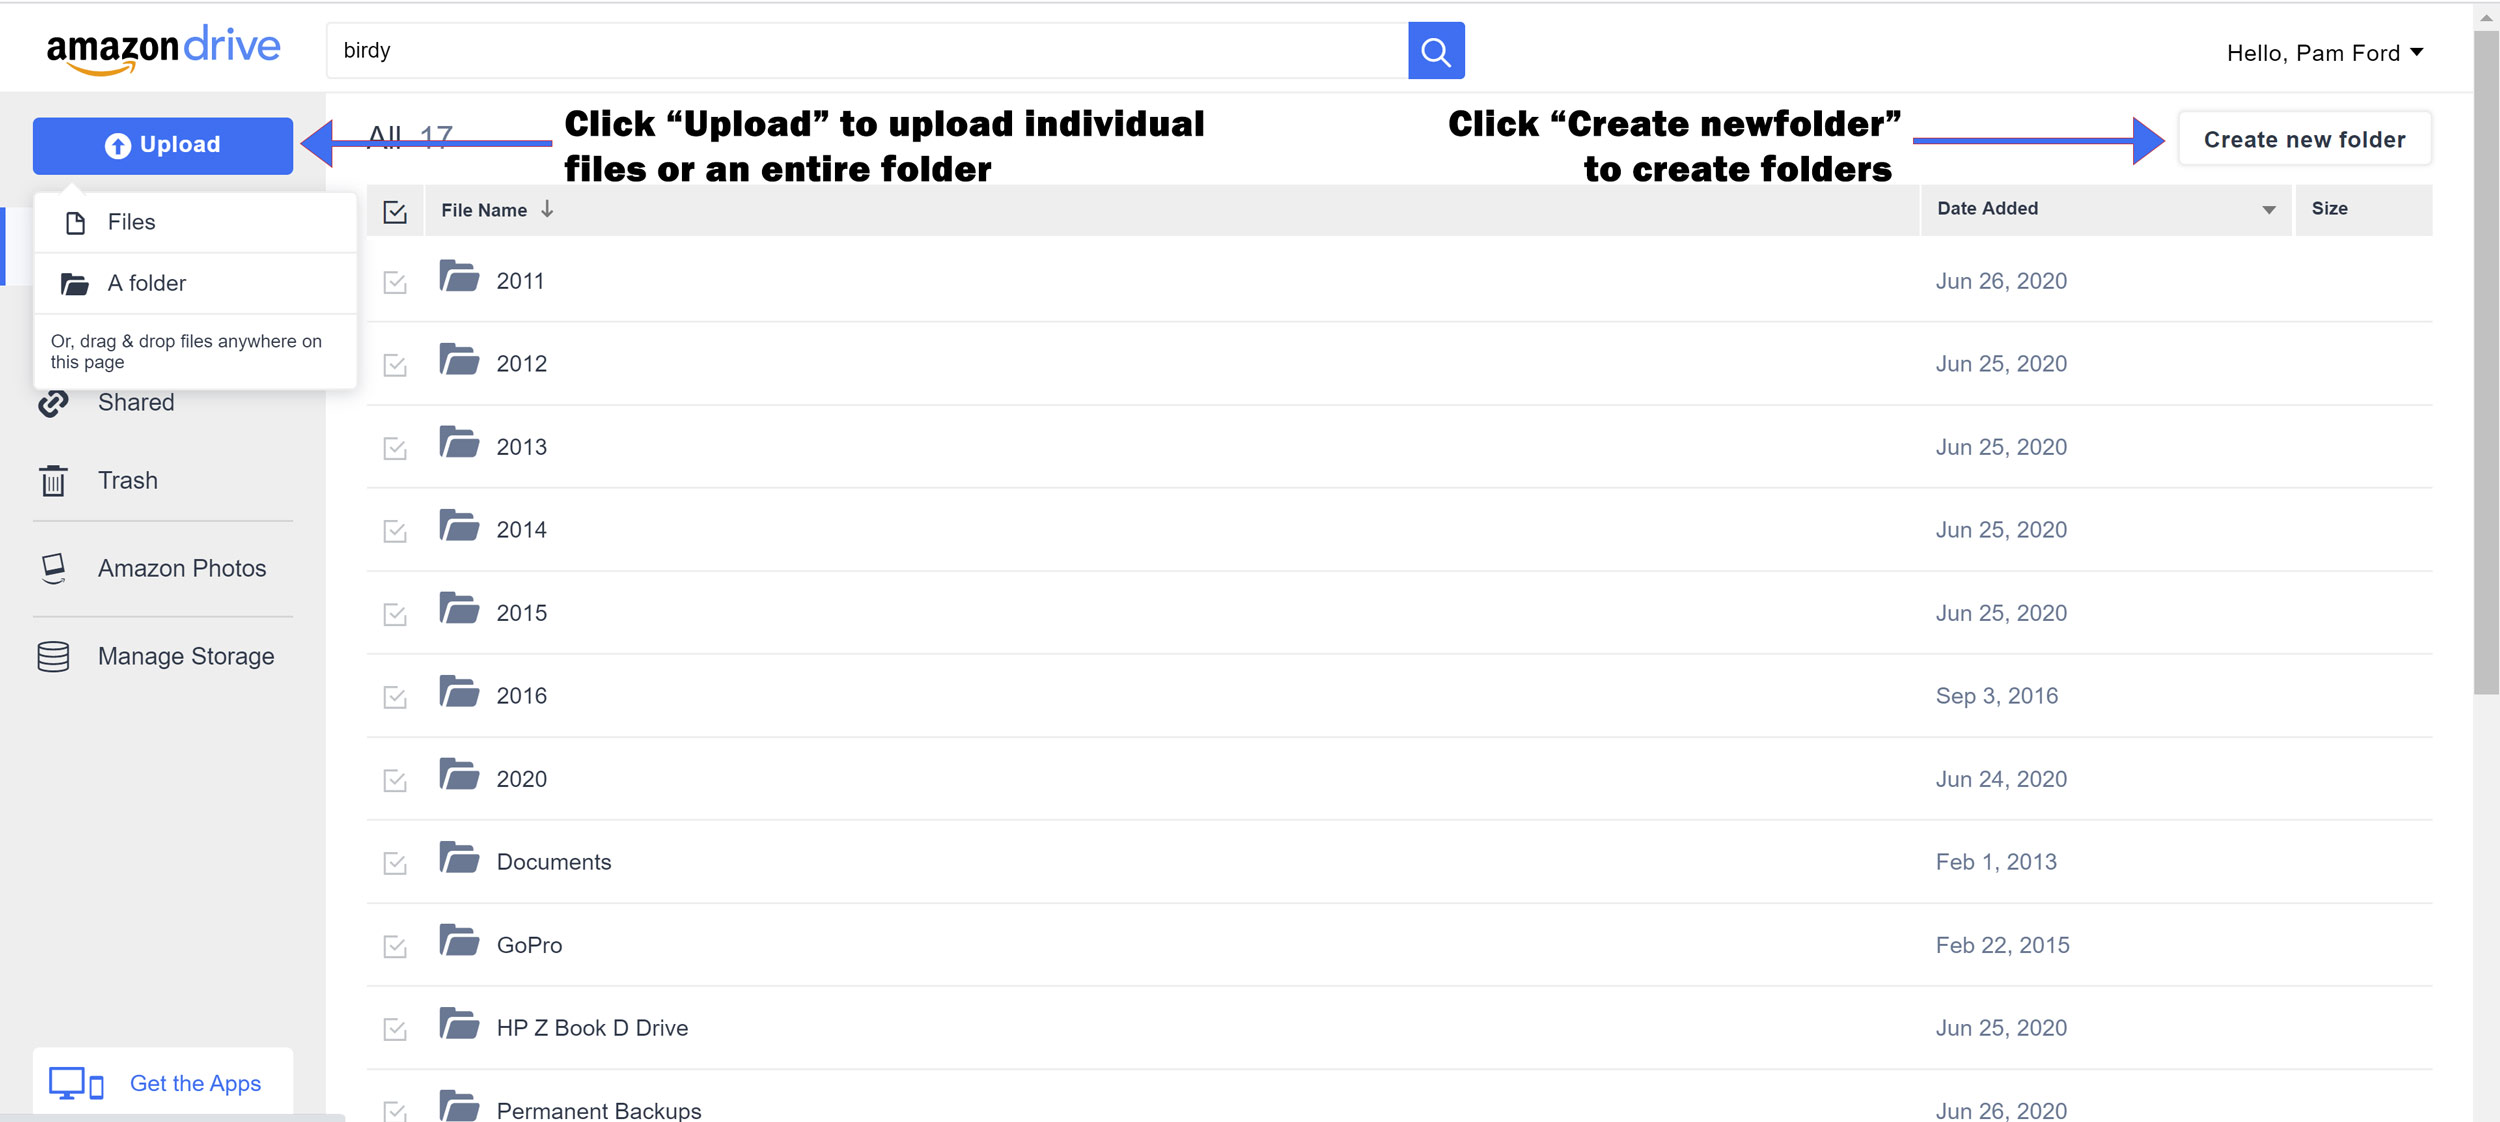
The Amazon Drive web interface.
If you had Amazon Drive backup your local drives and it becomes time to start clearing off some space locally, you can simply delete your photos on your local drive. Once you begin to add more photos to the drives/folders that are set to backup to Amazon, those will be automatically added to your Amazon Drive. In other words, every image that you upload to Amazon Photos remains on Amazon photos, period.
Moving Files on Amazon Drive
If you’d like to move some files on Amazon Drive, that’s easily done. Here’s how that works:
Within Amazon Drive, click the directory of images that you’d like to move, then click on the “Move” button, as shown below:
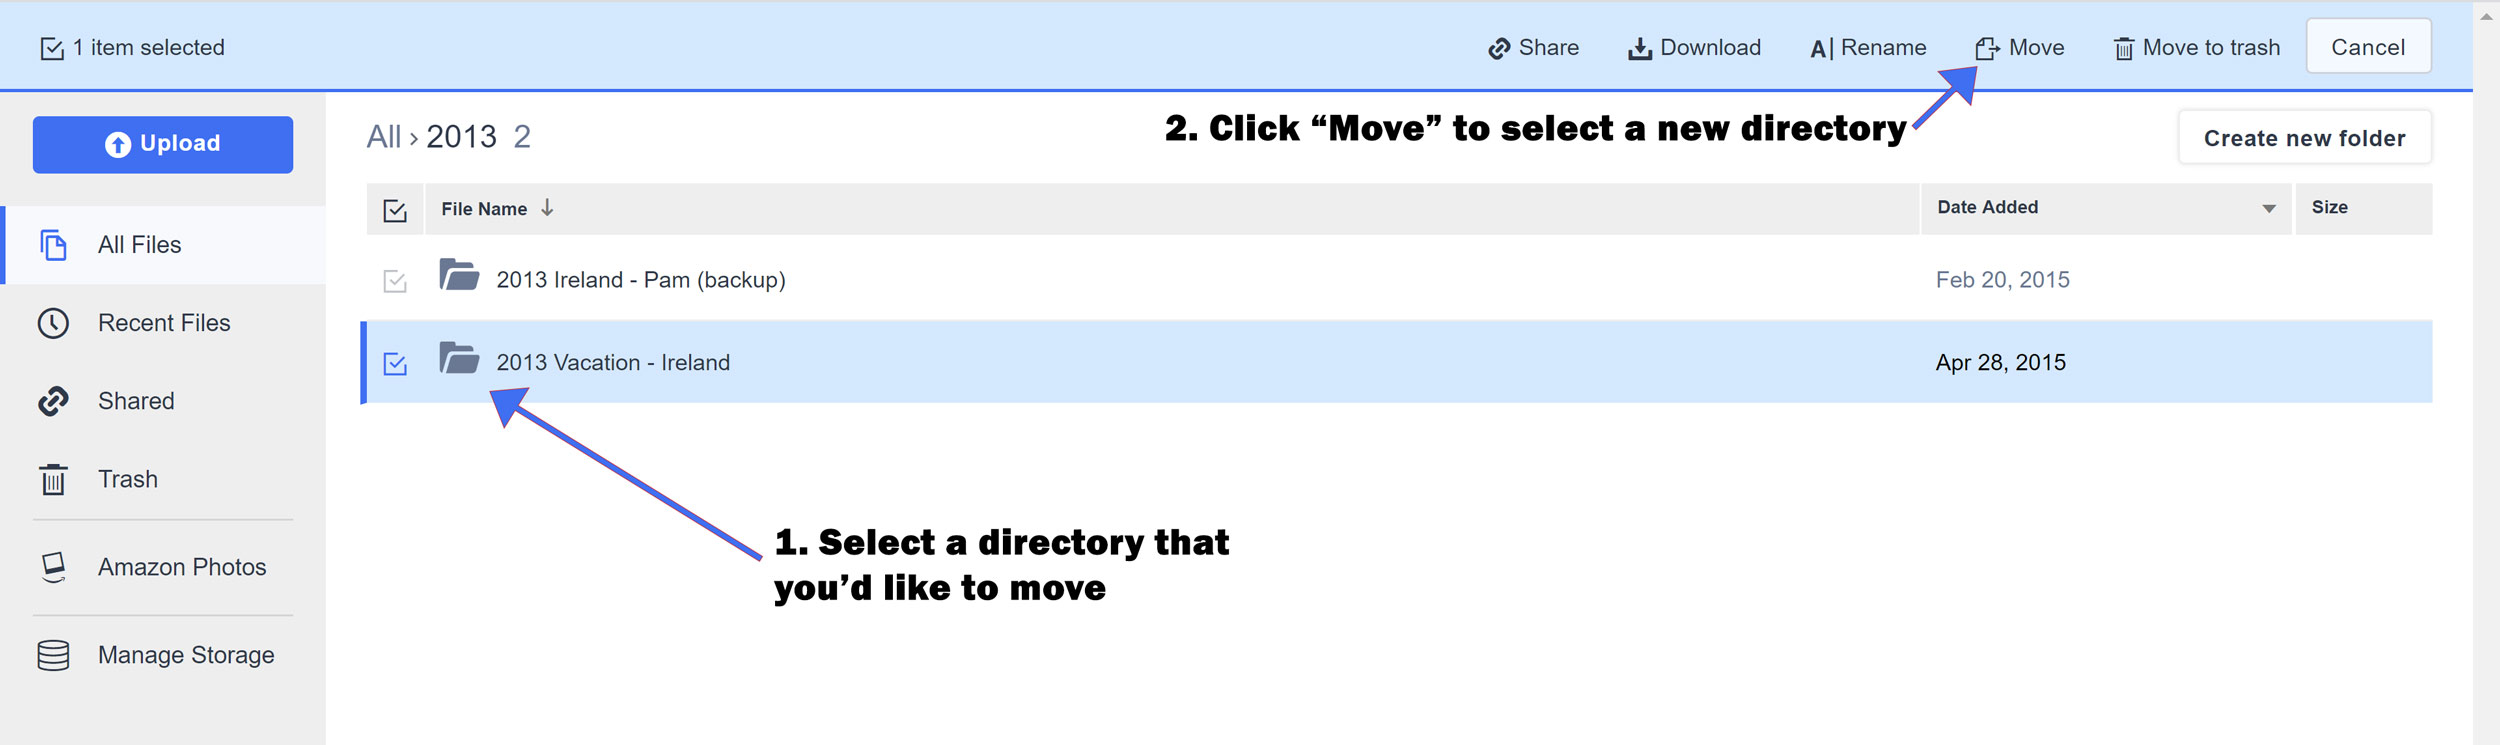
When you click the “Move” button, you’ll be prompted to select where to move your files. In this case, I’m moving mine into a folder I created called “Permanent Backups.”

Sharing, Deleting, and Renaming Files on Amazon Drive
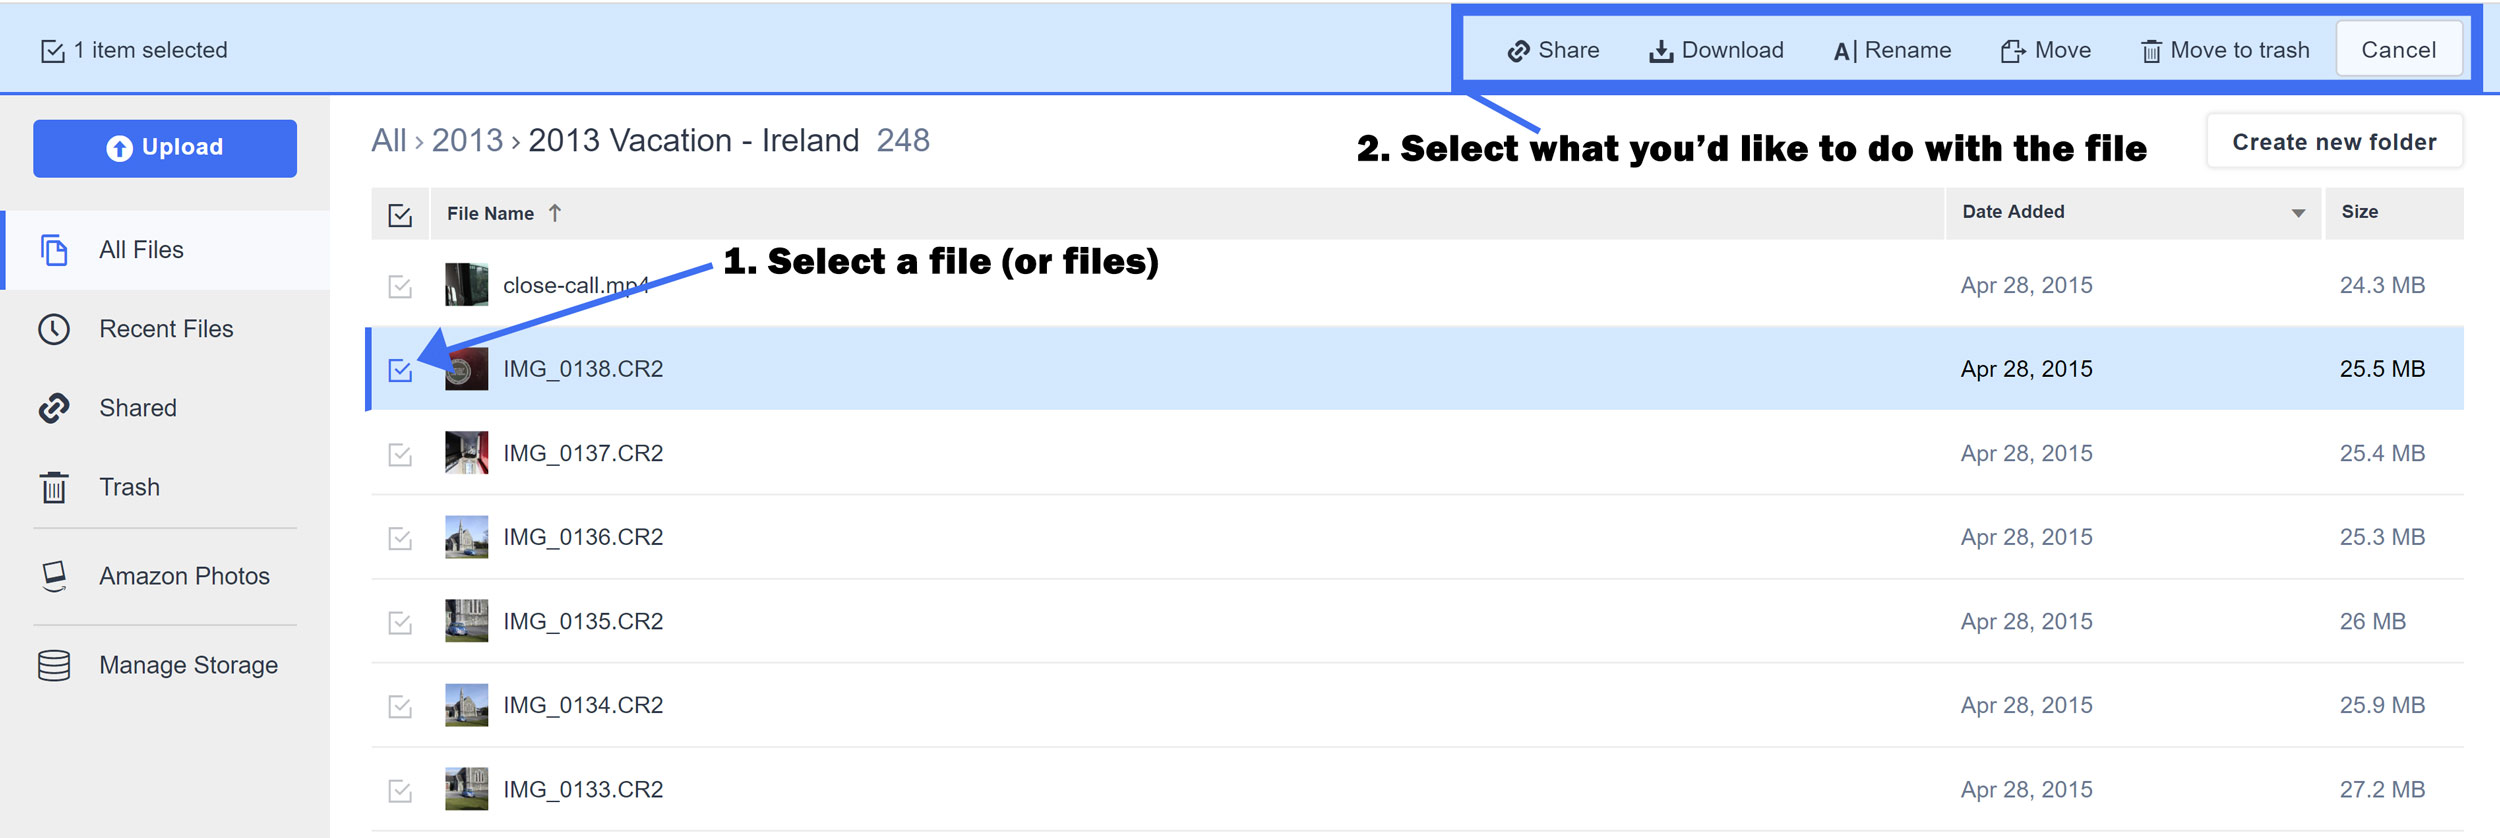
Sharing, Deleting, and renaming all work in the same manner (just check the little box beside whatever you want to modify, then tell the interface what you want to do), as shown below:
Restoring files from Amazon Photos
So how would you go about getting all these files back if necessary? Fortunately it’s pretty easy, whether you want to restore an entire folder or just an individual file. The best and easiest way to restore folders full of files is by using the Amazon Photos app on your computer. The best way to restore individual images is by using the Amazon Drive web interface.
Downloading Folders
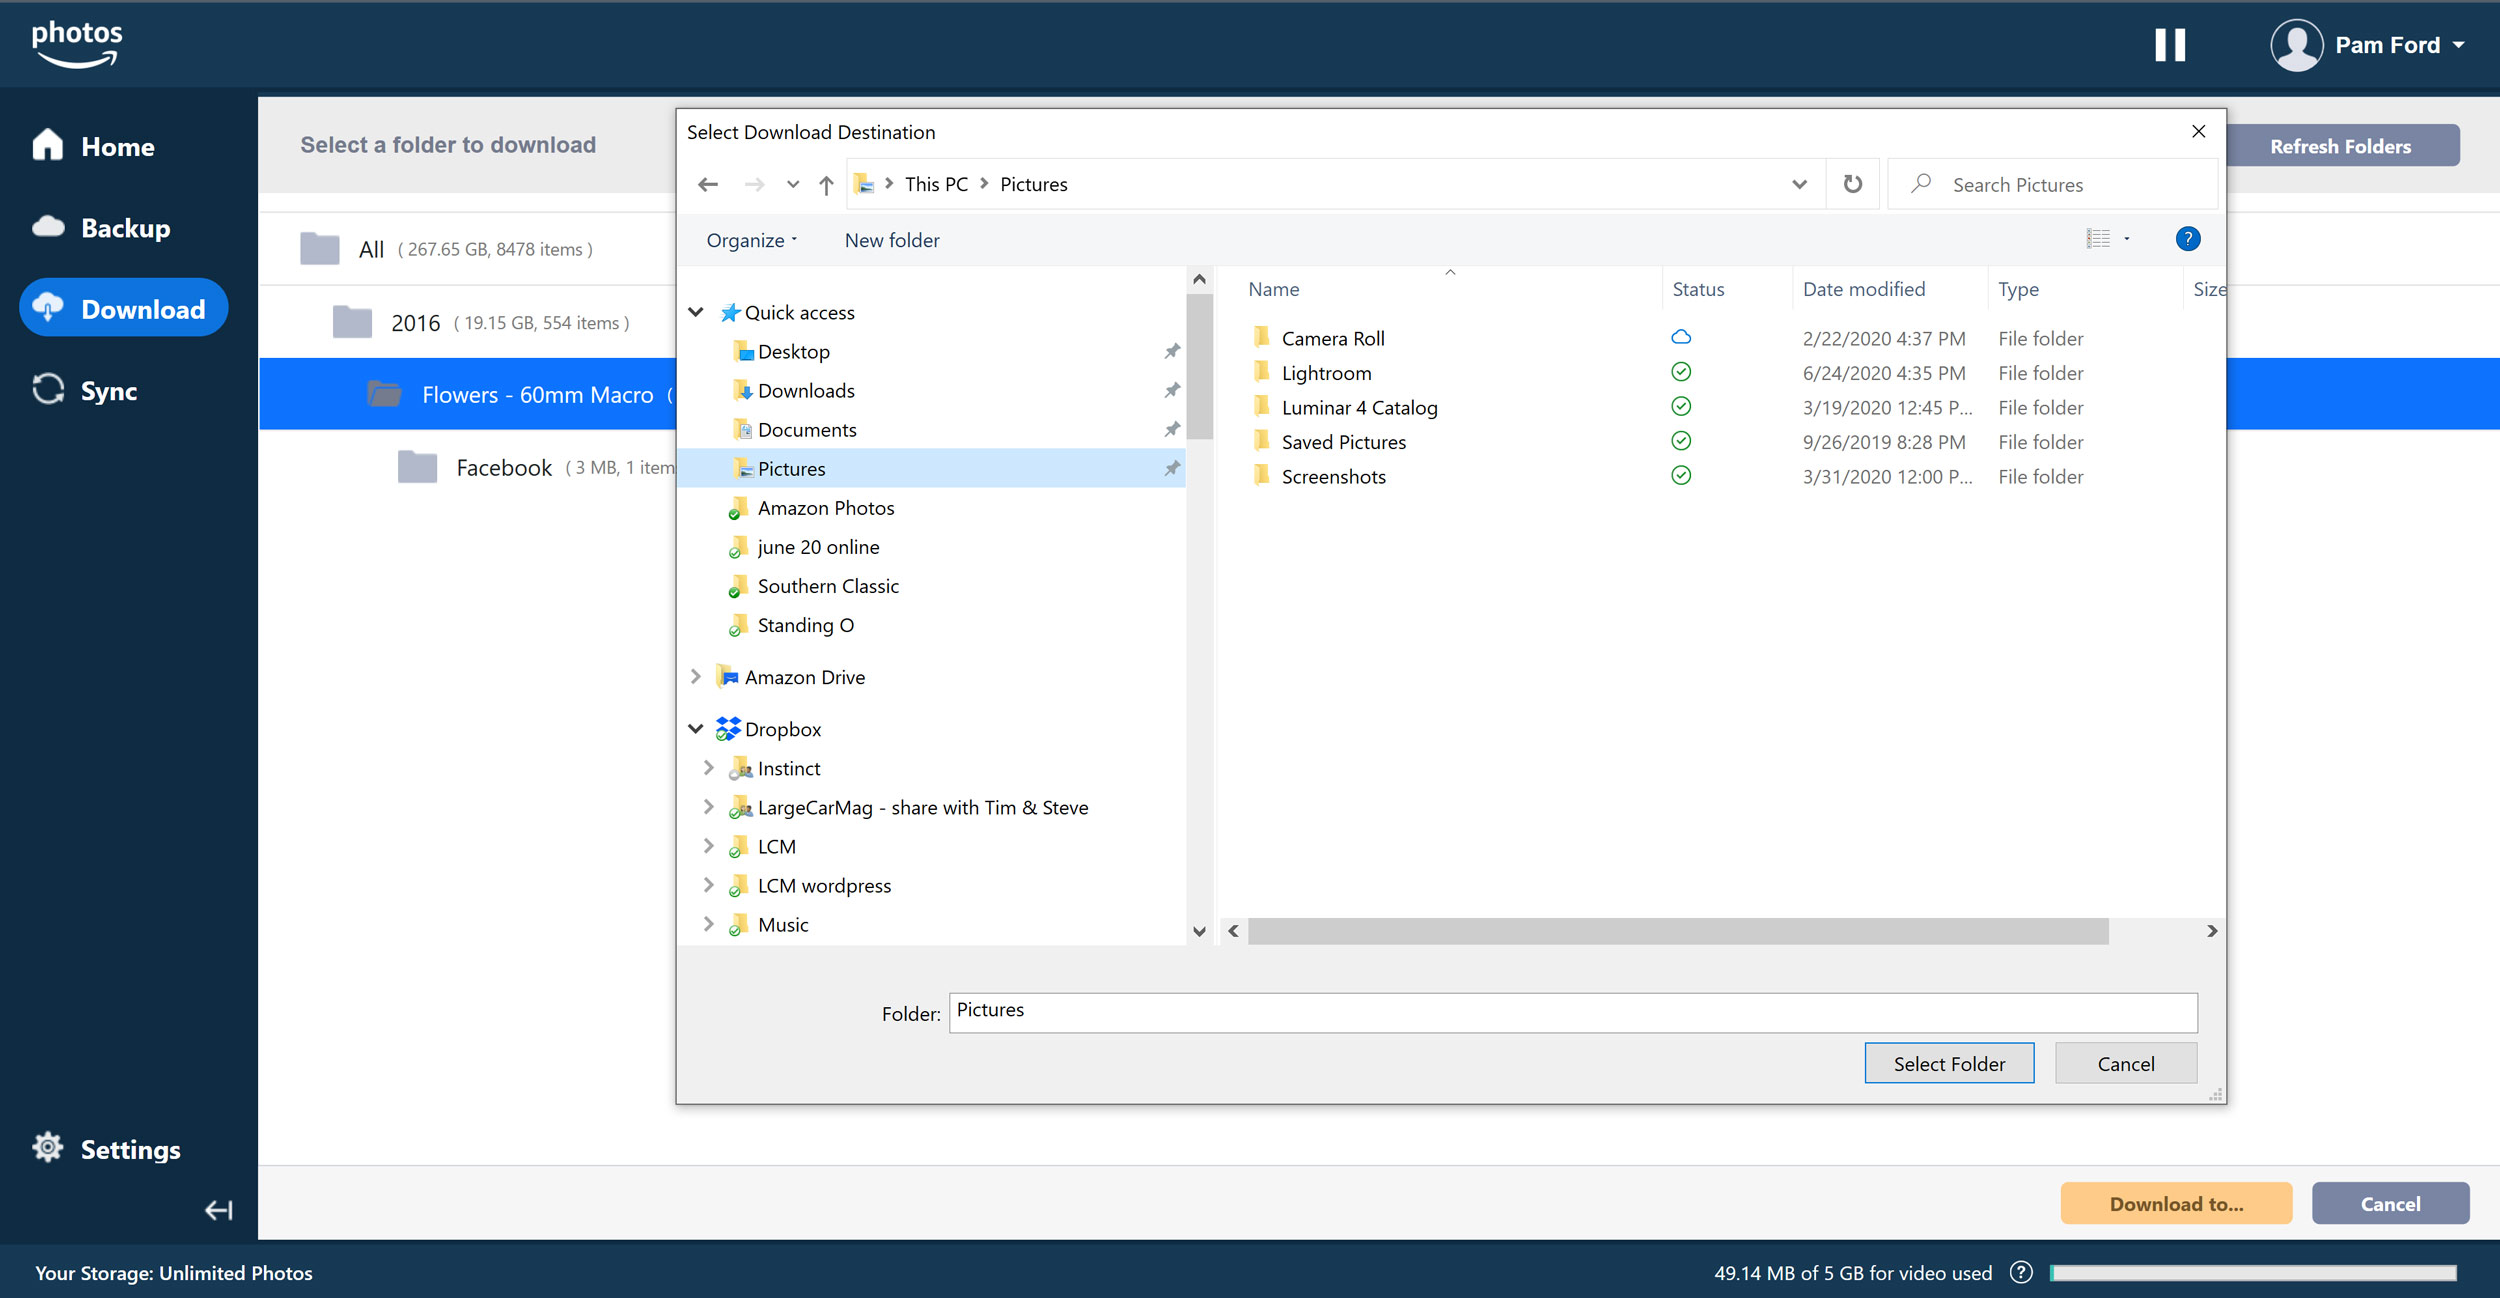
Open the Amazon Photos application and click on the “Download” button.
For some reason, you are only allowed to restore folders (and not individual images) from within the Amazon Photos app, which is odd. Regardless, you’ll see all of the folders in your Amazon Drive folder when you hit the “Download” button.

All photos in my Amazon Drive.
Click on the folder that you’d like to download, then tell Amazon Photos where to download everything.
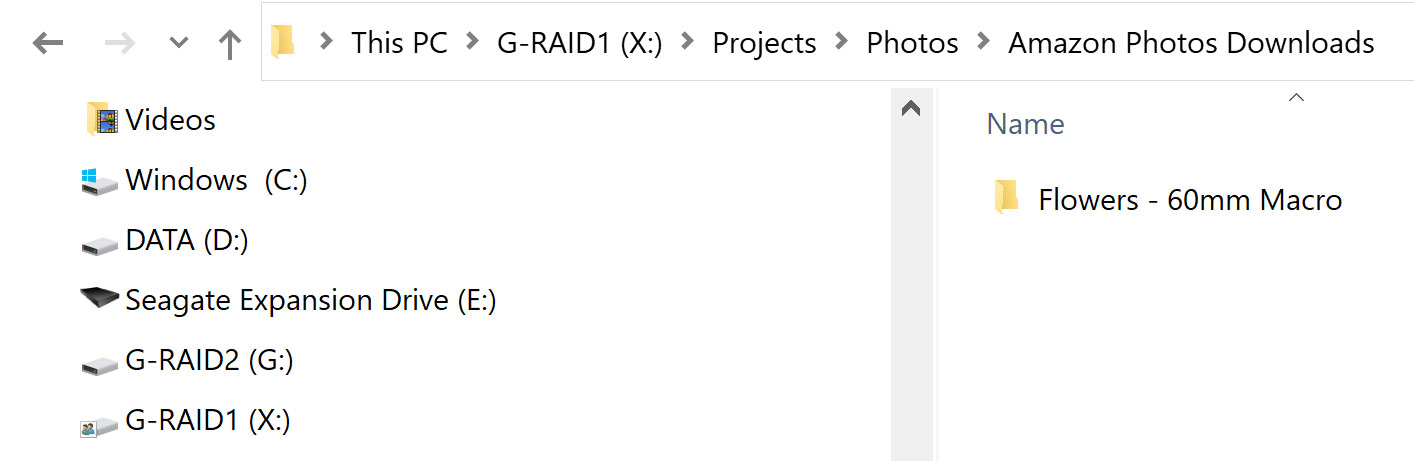
Once you select a destination to save the folder, the download will be placed in a new folder called “Amazon Photos Downloads” with the name of your selected folder within. You’ll probably want to move the folder you downloaded out of that “Amazon Photos Downloads” folder and into the folder you actually wanted it downloaded to in the first place. Shown below is the what a typical restore looks like with the images downloaded into the default “Amazon Photos Download” folder.
Downloading Images
If you want to download an individual image (or individual images), you’ll need to go back to the Amazon Drive web interface.
Browse to the photo (or photos) you want to download and select them. Individual files will retain their file names, while multiple selections or entire folders will be downloaded as zip files.
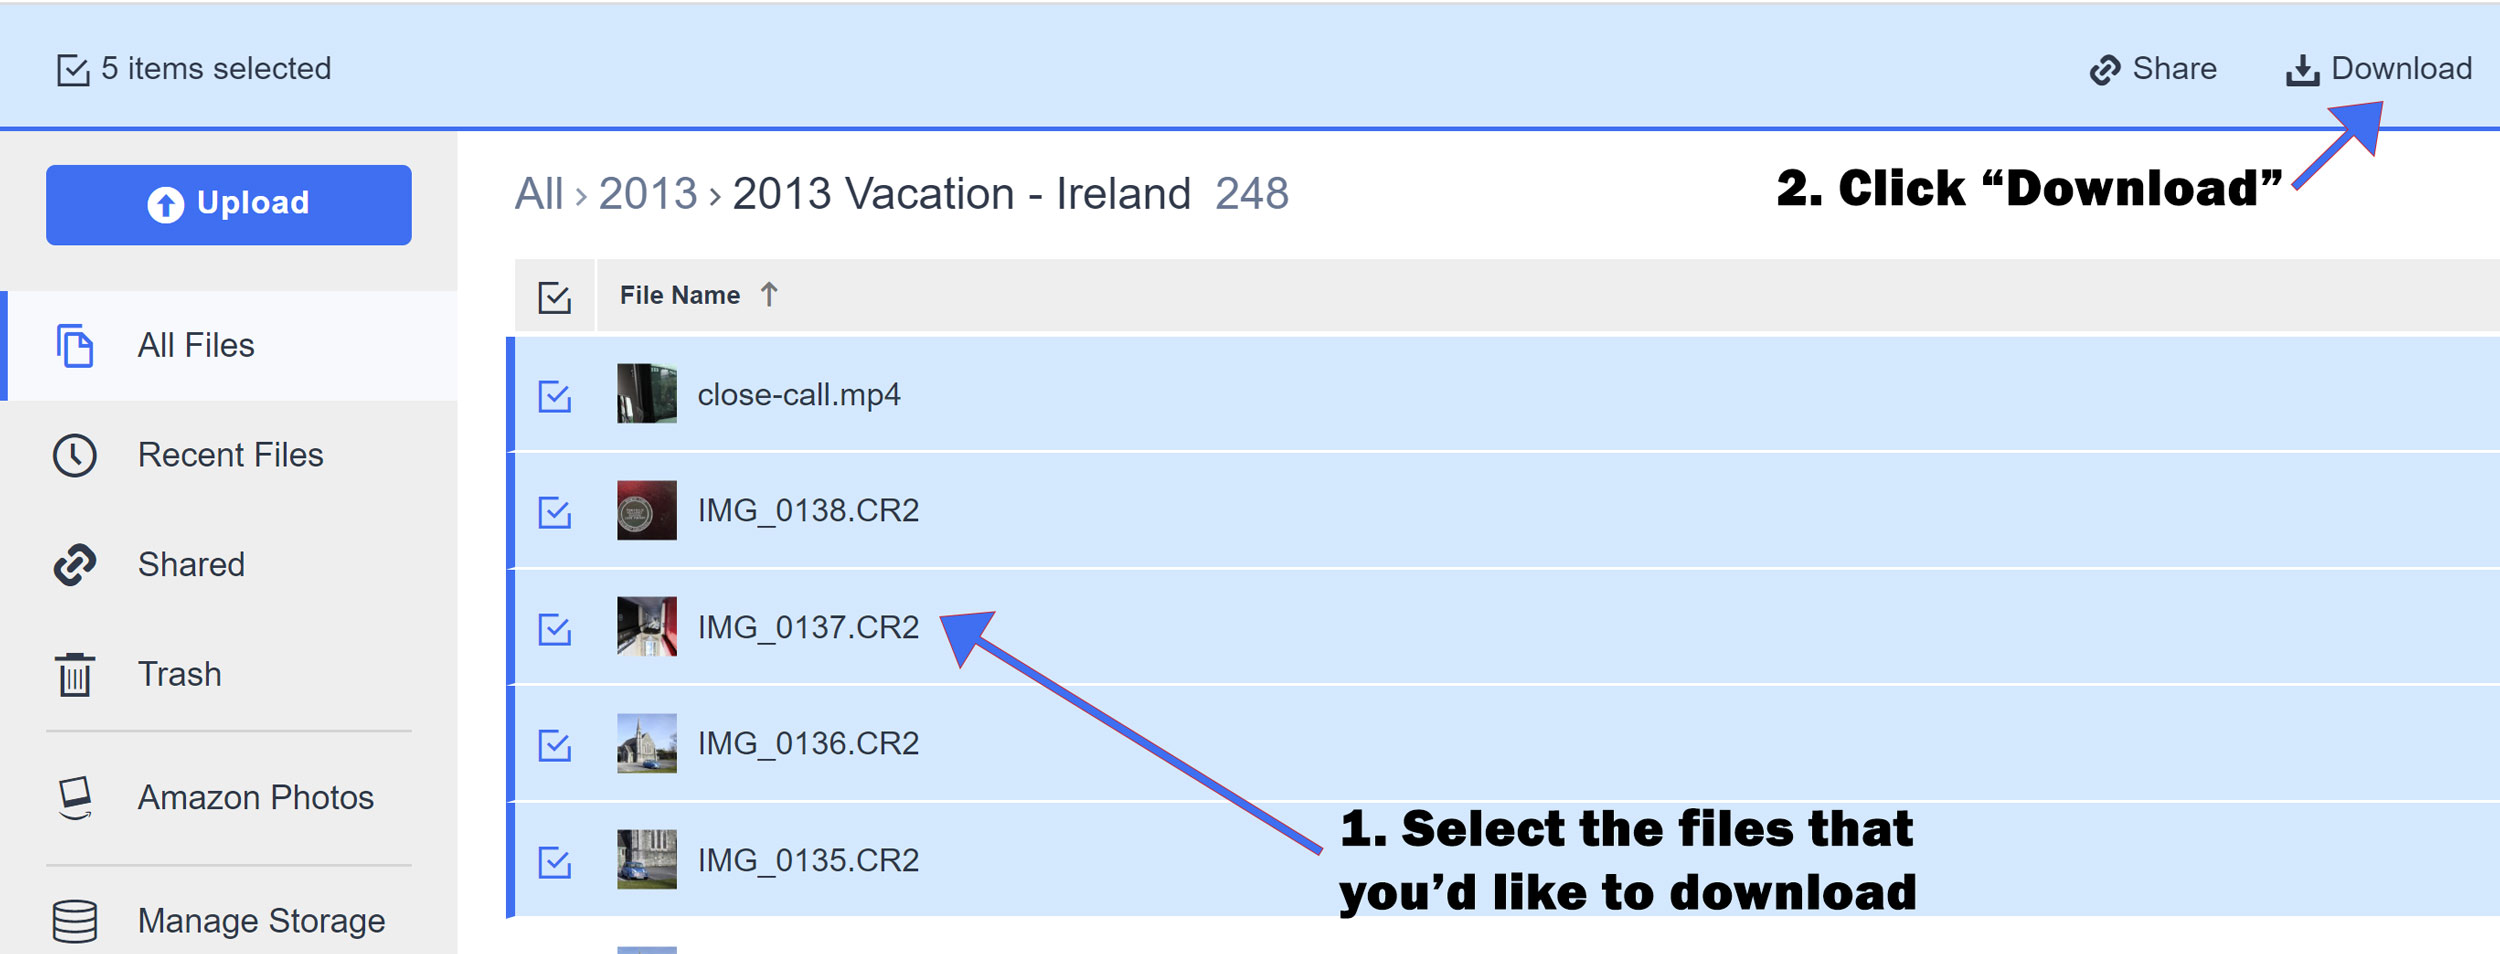
Select and download your files.
In the image below, I’ve selected a particular folder and hit the “Download” button. You can see that the download will be packaged as a zip file, which I can later unzip to the folder of my choosing.
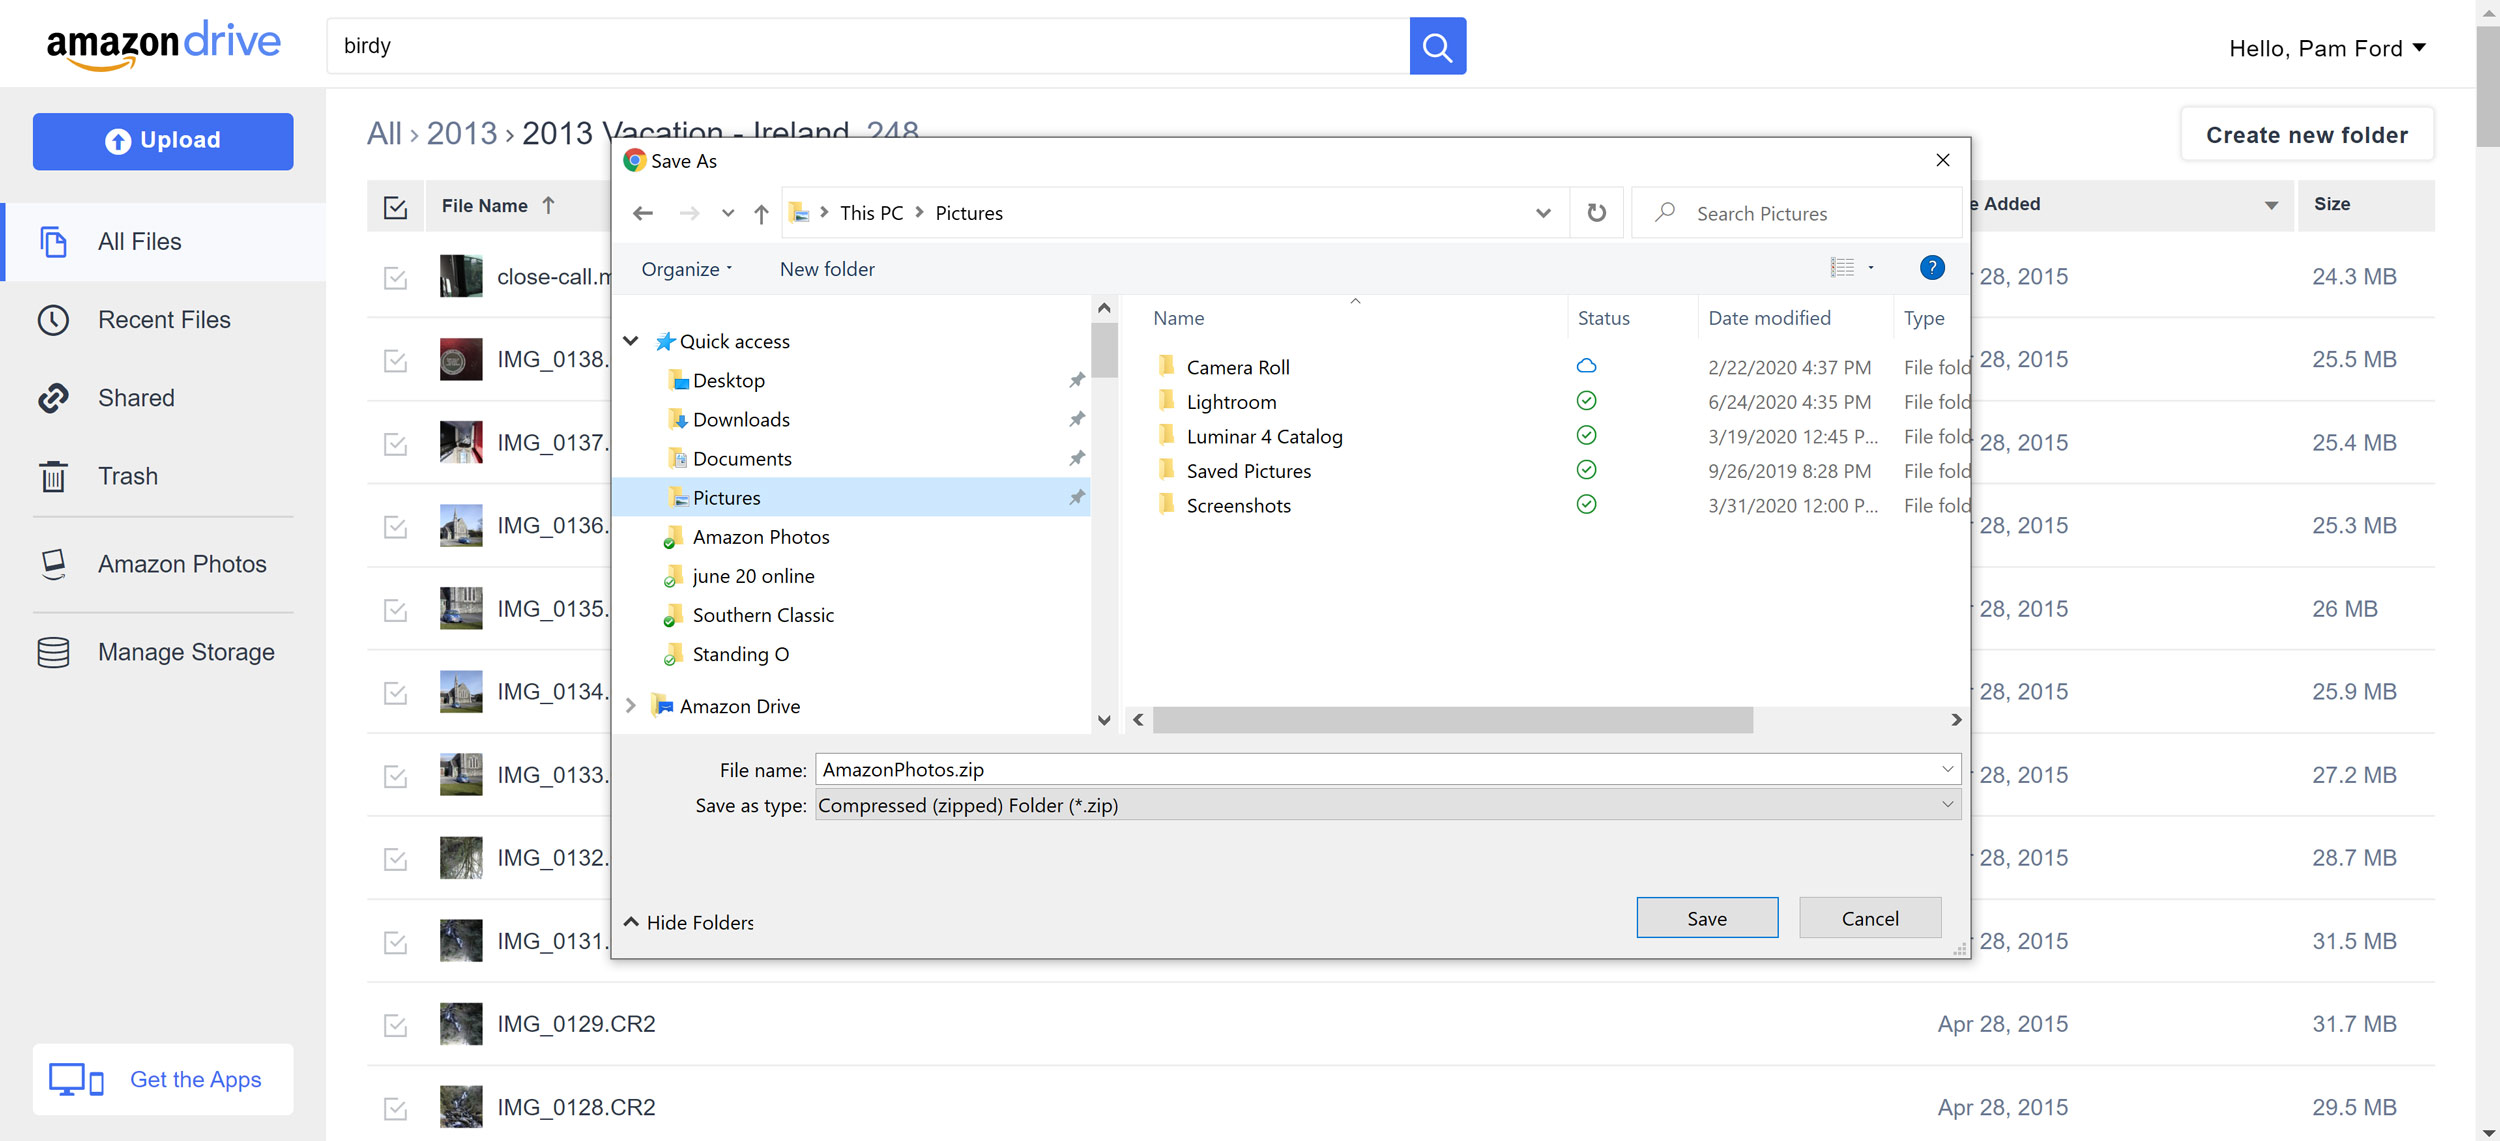
Download your files as a zip.
Syncing?
While there is a “Sync” option within the app, it’s implemented in a confusing way and it needs to be manually enabled.
The “Sync” option is actually Amazon’s answer to Dropbox and Google Drive. I honestly don’t know why the sync option is even included in the Amazon Photos app – it should be a completely separate download to avoid confusion if you ask me. Here’s why it’s weird – when you set it up, you tell Amazon Photos which folder to use for your “Amazon Drive” folder. Then you tell the app which folders should remain synced to the Amazon Drive folder (exactly like “selective sync” with Dropbox). I have three different drives that I currently have set to back up to Amazon Photos/Drive – literally terabytes of data. So, imagine if I chose to tell Amazon Drive to just sync every single folder that I’ve uploaded! I would wind up with duplicate files on my machine and I’d also run out of hard drive space quickly. So “syncing” seems to be more about working with very specific files or folders across different devices, similar to the capabilities allowed via Dropbox or Google drive. I wanted to point out the difference as it’s extremely confusing upon first use.
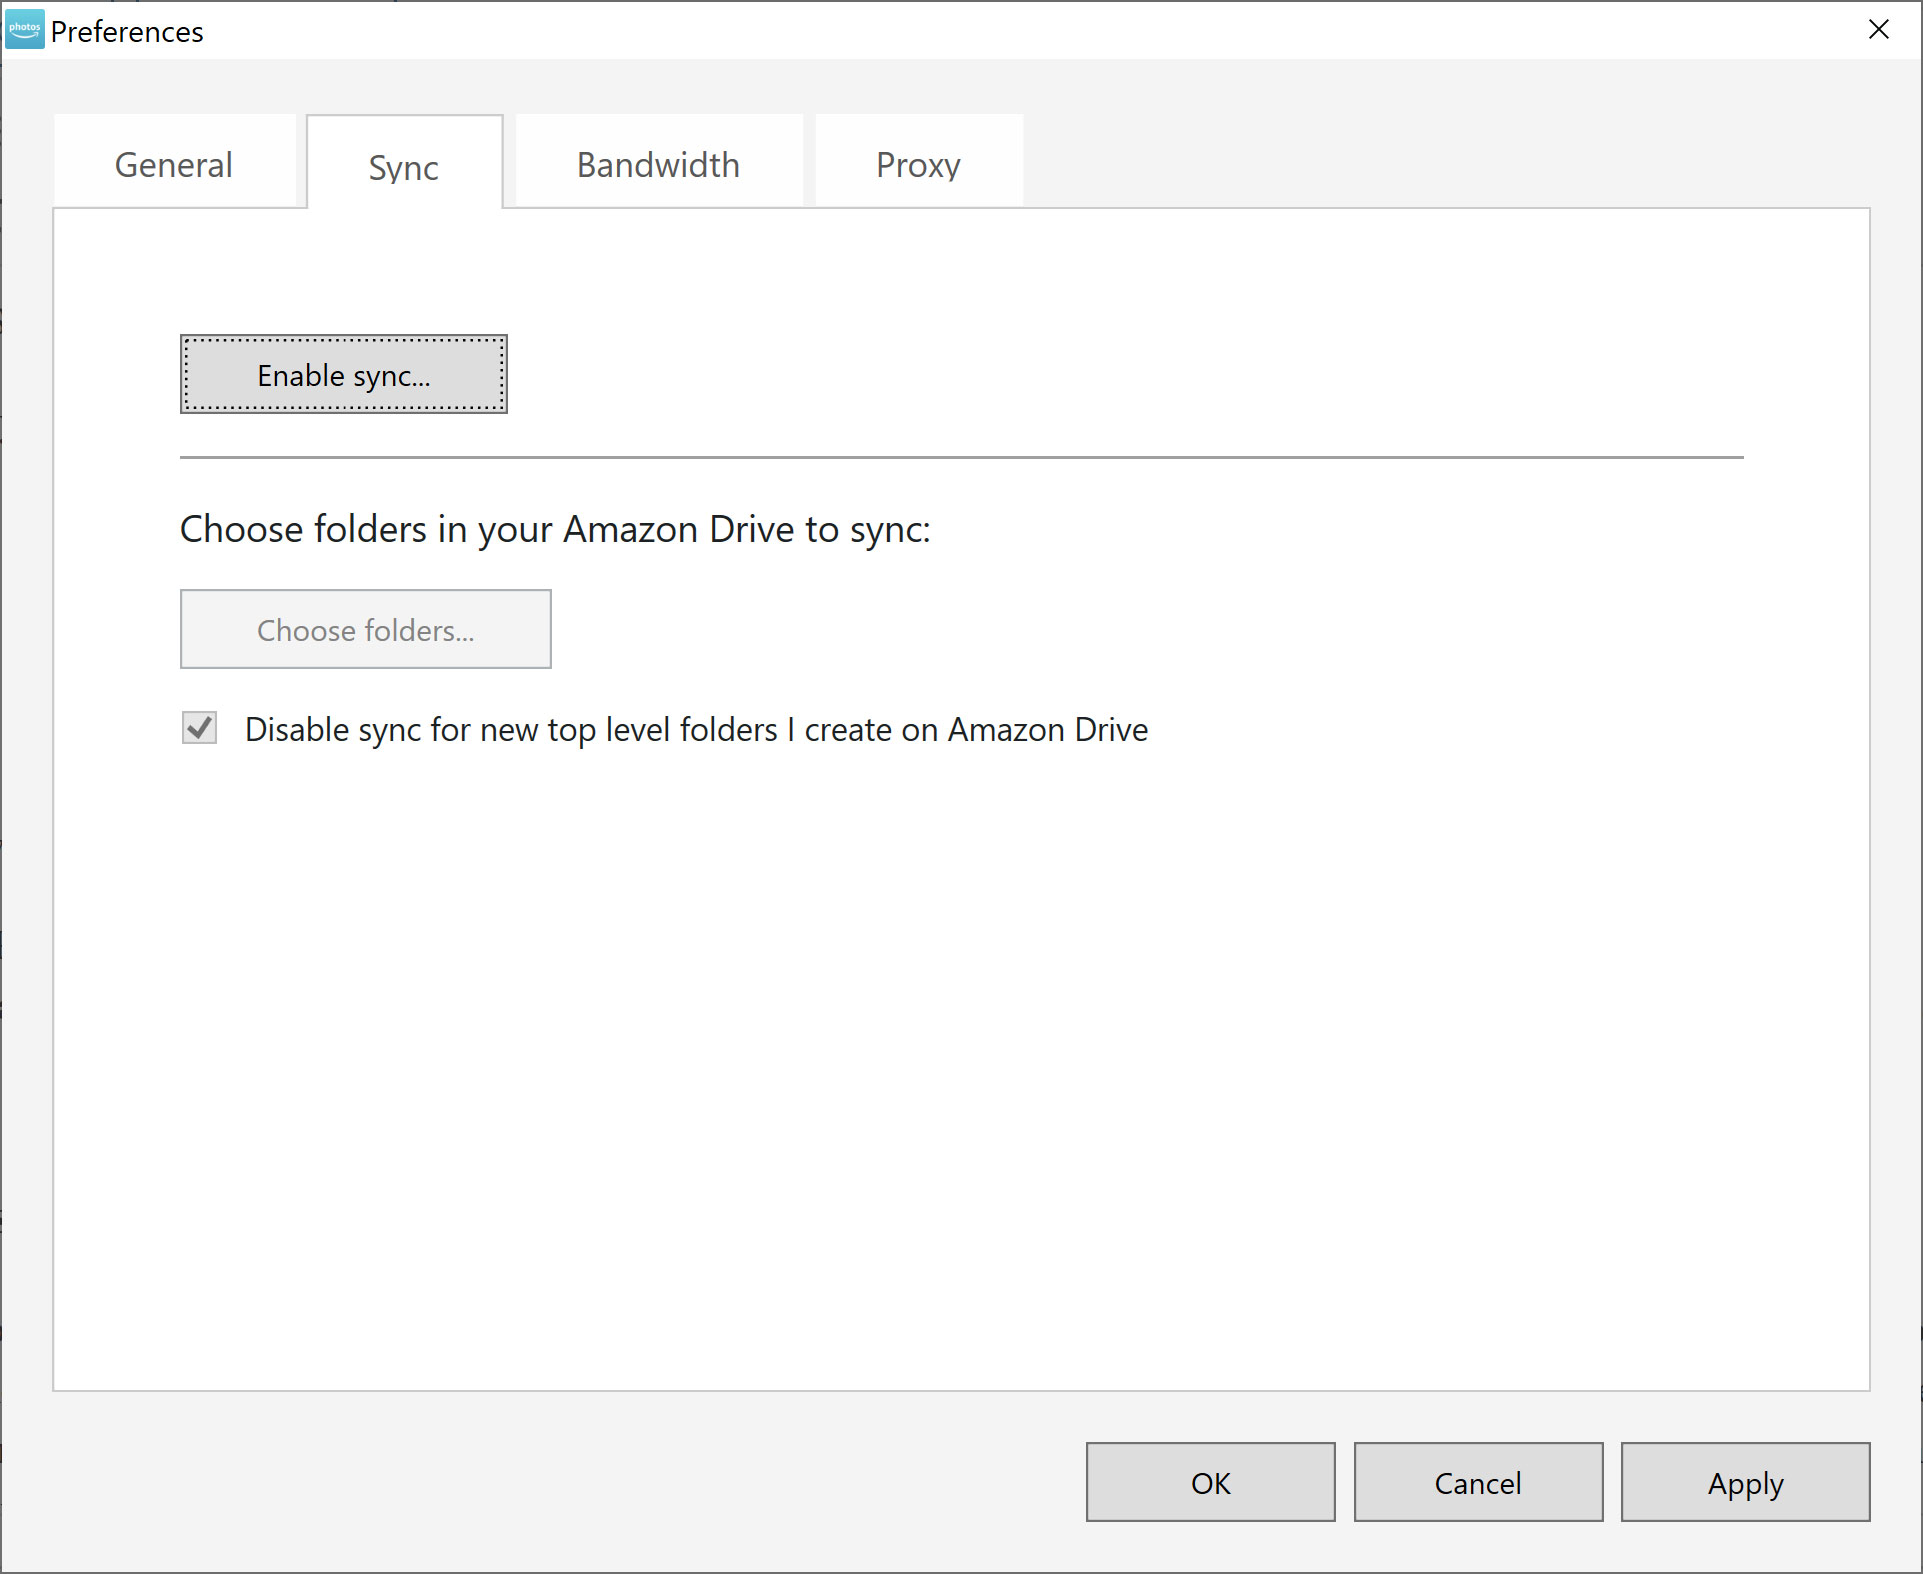
How to set up the “Sync” feature
First, you need to enable Sync by clicking on the “Settings’ button in the lower left corner of the Amazon Photos app, shown below:

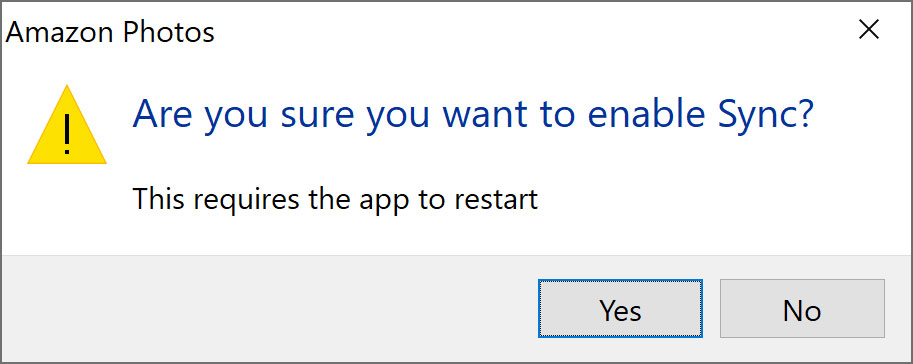
Next, select the “Enable Sync” button, shown below:
When you hit the “Enable Sync” button, the app will need to restart.
When the app restarts, you’ll be prompted to select where to put your synced files, as well as which files you want to sync. I chose to create a folder called “Photo Sync.”
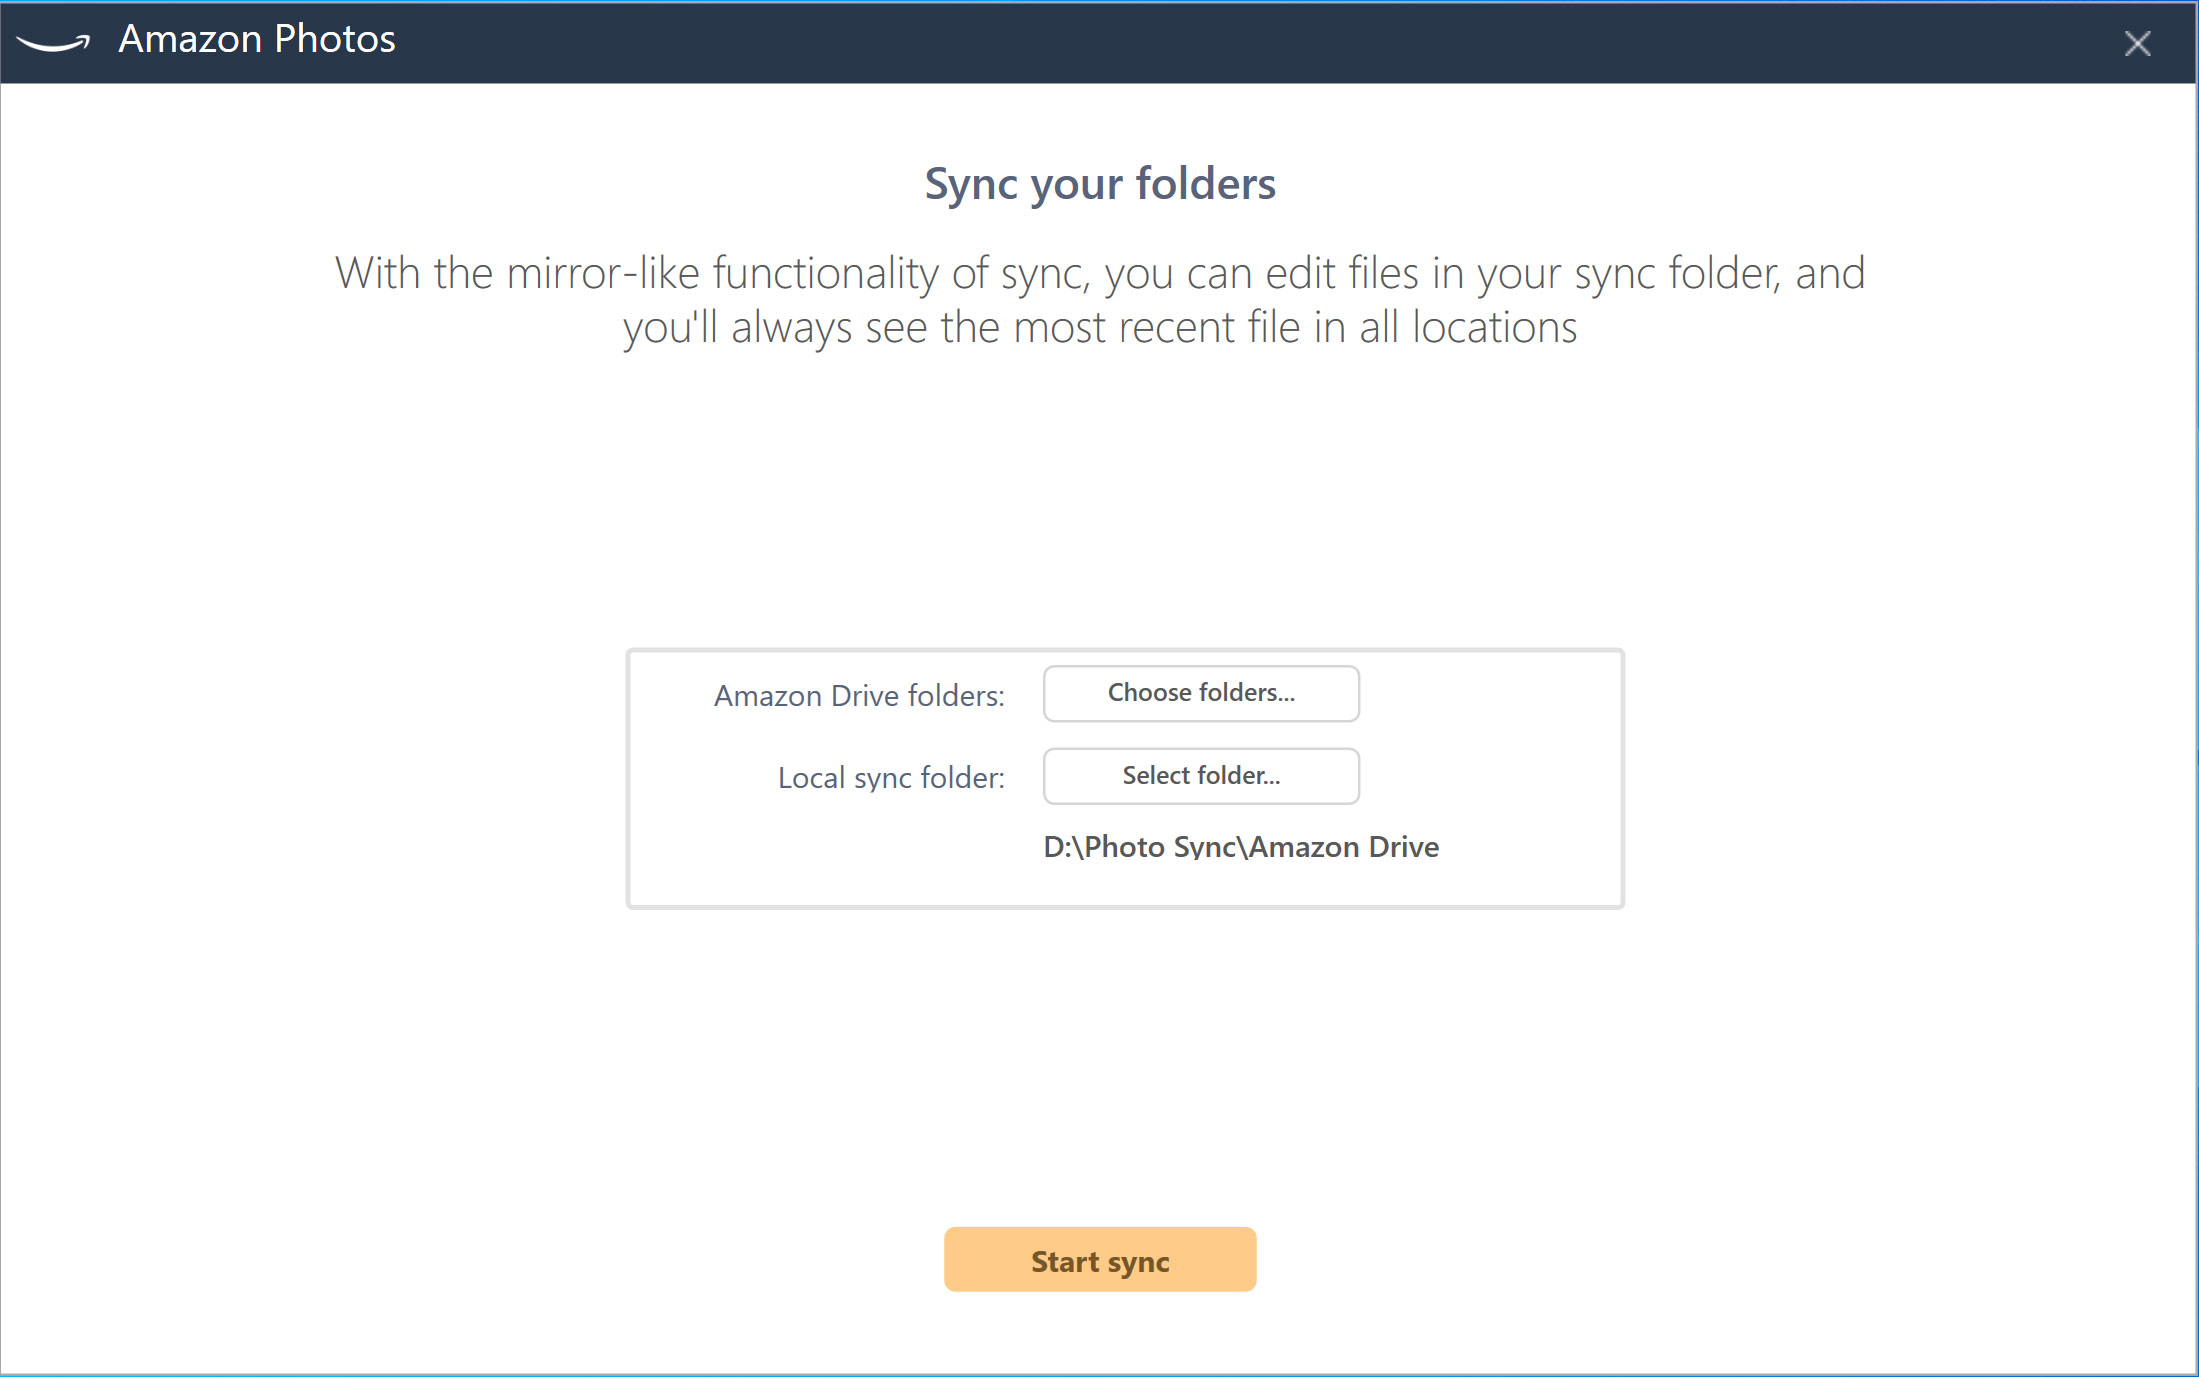
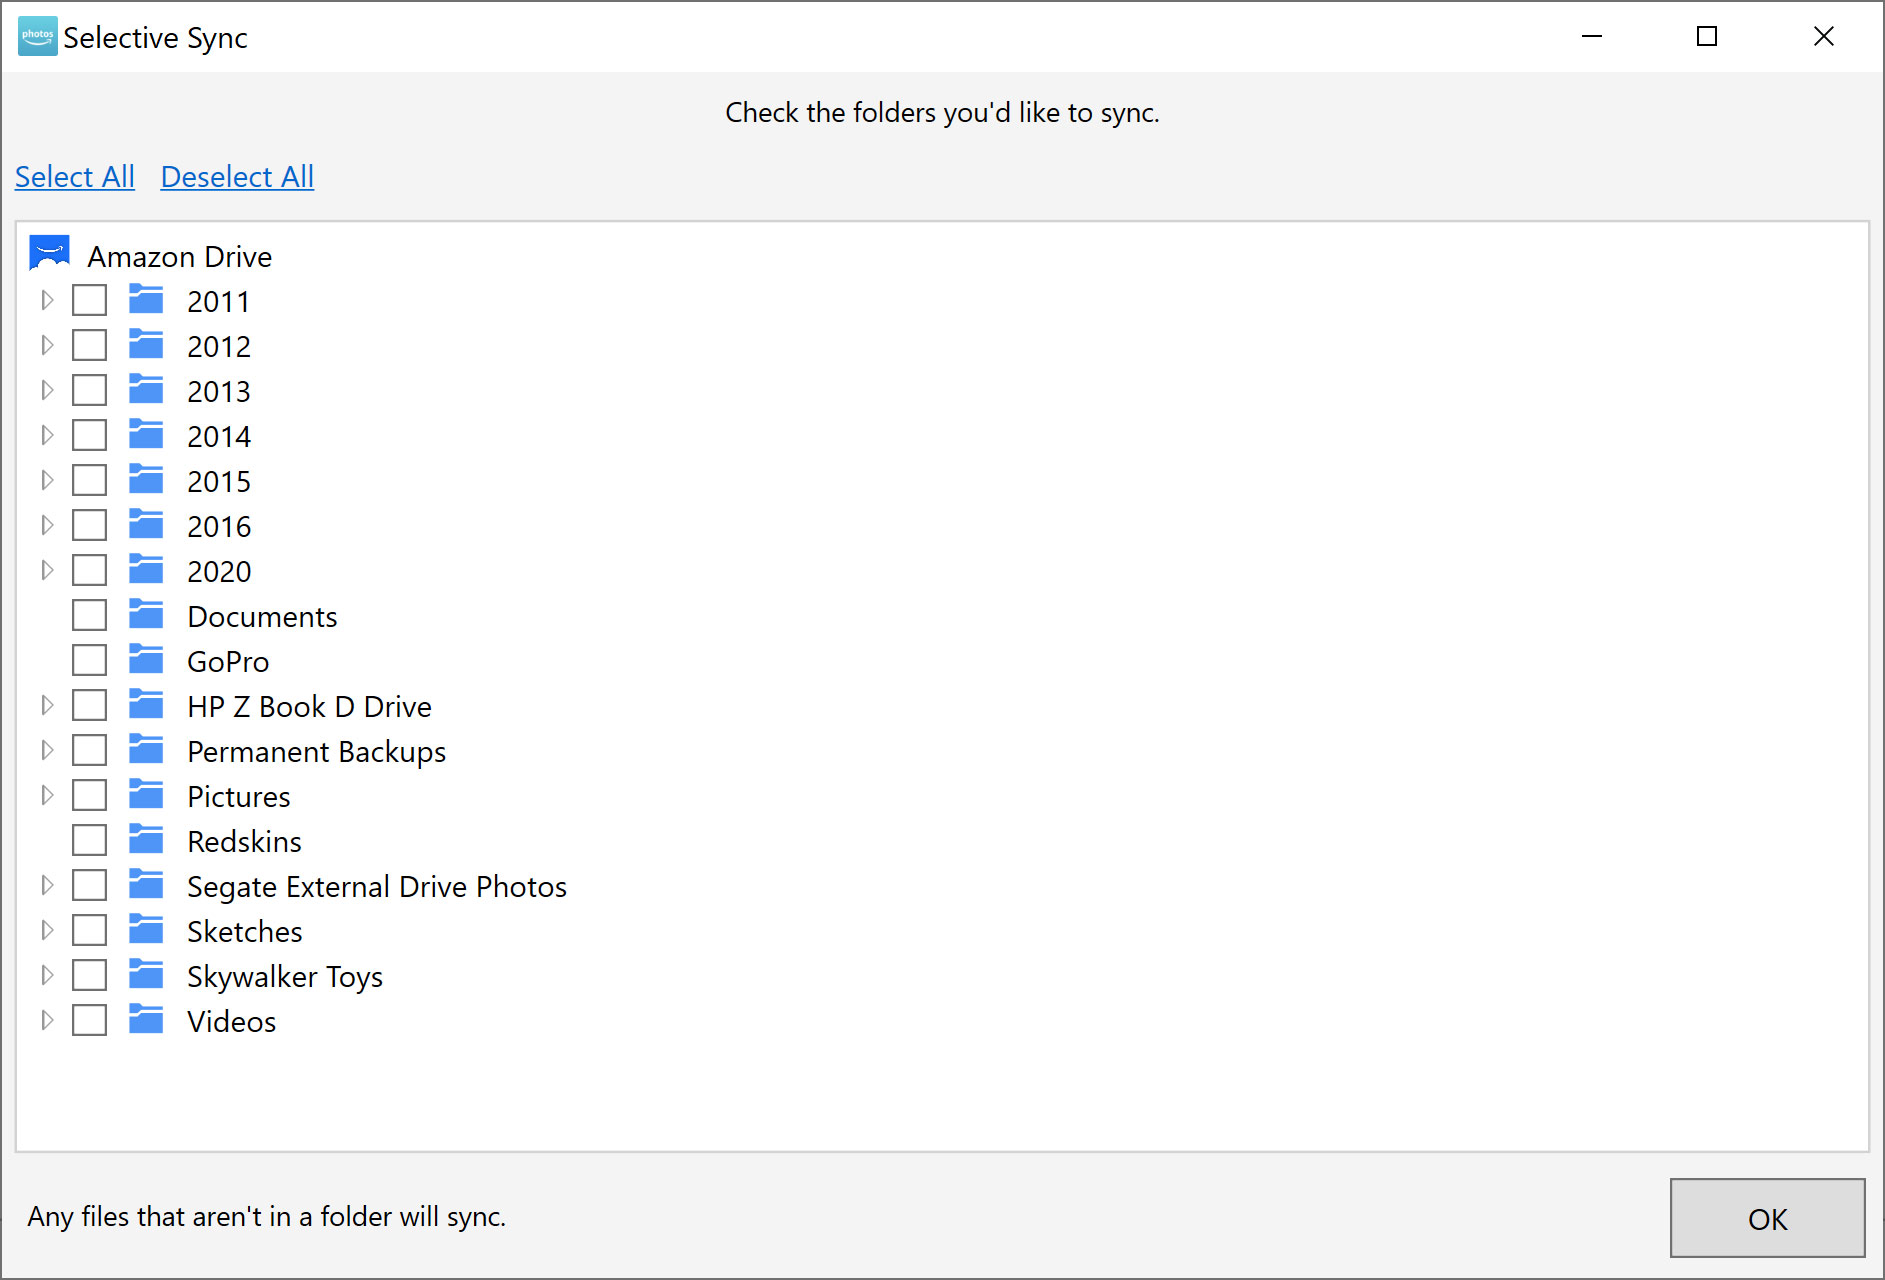
Now you can tell Amazon Photos which folders to “sync” to your computer. This would admittedly be handy if you are working with images across multiple devices, but beyond that I don’t see a need to use it for the purpose of photo backups. Here’s the interface you’ll see when you click on “Choose Folders”:
Workflow
I set up Amazon Photos to upload every photography project that I work on. I use Adobe Photoshop Lightroom for processing, and as you are probably already aware Lightroom never modifies the RAW files. The edits are stored in a separate catalog file. That means that as soon as I return from a photo shoot and have transferred the RAW files from my camera to my usual photo storage location, those files will upload right to Amazon Photos without any interaction on my part. Once I finish processing the photos, I can export the hi-res JPG, TIF or even PSD files and those will be automatically uploaded to Amazon Cloud as well. I can use also use the “share” feature from within the Amazon Drive web interface to share individual files or folders with clients if necessary.
Using the workflow I described above, I can optionally have my Lightroom catalog stored on Dropbox (which backs up regularly) and my edits would then be backed up as well. I currently have 2 TB available in my Google Drive, so if my Lightroom catalog exceeds that…well, it might be time to start a new catalog.
Conclusion
I’ve seen a lot of backup services that advertise how they allow you to backup one computer, with additional computers costing extra. With Amazon Photos/Amazon Drive, I can install the application on any number of computers, login, and just start throwing photos at it. I’ve also seen some backup services that require you to plug any backed up external drives in at least once a month or they will delete any data associated with that particular drive! Isn’t the entire point of hard drive backups to save you from a drive that fails? Not an issue here. If you are an Amazon Prime member, I’d recommend using this service immediately. If you aren’t a member, and you want to give Amazon Prime a try, you can do so free for thirty days. Annual membership is $119.
Any thoughts? Feel free to leave them below!


