If you are wondering if you can use a Canon 5D Mark IV as a USB webcam, the answer is yes! Canon has released a free app called the EOS Webcam Utility that allows you to use your Canon camera as a webcam using a single USB cable. This post shows you how it all works on a PC with a Canon 5D Mark IV.
I also recently put together an article on how to stream to Facebook Live and YouTube simultaneously, for free, in case that’s something you are interested in. If not, read on!
Download and Install the Software
The Canon Webcam Utility for the Canon 5D Mark IV is available for free from Canon’s website. Other models besides the Mark IV are available as well, and when you visit the site you’ll be prompted to select your camera model. Not all Canon cameras are supported, but many of them are.
Once downloaded, open the Zip file and double-click “Setup.exe” in the extracted folder and the software will be installed. Be aware that all you’ve essentially done here is install a driver, and there is no software interface to refer to after installation (that tripped me up at first so I thought it was worth mentioning).
WARNING: If you also have Canon’s EOS Utility installed (different from the Webcam Utility), be sure to exit completely from it before attempting to use the Webcam Utility. To exit the EOS Utility, right click the icon in your taskbar (it might be in your hidden icons) and choose “Quit” as shown below. The Webcam Utility will not work if the EOS Utility is running.

Setting up the Camera
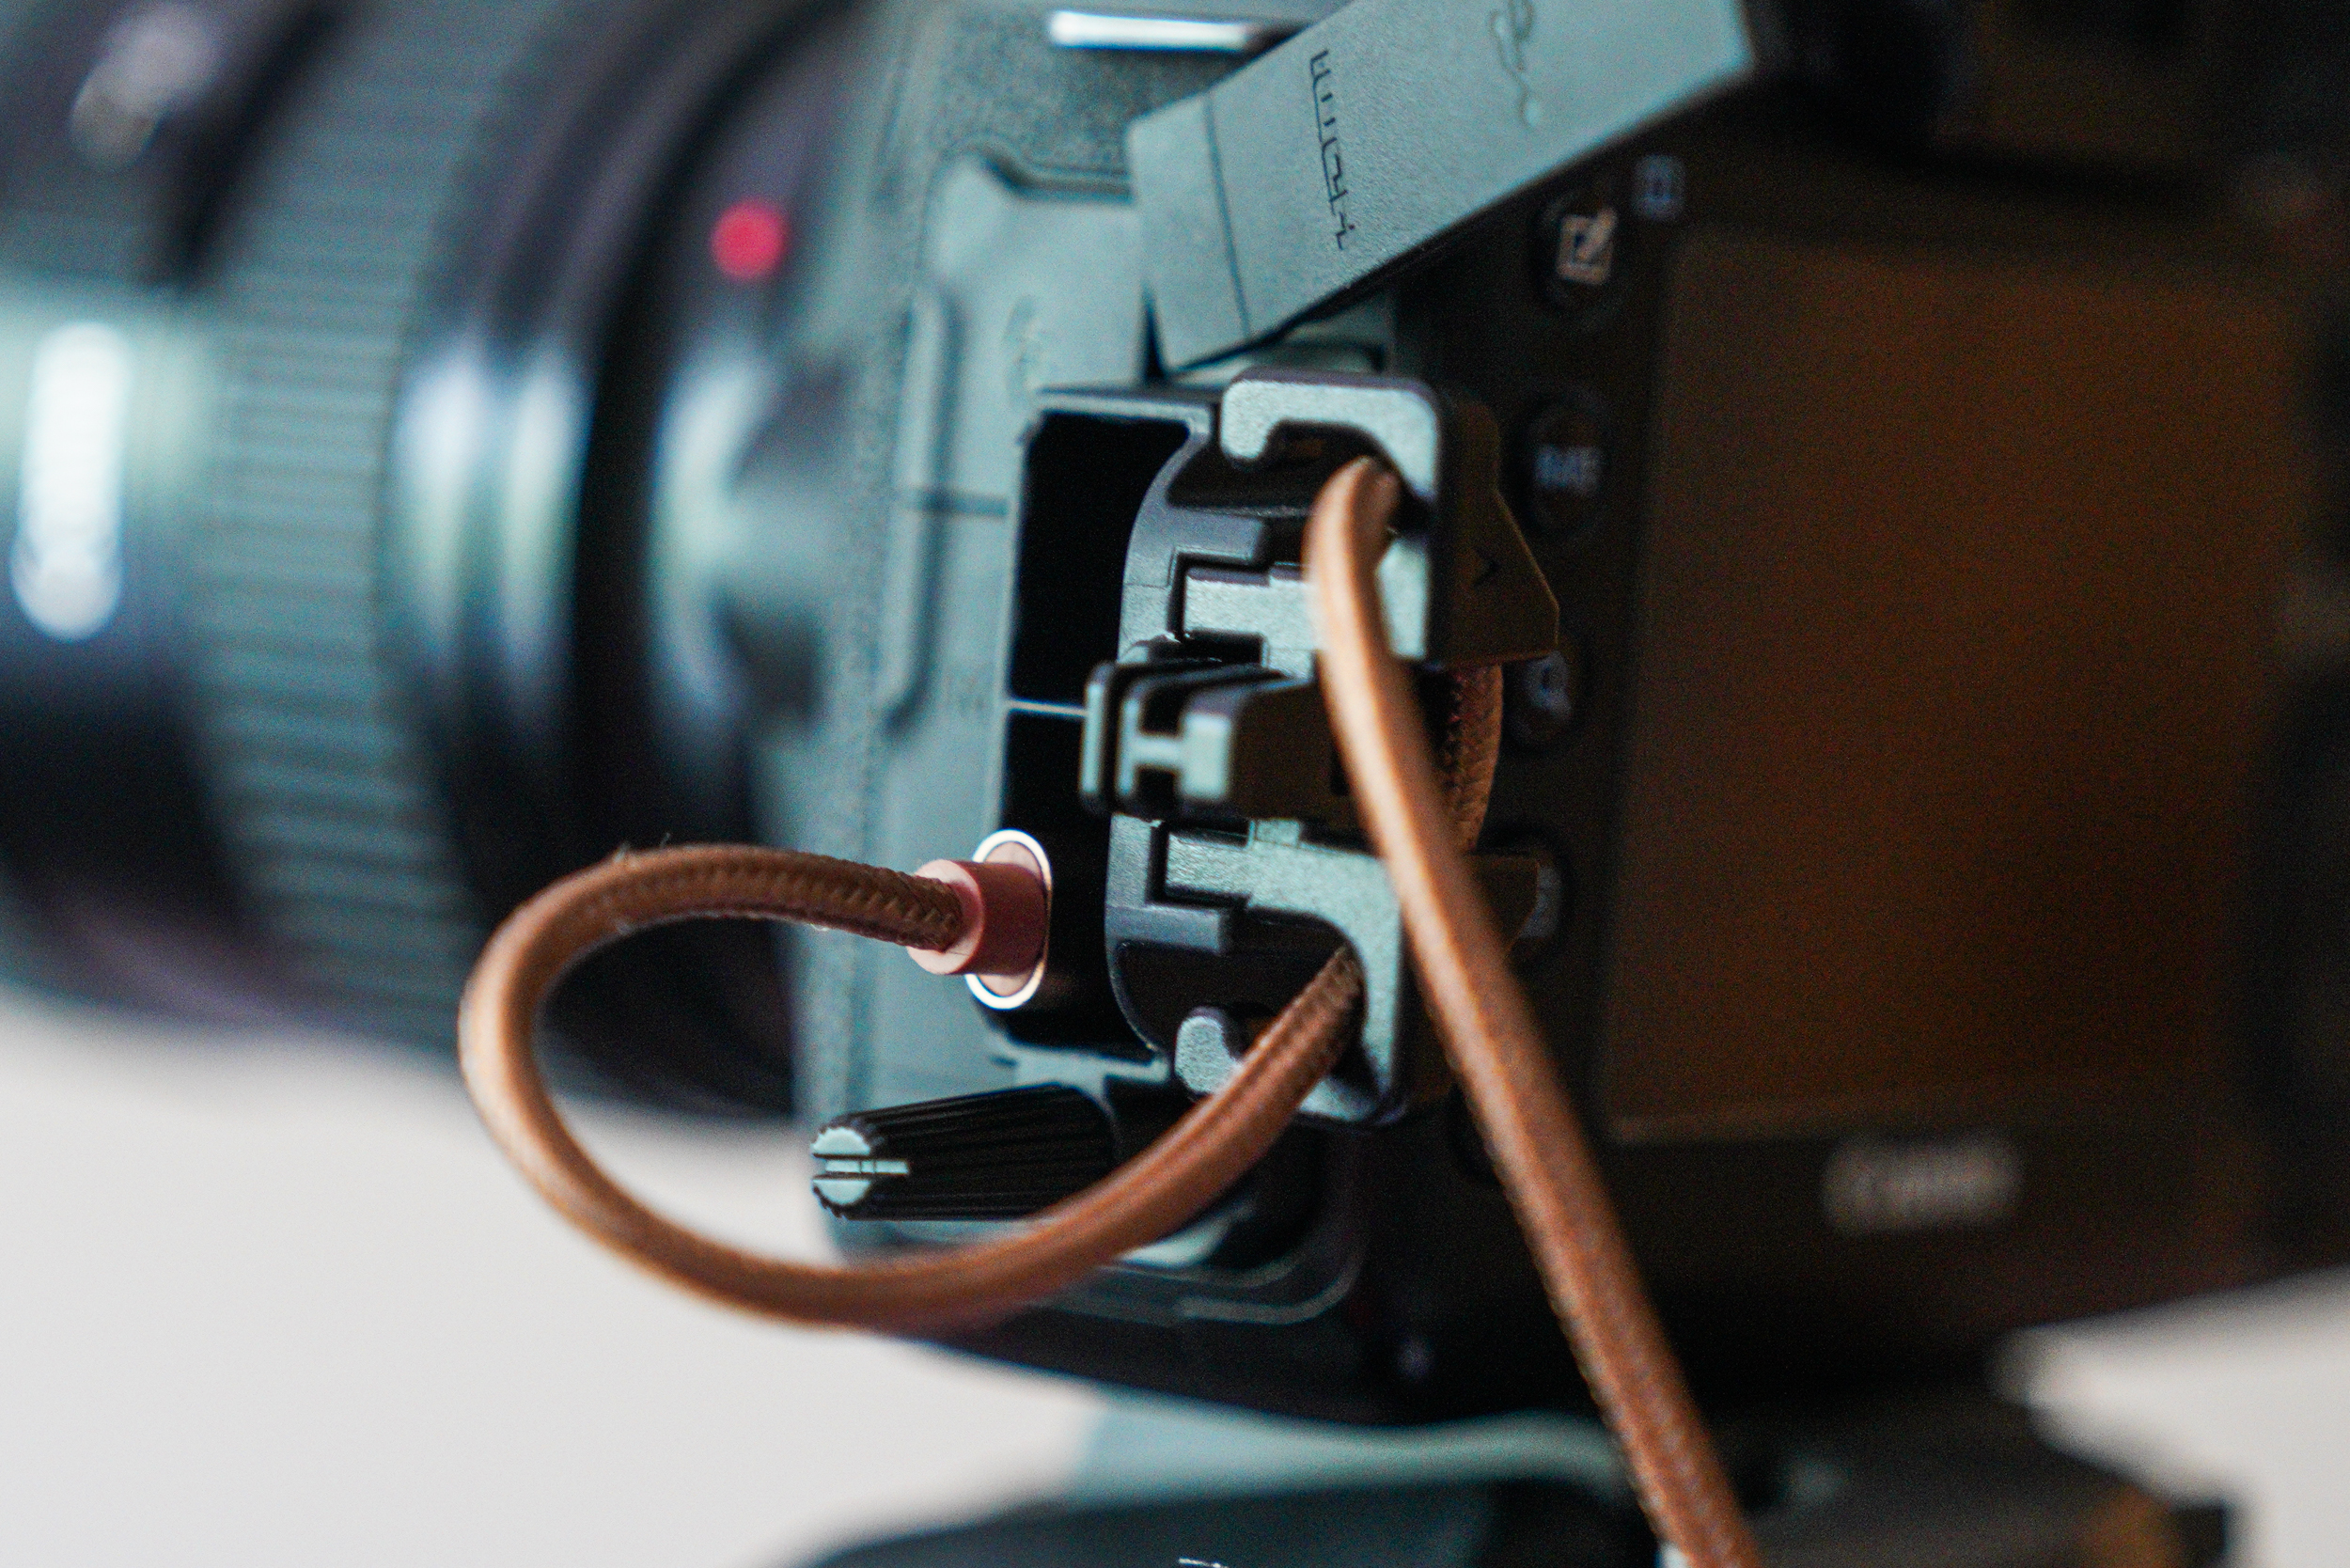
First things first, you’ll need a USB cable that works with the 5D Mark IV. Fortunately your camera came with one (the Canon IFC-150U II) but if you don’t have that at the ready (I didn’t), you can grab an inexpensive replacement USB cable pretty easily (or you might just have one sitting around the house like I did). Here’s one from Amazon. Also be aware that even though the inexpensive replacement USB cable doesn’t look like it will fit (if you needed to go that route), rest assured that it will. Just plug it in using the lower portion of the USB input on the camera. Shown below is how to plug it in, although you should use the cable protector if you have it (more on that below).

A “non OEM” USB cable plugged into the 5D Mark IV
The EOS Webcam Utility requires that the camera be put into “Movie Mode.” The way to do that on the 5D Mark IV is to use the switch on the back of the camera, as shown below:
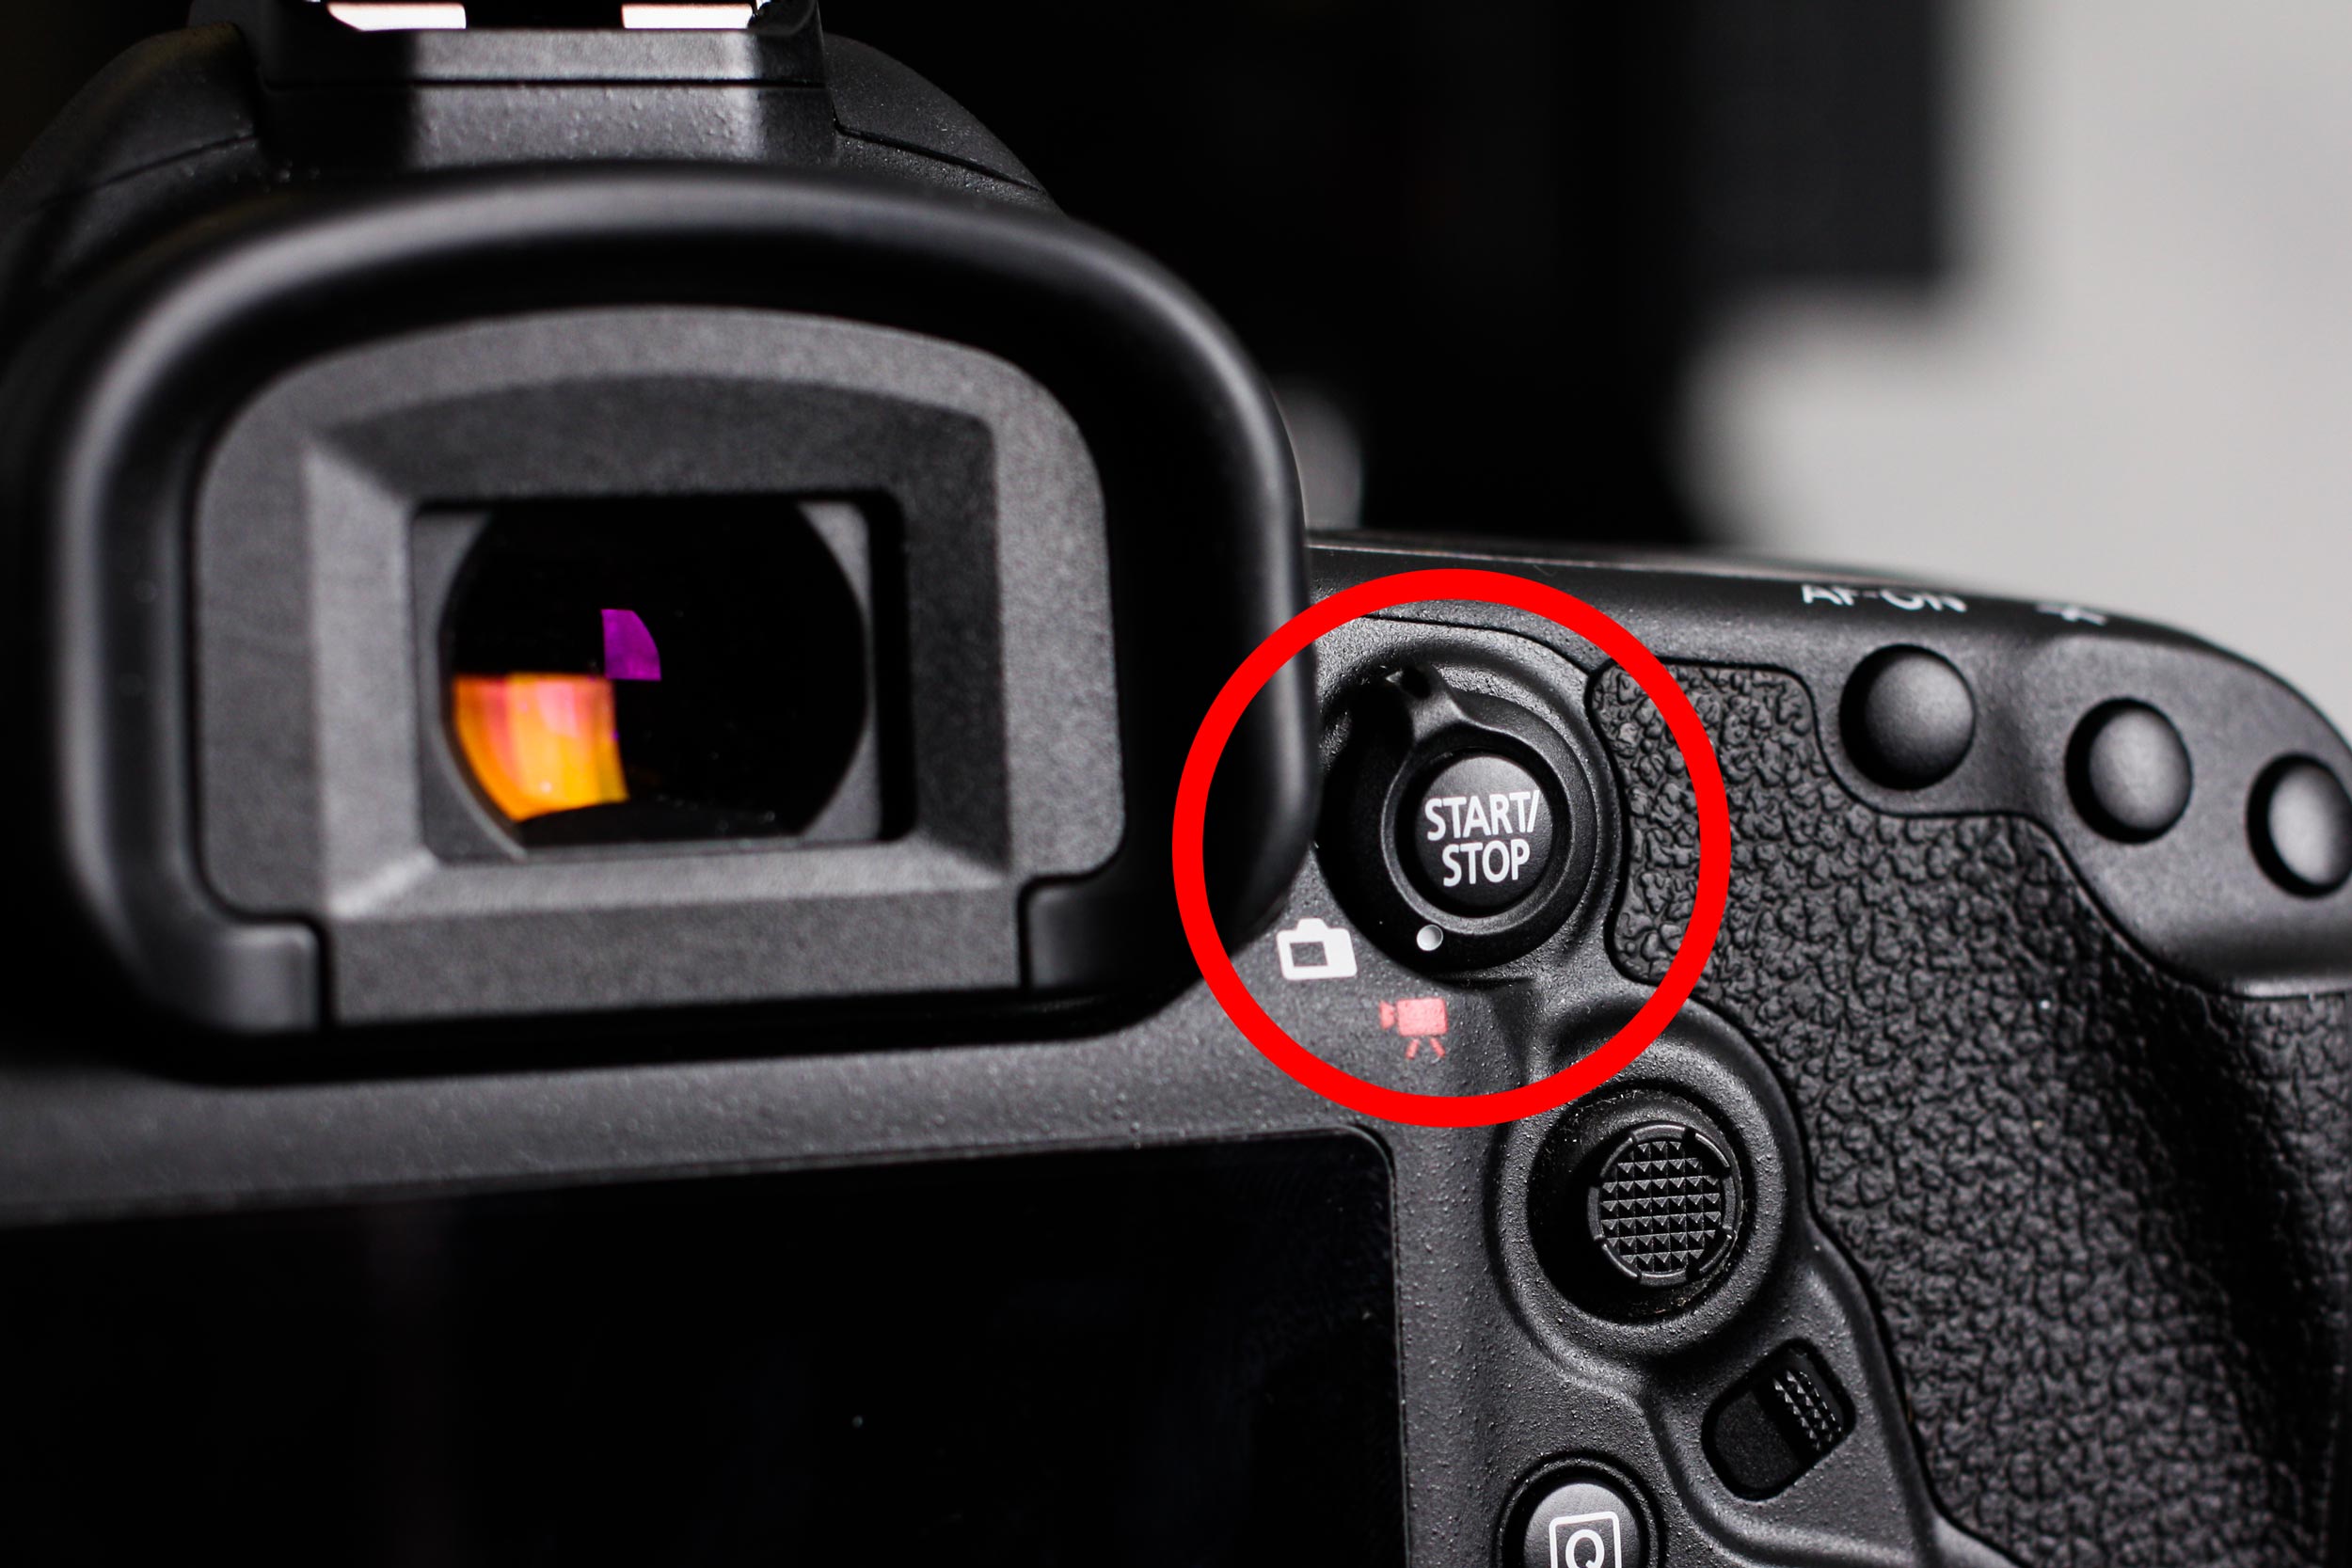
5D Mark IV Video Mode Switch
Once in movie mode, you can choose to use any of the shooting modes at your disposal on the top of the camera (M, Av, Tv, P, or full auto). I’d recommend that you get your settings dialed in to your liking before you start streaming. Once that’s all set up, it’s time to plug in your USB cable.
Your 5D Mark IV came with a cable protector (it’s a weird looking plastic thing). The purpose of the protector is to prevent damage to the HDMI or USB input, which apparently costs a LOT of money to repair. Here’s what the cable protector looks like with the USB cable routed through it and plugged into the camera:
Focus Mode on the Camera
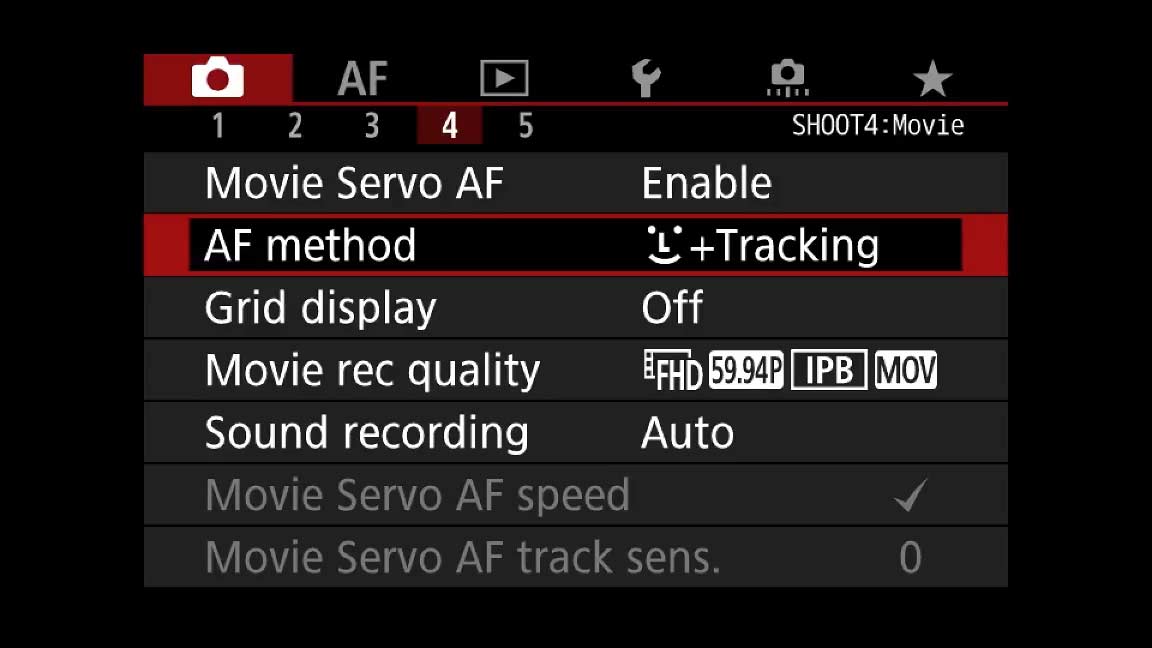
The Canon 5D Mark IV has a “face tracking” focus mode that’s perfect for a webcam setting, so it’s a good idea to go ahead and get that setup now, before plugging the camera into the computer. In order to enable face tracking, go to page 4 of the “shoot” menu and use the center button on the back of the camera to select “AF method.” Select face tracking, as shown below:
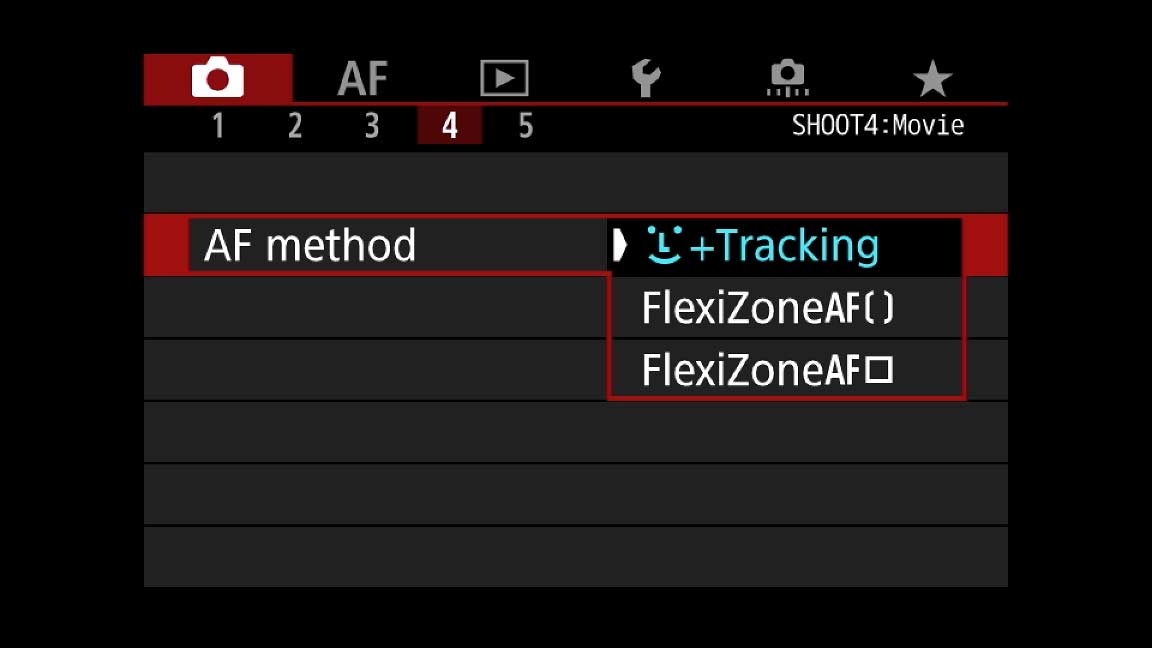
Once selected, your menu should look like the image below:
Attach the USB cable from the Camera to the Computer
Next step is to simply plug the other end of the USB cable into a USB 3 port on your computer. The port needs to be USB 3.0 for maximum video quality, as lower speed USB ports will result in choppy playback. The computer should instantly recognize that you’ve plugged the camera in, but you’ll still need to do some tweaking in whatever streaming software you plan to use. Also, when you first plug the USB cable in, the camera will not go into video mode right away. In fact, if you have the camera turned on and in video mode when you first plug it in, video mode will stop and a little icon of a computer will appear on your LCD instead! It’s confusing, but video mode will automatically (re)start on the camera once you select the camera as a source in your software.

Mount the Camera to a Tripod
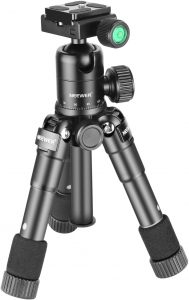
If you are looking for a tripod that will mount on your desk (and holds the weight of the 5D Mark IV), you can pick up the Neewer 20 inch desktop tripod from Amazon for $50.
There are a number of standard sized tripods available as well, and if you are looking for an inexpensive solution you can pick up something like this 57 inch Camera Tripod from Amazon ($40.99).
Configuring Software
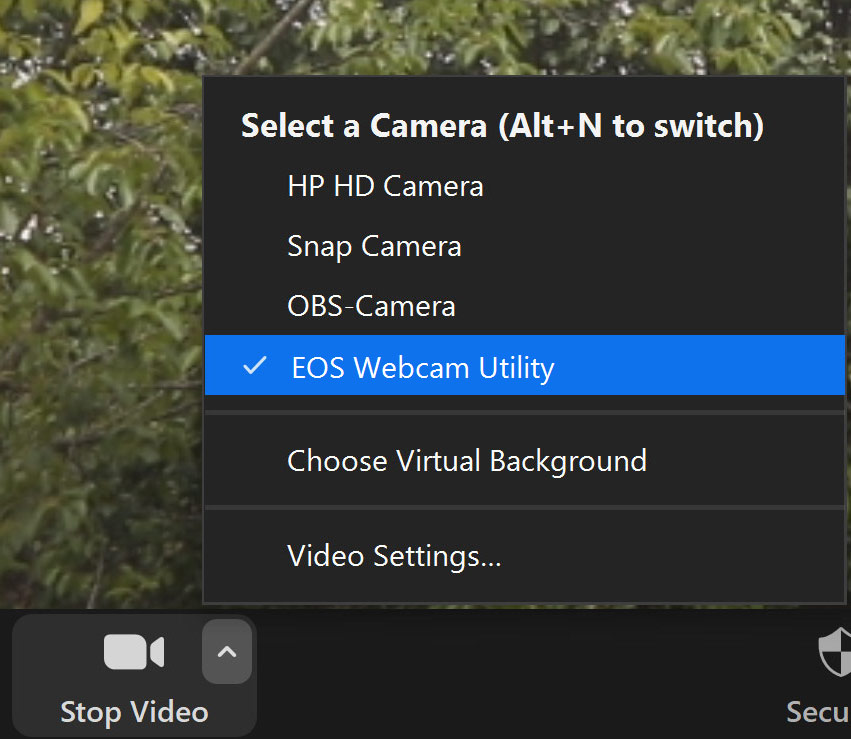
You’ll need to configure your software (such as the free OBS) to use your camera as a USB webcam. Settings will vary depending on the software you are using, but in general there should be a way to easily tell the software which device to use as a camera. The camera will show up in your devices as “EOS Webcam Utility Beta” and once you select it, you’ll hear the camera’s mirror go “whack” as it becomes disabled and video will appear on your camera’s LCD.
Here’s what you’ll see in Zoom:
Here’s what you’ll see in WebEx:
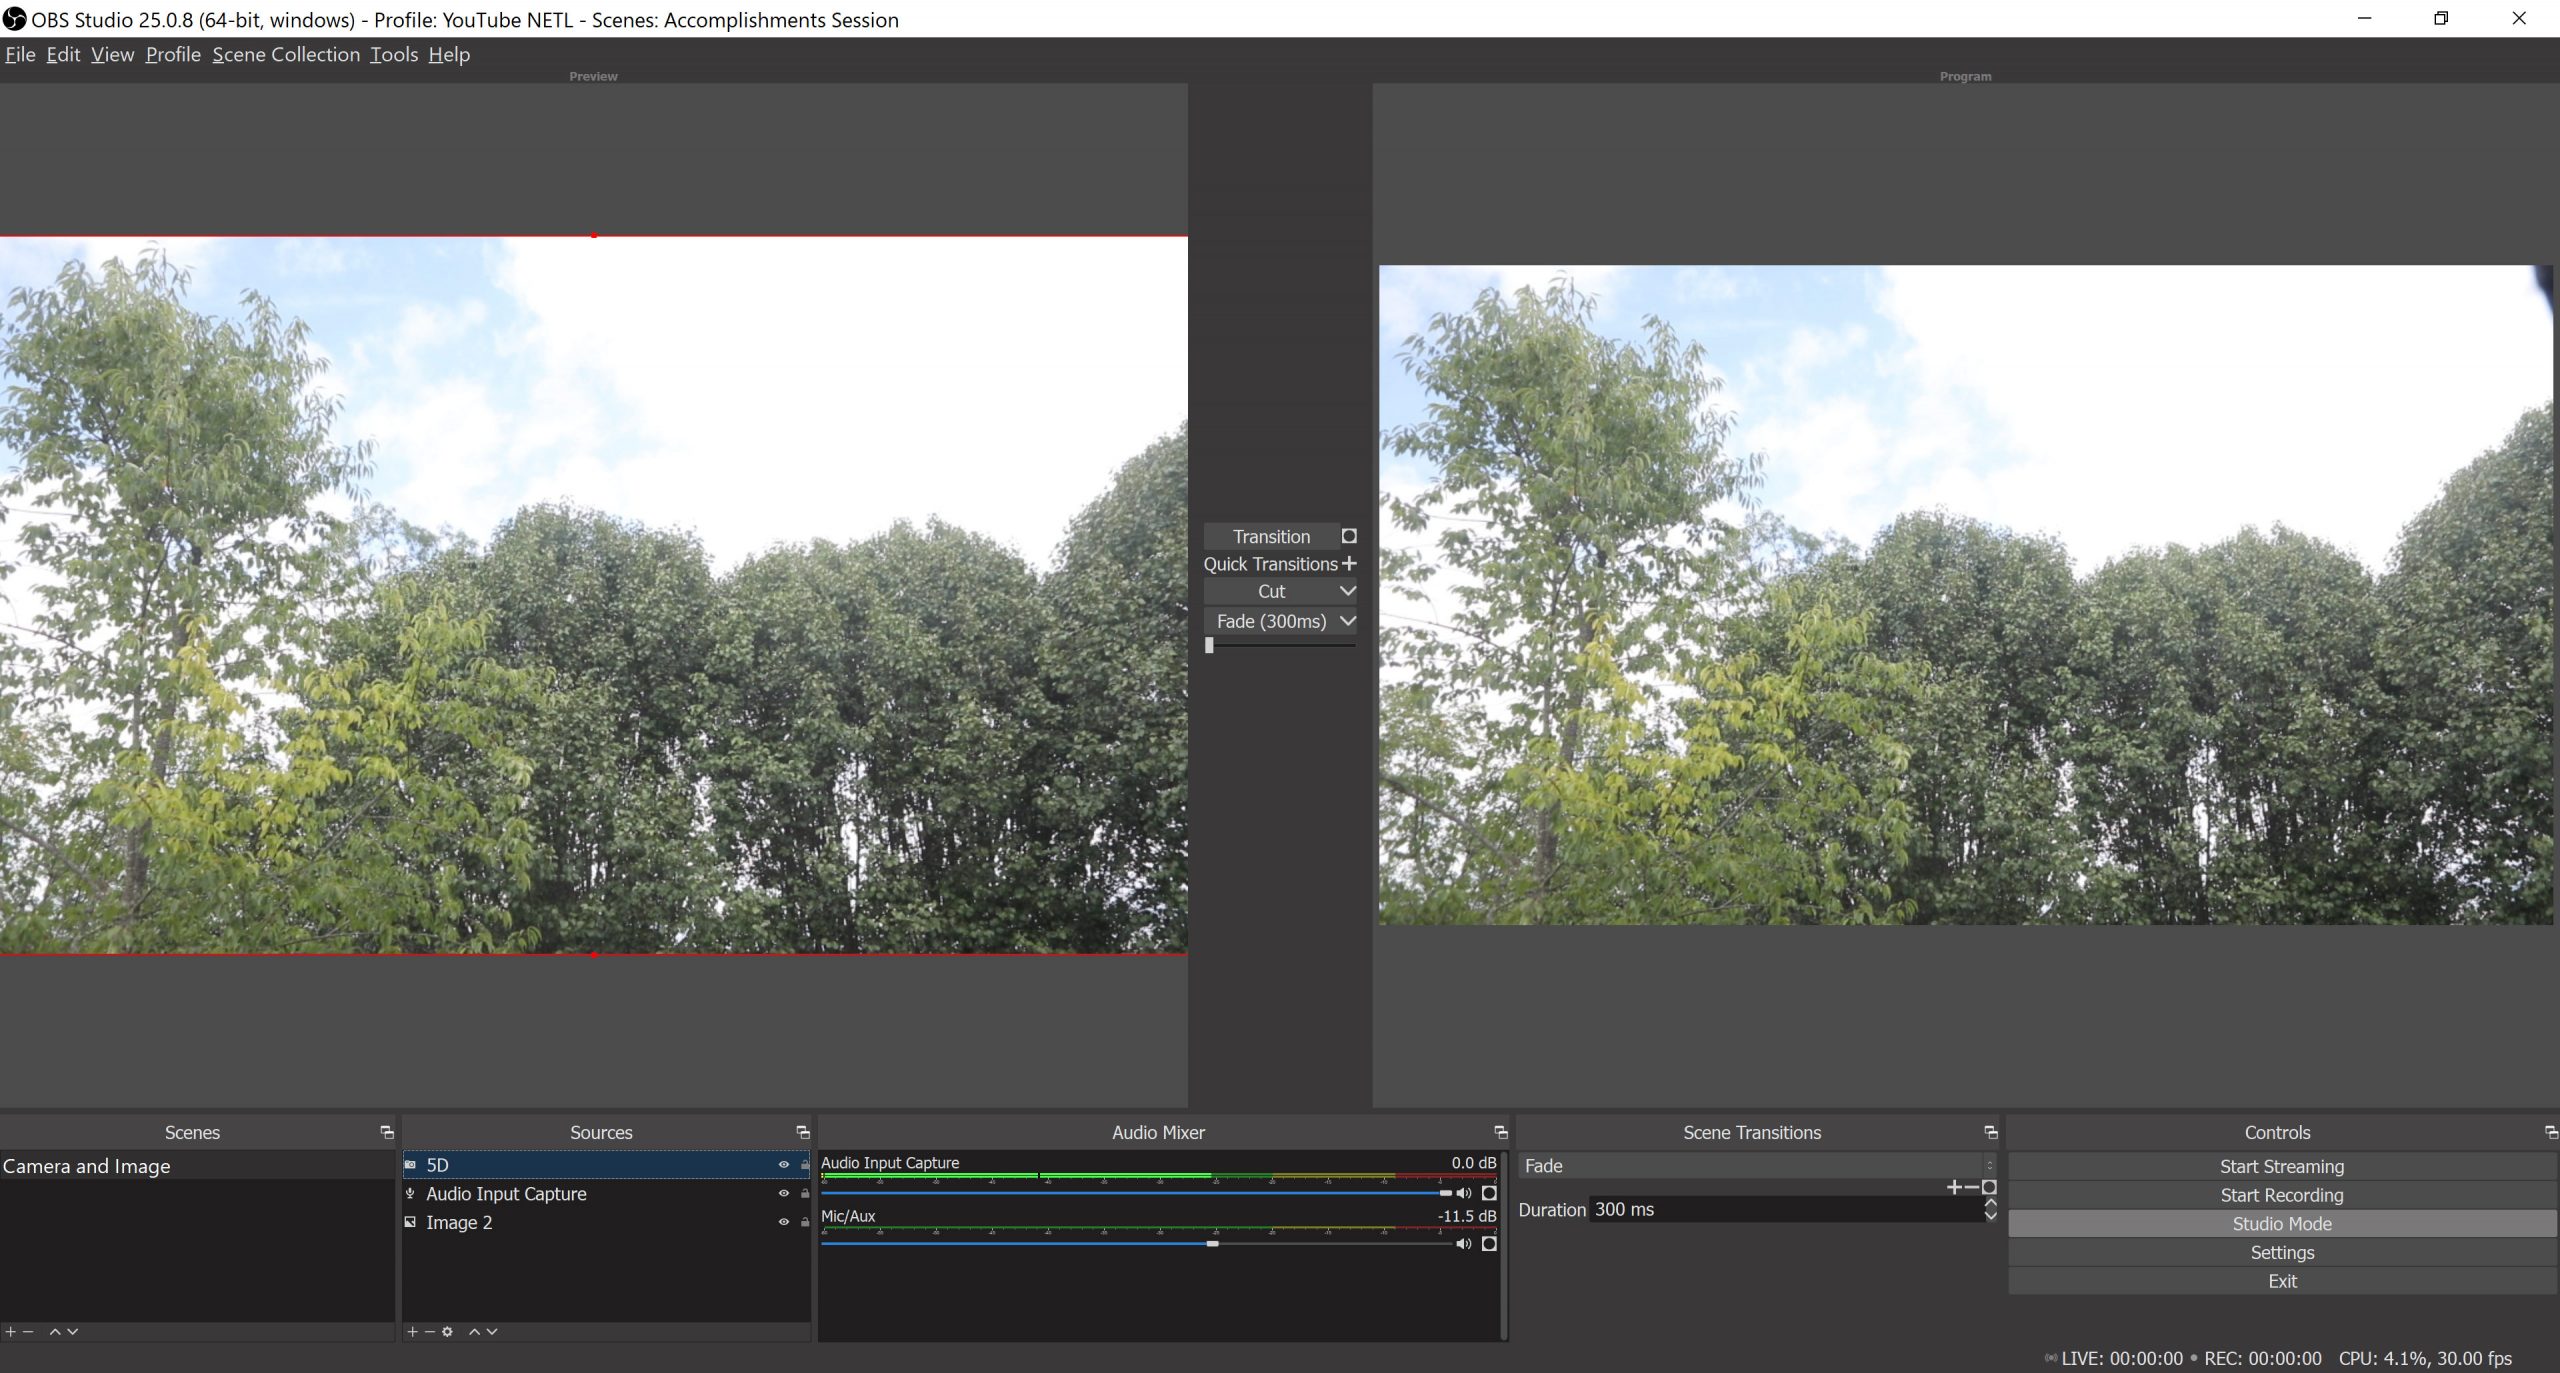
Here’s how to configure OBS in Windows 10:
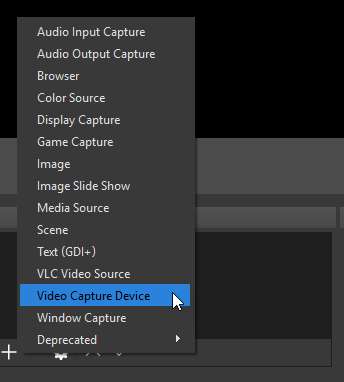
In the “Sources” window, click the plus icon to add a source and choose “Video Capture Device” as shown below:
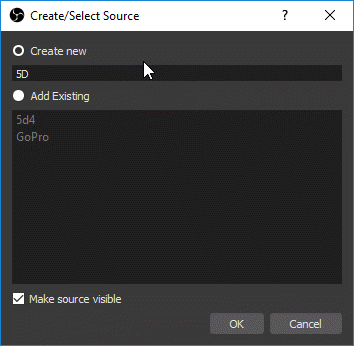
Choose “Create new” and type in a name, as shown below:
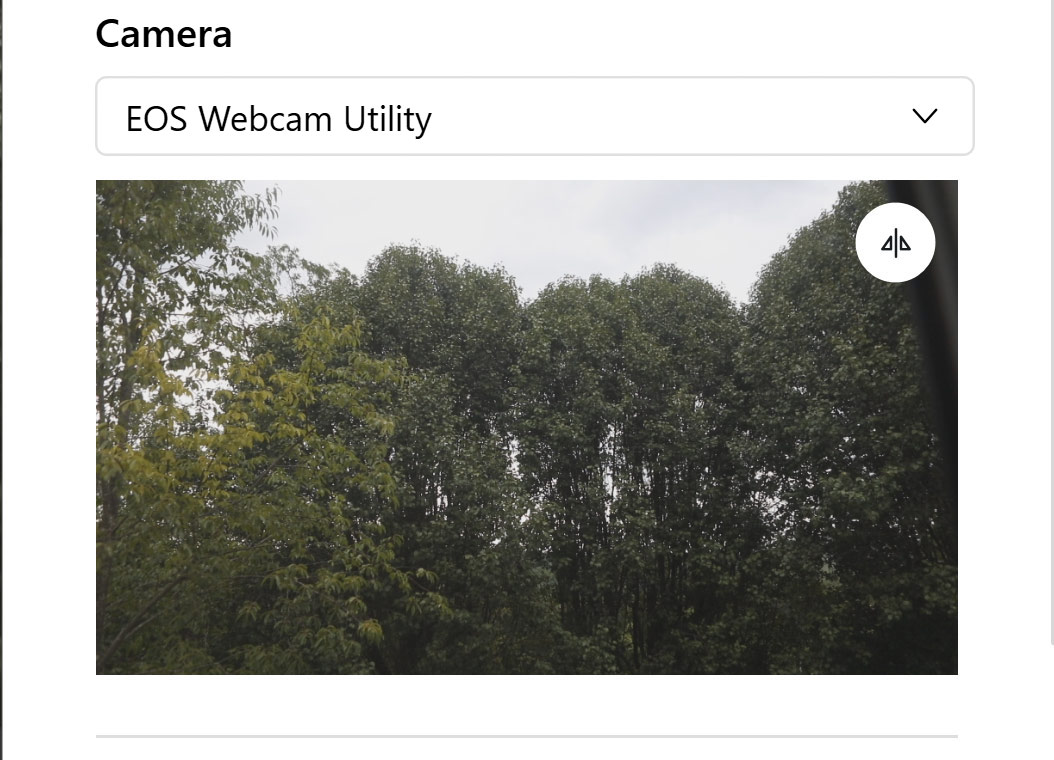
If you don’t see a preview from your camera, double-click on the source you just created to open the settings and make sure that “EOS Webcam Utility Beta” is chosen, and be sure that “Resolution/FPS Type” is set to “Device Default” as shown below:
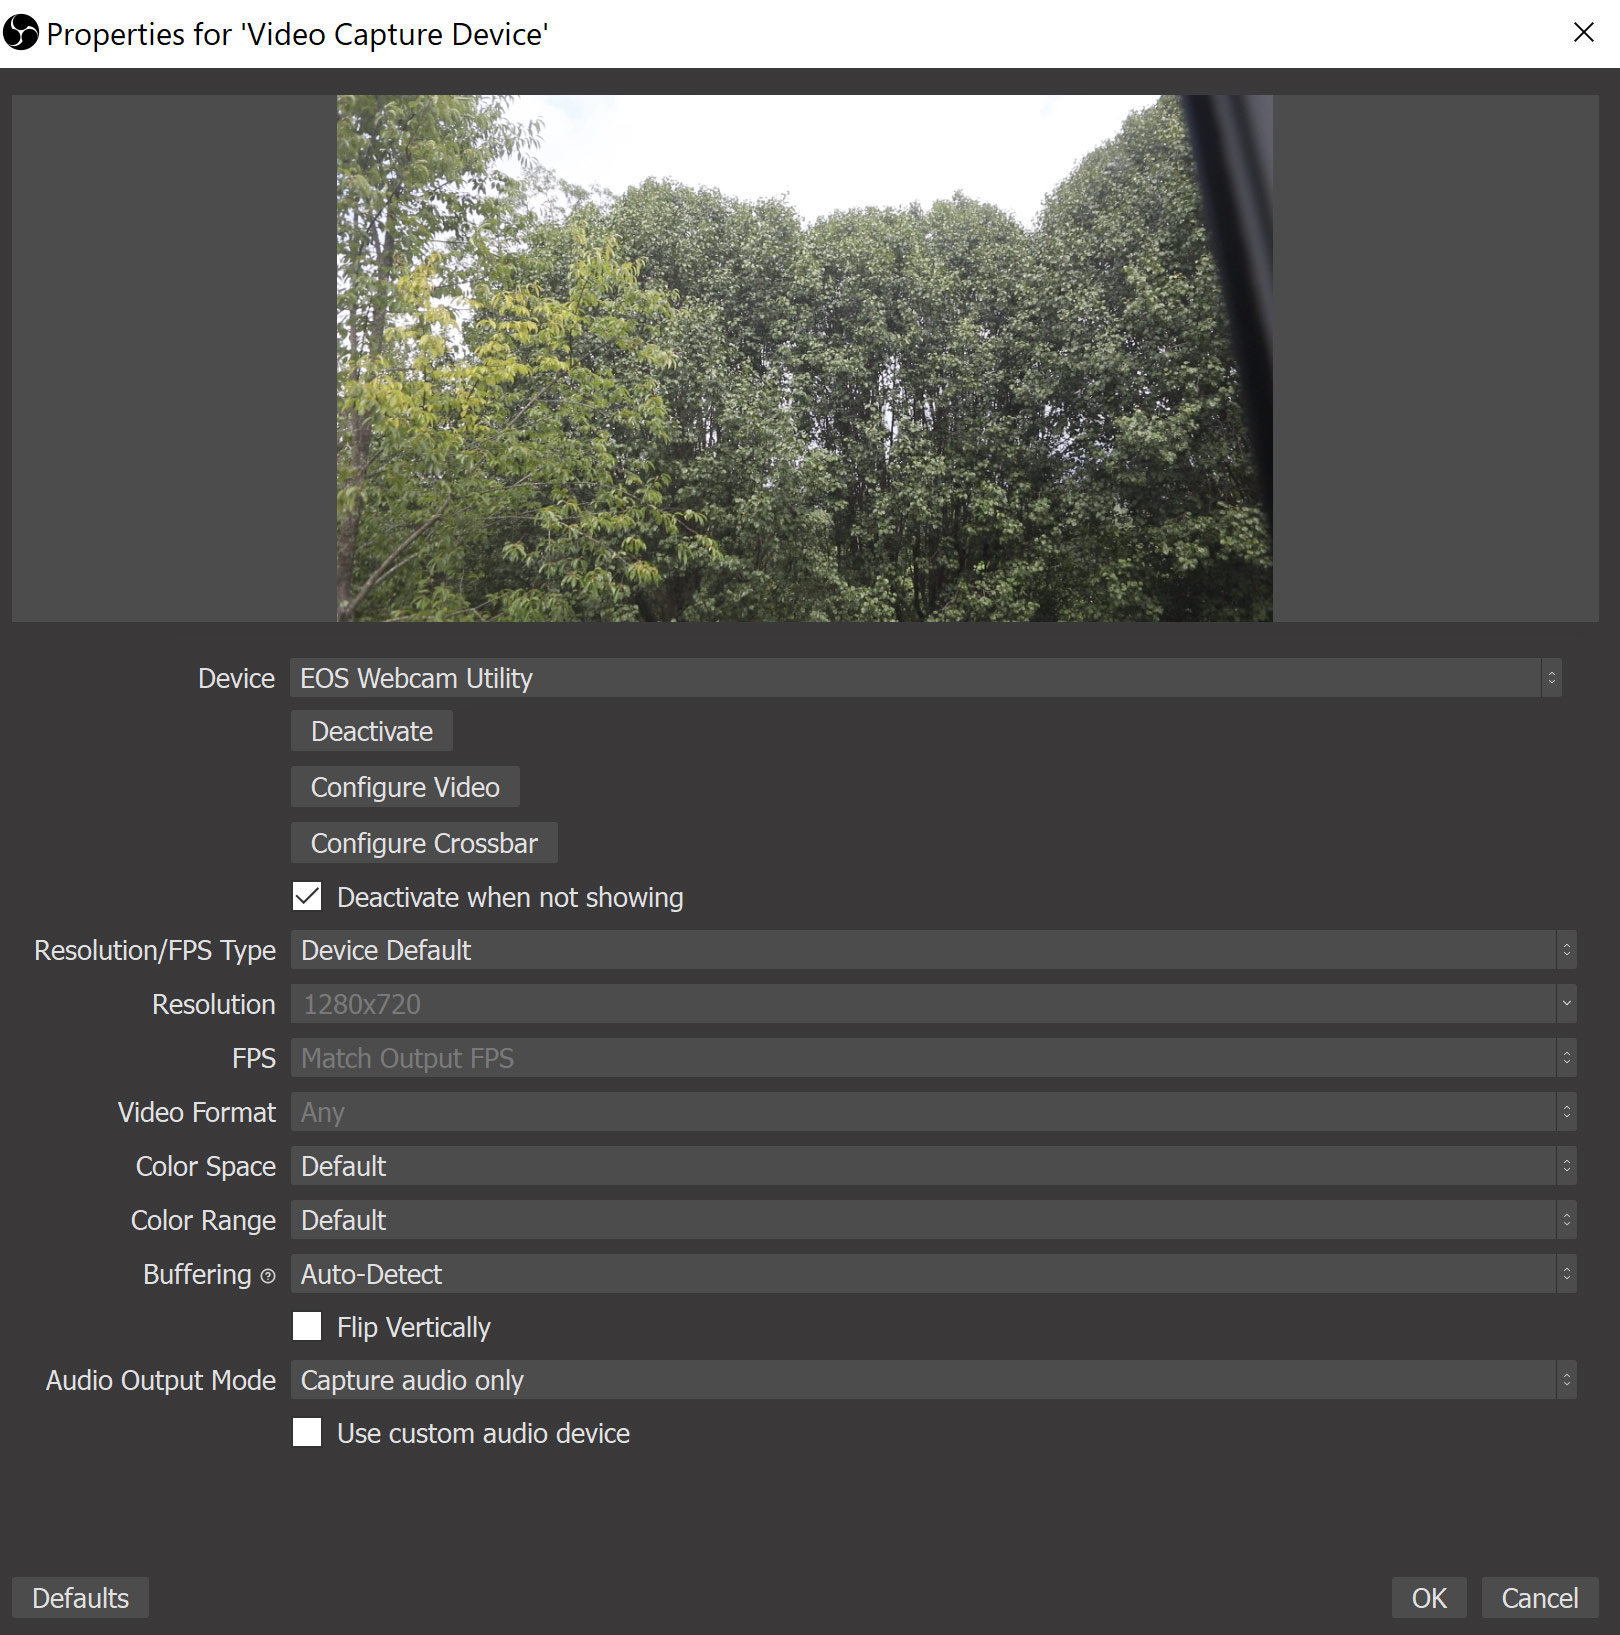
Once that’s configured, the software should give you a preview of what the camera sees.
Audio (Or Lack Thereof)
The 5D Mark IV does not send audio through the USB port, so it’s up to you to get your audio working, be that through an integrated mic on your computer or an external source. I prefer to use standalone USB mics, such as the Fifine Metal Condenser Recording Microphone.
Battery Life
Need to use your camera for a live stream that will run for hours? Sadly, the standard battery won’t last very long without a bit of help, and even though you are plugged in via USB, the camera is NOT being charged. Fortunately, there is a solution.
The setup that I put together utilizes these four pieces of equipment (around $192 total):
- EasyAcc Monster 20000mAh Power Bank ($32.99) – this is your “battery”
- Tether Tools Case Relay Camera Power System ($99.99)
- Tether Tools Relay Camera Coupler ($34.99)
- Tether Tools StrapMoore ($23.95)
Here’s how it works:
If you are using a tripod, the first thing to do is attach the Tether Tools StrapMoore to a leg on your tripod, as shown below:
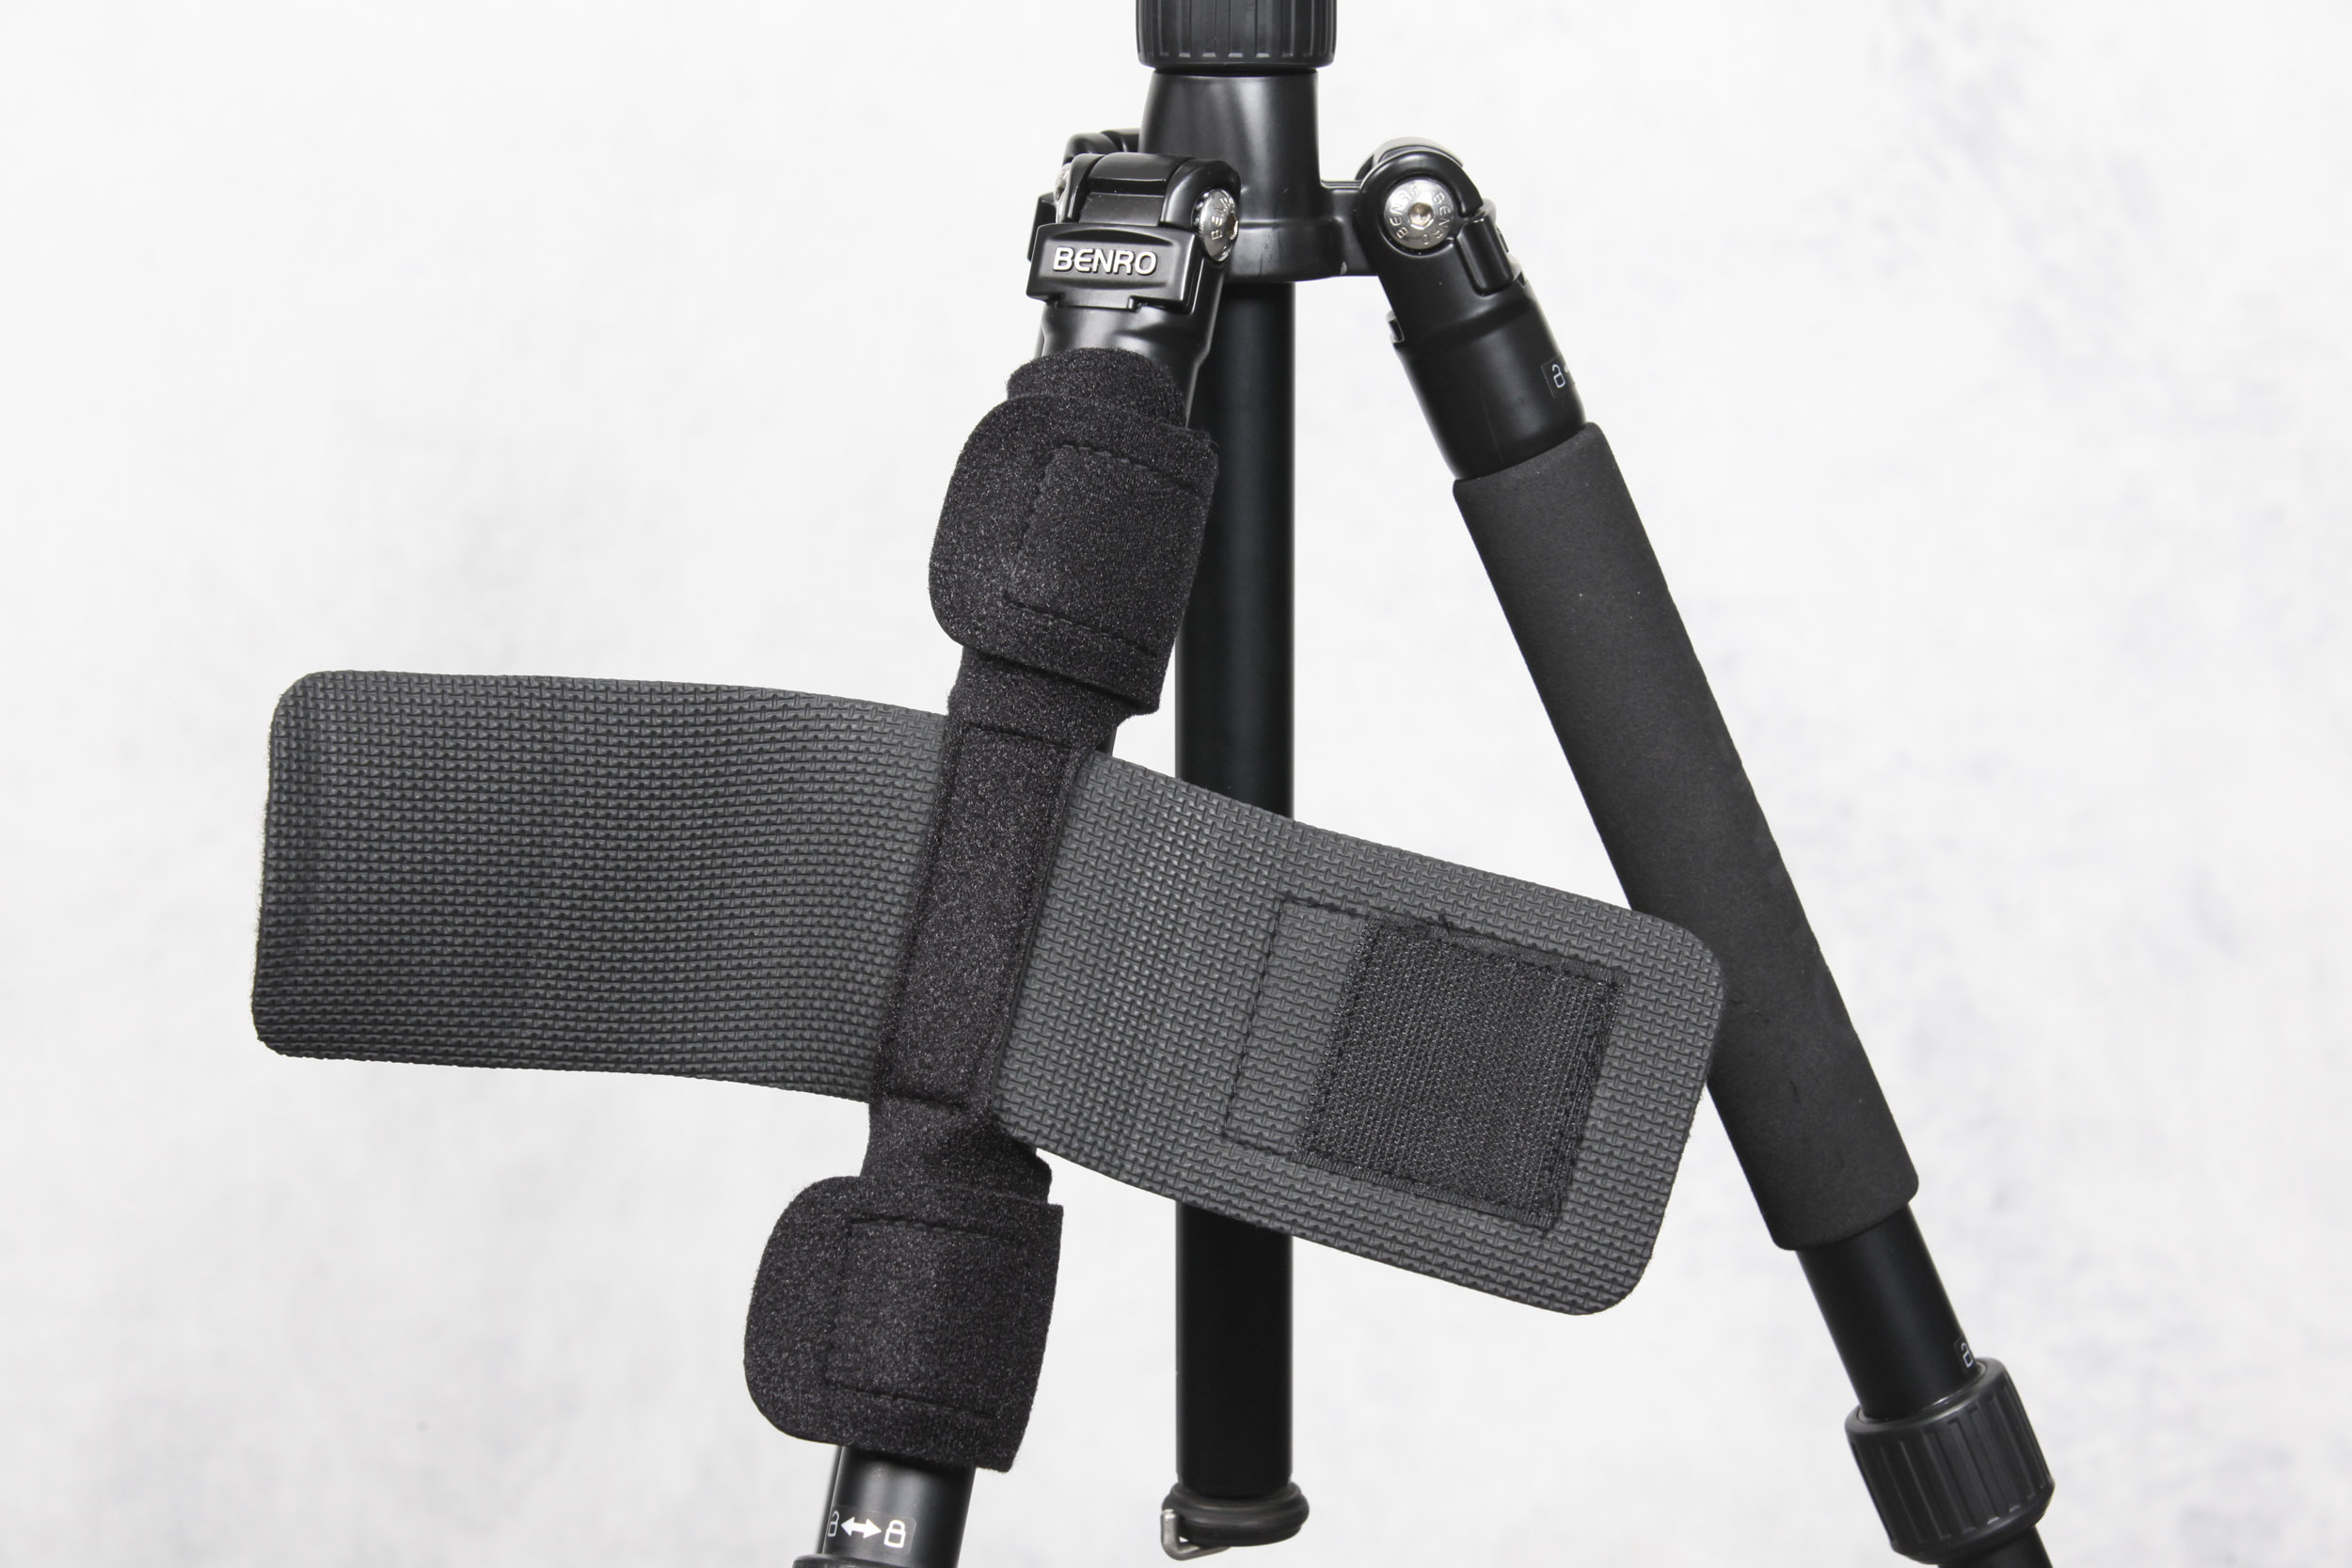
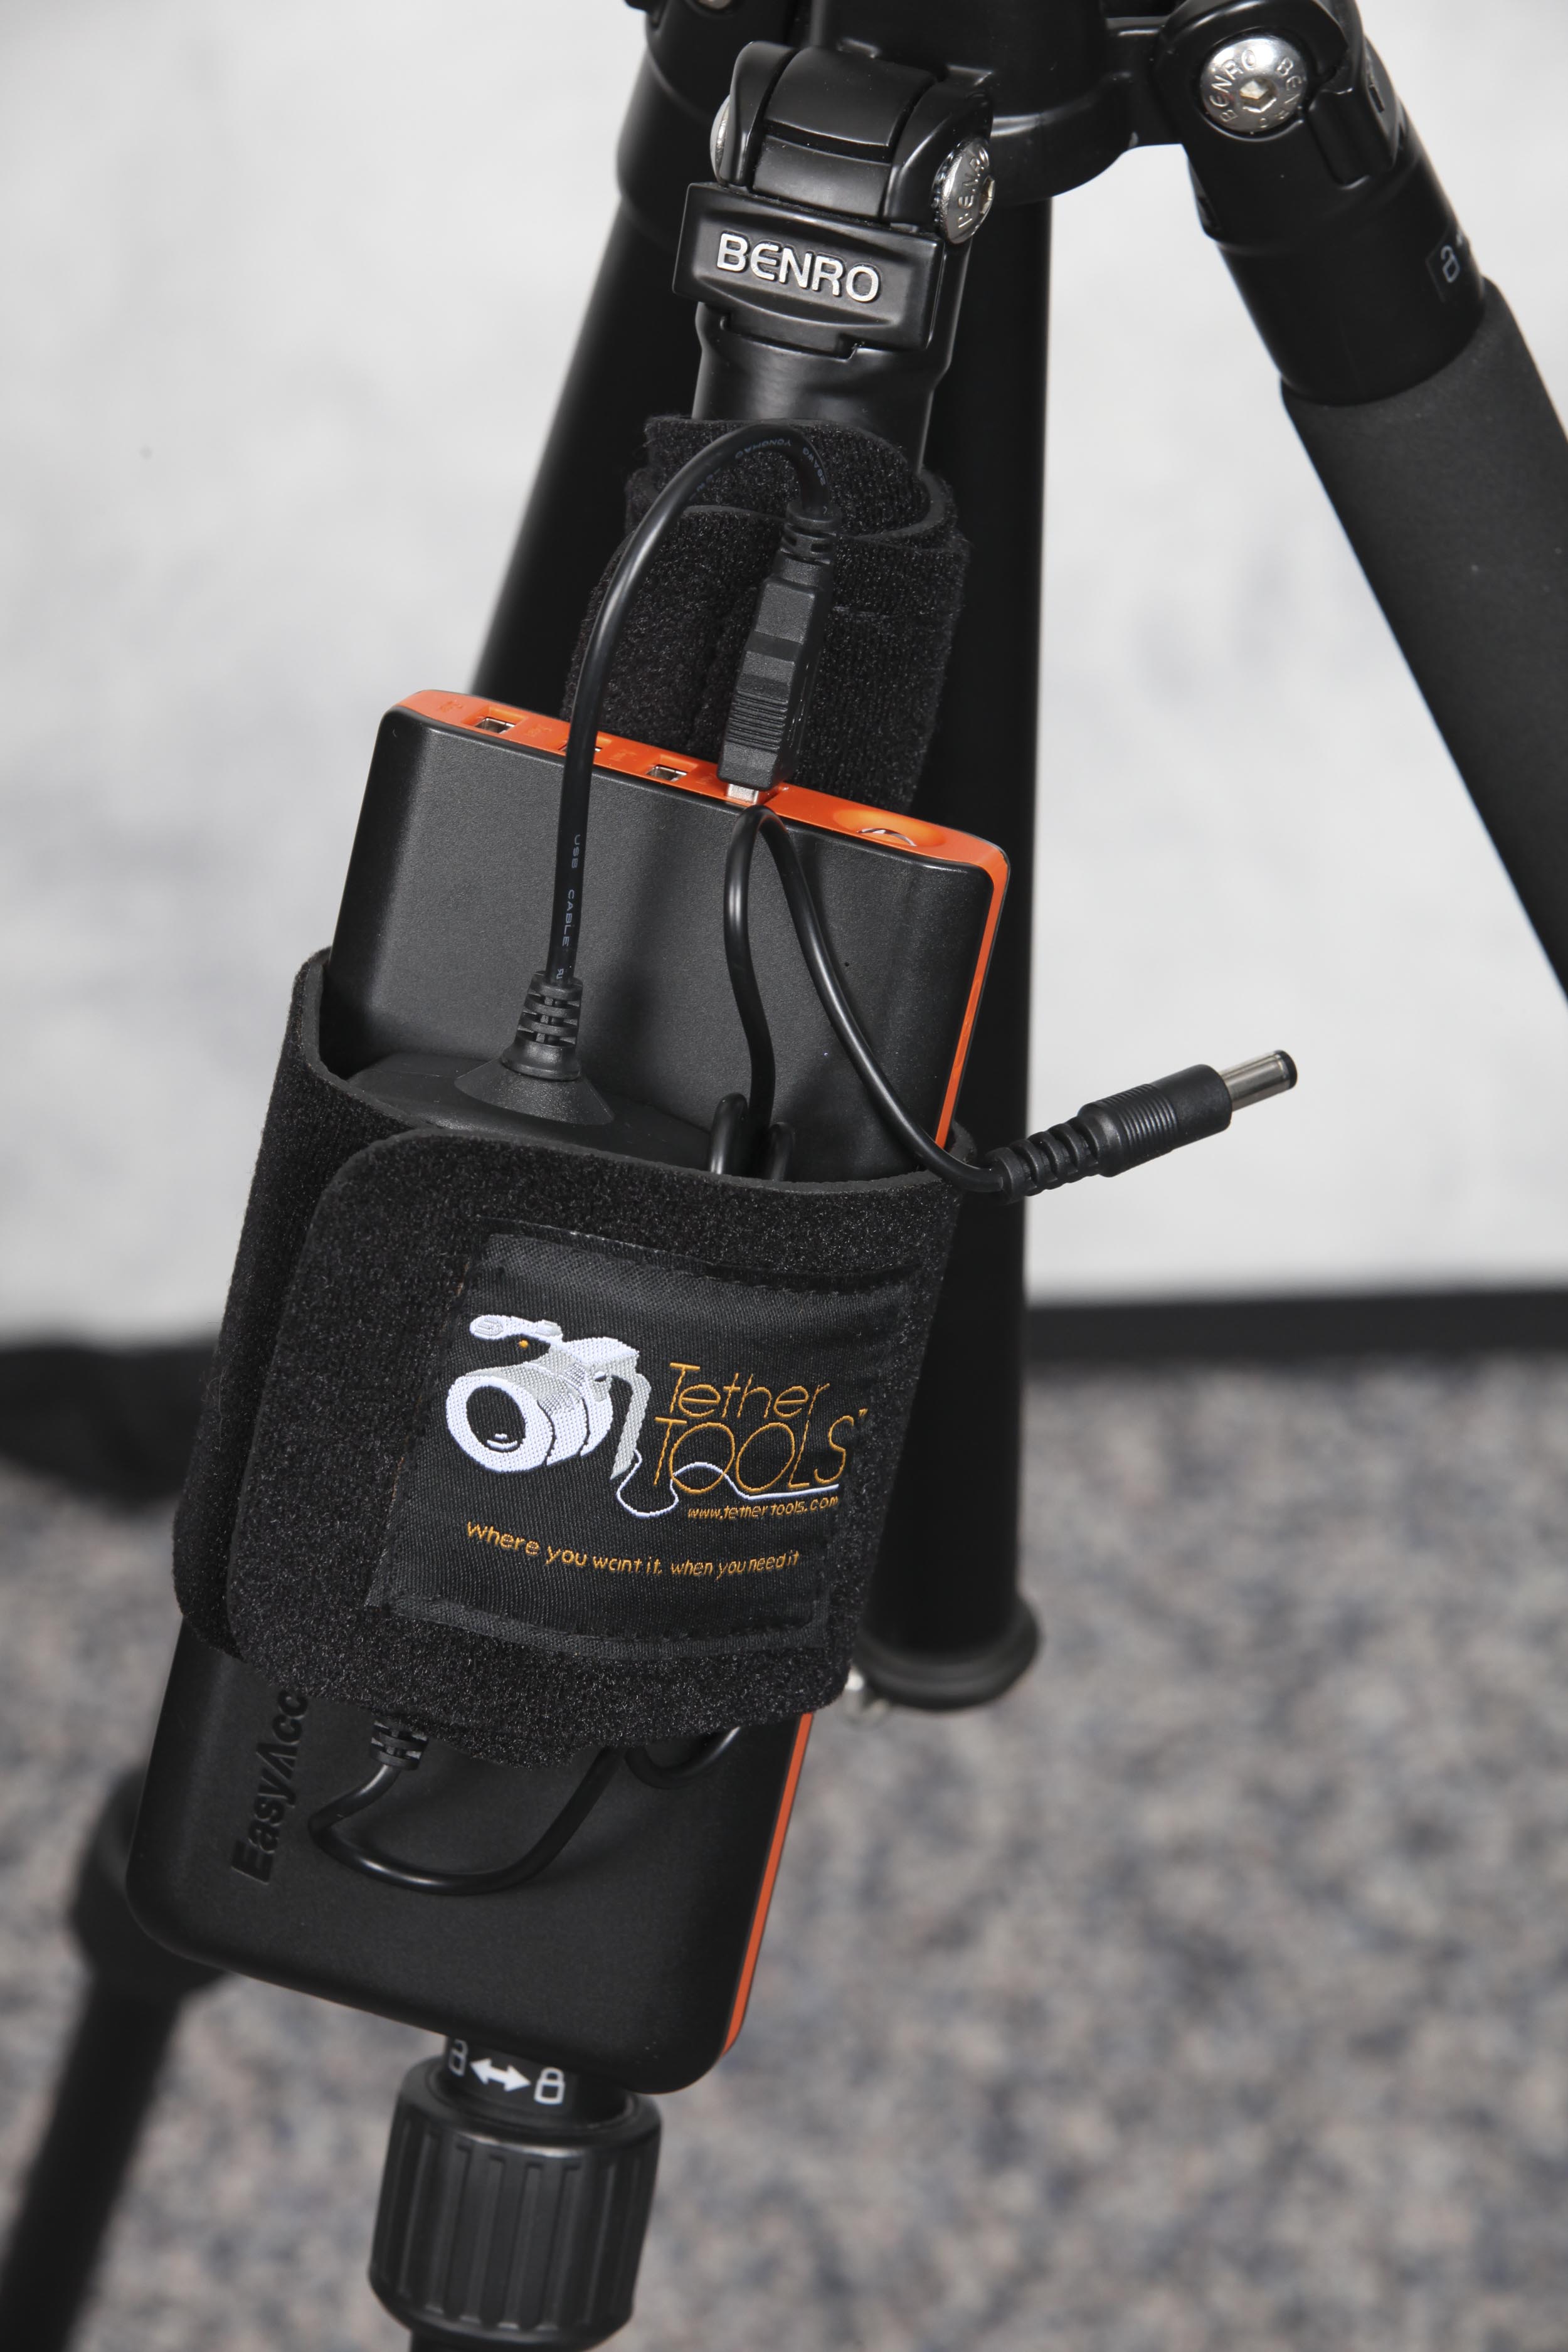
Next, grab the power bank and the Case Relay Camera Power System. For my setup, I stacked the Power System on top of the power bank (in the middle), then holding both together, wrapped the TetherTool’s StrapMoore’s strap around them. The power bank and Power System are held in place both by the StrapMoore’s strap as well as the heavy-duty GripperElastic that the StrapMoore is lined with on the inside. The StrapMoore can hold up to two pounds without a problem.
Once attached, you’ll have both the power bank and the Case Relay Power System fitted snugly to your tripod leg via the StrapMoore. Go ahead and plug the USB cable from the Case Relay Camera Power System into any of the available USB ports on the power bank. Once that’s done, your setup should look similar to what’s shown below:
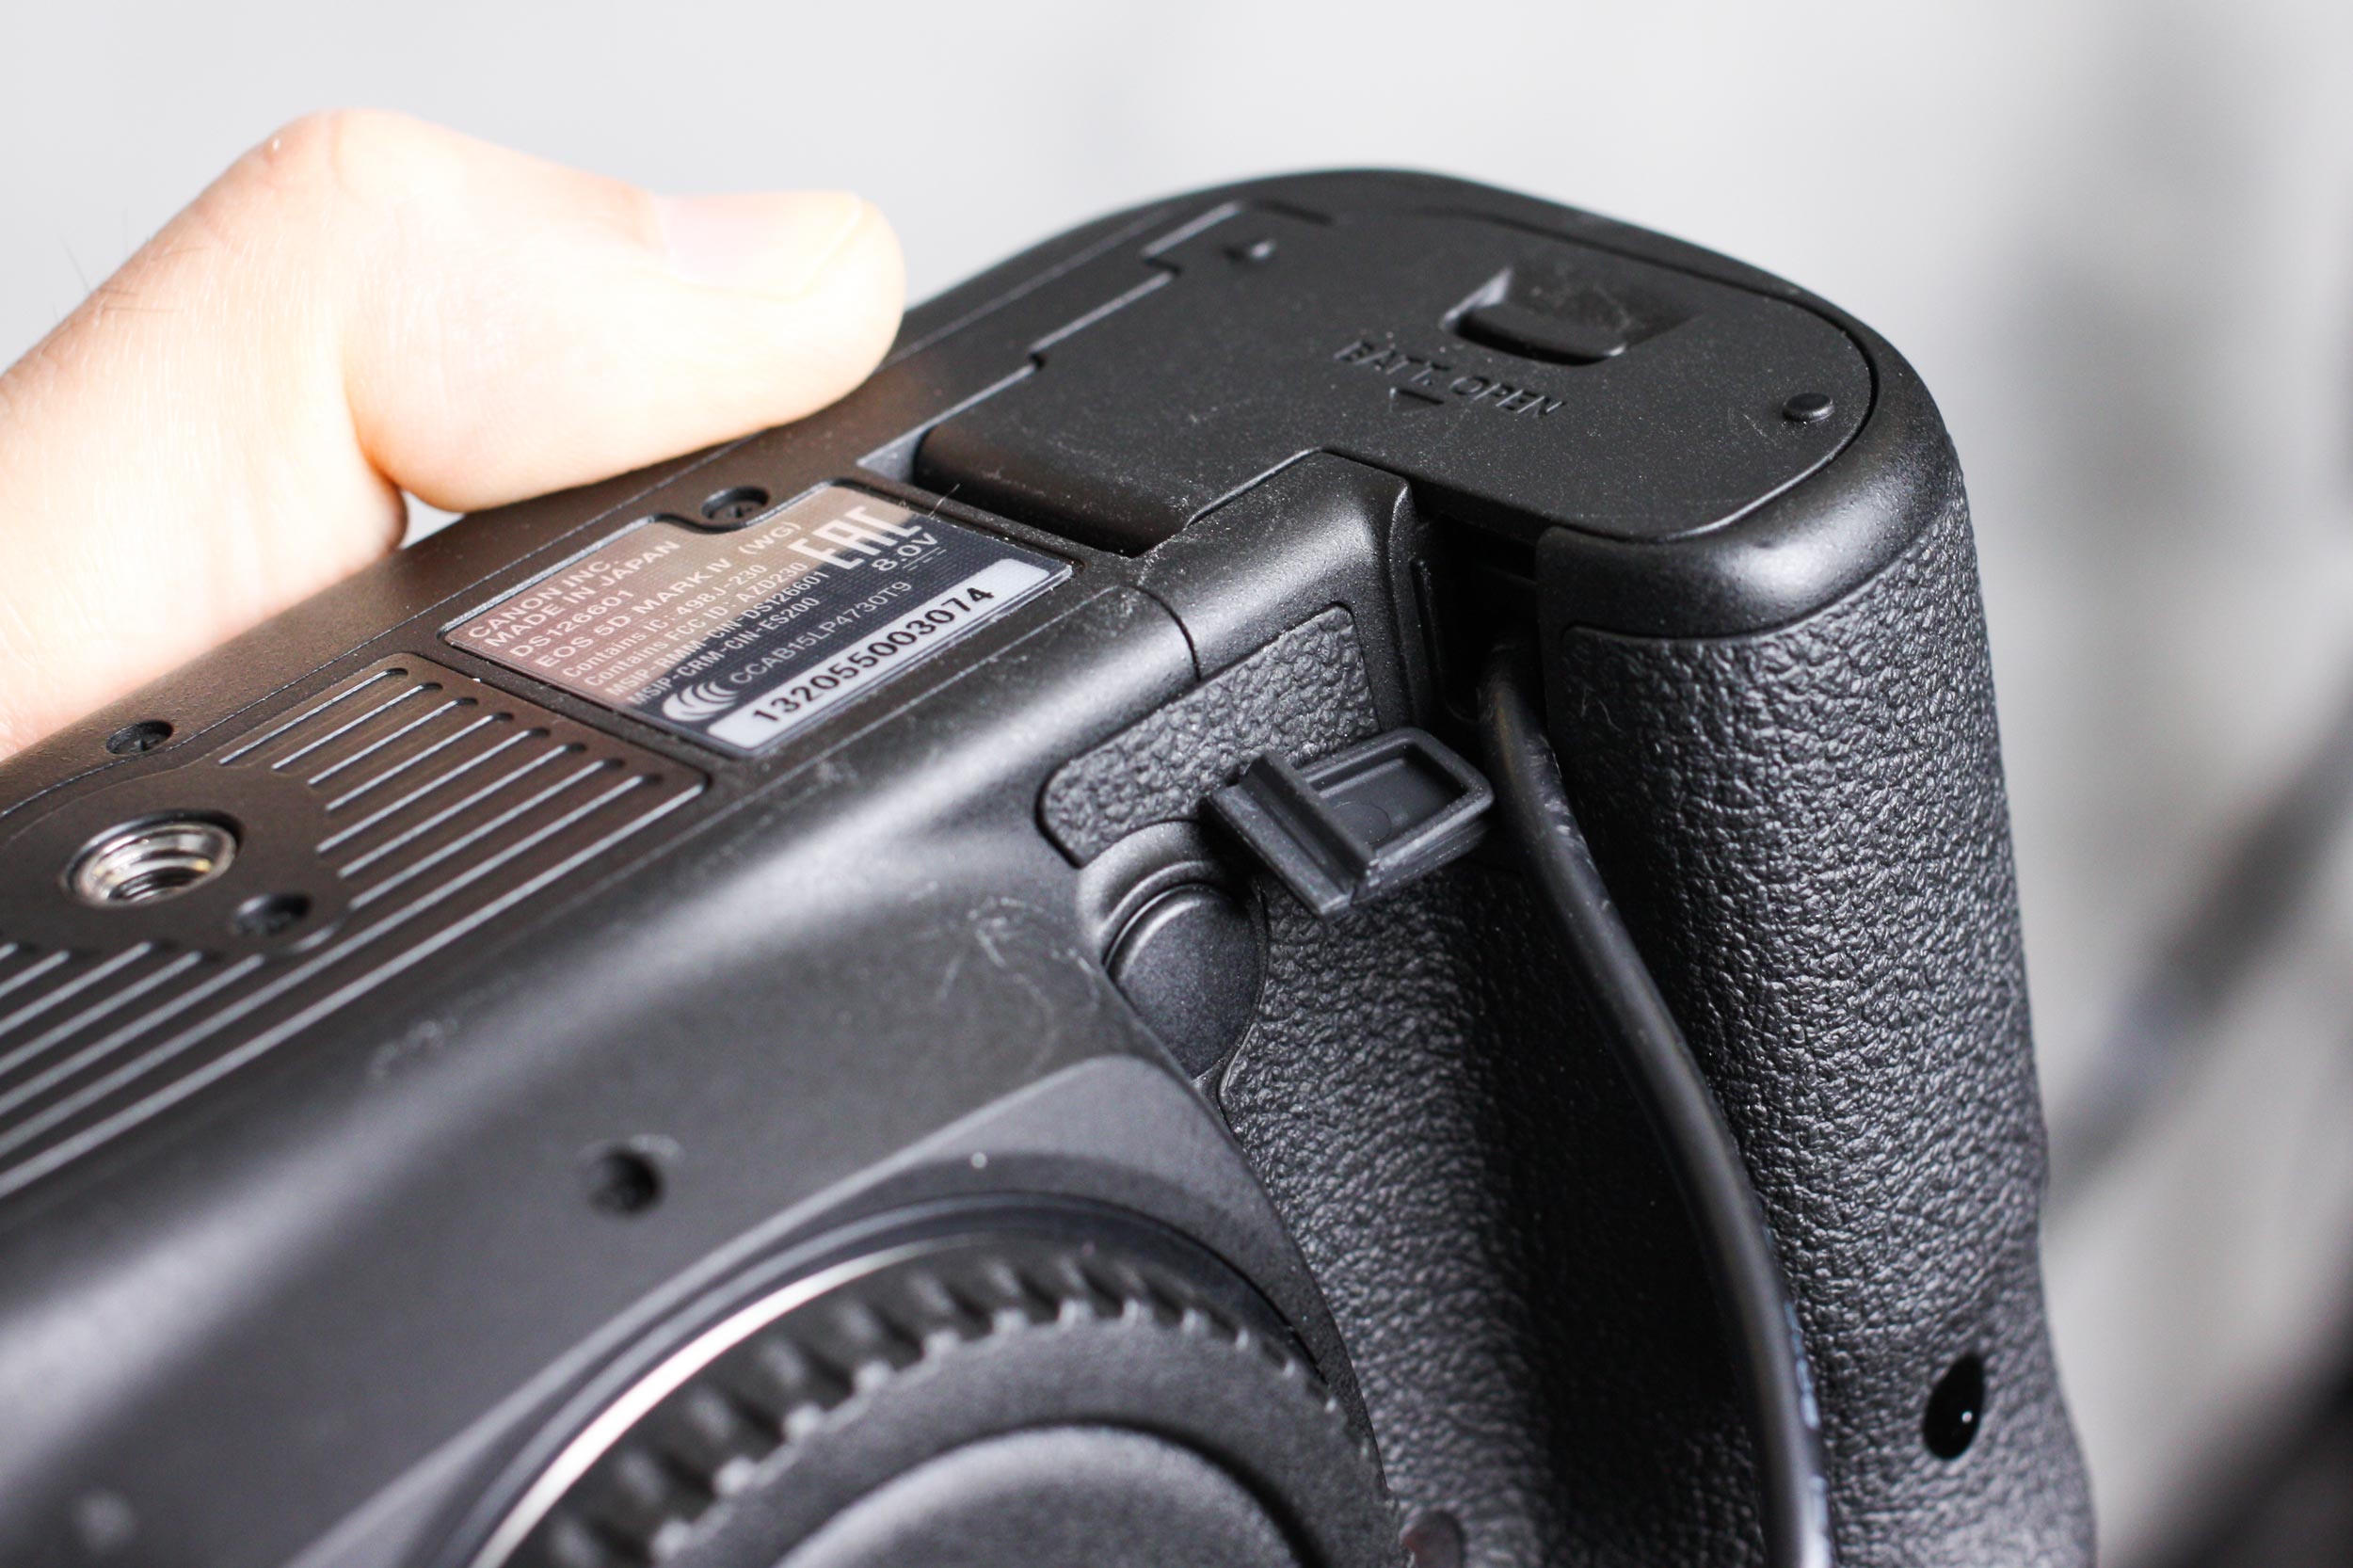
The only thing left to do now is attach the Tether Tools Relay Camera Coupler and plug it into your camera where your original battery was. Keep in mind that in order for this to work on the Canon 5D Mark IV, you’ll need to use the little hidden “trap door” and run the cable from the Camera Coupler through it. The camera will literally not turn on unless the battery door is closed nice and tight, so this is a vital step! Shown below are some shots of how the hidden door works along with both ends of the Camera Coupler plugged in:
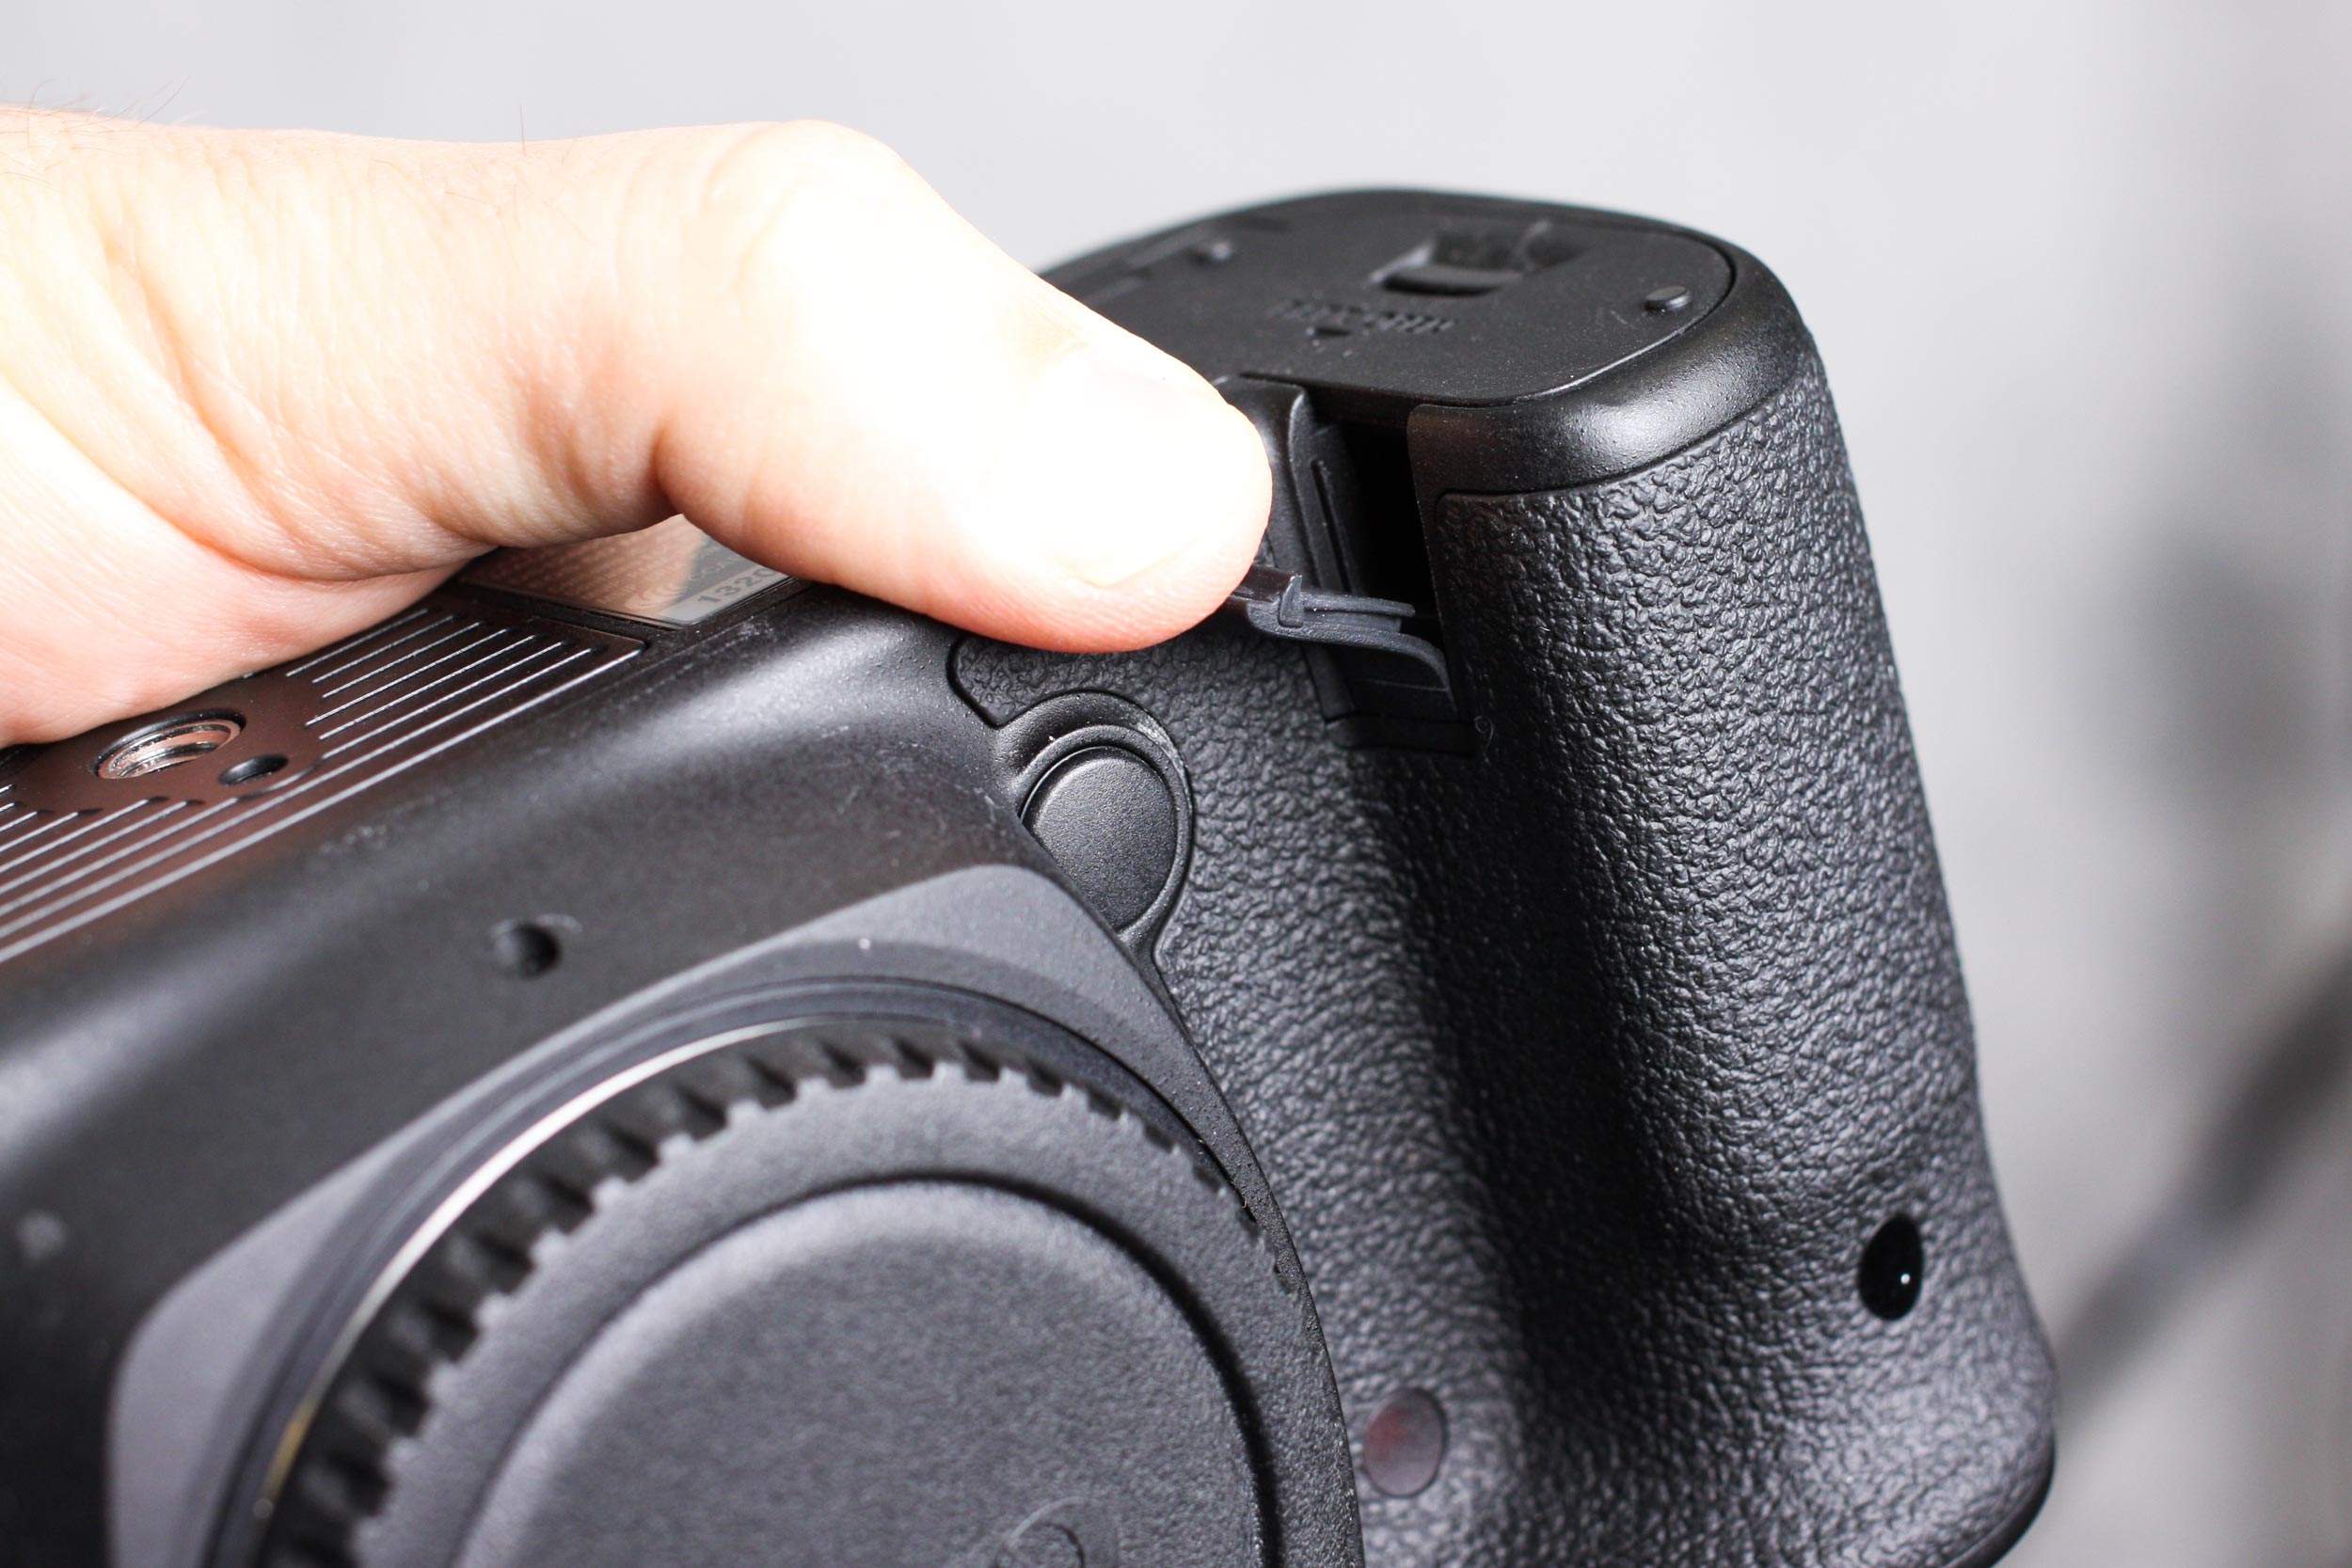
Hidden “trap door” on the body of the Canon 5D Mark IV
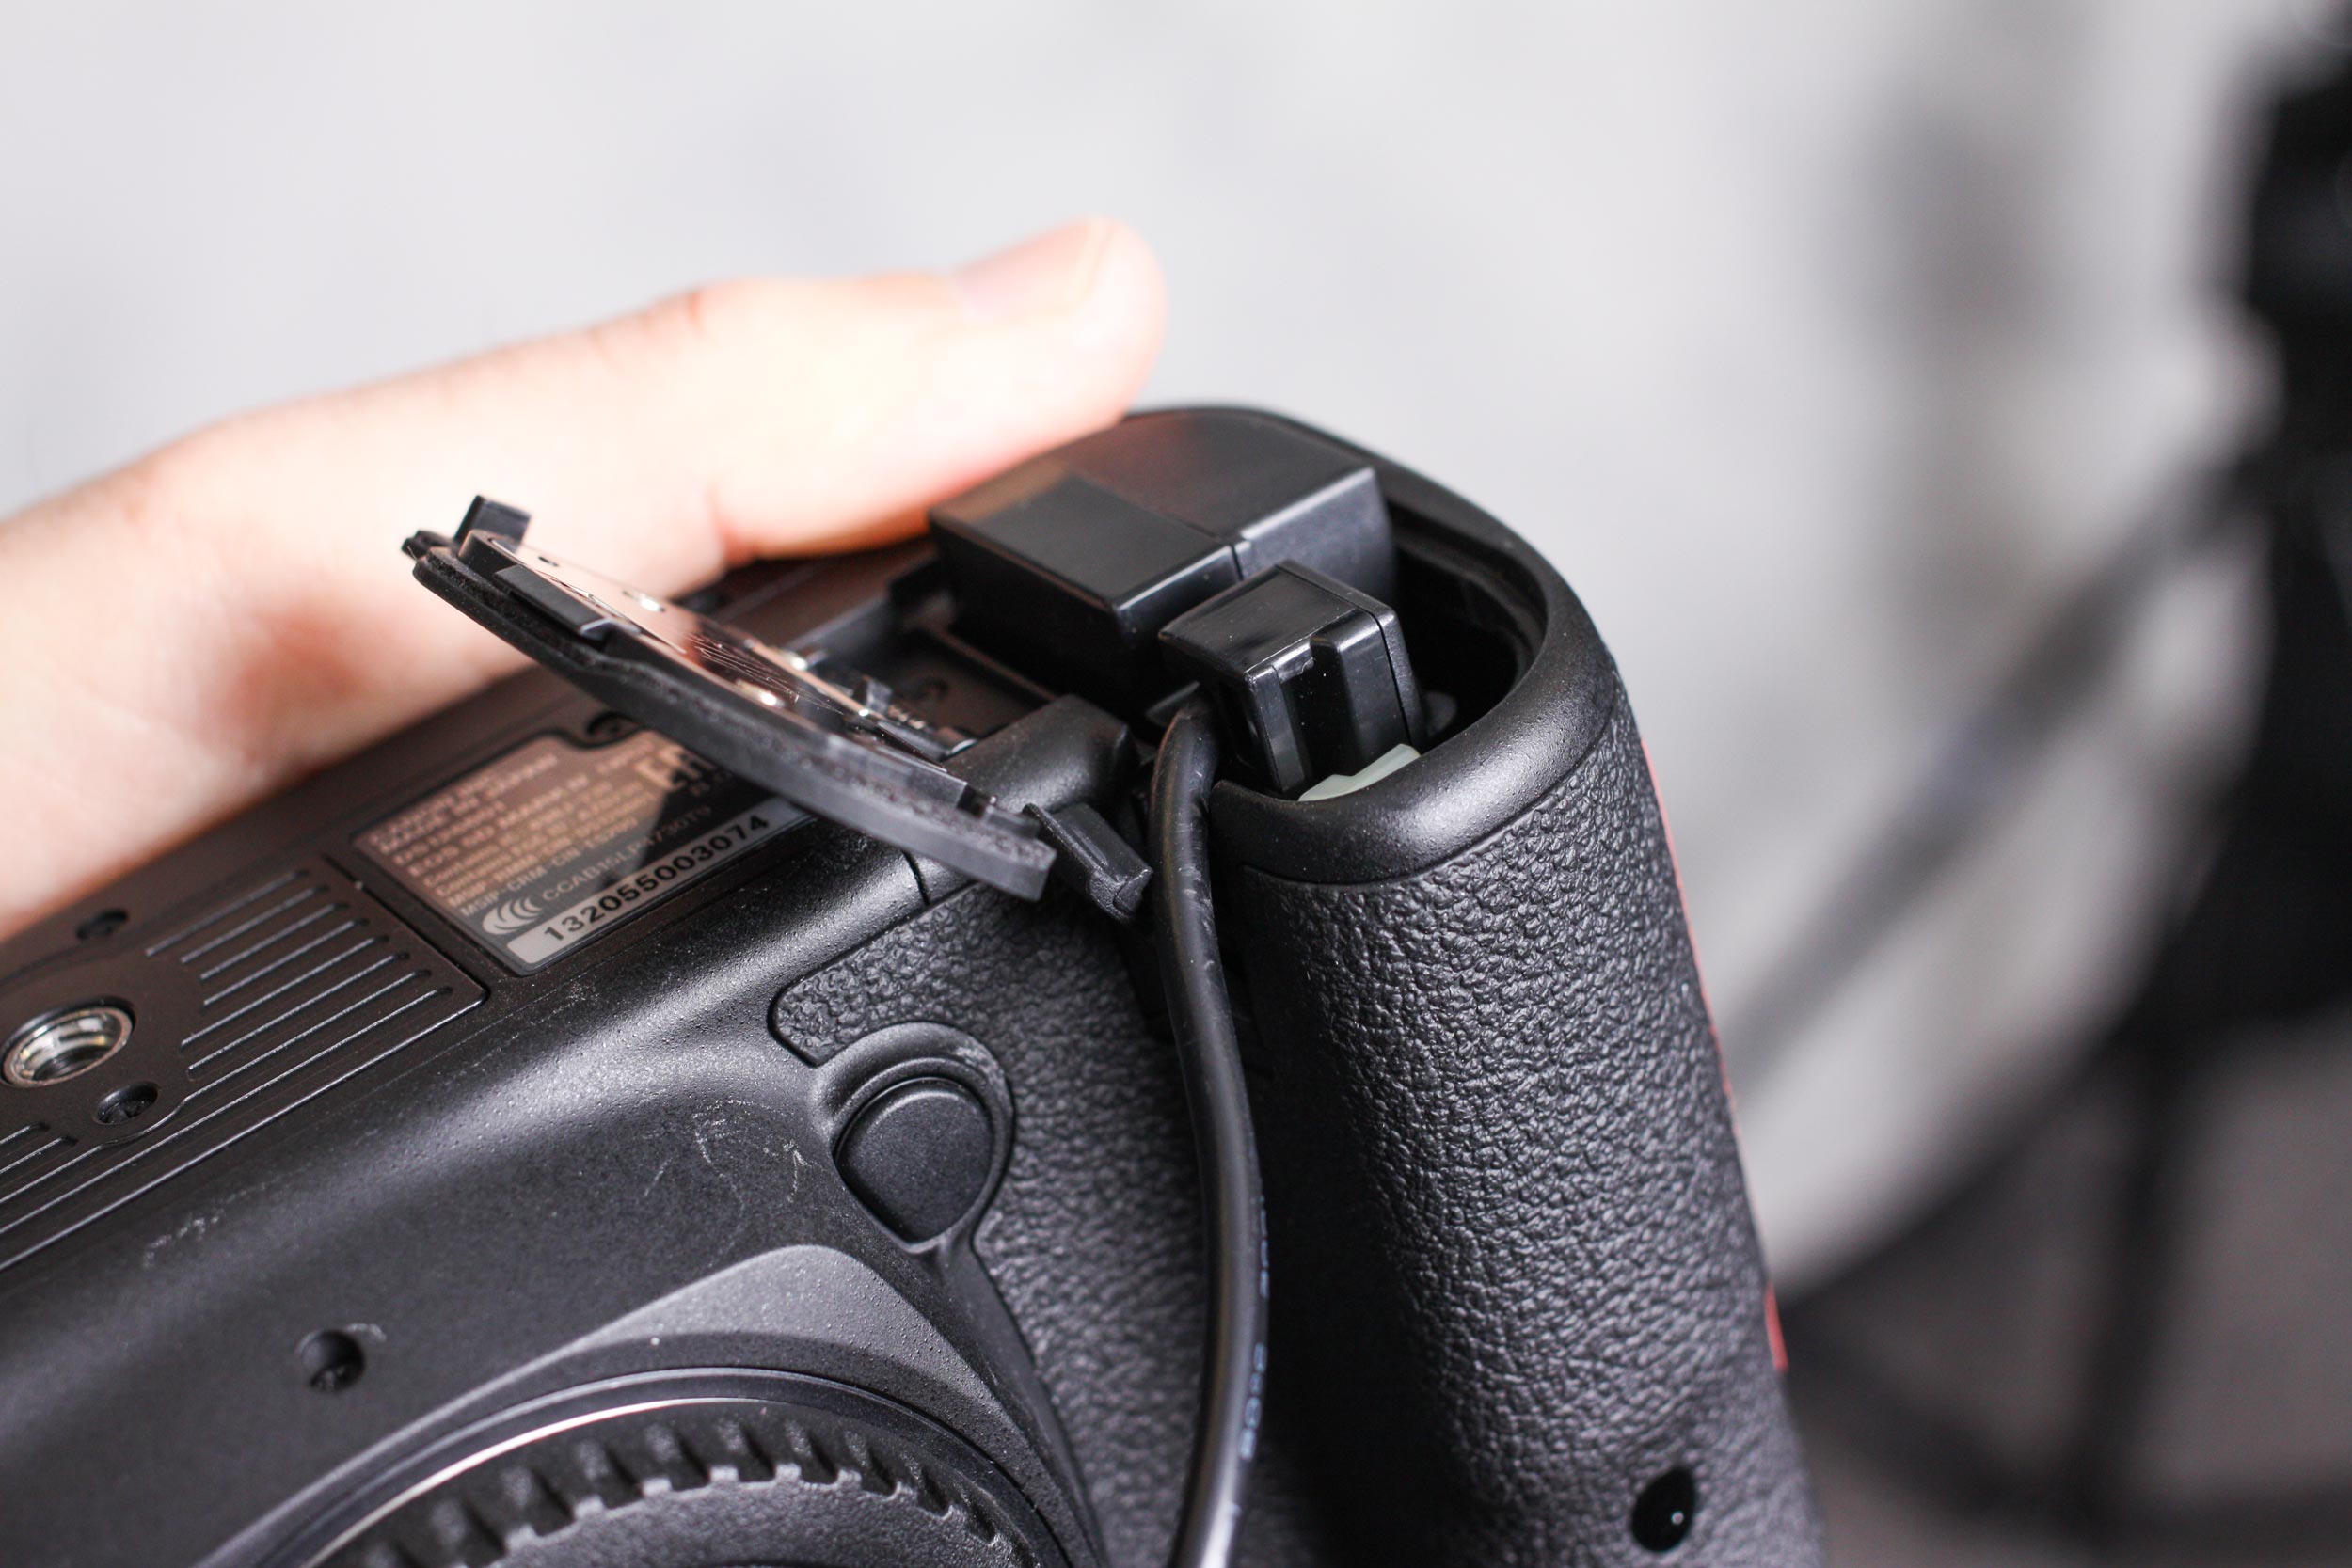
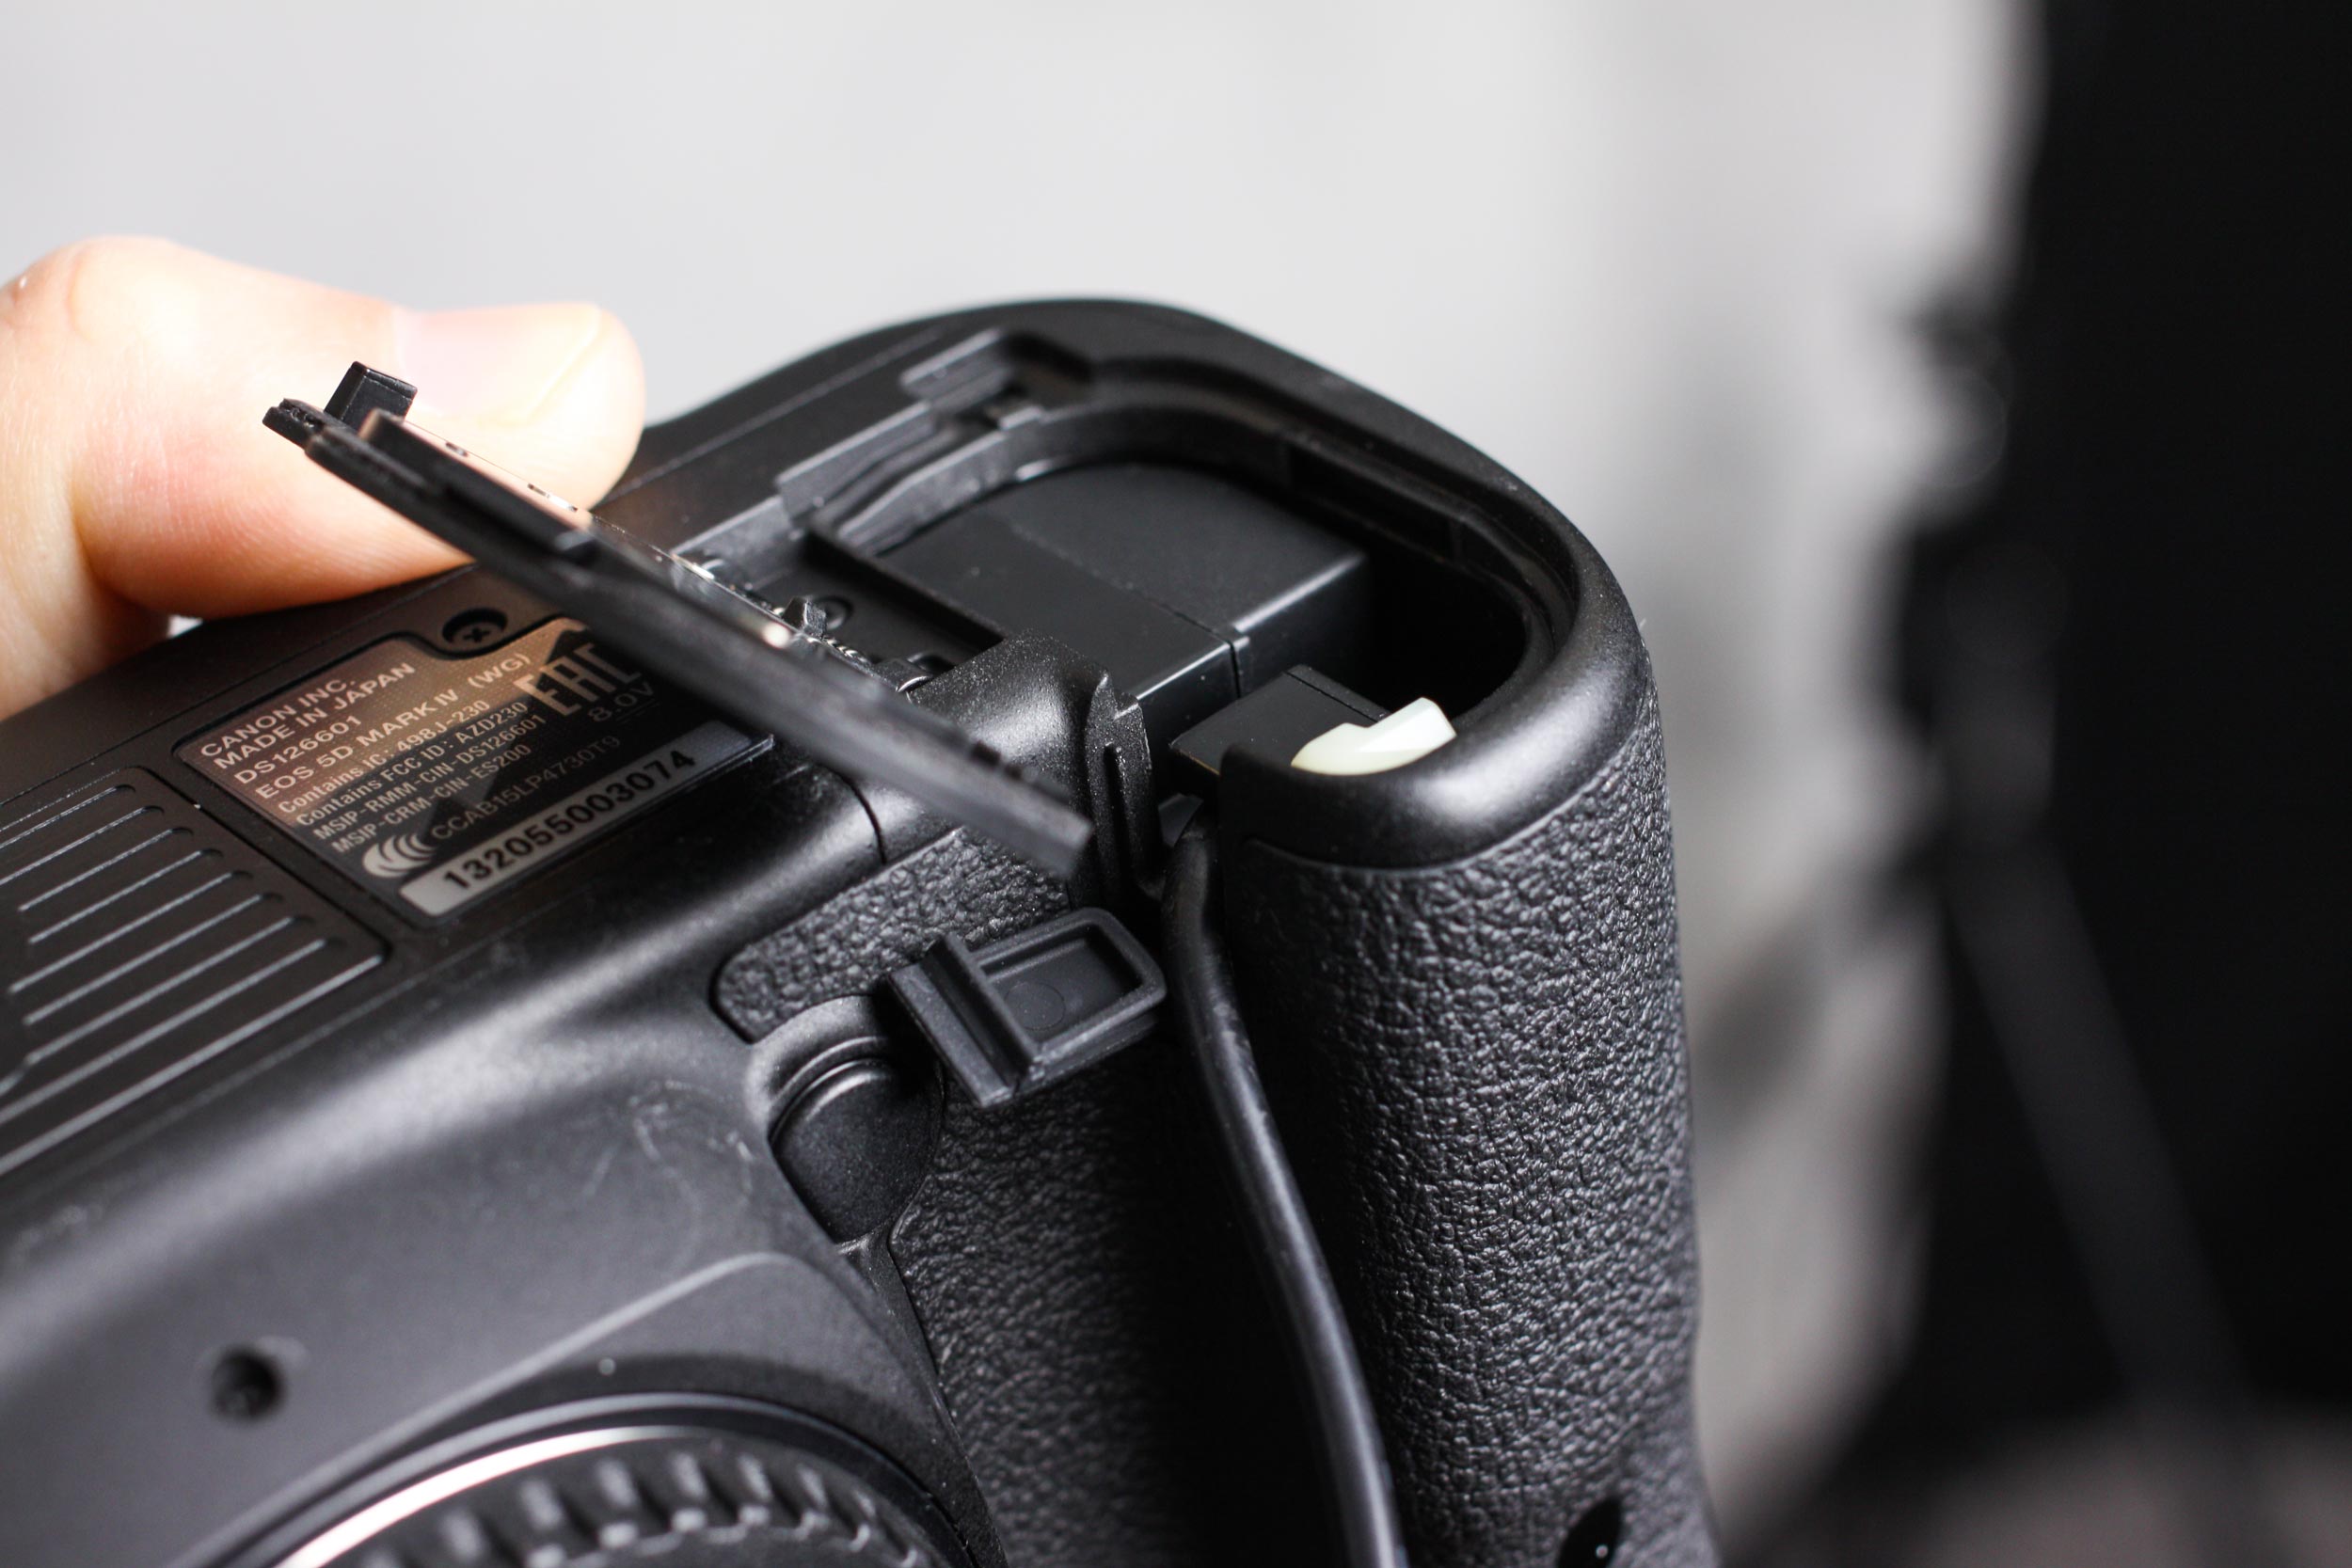
Camera Coupler fully seated in the camera’s battery housing.
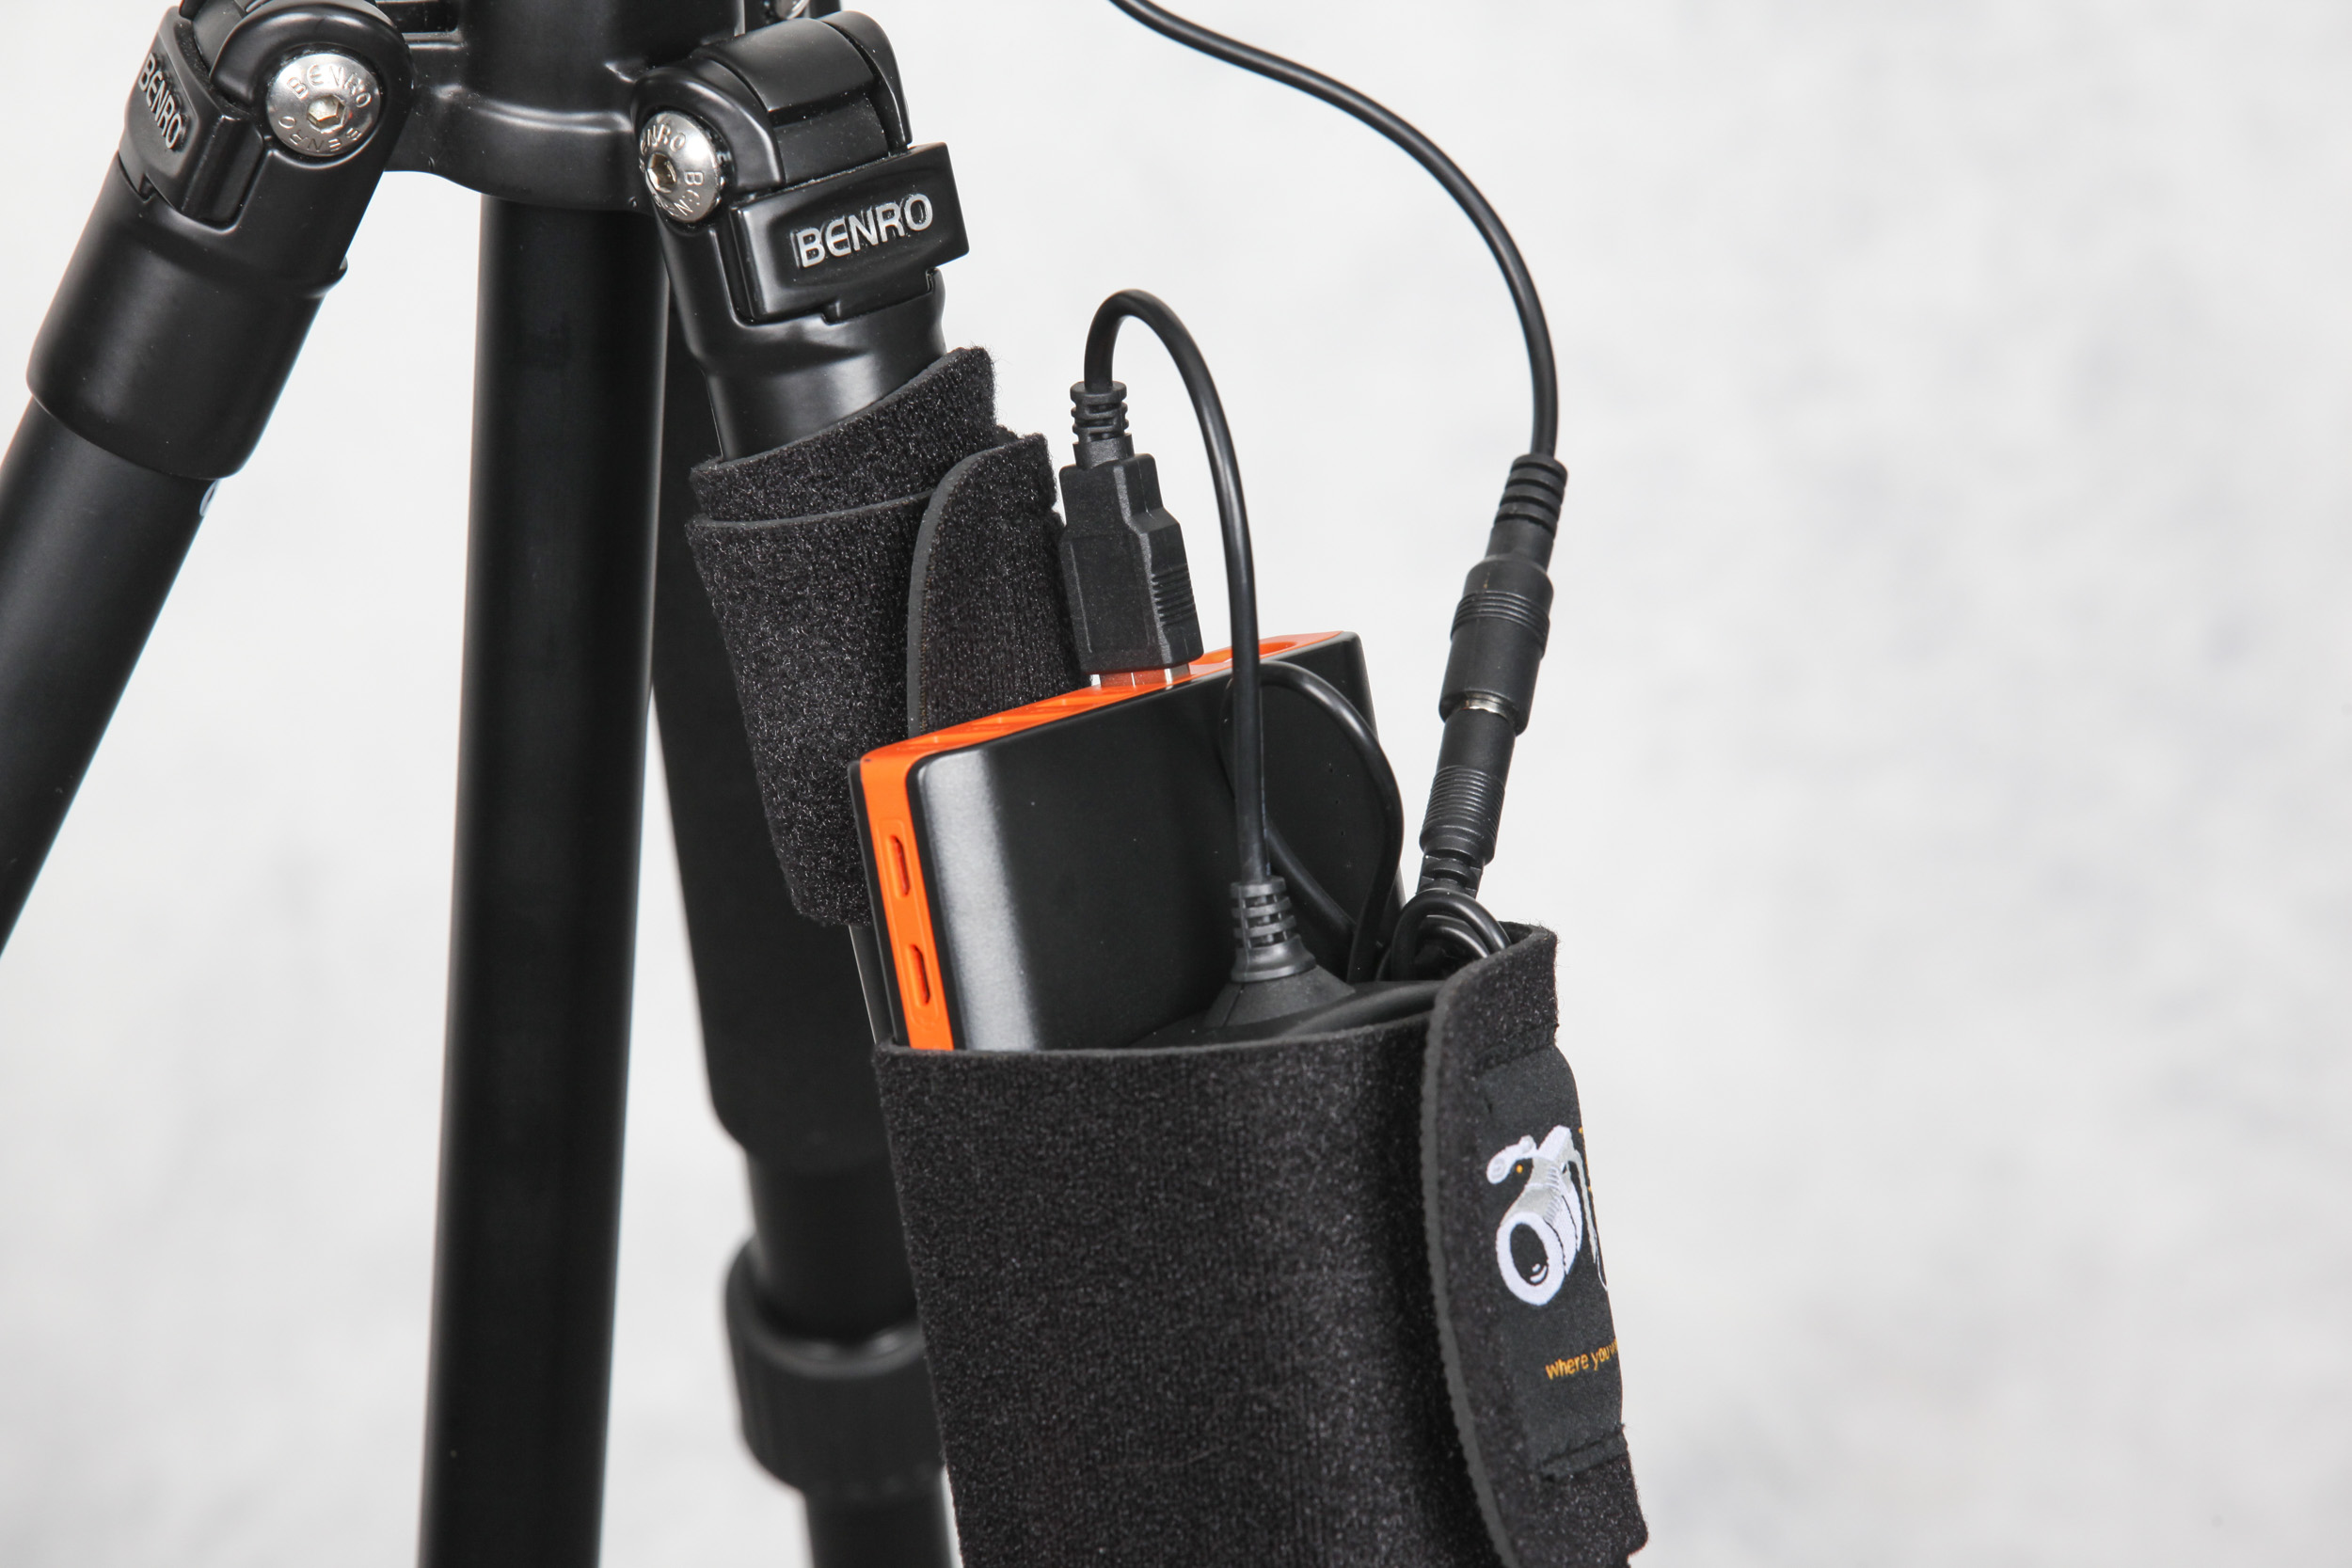
The StrapMoore and the Case Relay Power System working together!
Once the Camera Coupler is attached, you can turn your camera on and enjoy hours of hot-swappable battery life!
If you need a continuous power source for a long video shoot, that can be done as well. I used a Samsung power adapter and plugged the USB cable from the Case Relay power system into it (shown below). If you don’t have a power adapter handy, this one will do the job.
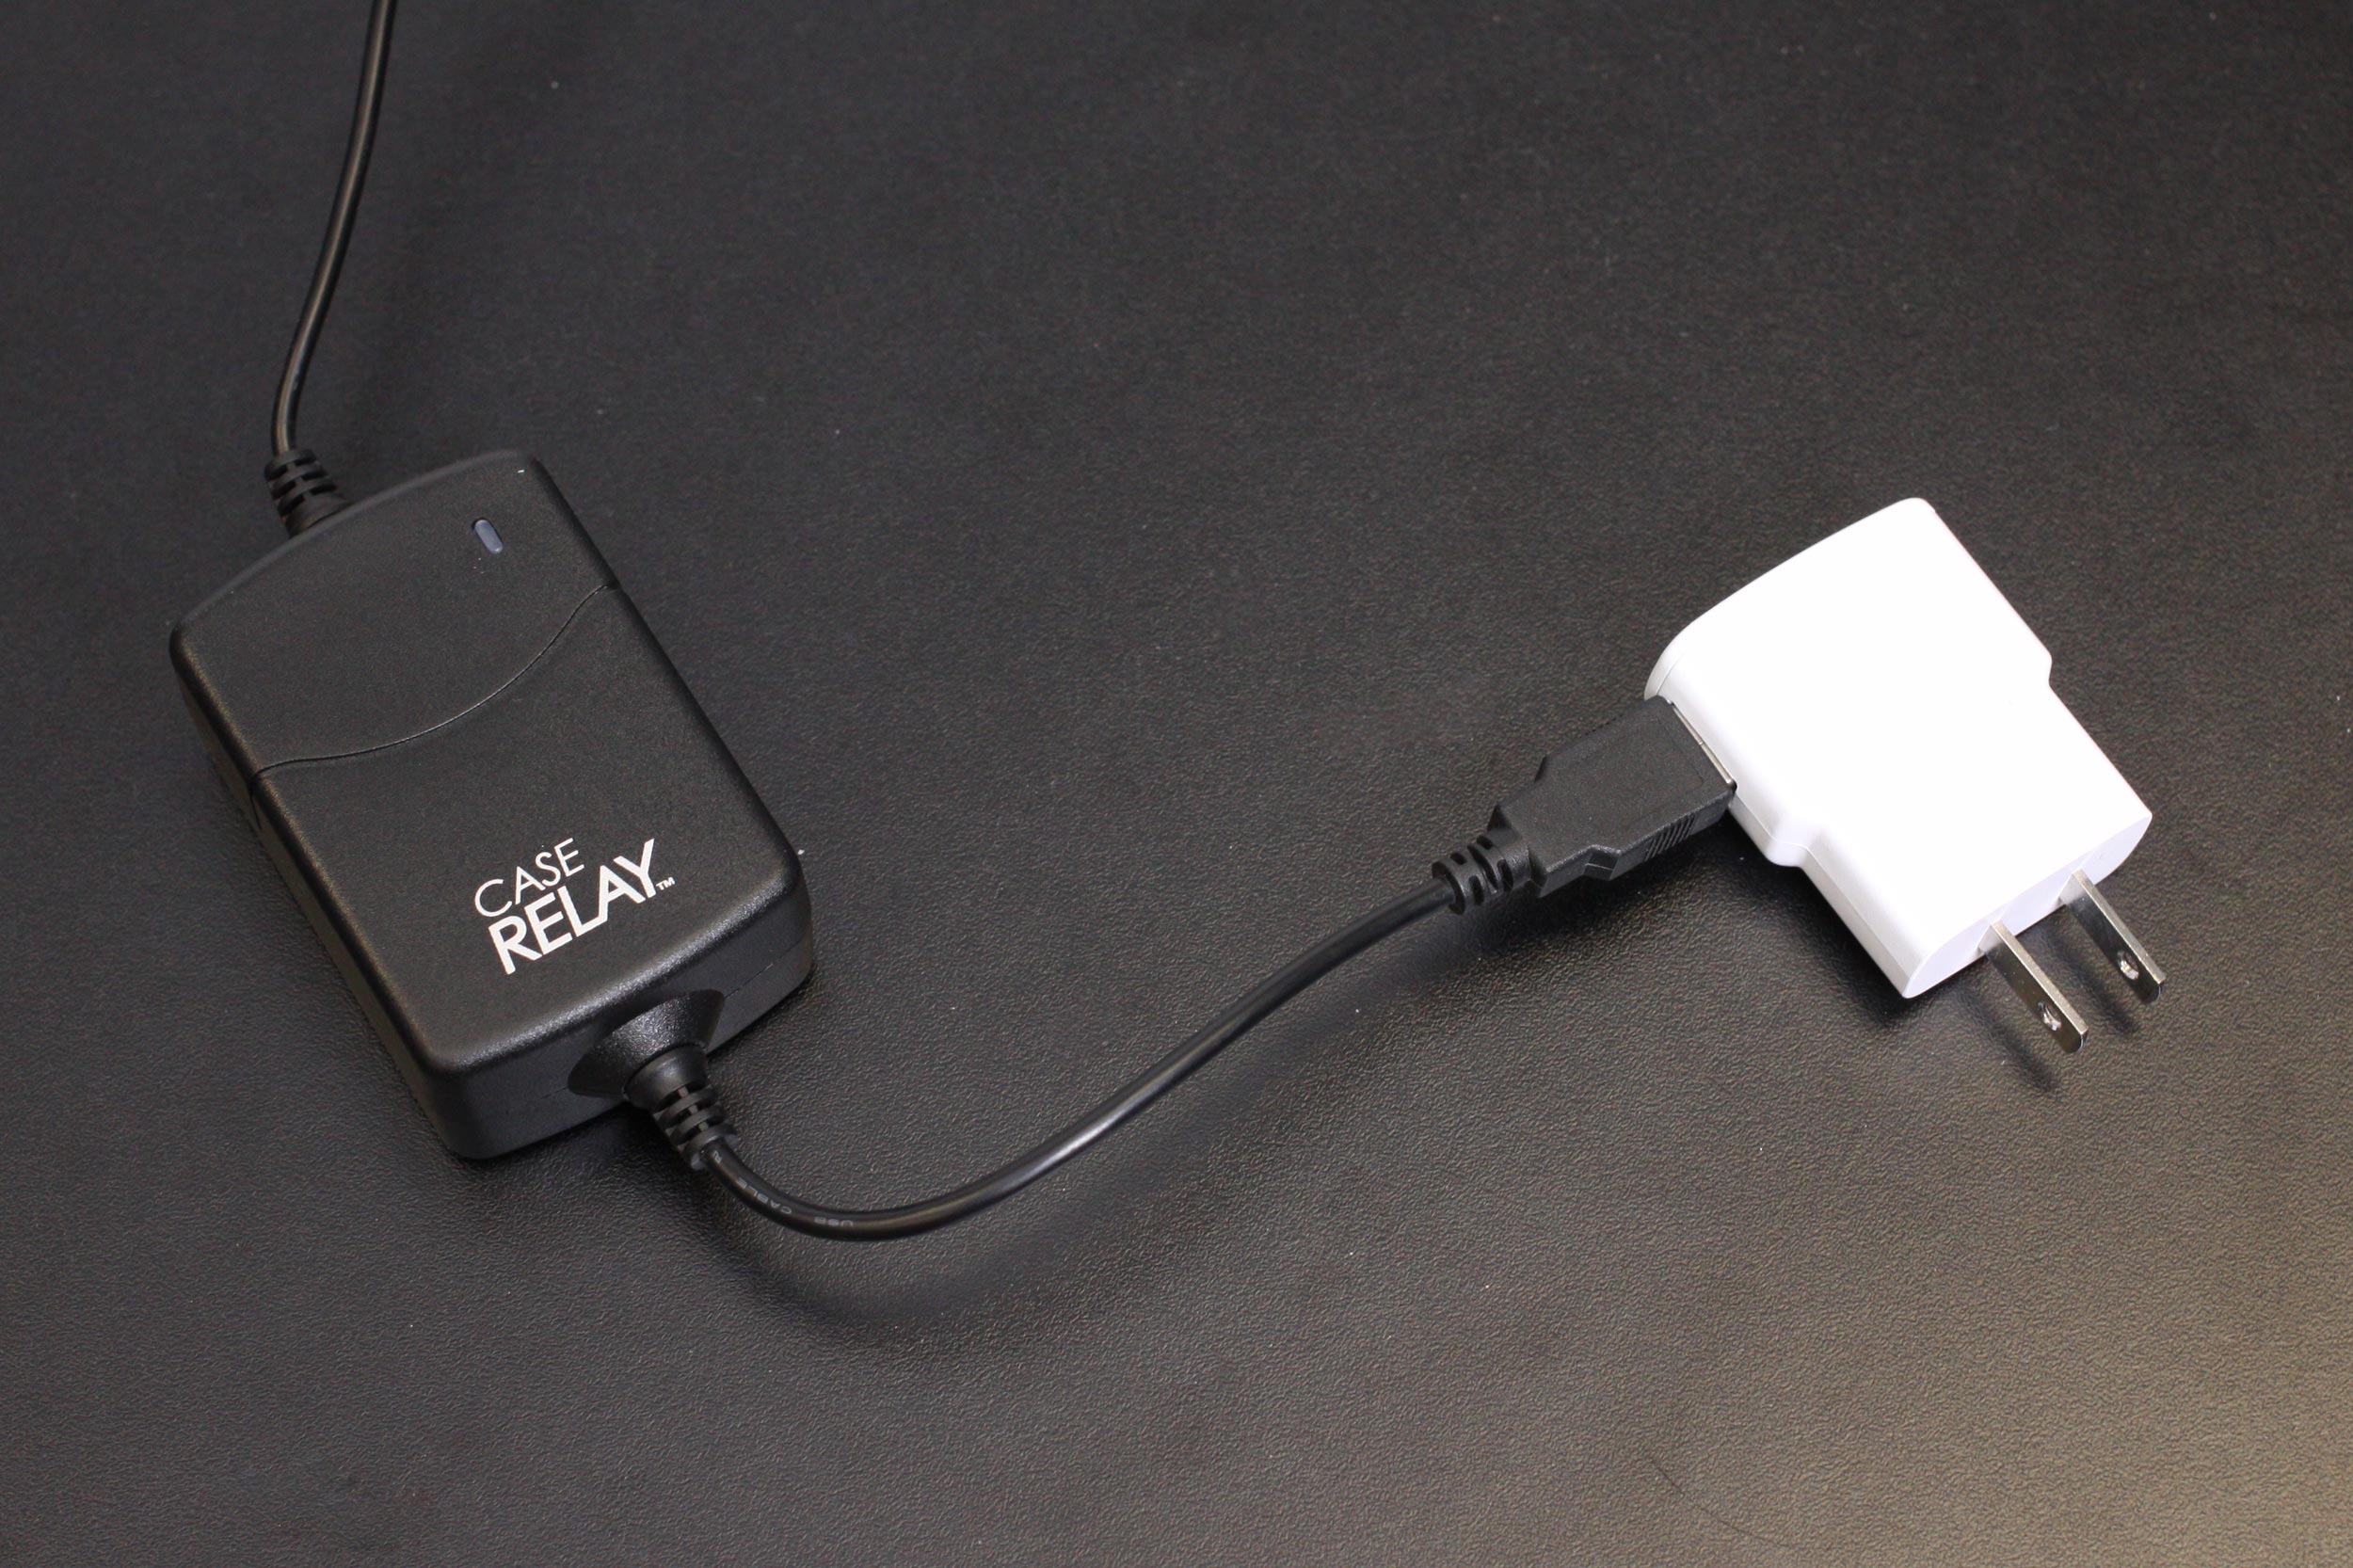
Case Relay Power System plugged into a power adapter
I plugged the Samsung adapter into an extension cord and I was all set! Continuous power for as long as I needed it.
That’s it! Let me know if you have any questions in the comments below!


