I recently got my hands on a Sony A7R III (upgraded from an A7R) and one thing that I was eager to try on it was recording to an Atomos Ninja Inferno HDMI recorder.
The Ninja Inferno is a portable HDMI recorder that records directly from your camera’s sensor. Your camera is saved from the usual wear and tear of having the sensor heat up (which can also result in noisy footage) and the usage of the Ninja Inferno results in higher quality footage. Not to mention the only limitation in terms of the length of the clip that can be recorded is the size of the hard drive you’ve chosen for the Ninja Inferno, which might be why you are interested in it in the first place. For long form video shoots, The Ninja Inferno is a great solution. So how does it work with the A7R III? Read on…
The A7R III will output either 4k or HD (1080p/1080i) from its HDMI port when used in conjunction with the Ninja Inferno, although getting it to output in 1080 requires changing a buried setting (more on that later). That being said, the Ninja Inferno and the A7R III work nearly perfectly together directly out of the box, but there are some settings you need to be aware of, which I cover in this post.
Basic Setup
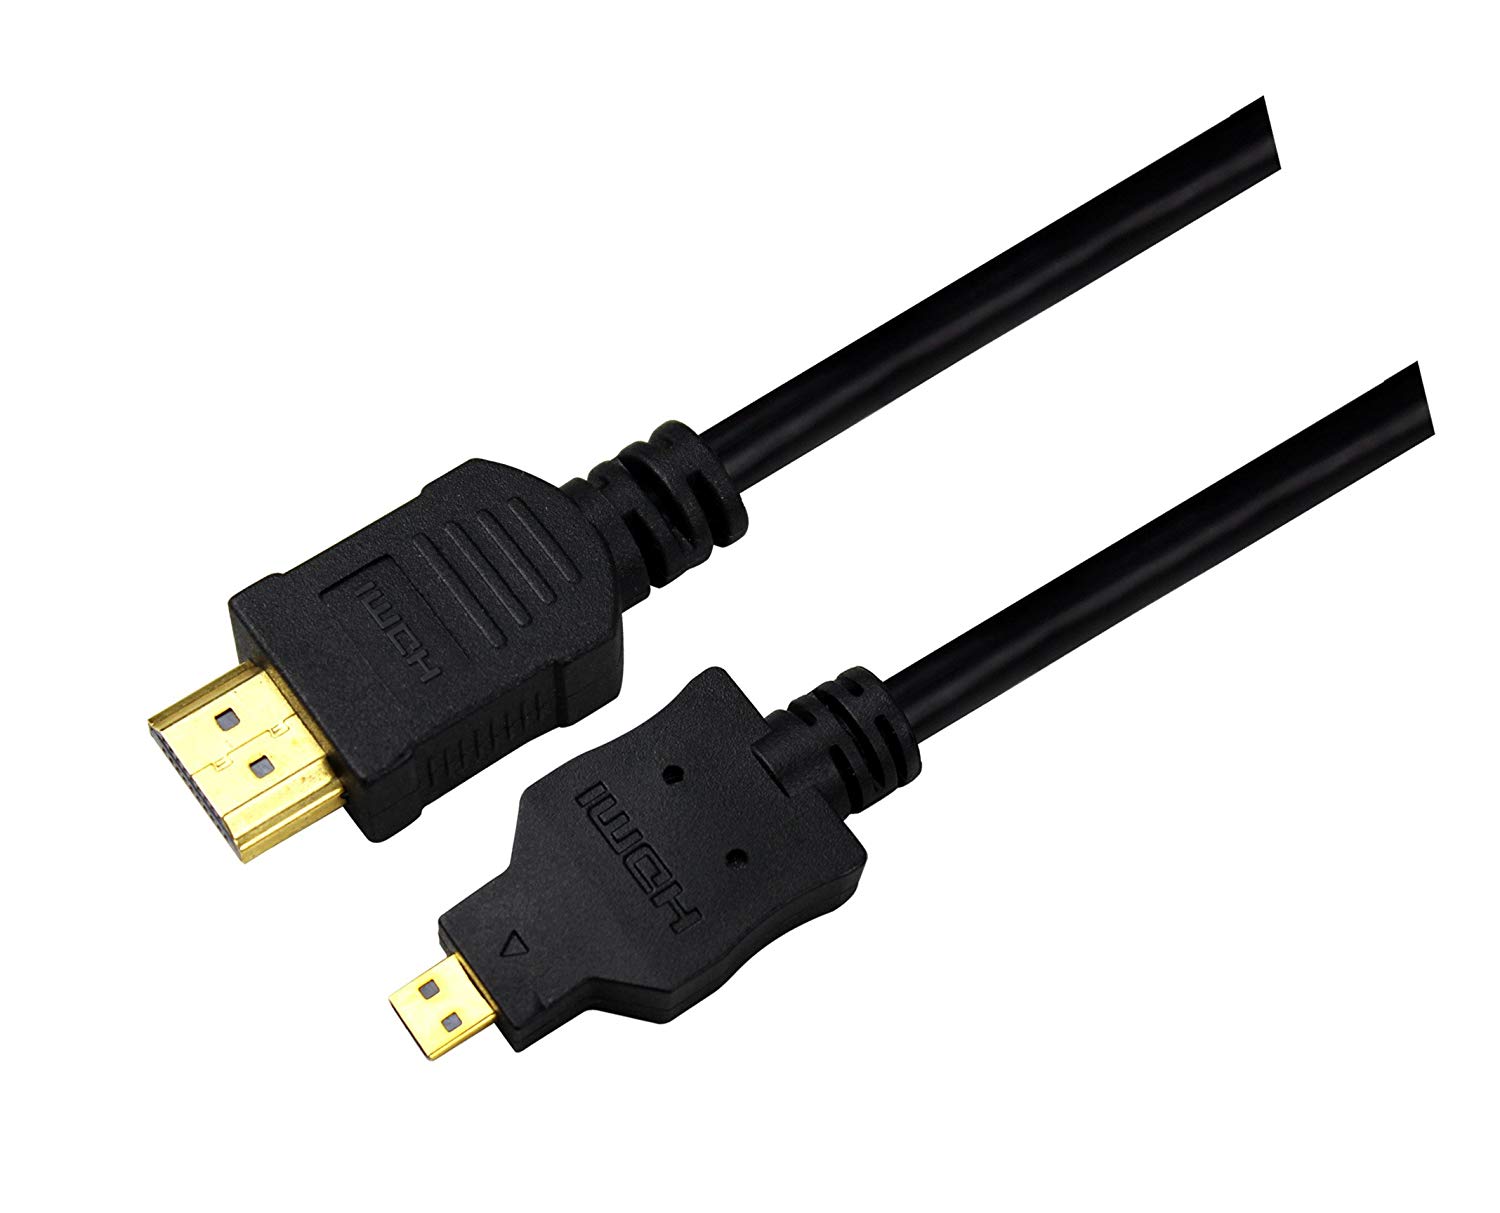
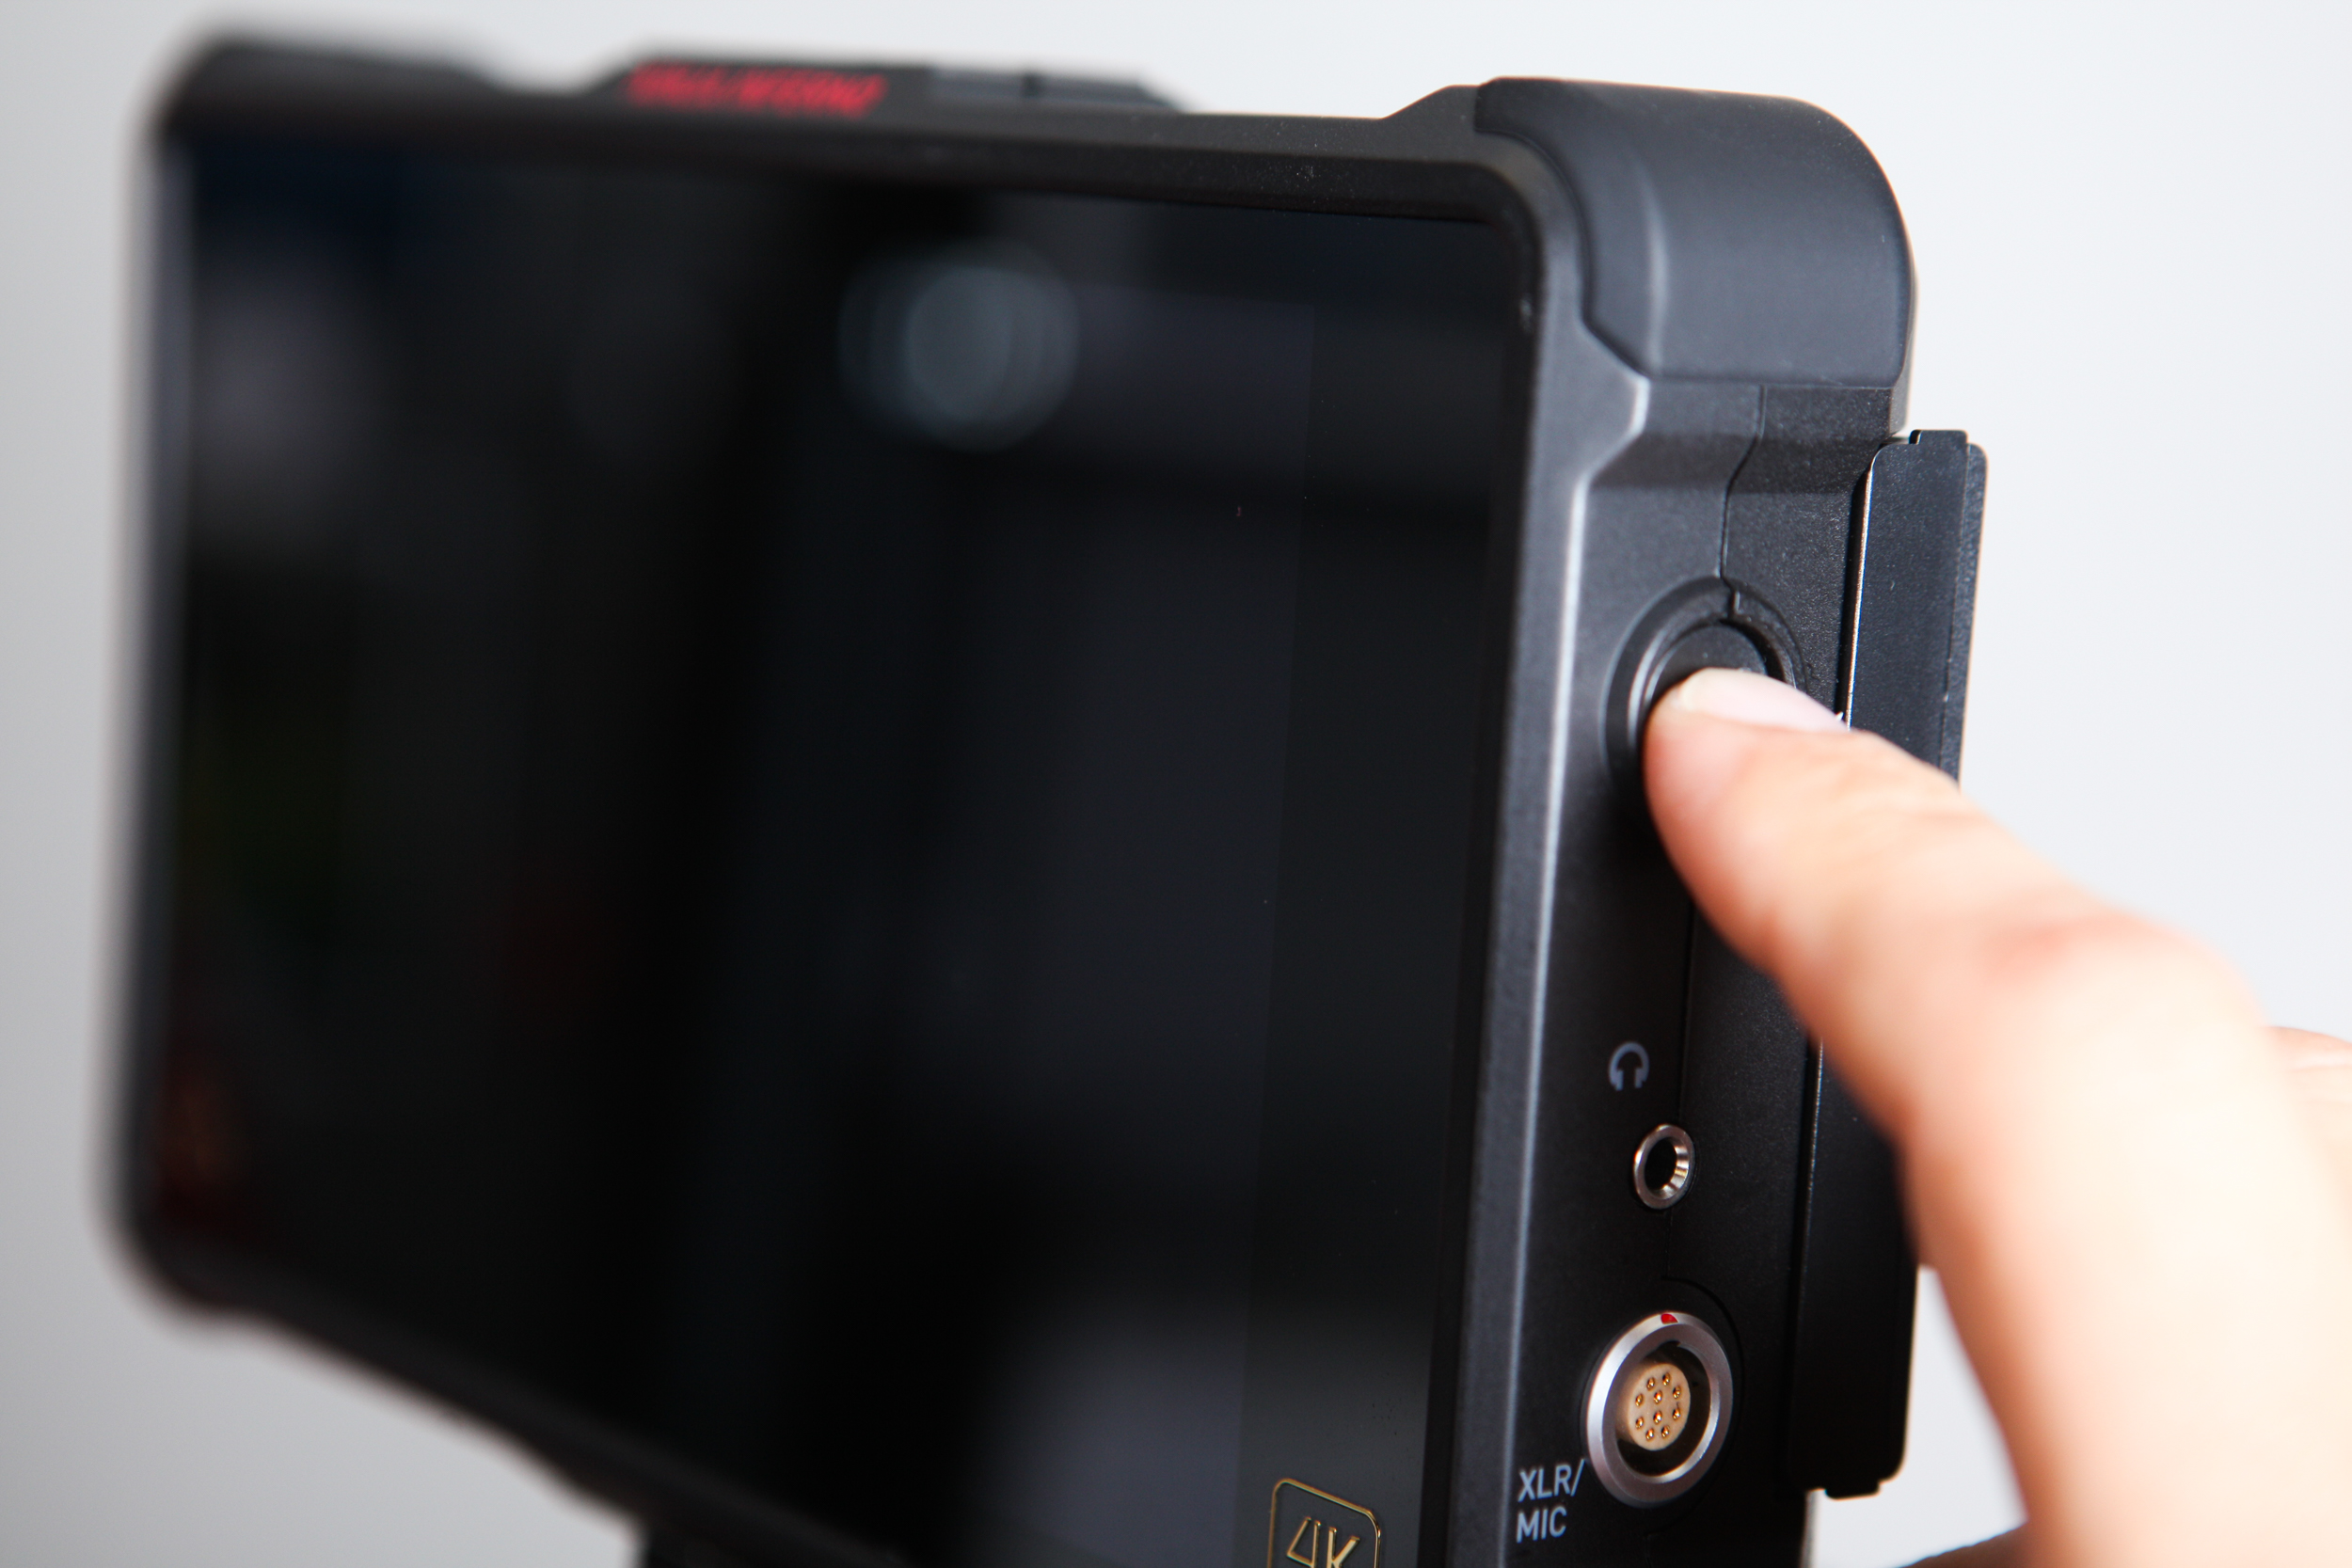
The A7R III does not come with an HDMI cable, so you’ll need to buy one. This one will work – even with the cable protector (more on the cable protector below).
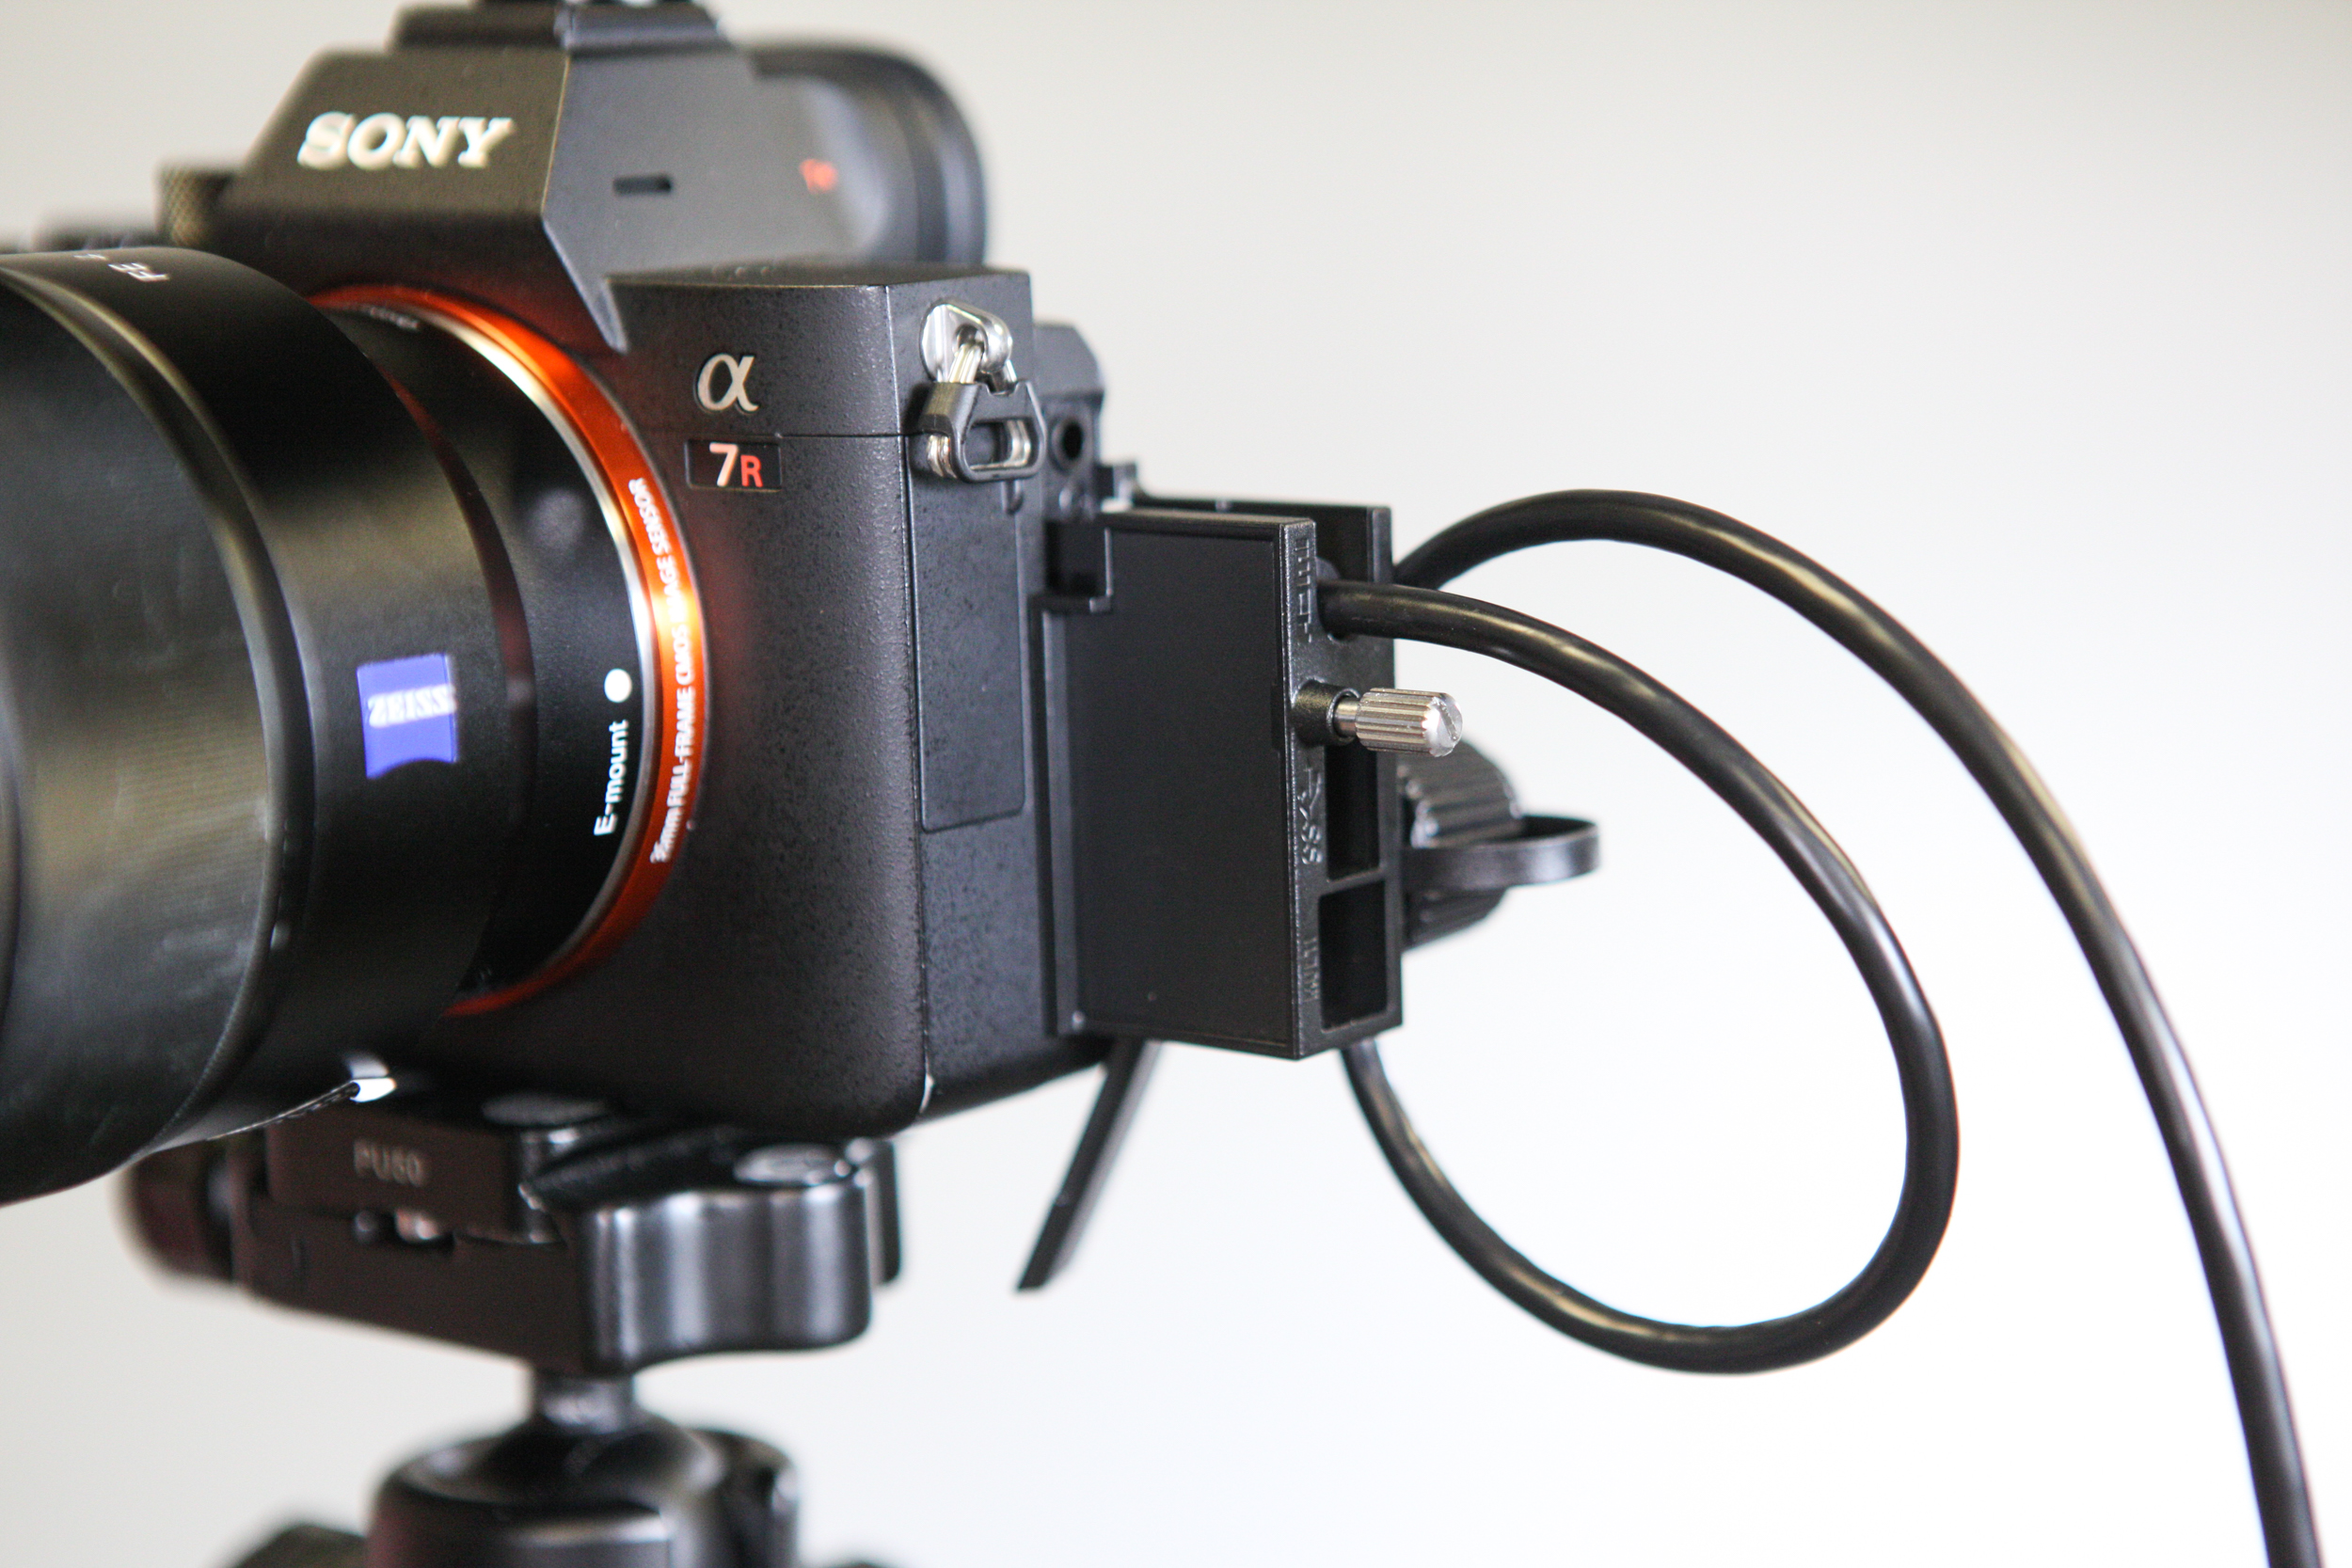
Your Sony A7R III came with a cable protector (it’s a weird looking plastic thing). The purpose of the protector is to prevent damage to the various side inputs. Here’s what the cable protector looks like with the HDMI cable routed through it:
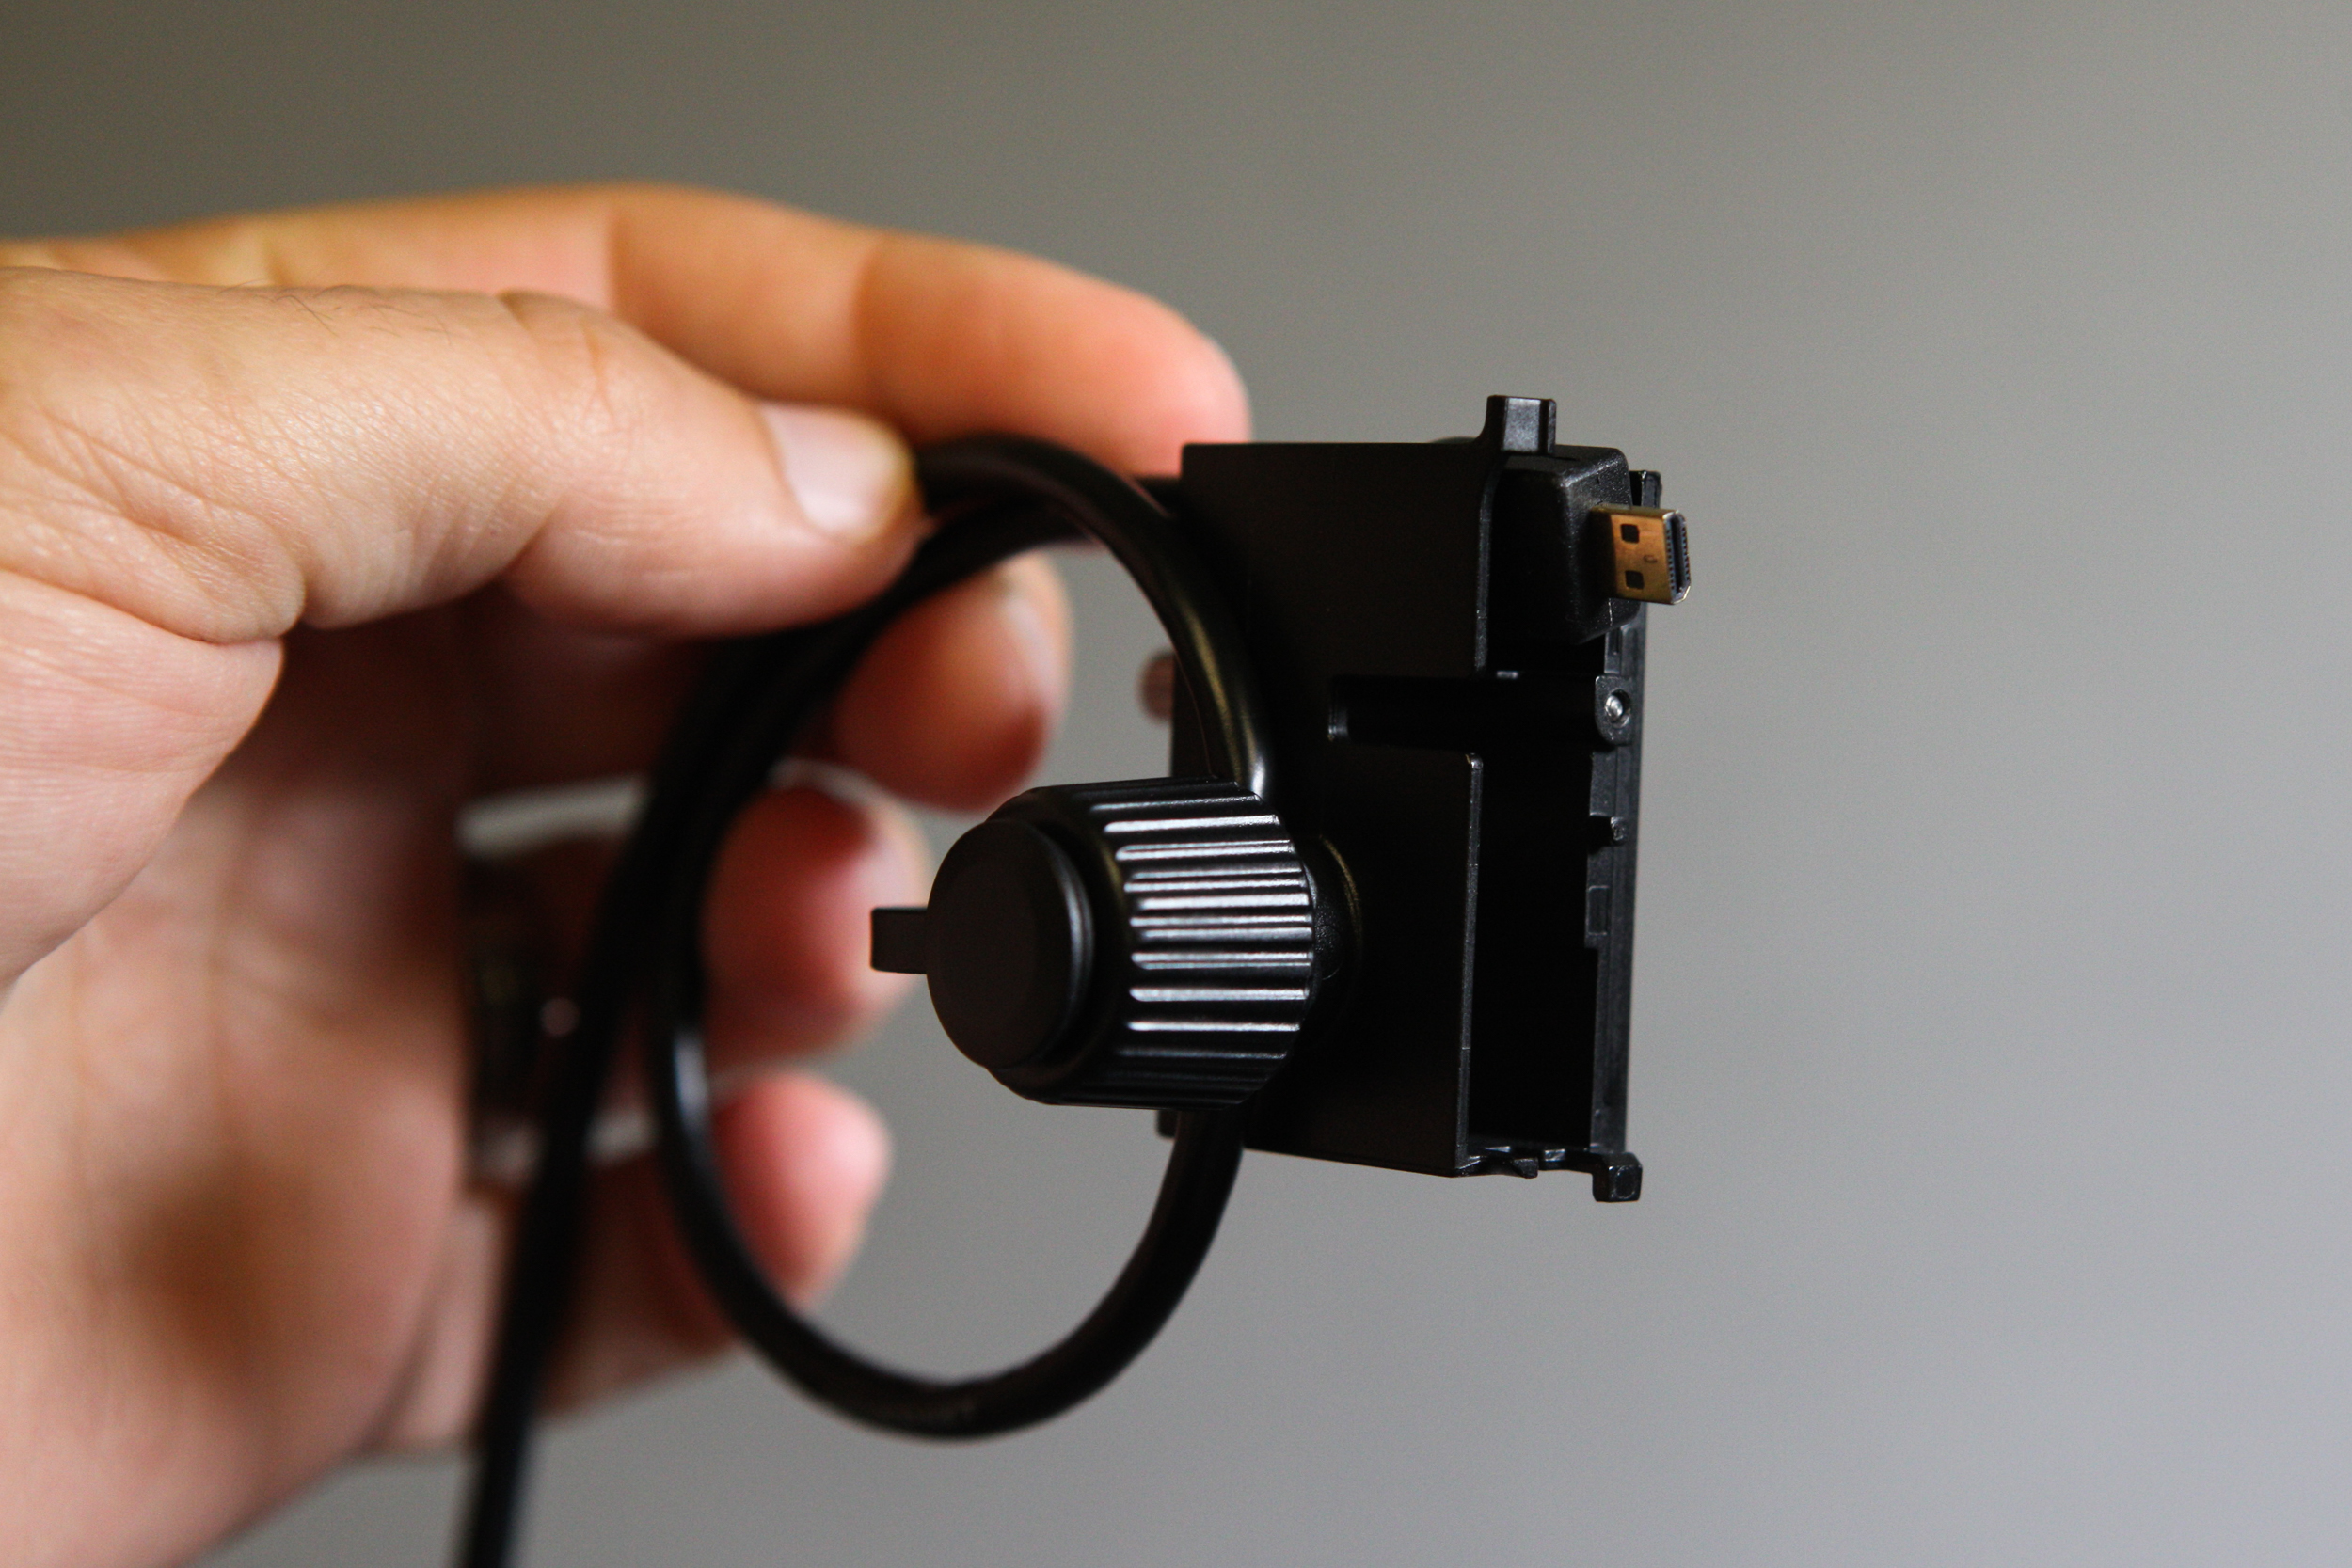
Attach the cable protector to the camera and plug in the HDMI cable, as shown below (it attaches a bit awkwardly):
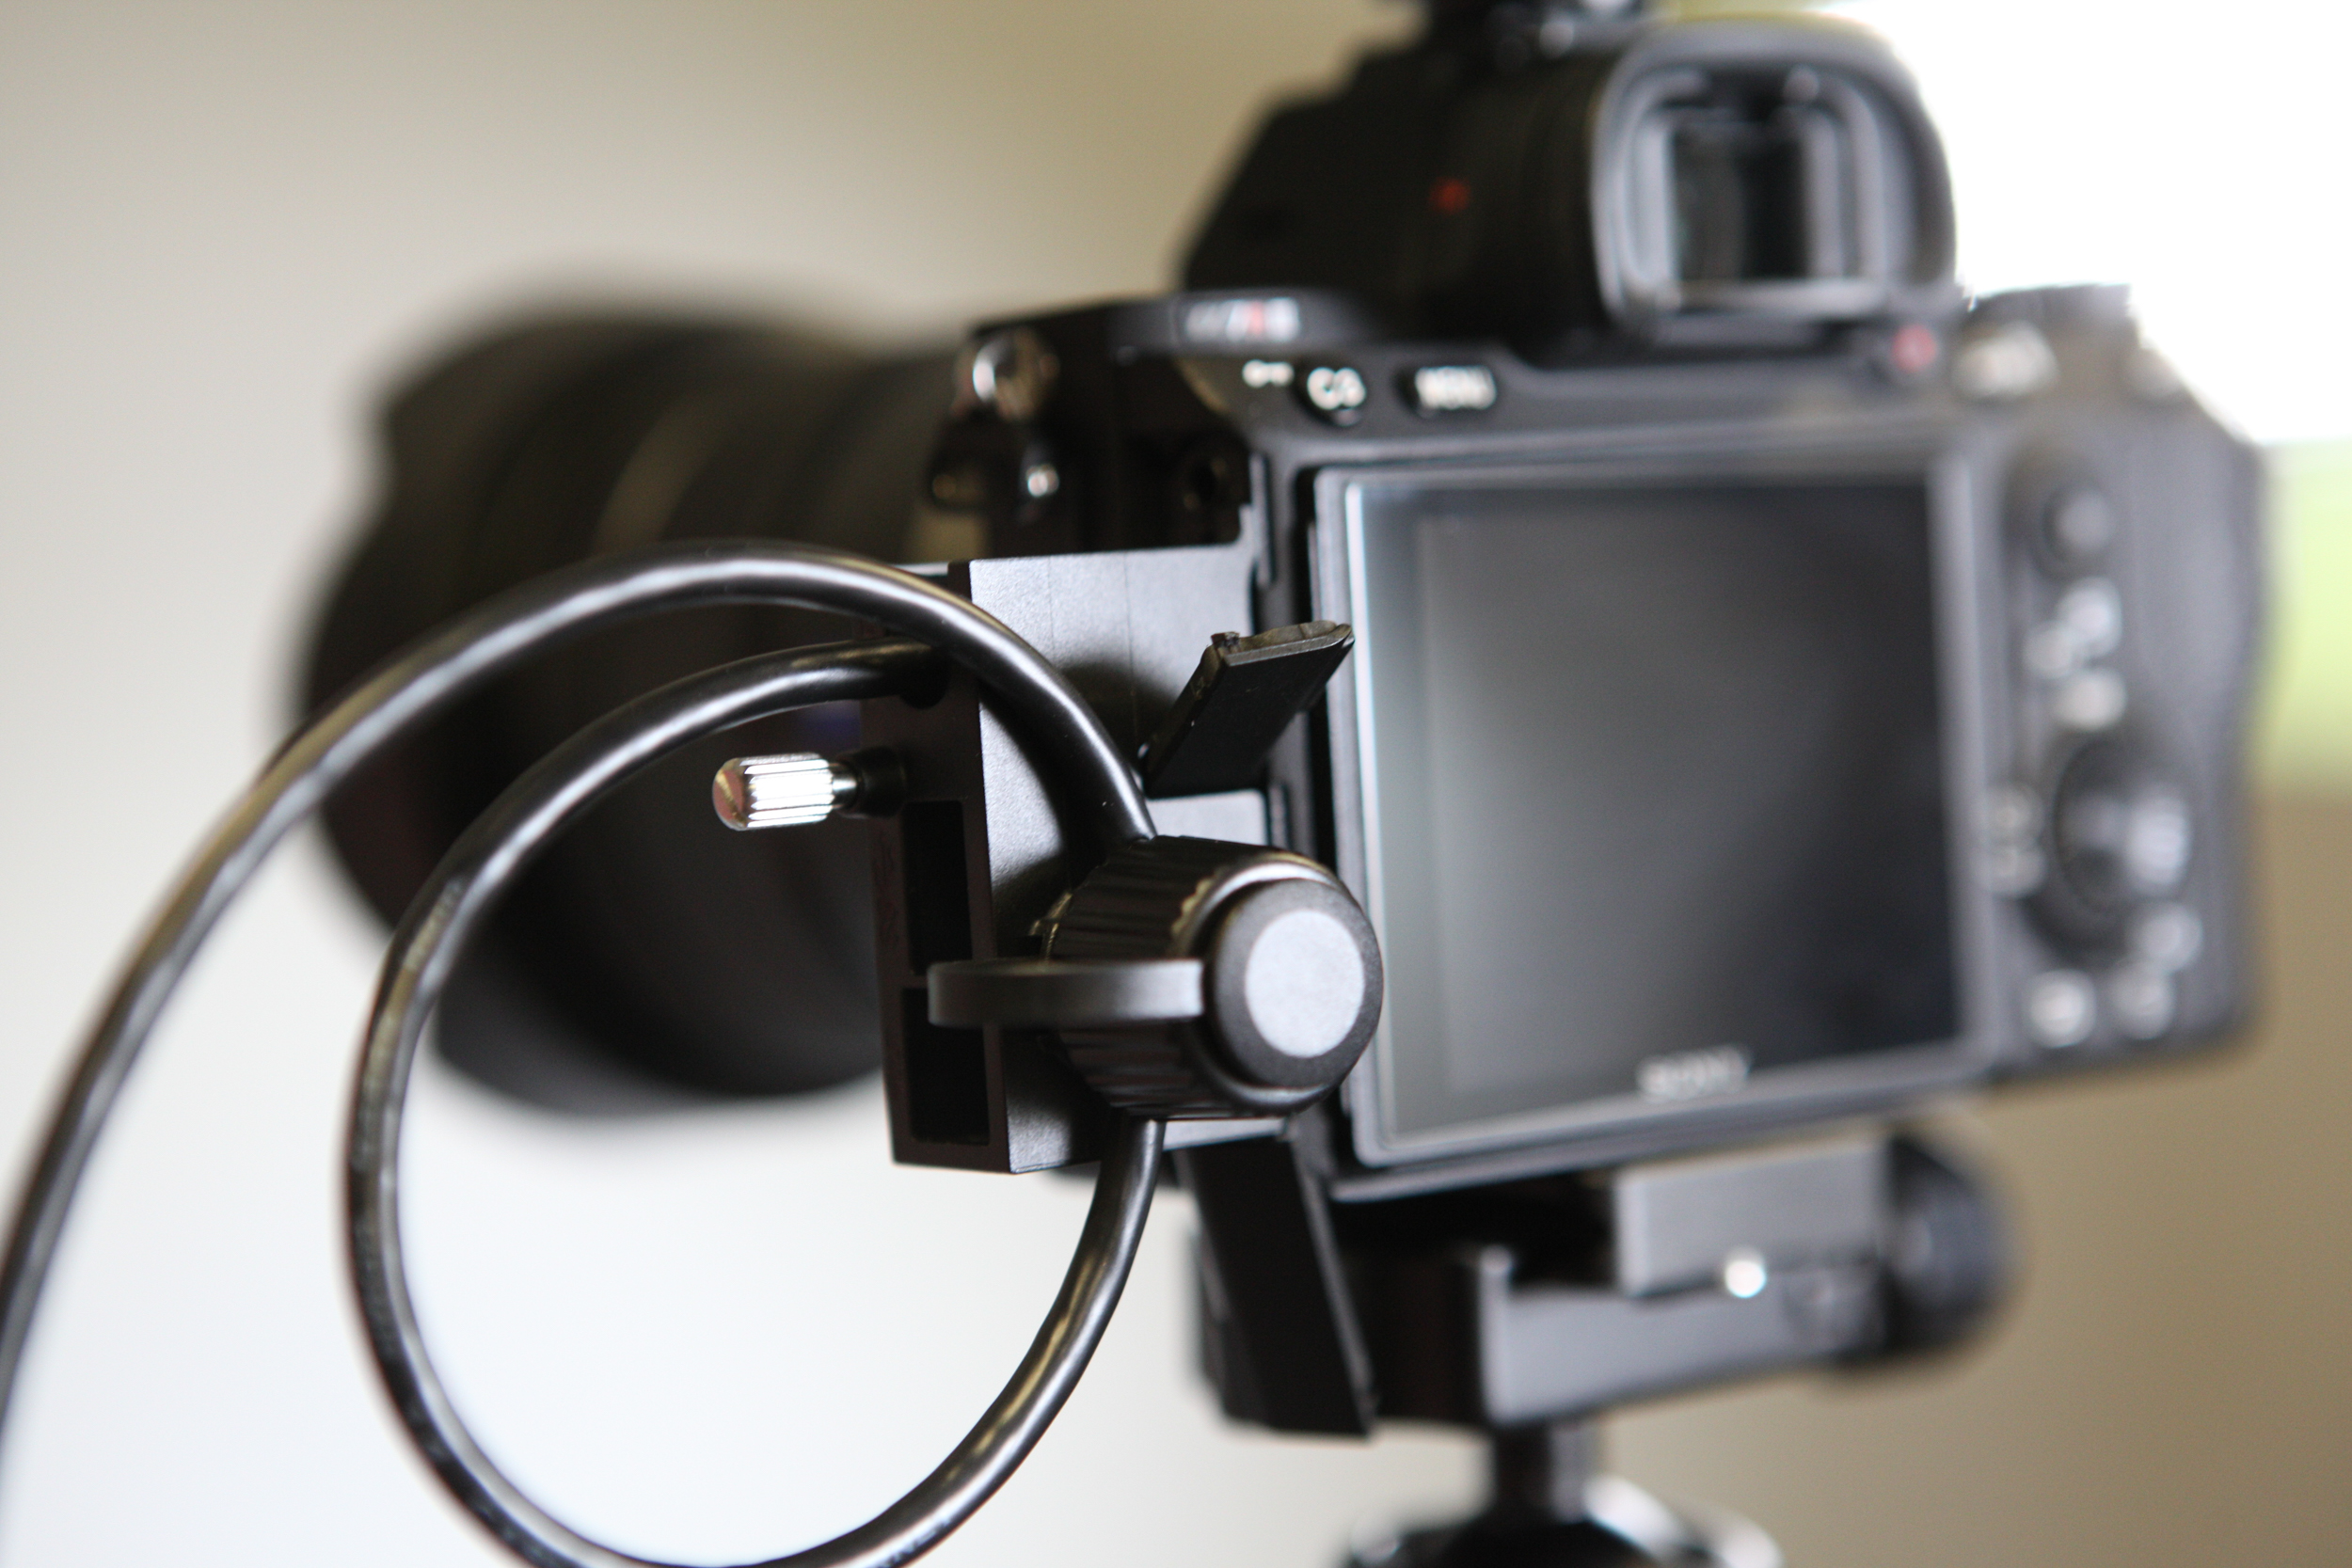
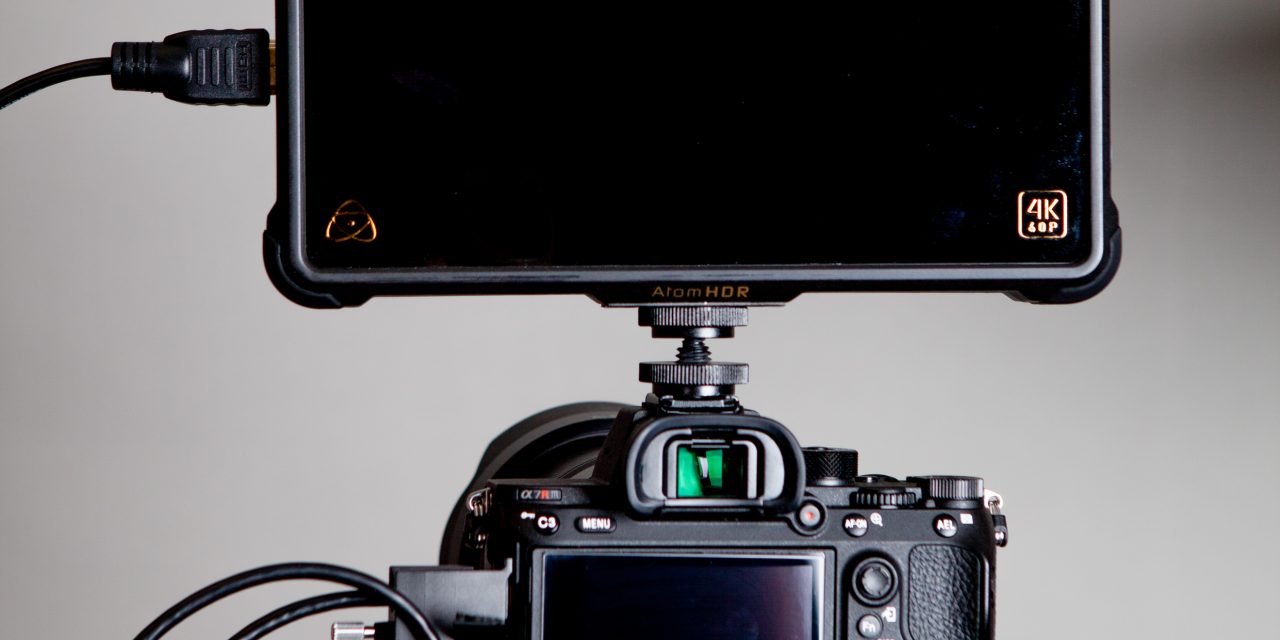
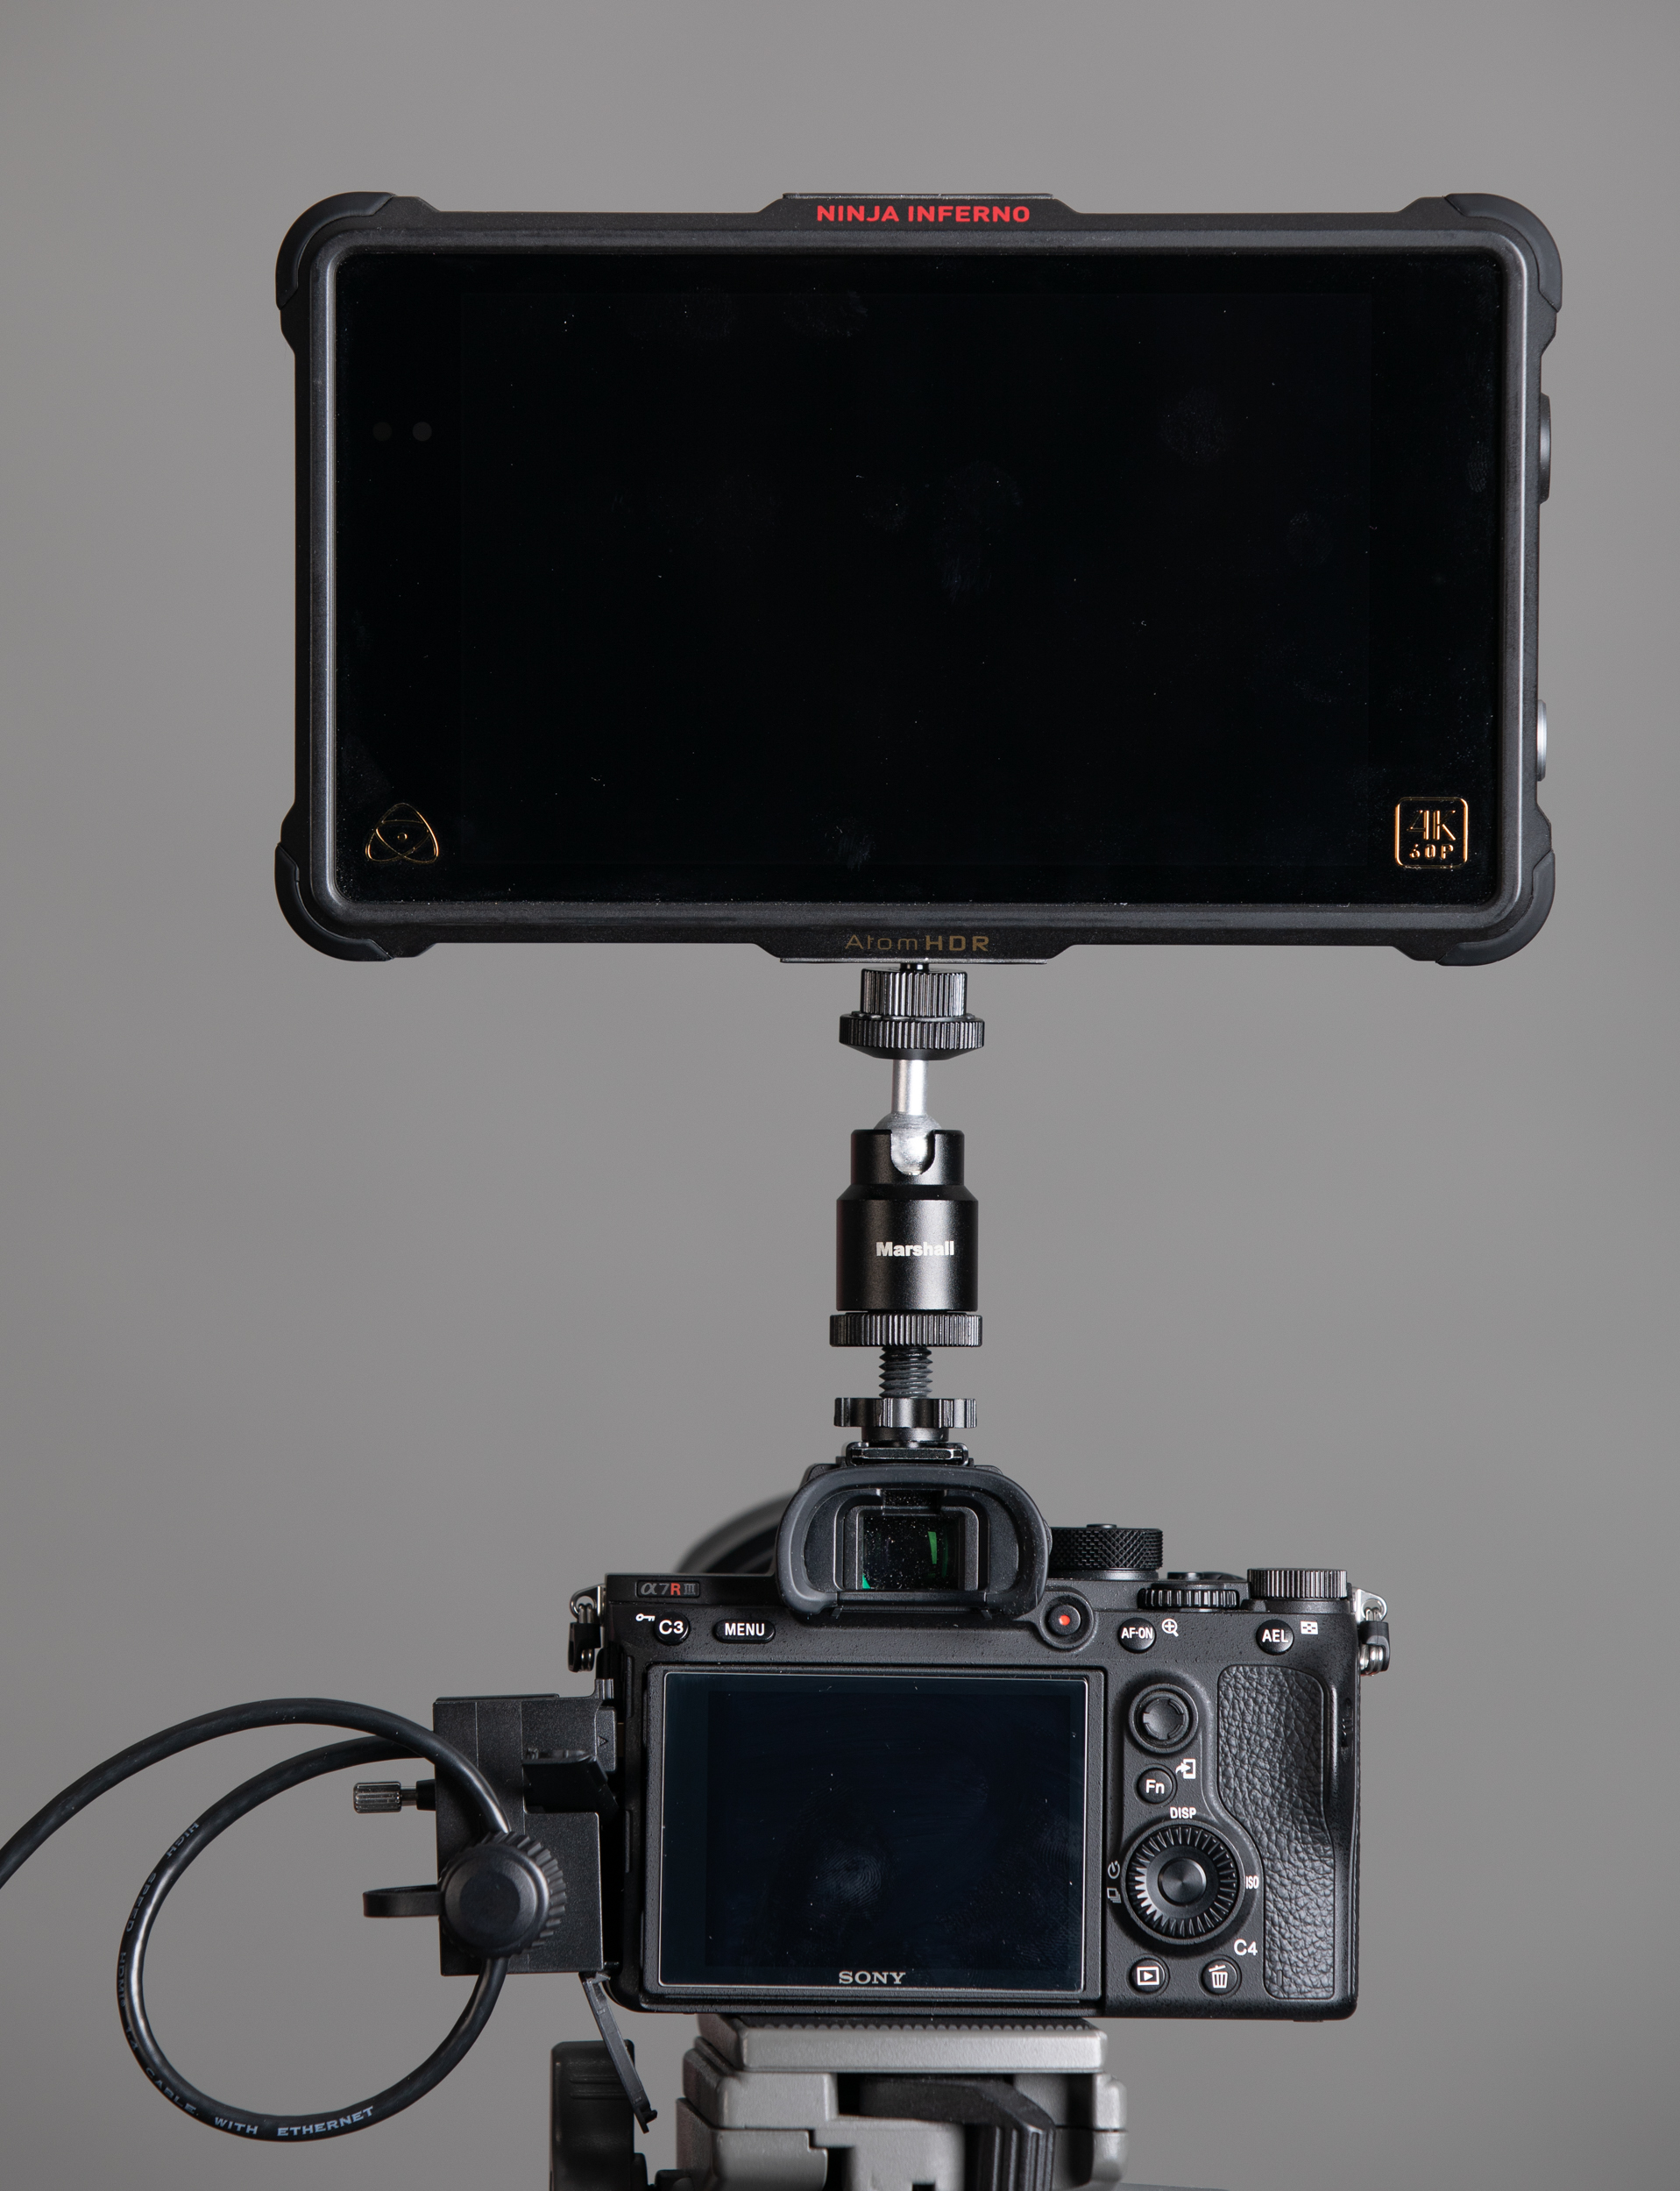
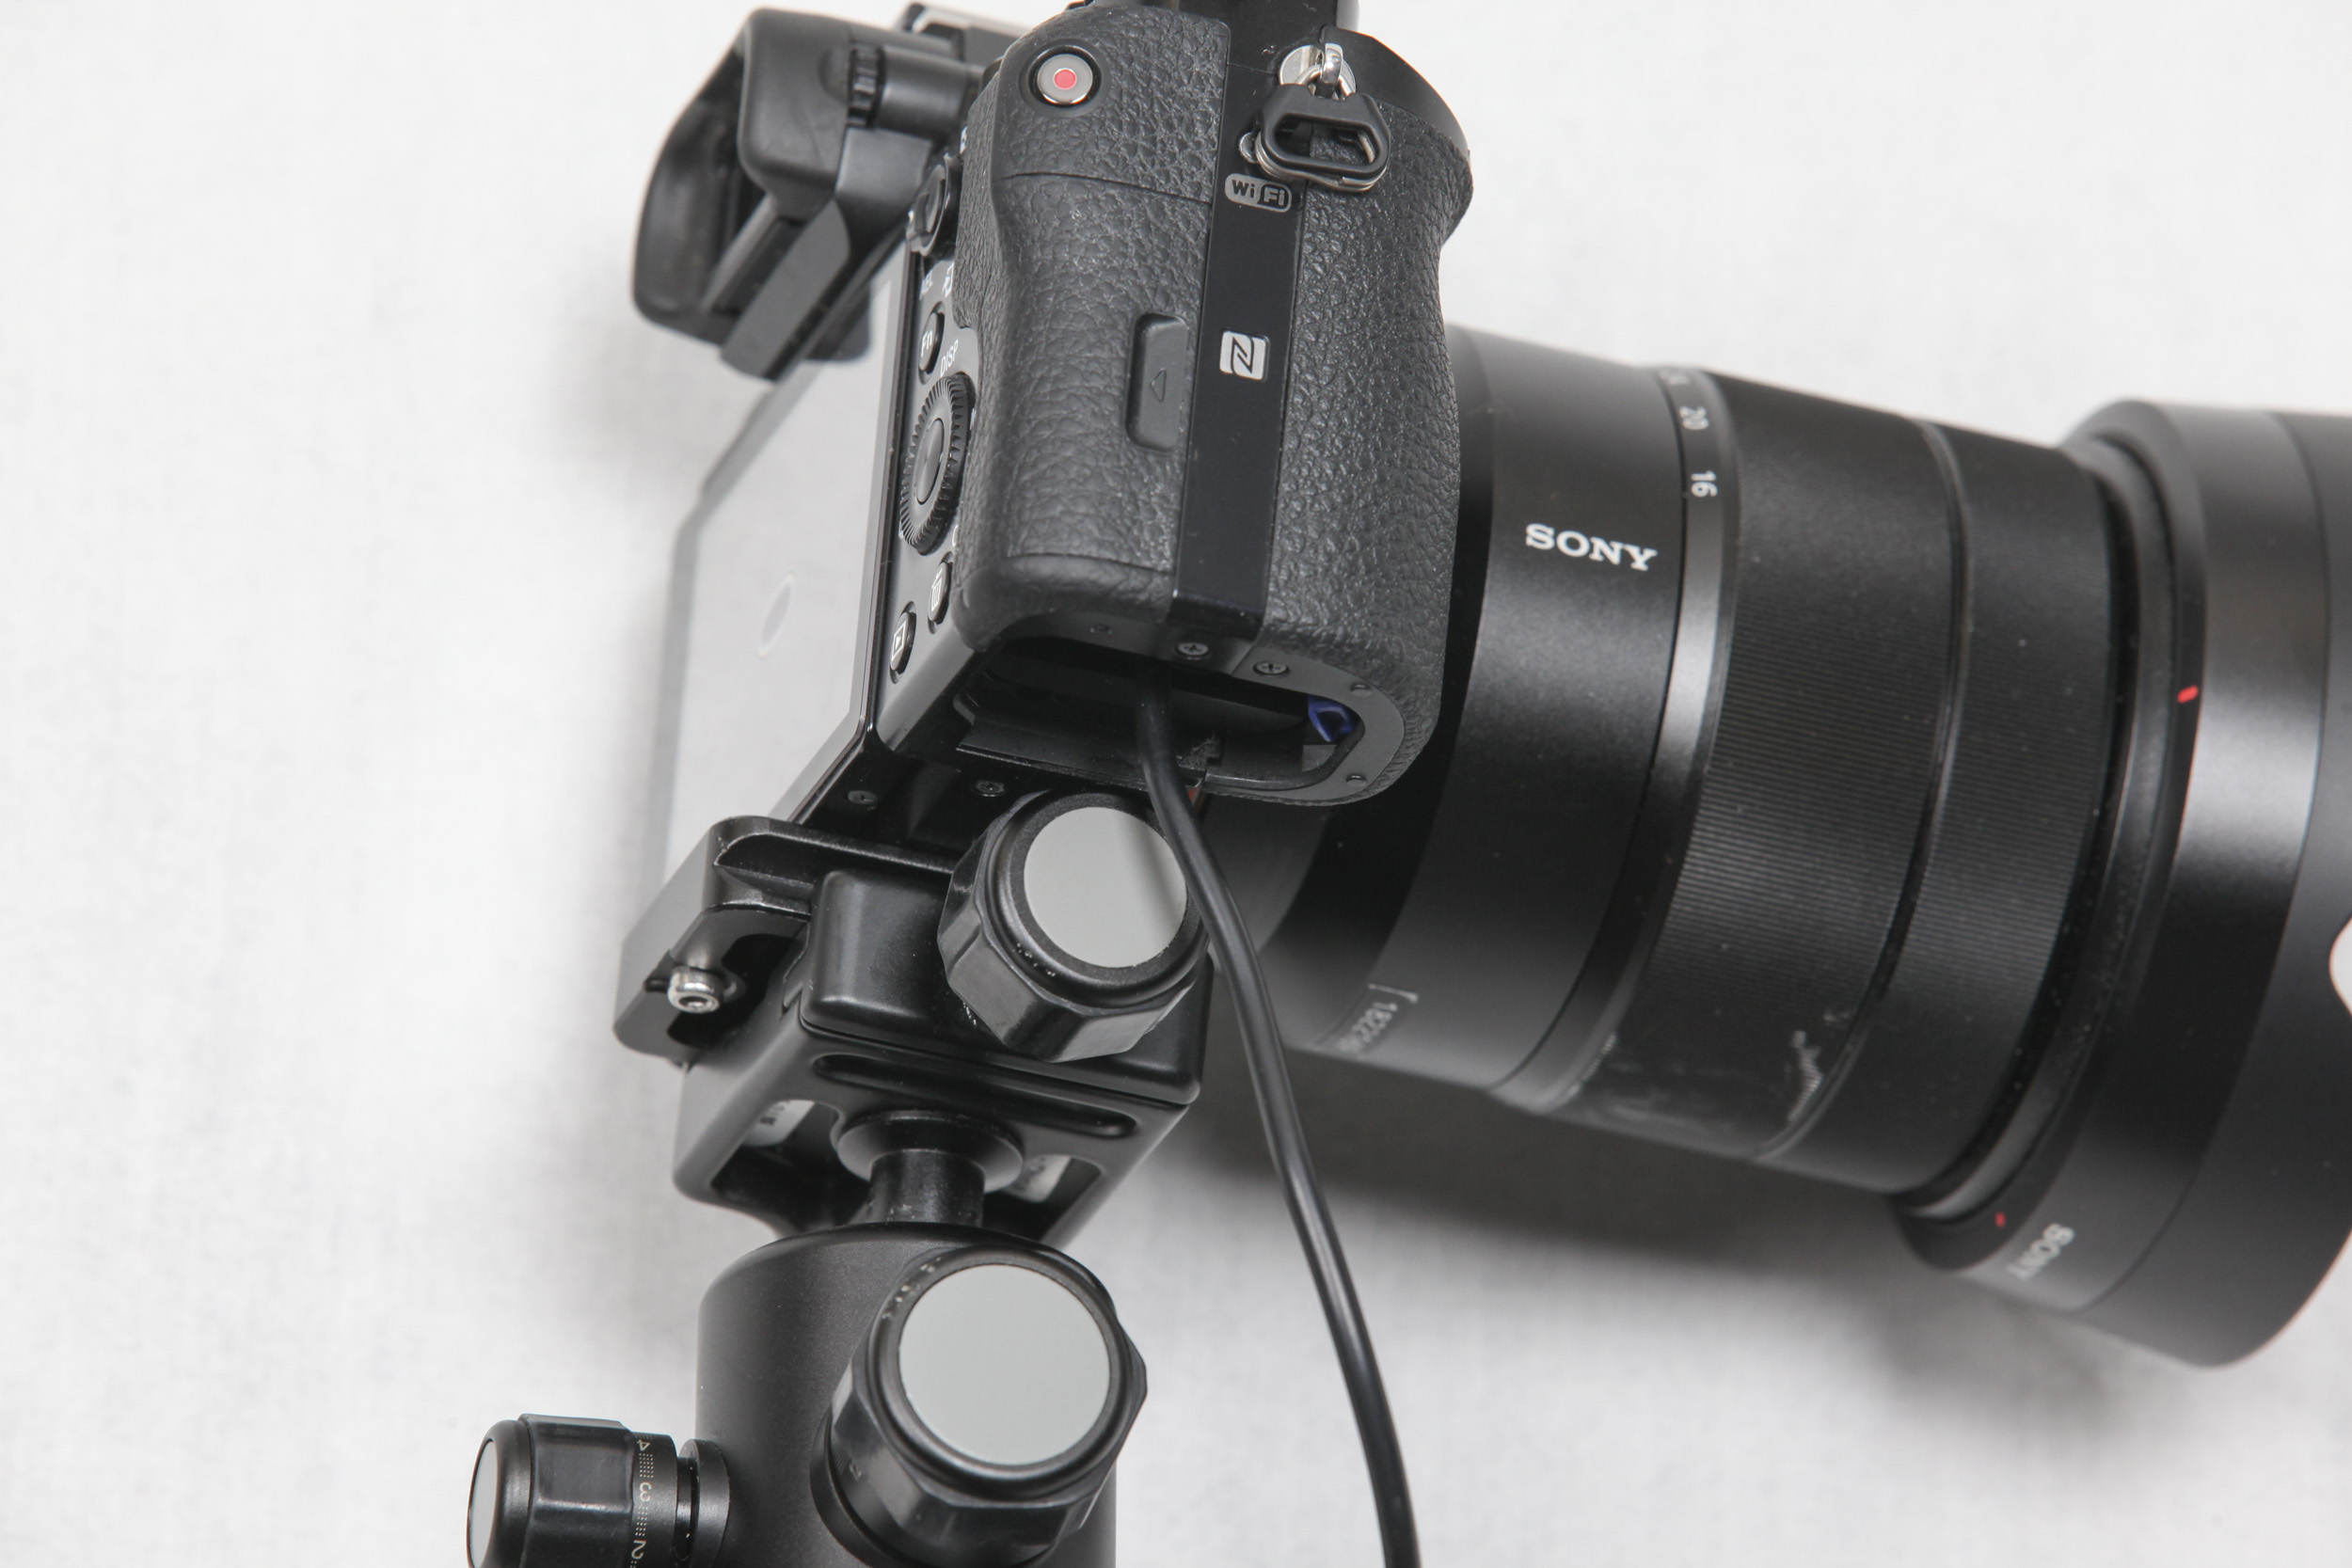
Attach the Inferno to the camera using a hot shoe adapter
You’ll need a hot shoe adapter in order to attach the Inferno to your camera. There are several to choose from on Amazon, but getting one with a ball head is the best choice – this one will get the job done. The image below shows the Inferno attached to my camera via the adapter. The ball head allows me to fine tune the position if necessary.
Plug in and Power On
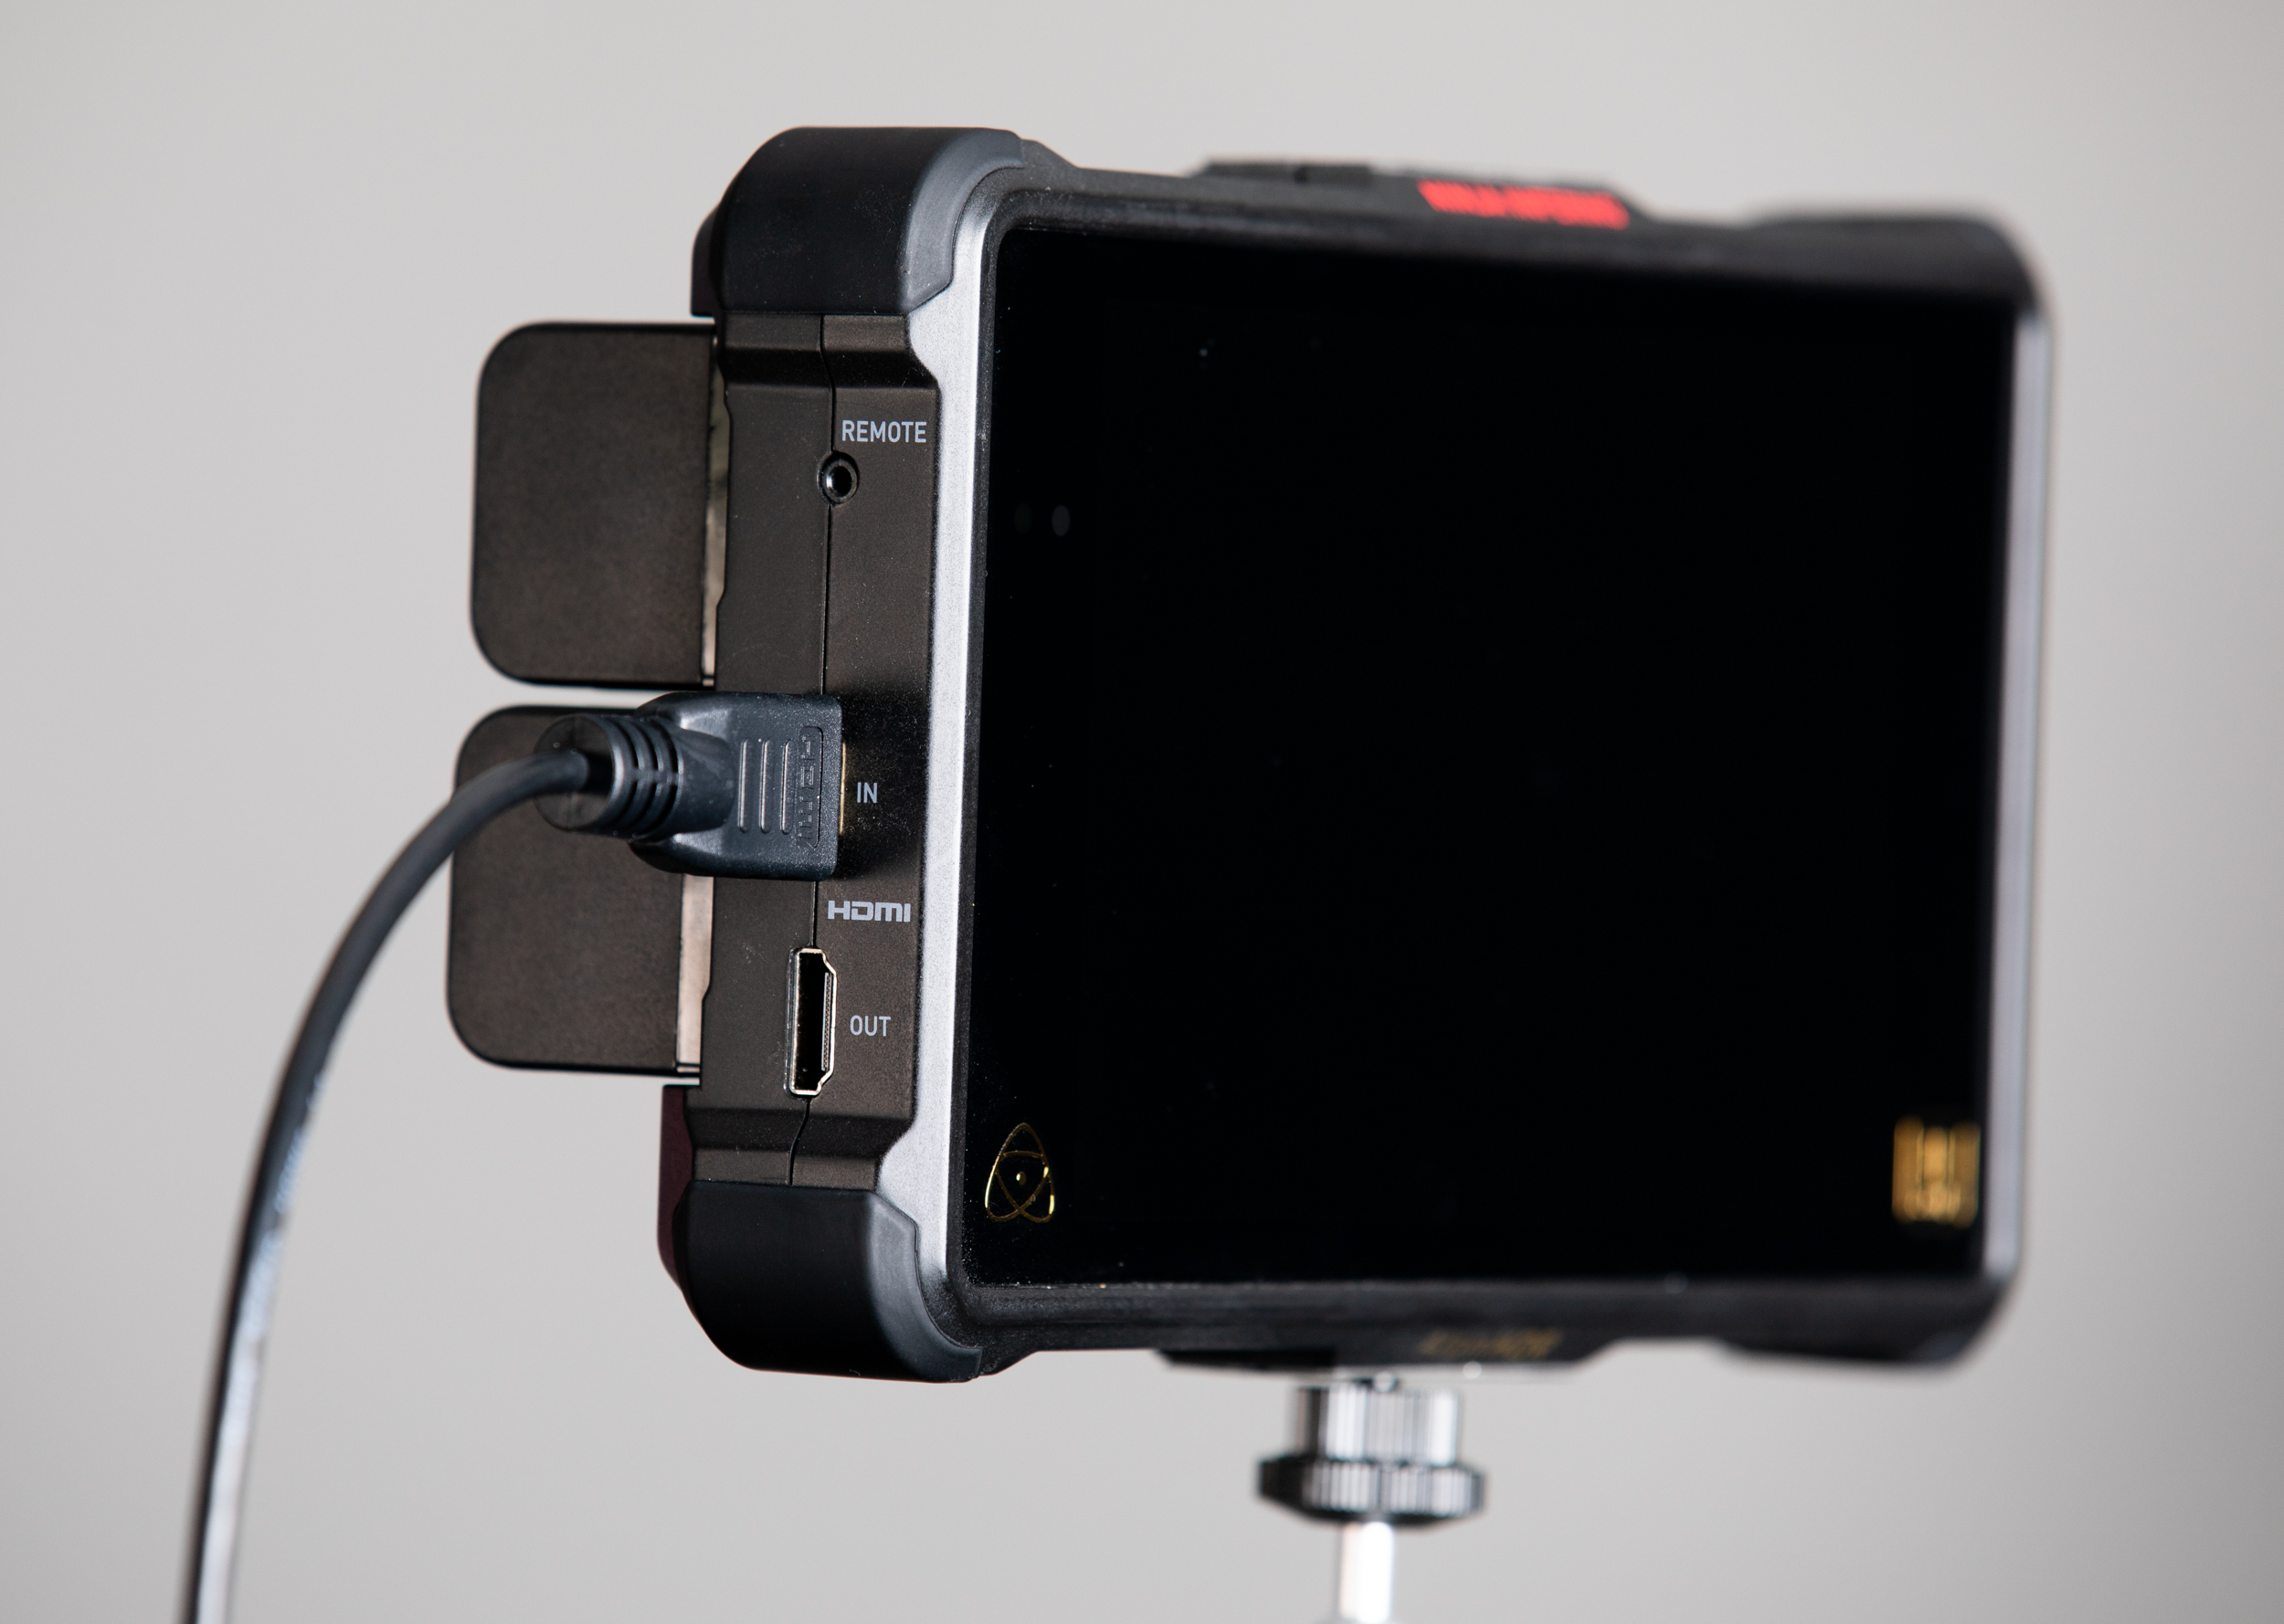
Plug the other end of your HDMI cable into the Inferno as shown below.
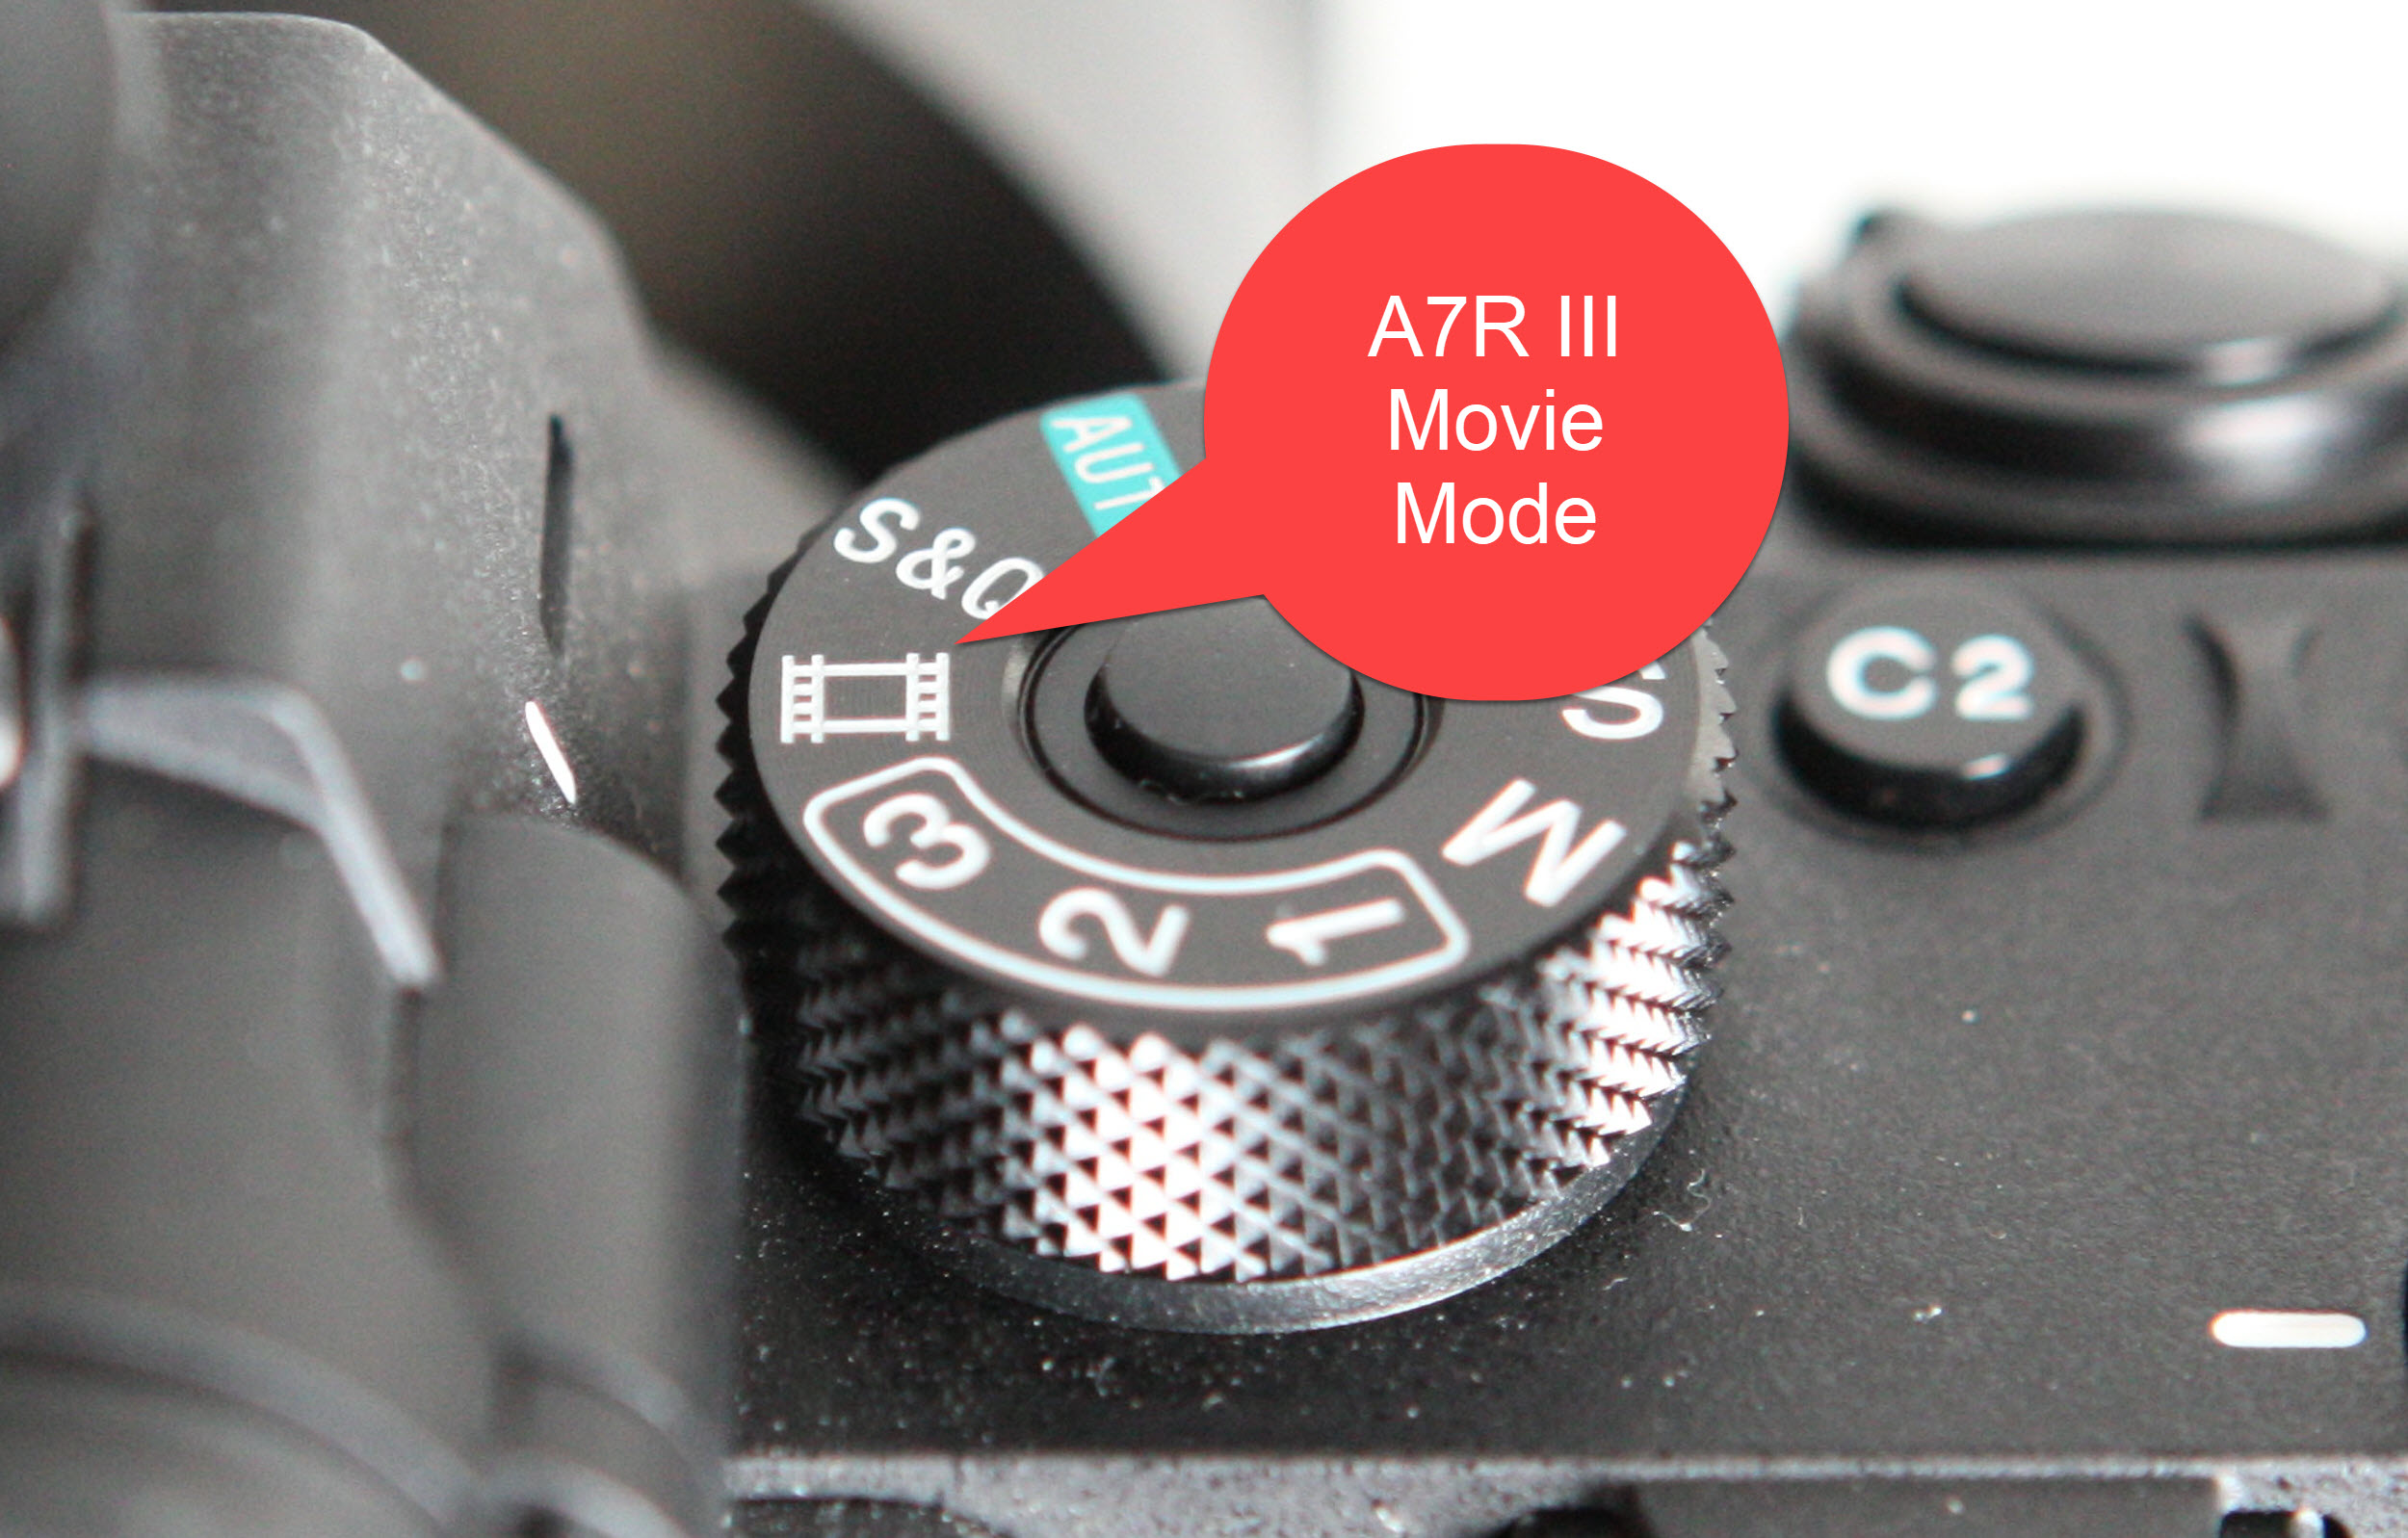
Next, turn the camera on and put it in movie mode using the switch on the top, as shown below:
Power the Inferno on by pressing and holding the power button on the side of the unit as shown below:
Using 4k with the Atomos Inferno
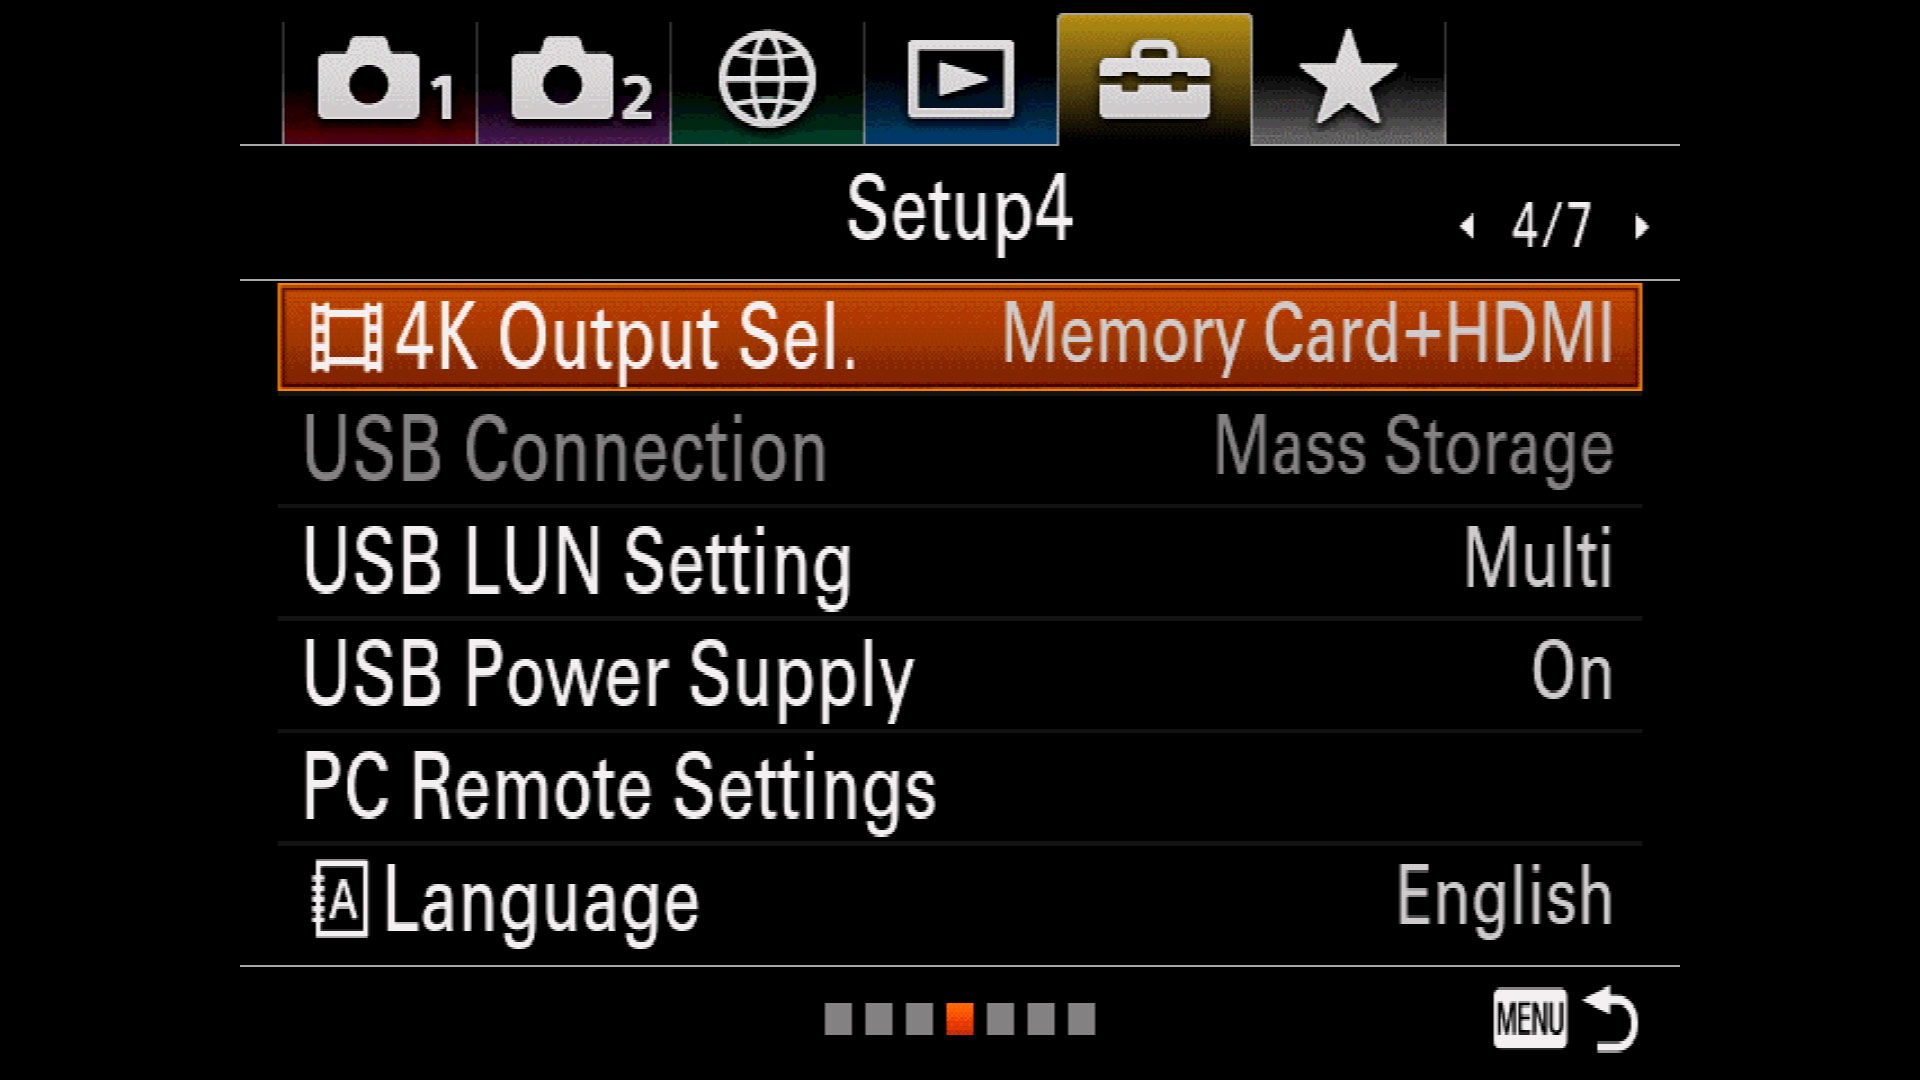
The A7R III’s 4k output resolution from the HDMI port when connected to the Ninja Inferno is 4:2:2 8-Bit UHD 4K (3840 x 2160) at 60p and 24p. You’ll need to dive into a camera setting to make sure the camera is outputting in 4k. To do so, hit the “Menu” button on the back of the camera, then go to page 4 of the Setup menu (the little toolbox icon). The “4k Output Sel.” setting is the first one listed.
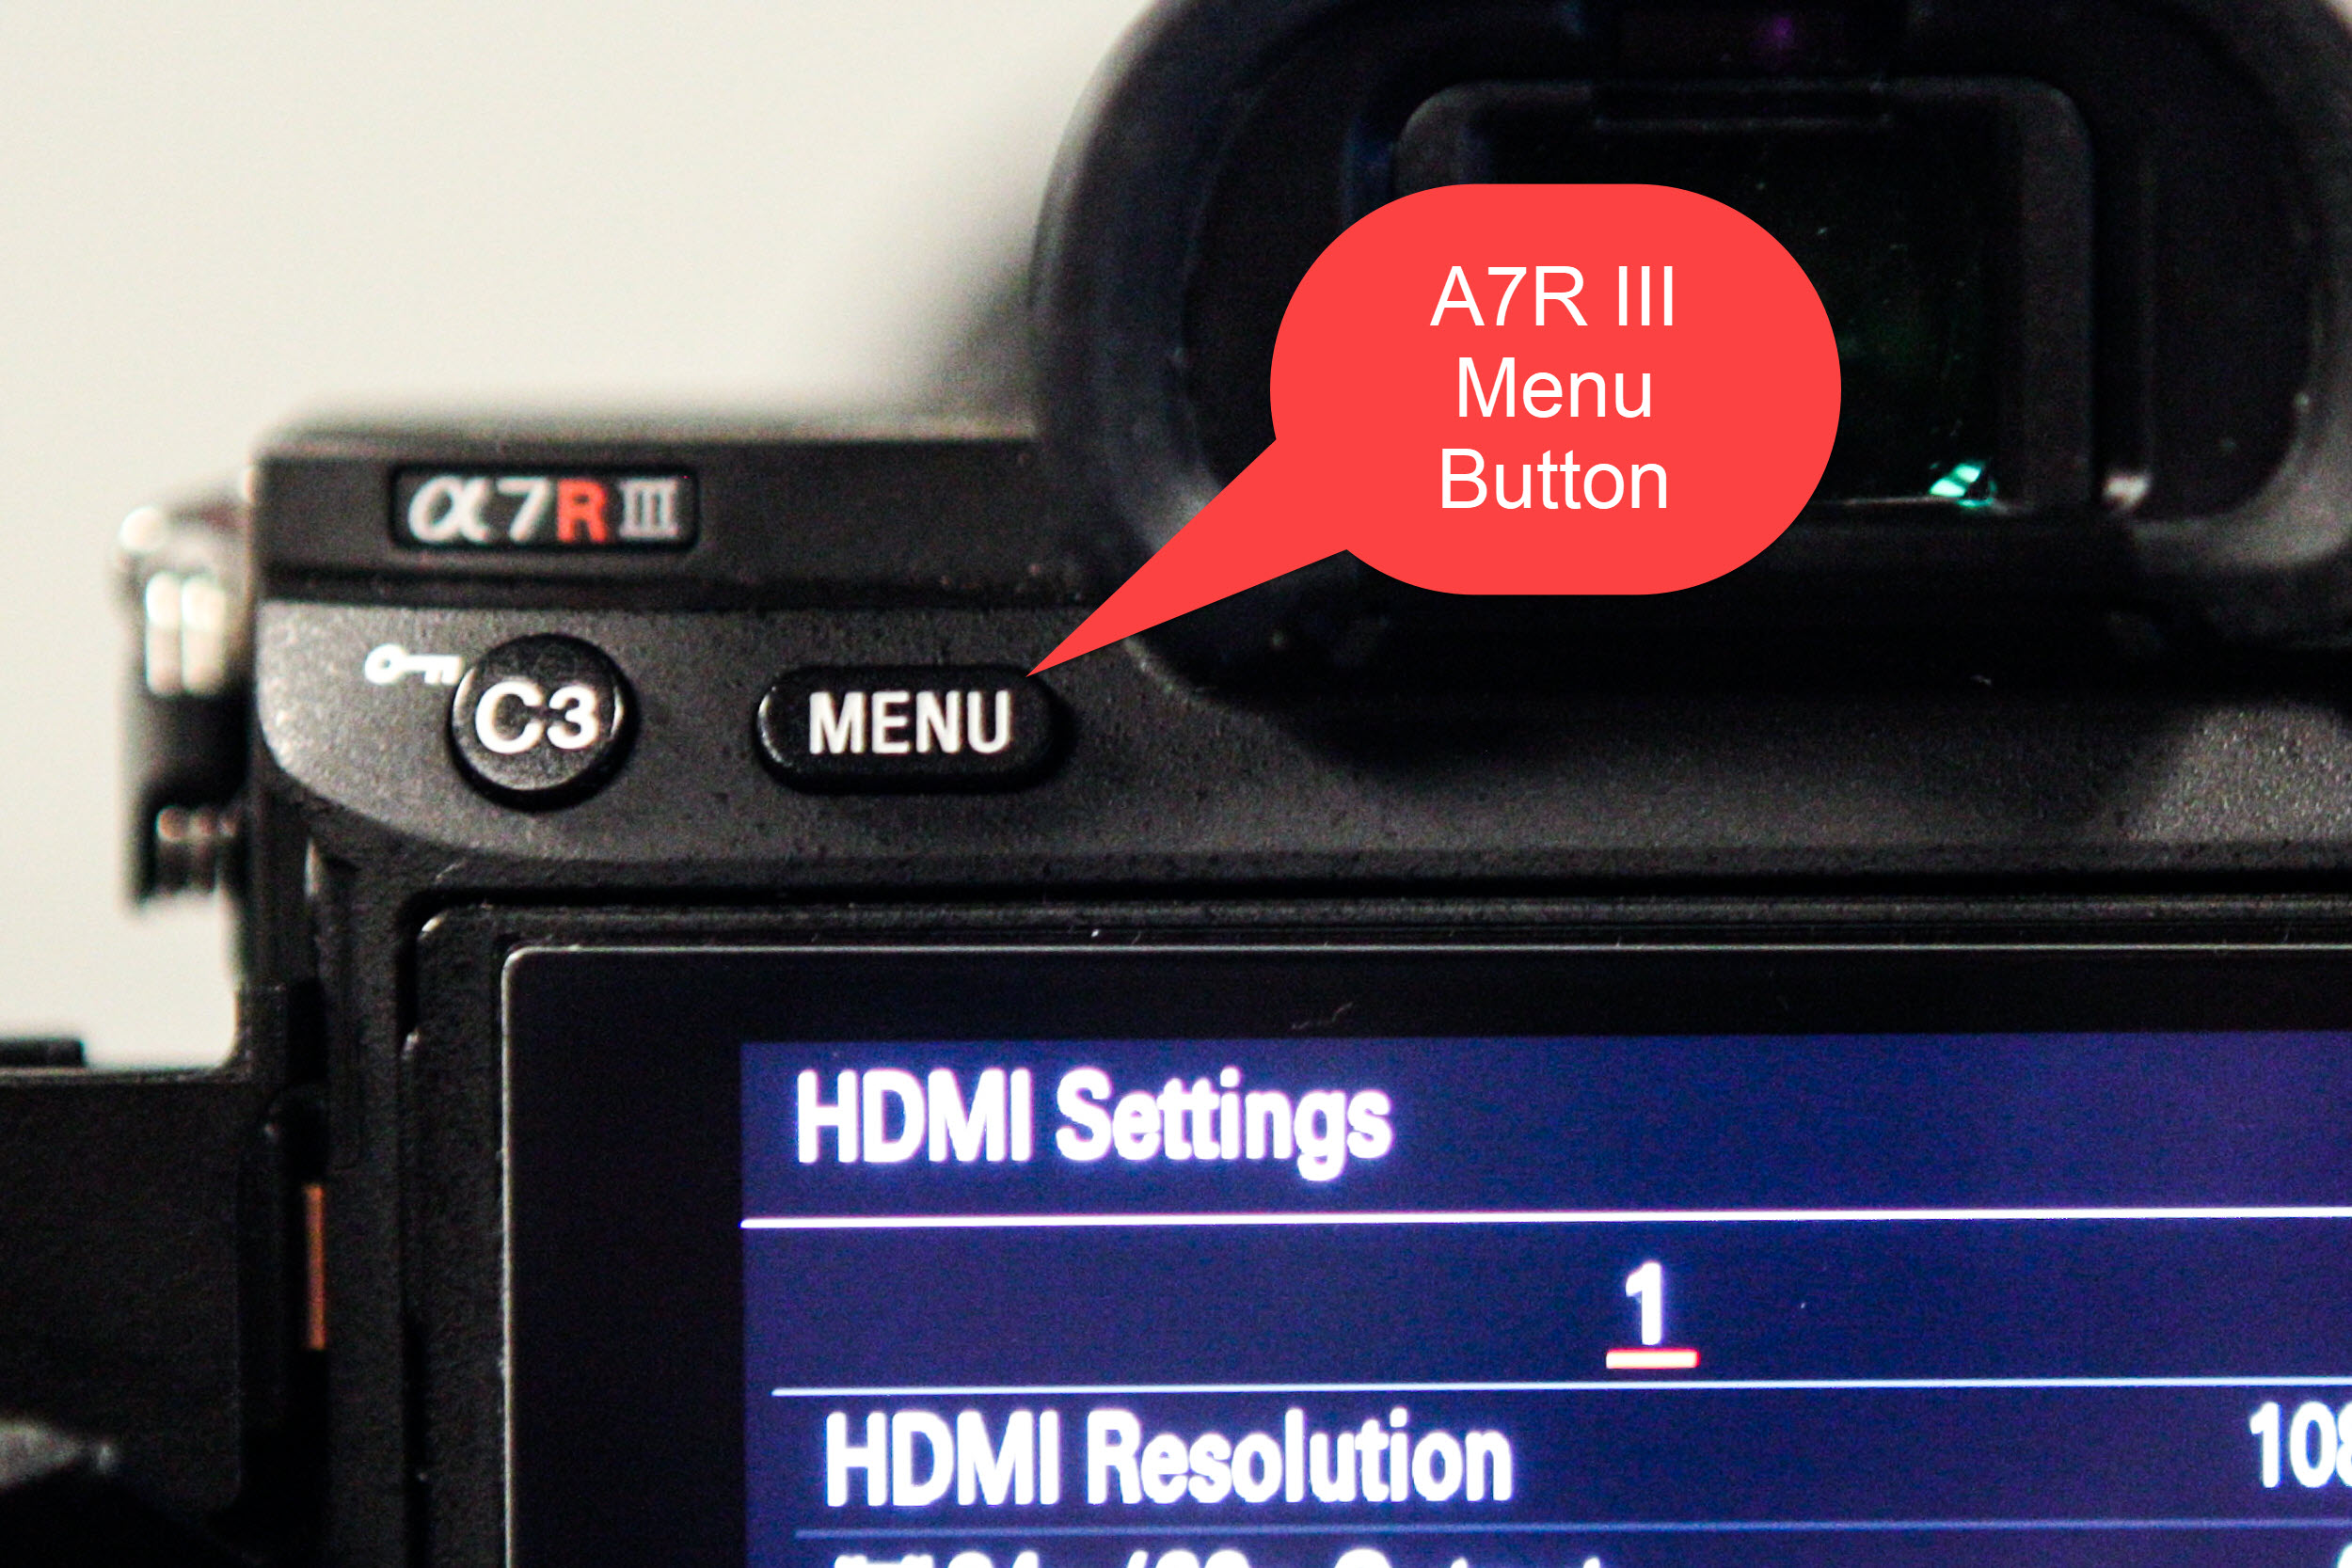
The Menu button on the back of the A7R III
The “4k Output Sel.” setting
Select the “4K Output Sel.” setting and make sure it’s set to either HDMI Only (30p) or HDMI Only (24p). Those are the ONLY two settings that will allow you to output in 4k. The Ninja Inferno will automatically detect and match either of the two frame rates you are outputting from the camera when shooting in 4k.

Make sure to use either “HDMI Only (30p)” or “HDMI Only (24p)” in order for the A7R III to output in 4k from the HDMI port.
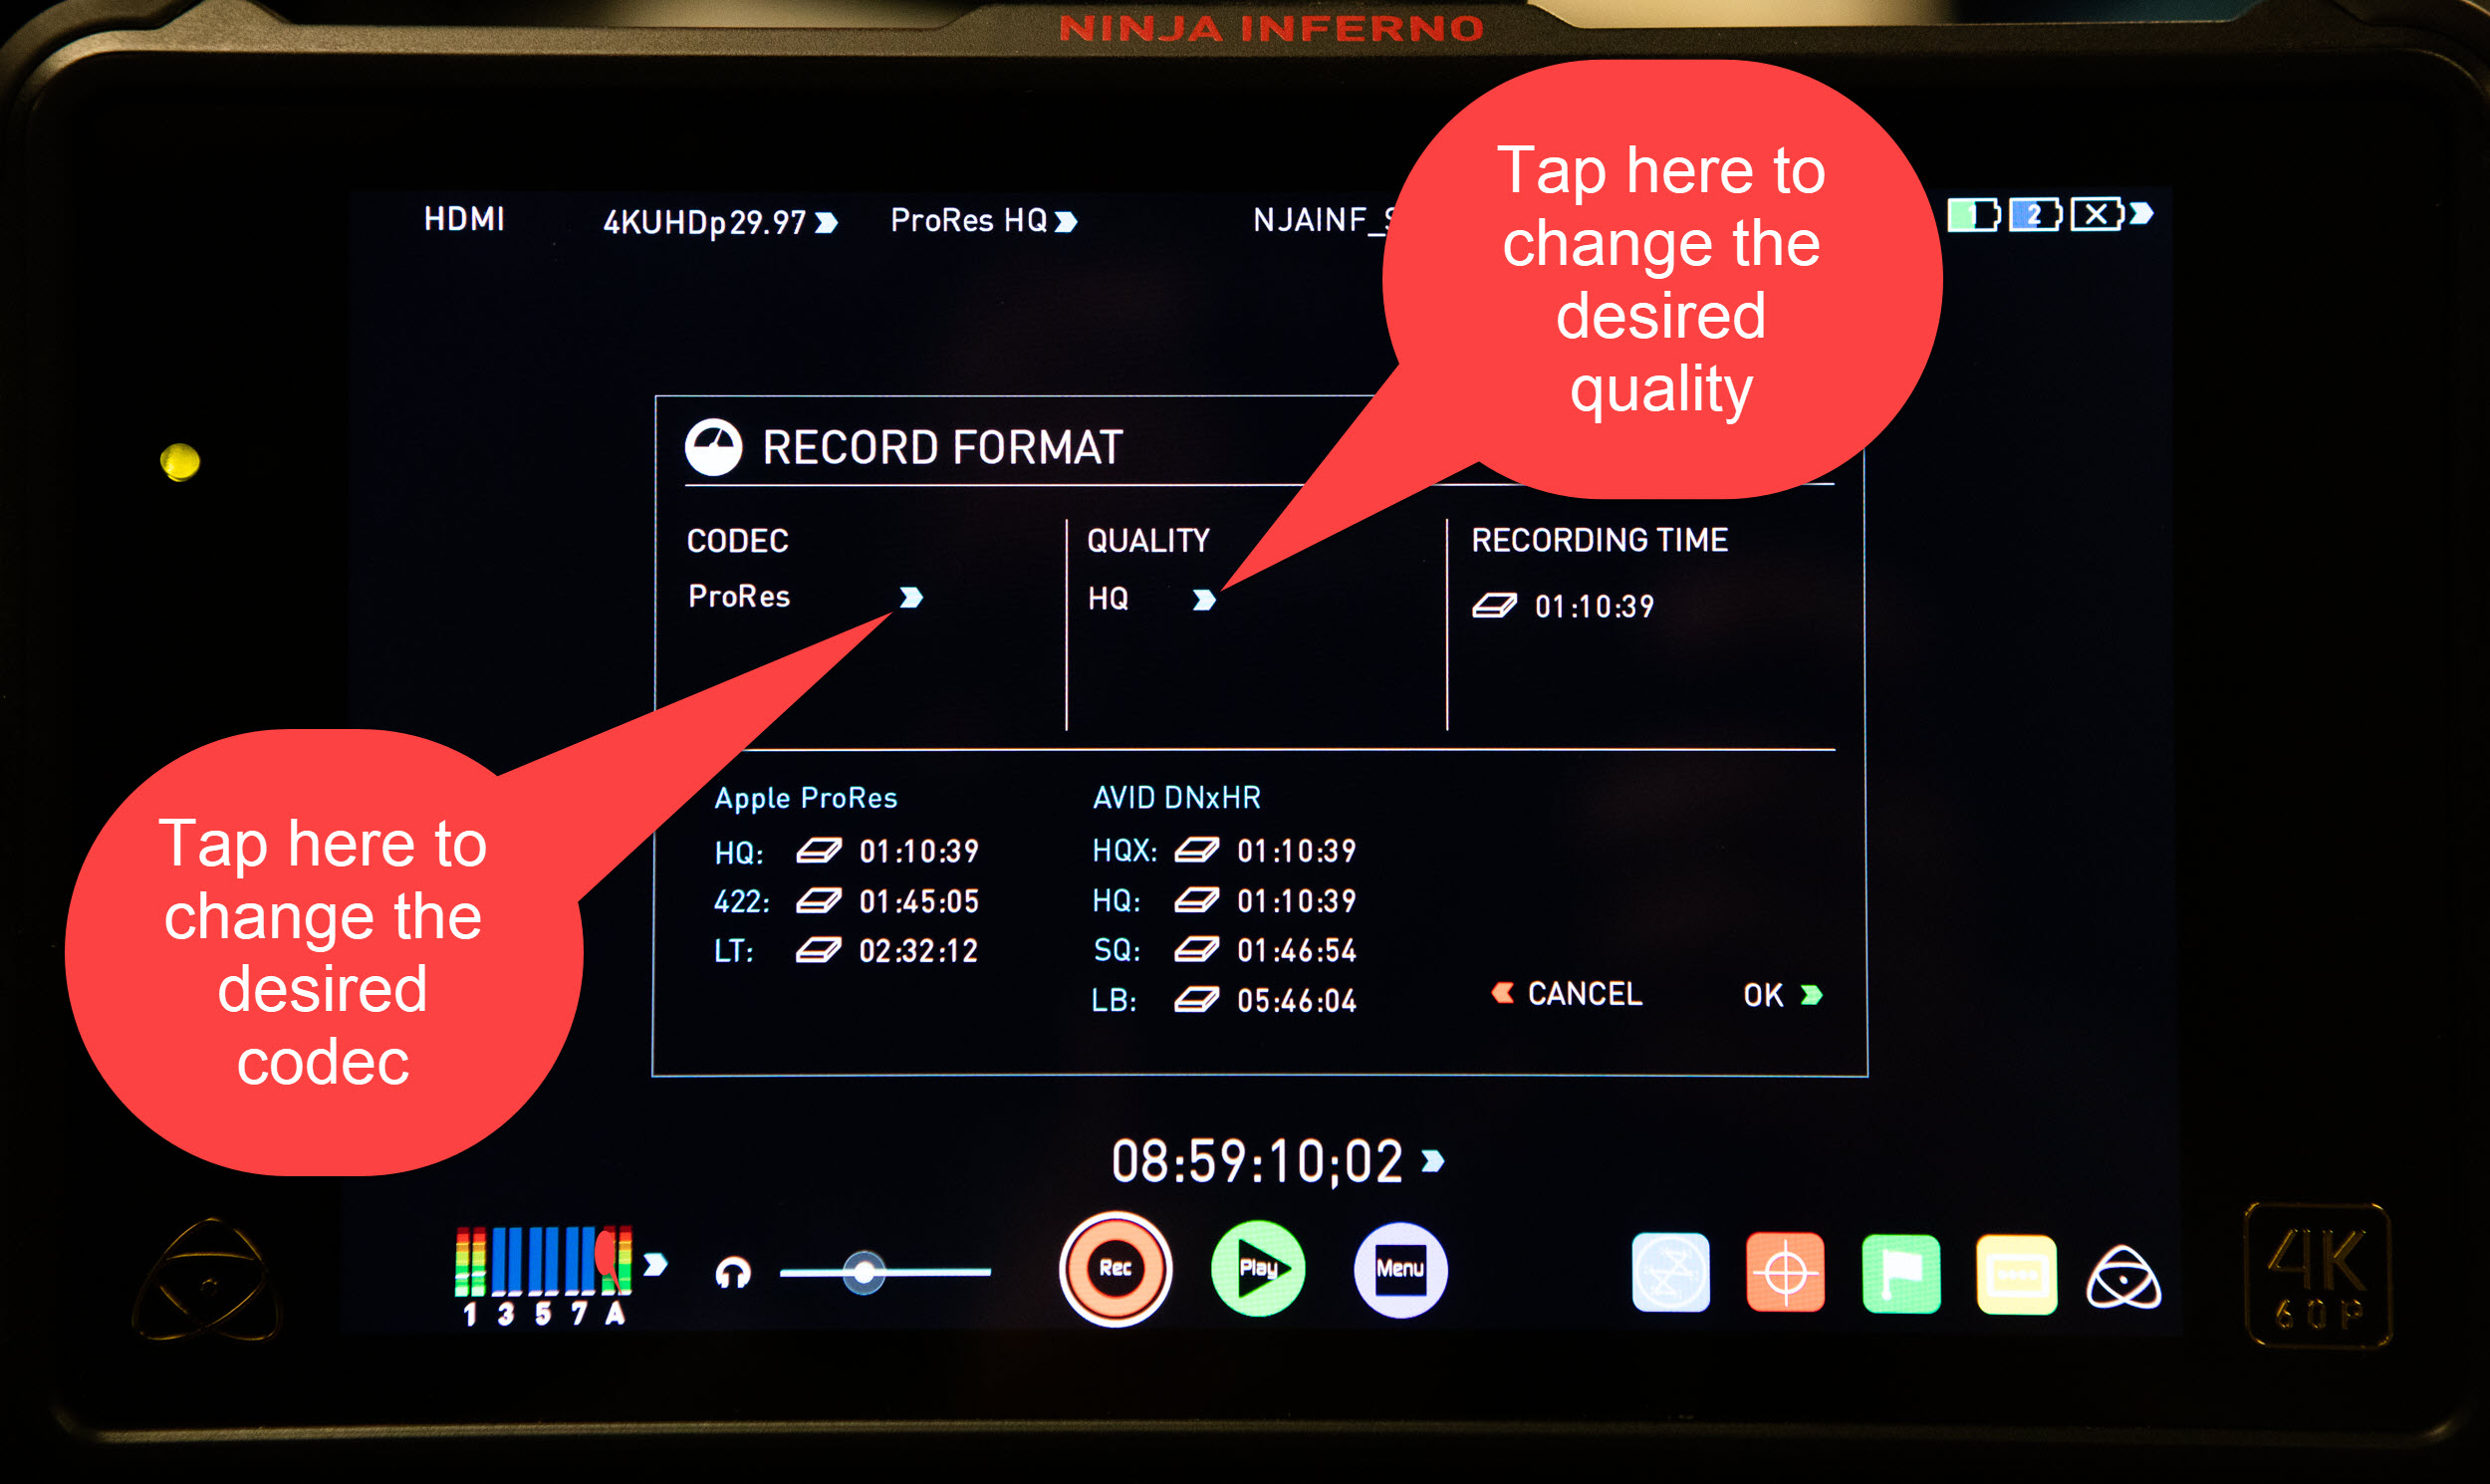
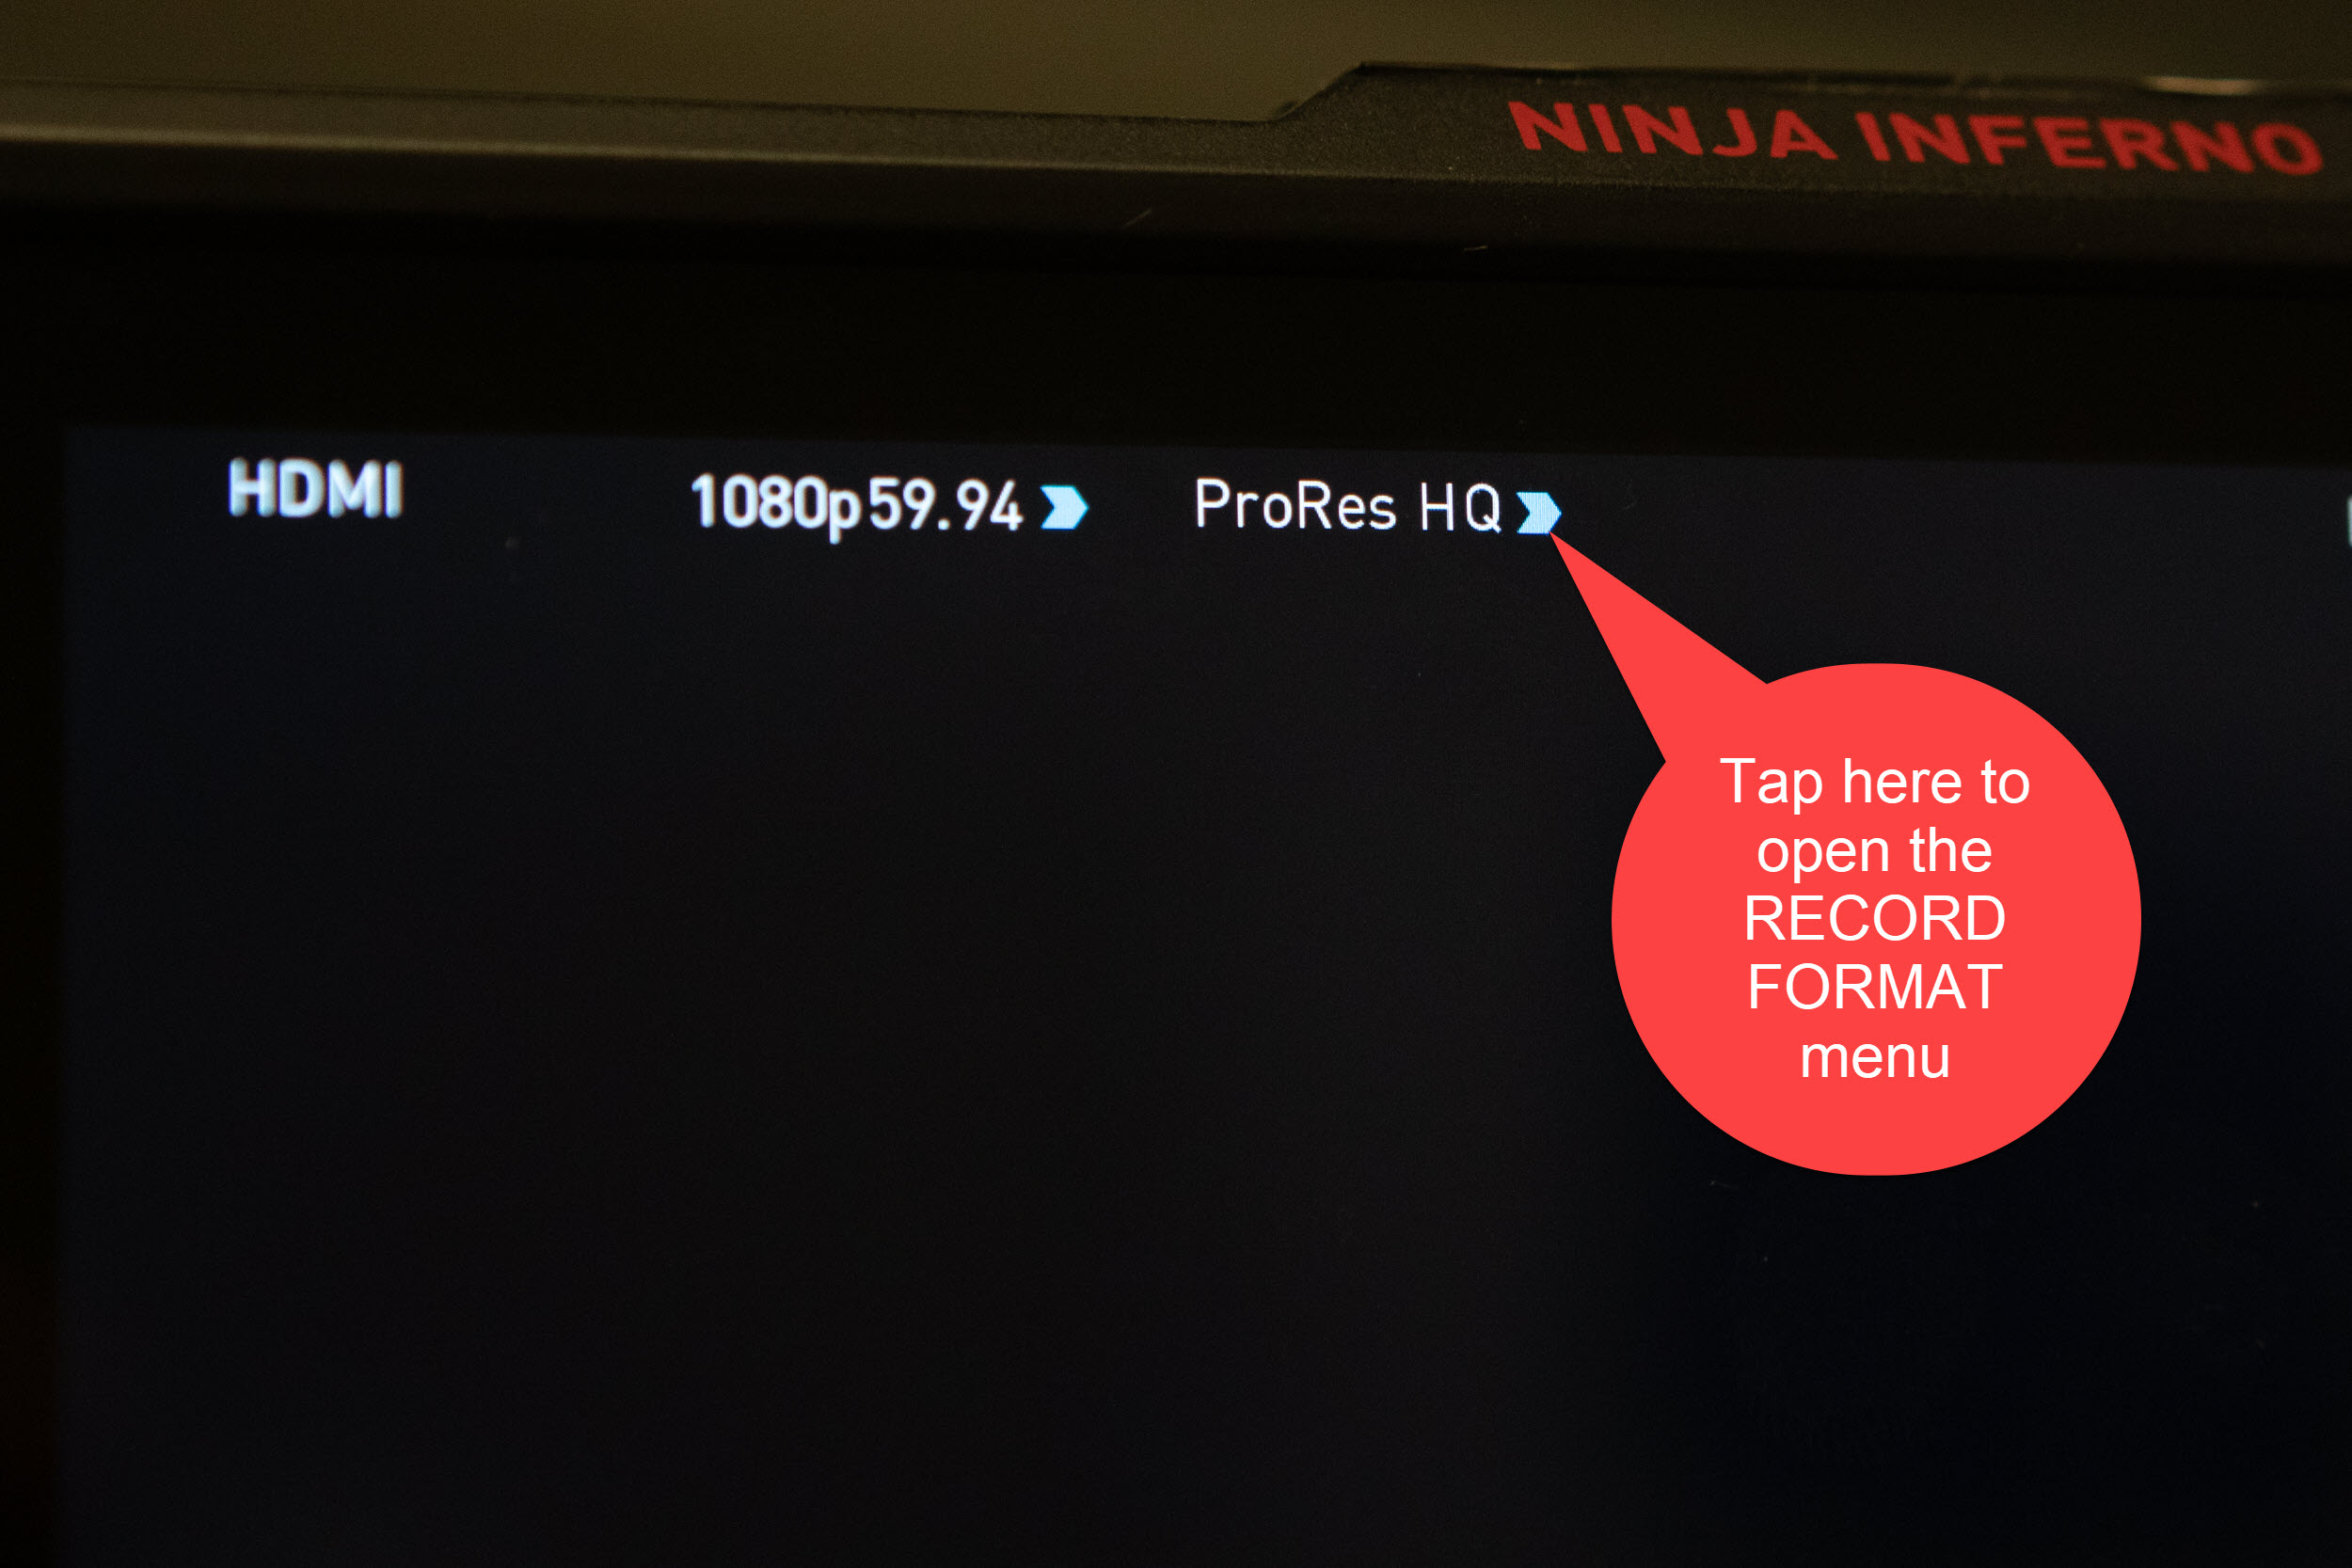
When working with 4k, the only setting on the Inferno that you need to worry about at this point is the codec and desired quality. To change both, tap the screen where the codec is currently listed (you can see that mine is set to “ProRes HQ” which is the only codec available unless you purchase the Avid DNxHR option).

Tap the currently selected codec to change quality and codec settings.
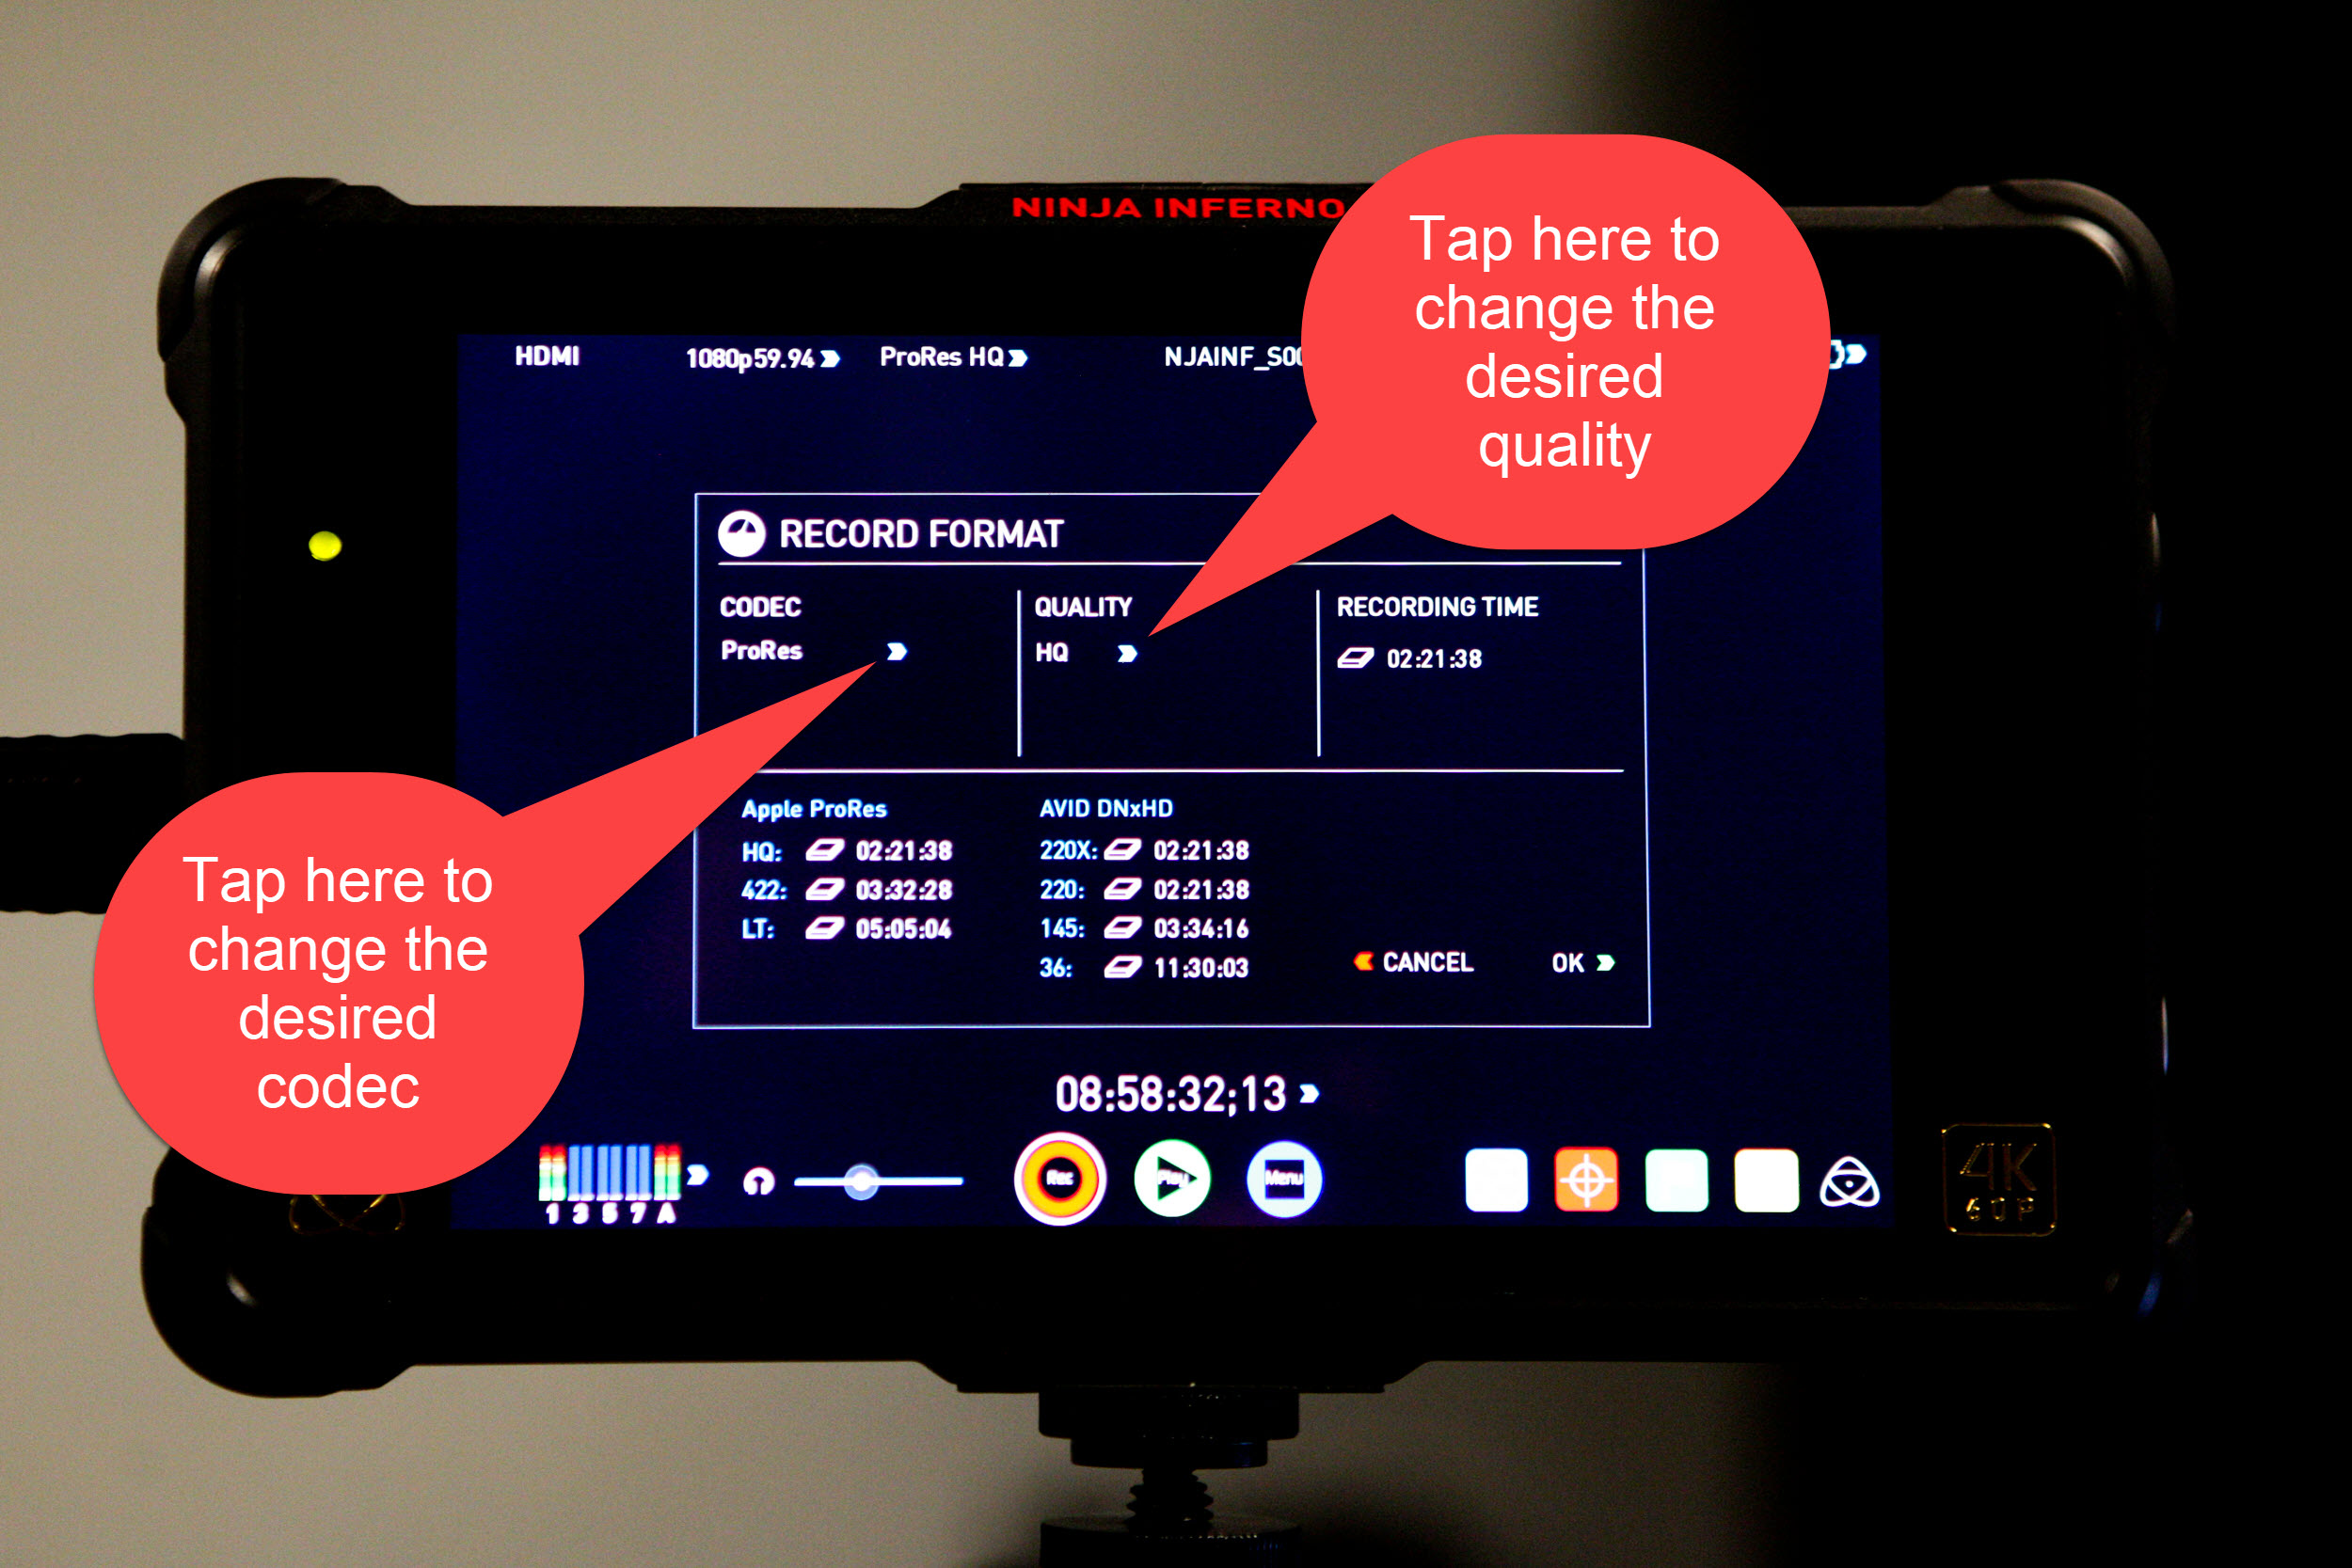
Once in the “RECORD FORMAT” screen, you can change the codec and the quality. To select the quality, touch the arrow next to the currently selected quality setting. The Inferno will allow you to cycle through the different quality settings, and will also interactively display how much recording time each setting allows you.
Using 1080(p/i) with the Atomos Inferno
If you want to record in standard HD (1080p/1080i) on the Inferno, you’ll need to go into a specific camera setting on the A7R III. To do so, hit the “Menu” button on the back of the camera, then go to page 4 of the Setup menu (the little toolbox icon). The “4k Output Sel.” setting is the first one listed. Once inside that menu item, make sure it’s set to “Memory Card + HDMI.” This setting will allow you to record in HD externally while also recording to 4k internally (if desired).
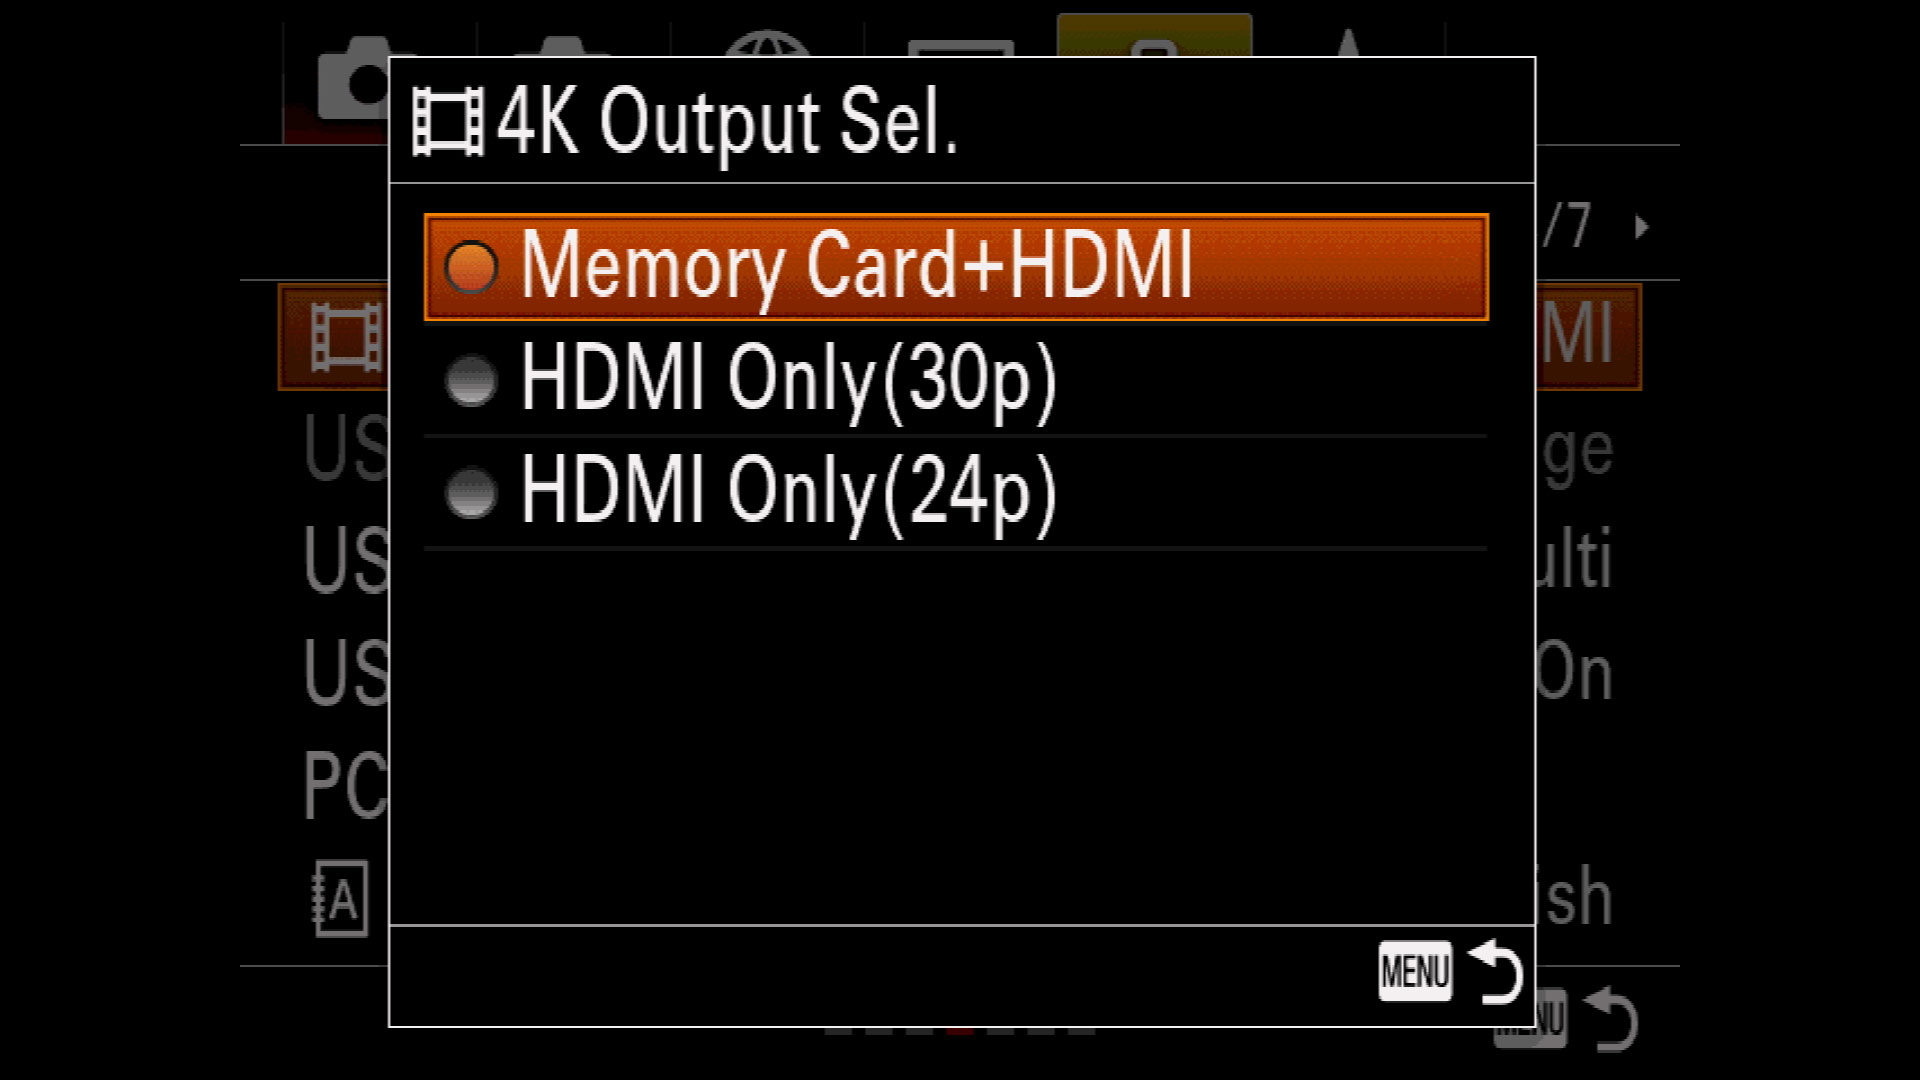
Use the “Memory Card + HDMI” setting if you’d like the Inferno to record in either 1080i or 1080p.
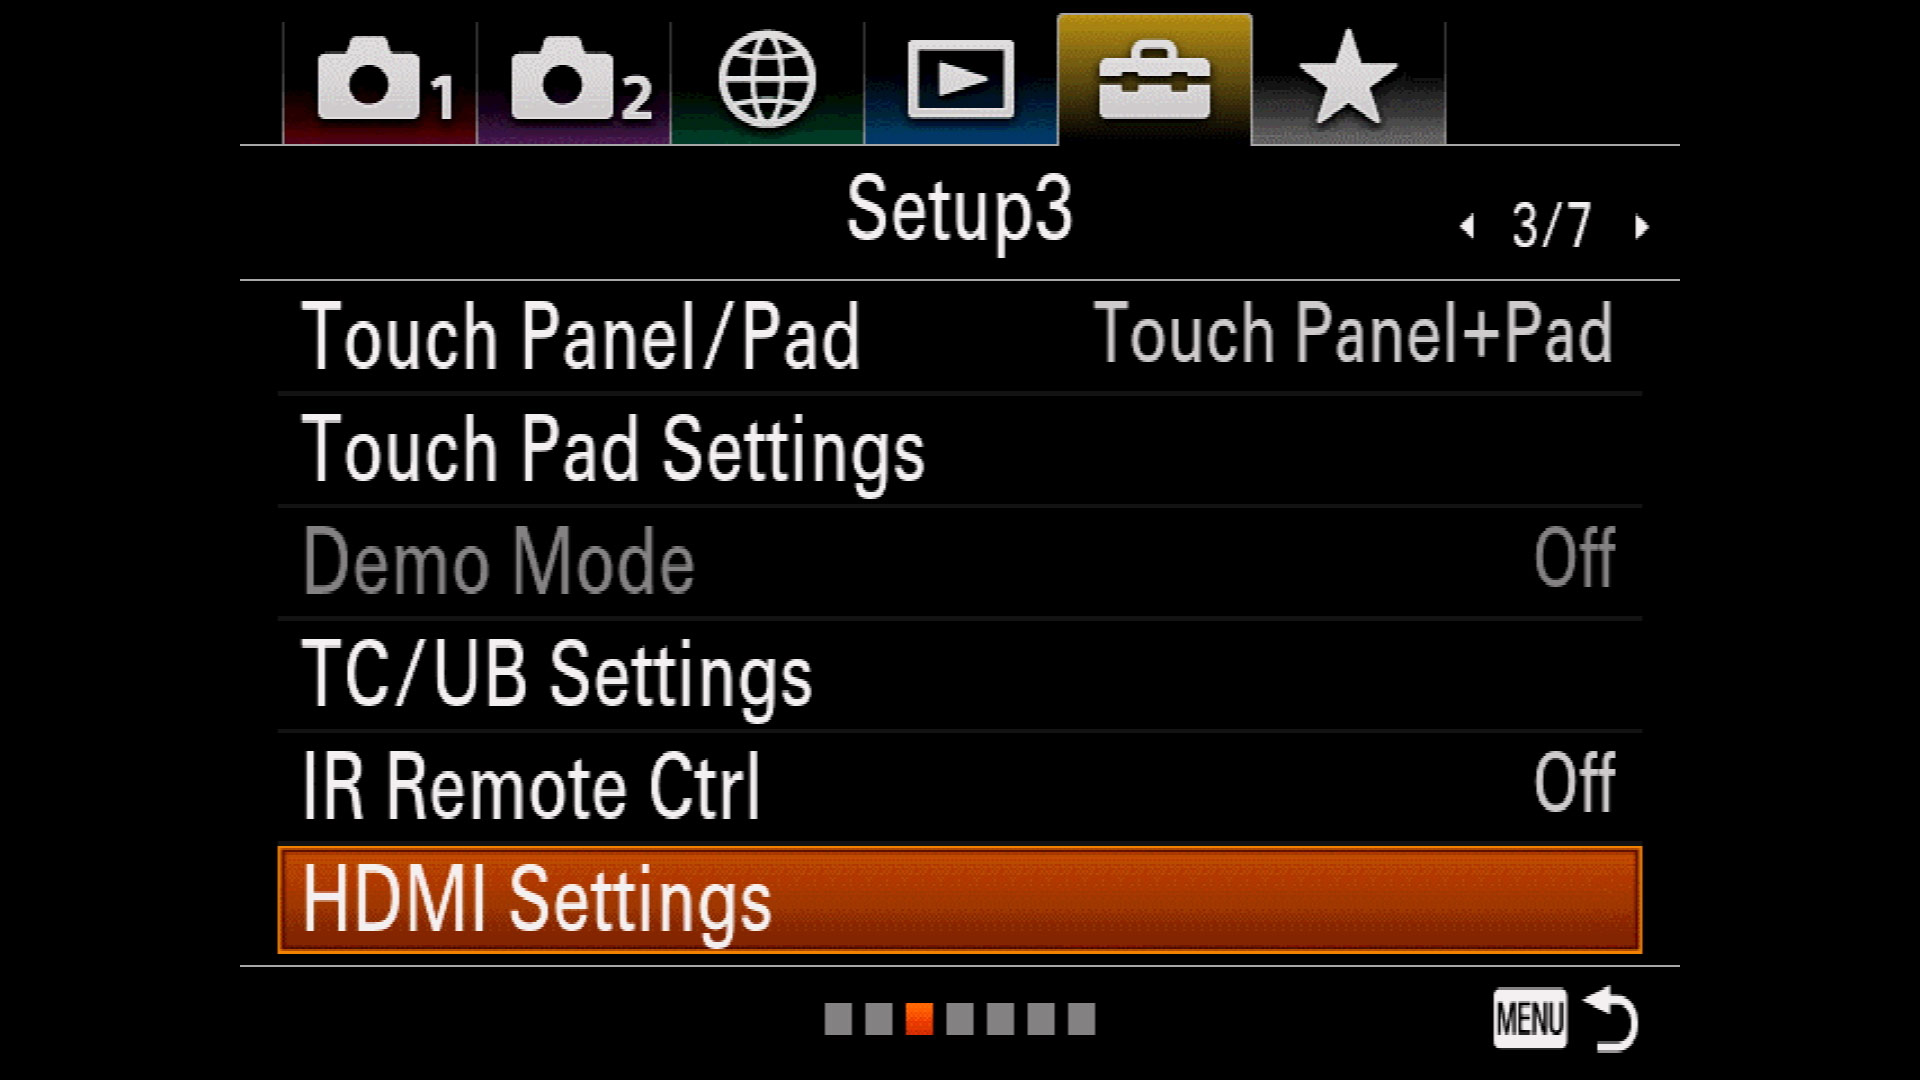
The A7R III’s HD output resolution from the HDMI port when connected to the Ninja Inferno is 4:2:2 8-Bit Full HD (1920 x 1080) at 59.94i/59.94p/29.97p. To change the frame rate settings, hit the “Menu” button on the back of the camera, then go to page 3 of the Setup menu (the little toolbox icon). At the bottom of this page you’ll see an option that reads “HDMI Settings” (shown below).
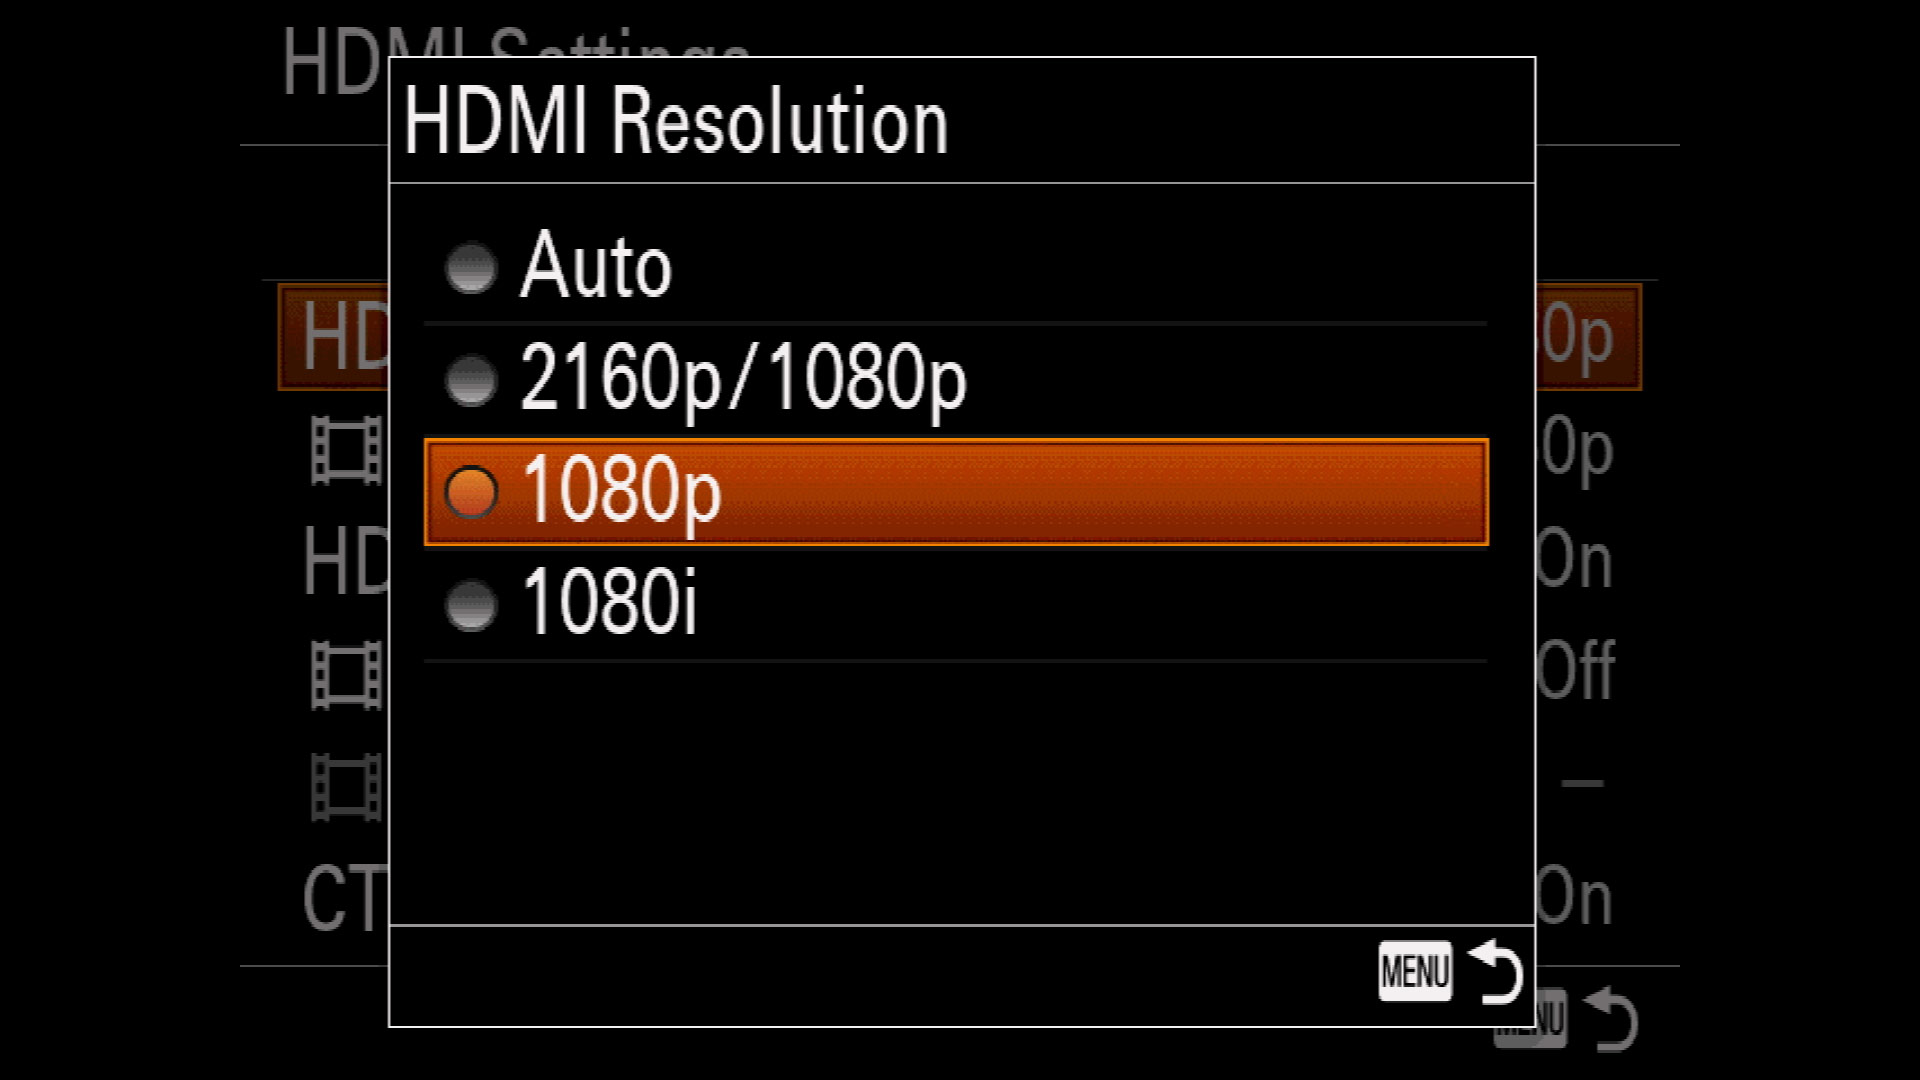
Once inside this menu item, you’ll see options for “HDMI Resolution” (shown below).

Hit the “HDMI Resolution” to change between 1080p and 1080i or to choose to record 1080p externally and 2160p internally (menu shown below).
for the frame rate, go back into the HDMI Settings and choose “24p/60p Output” (menu shown below).
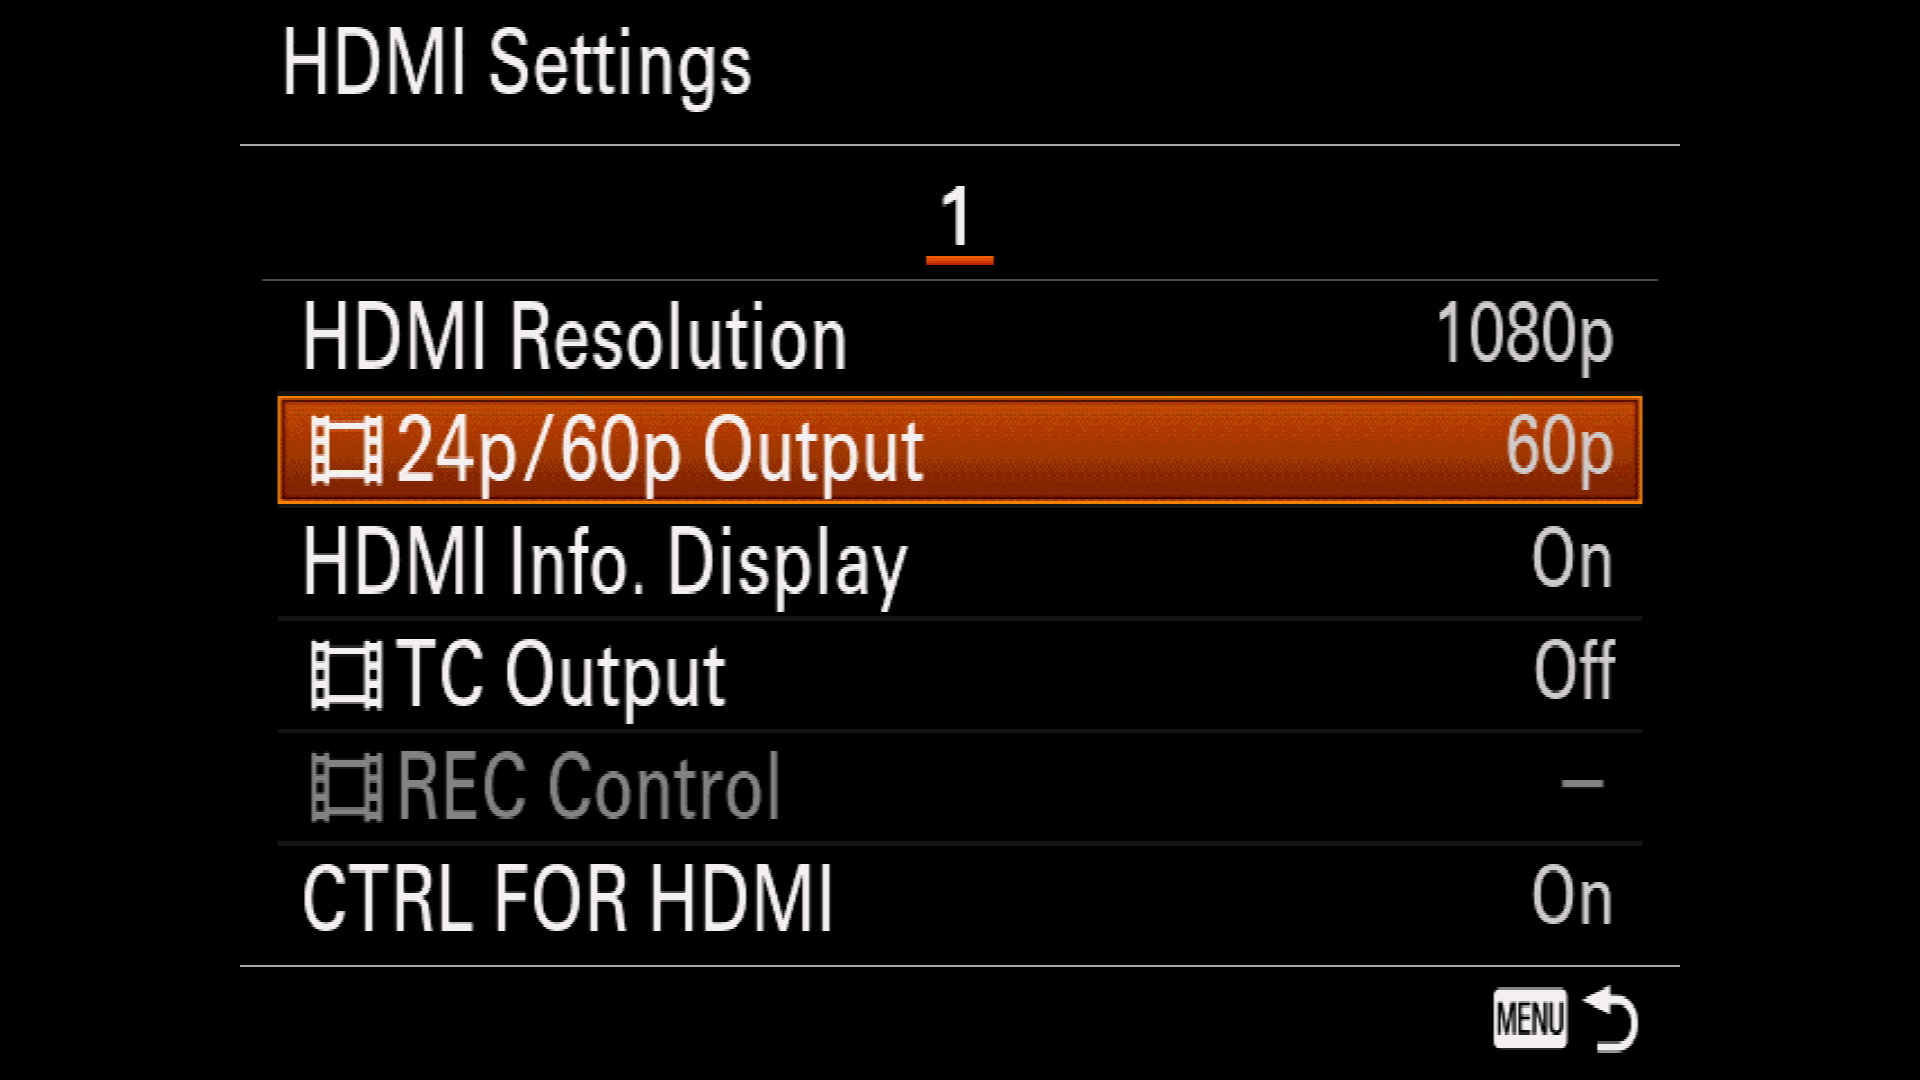
I recommend using 60p (shown below). The Inferno will work with a 24p output from the camera but it will record the footage at 60p.

You can output using either 1080i or 1080p, but the Inferno is picky about the settings. I’ll do my best to explain. It basically boils down to the Inferno only wanting to record standard HD in 60p.
If you are outputting in 1080p, the Inferno will ONLY record at 59.94. No exceptions. The option to change frame rates will be inactive on the Inferno.
If you are outputting in 1080i, the Inferno will allow you to choose to record at either 1080p at 29.97 (using a 2:2 pulldown) or 1080i at 59.94 (no pulldown).
If you attempt to output at 24p, the Inferno will record at 60p.
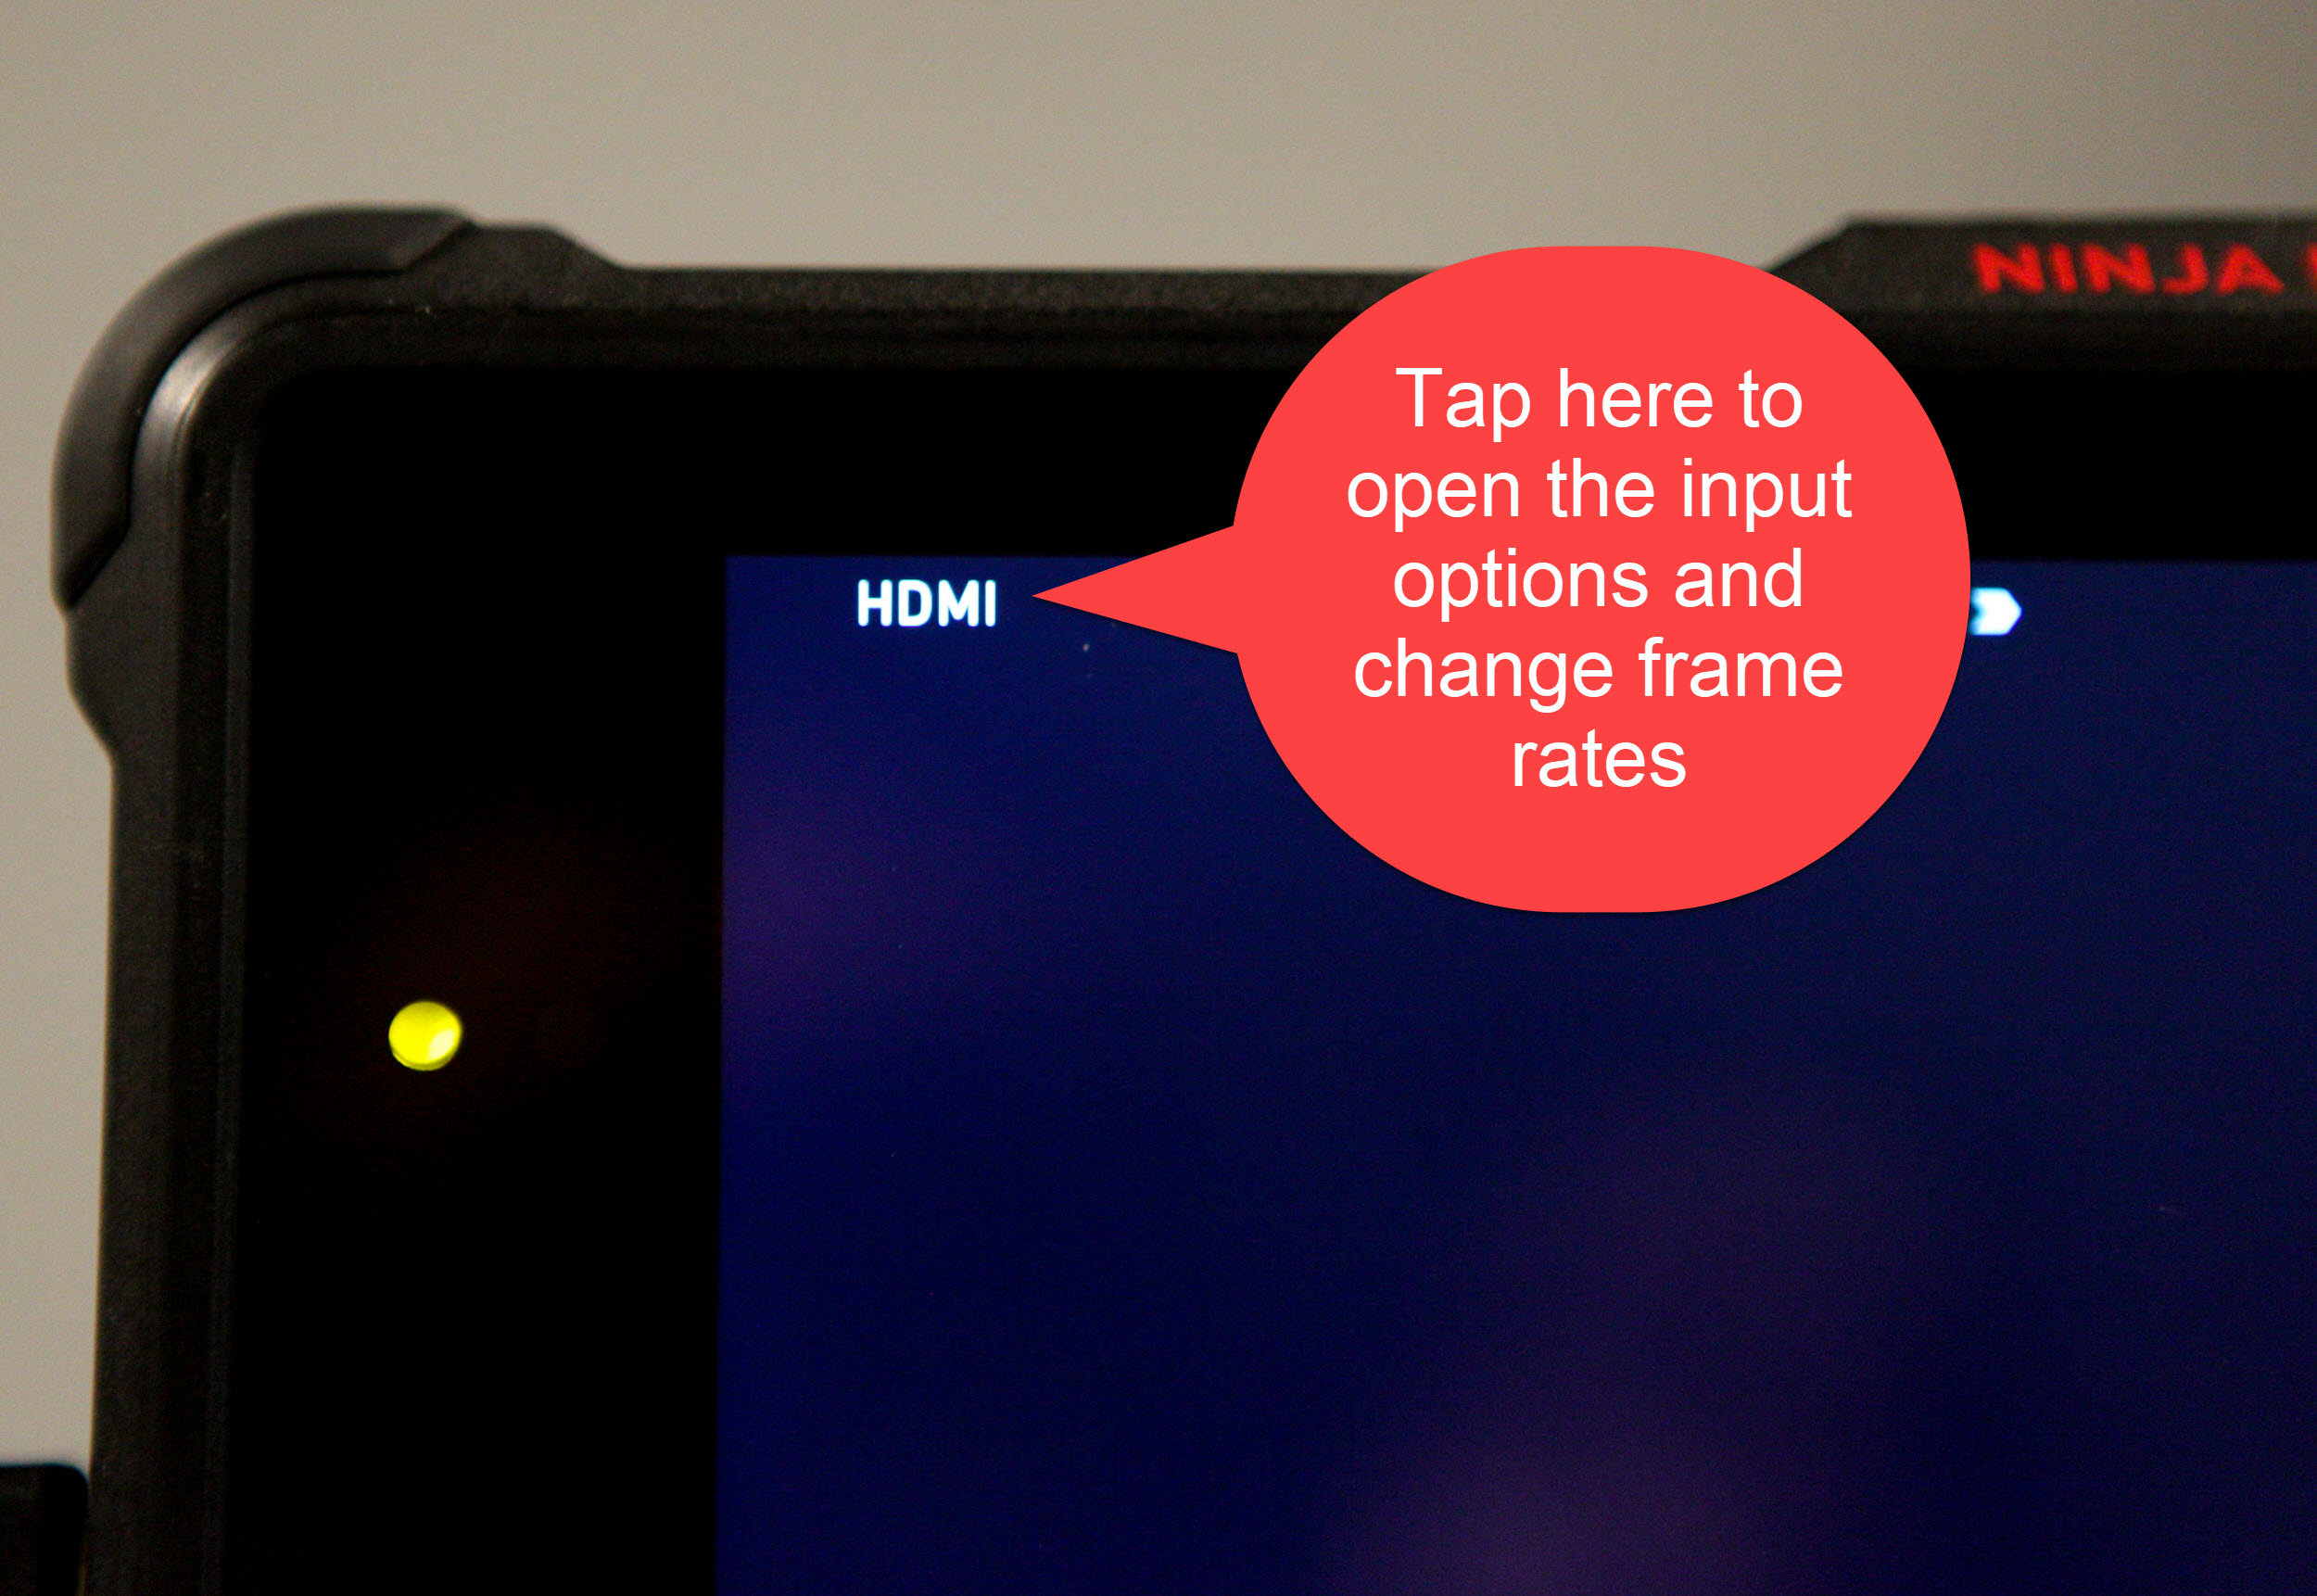
If you are using 1080i and want to change the desired frame rate that the Inferno will record in, tap where it says “HDMI” on the top left of the Inferno’s display as shown below.
To change the frame rate, tap the little blue arrow to cycle through the options as shown below.
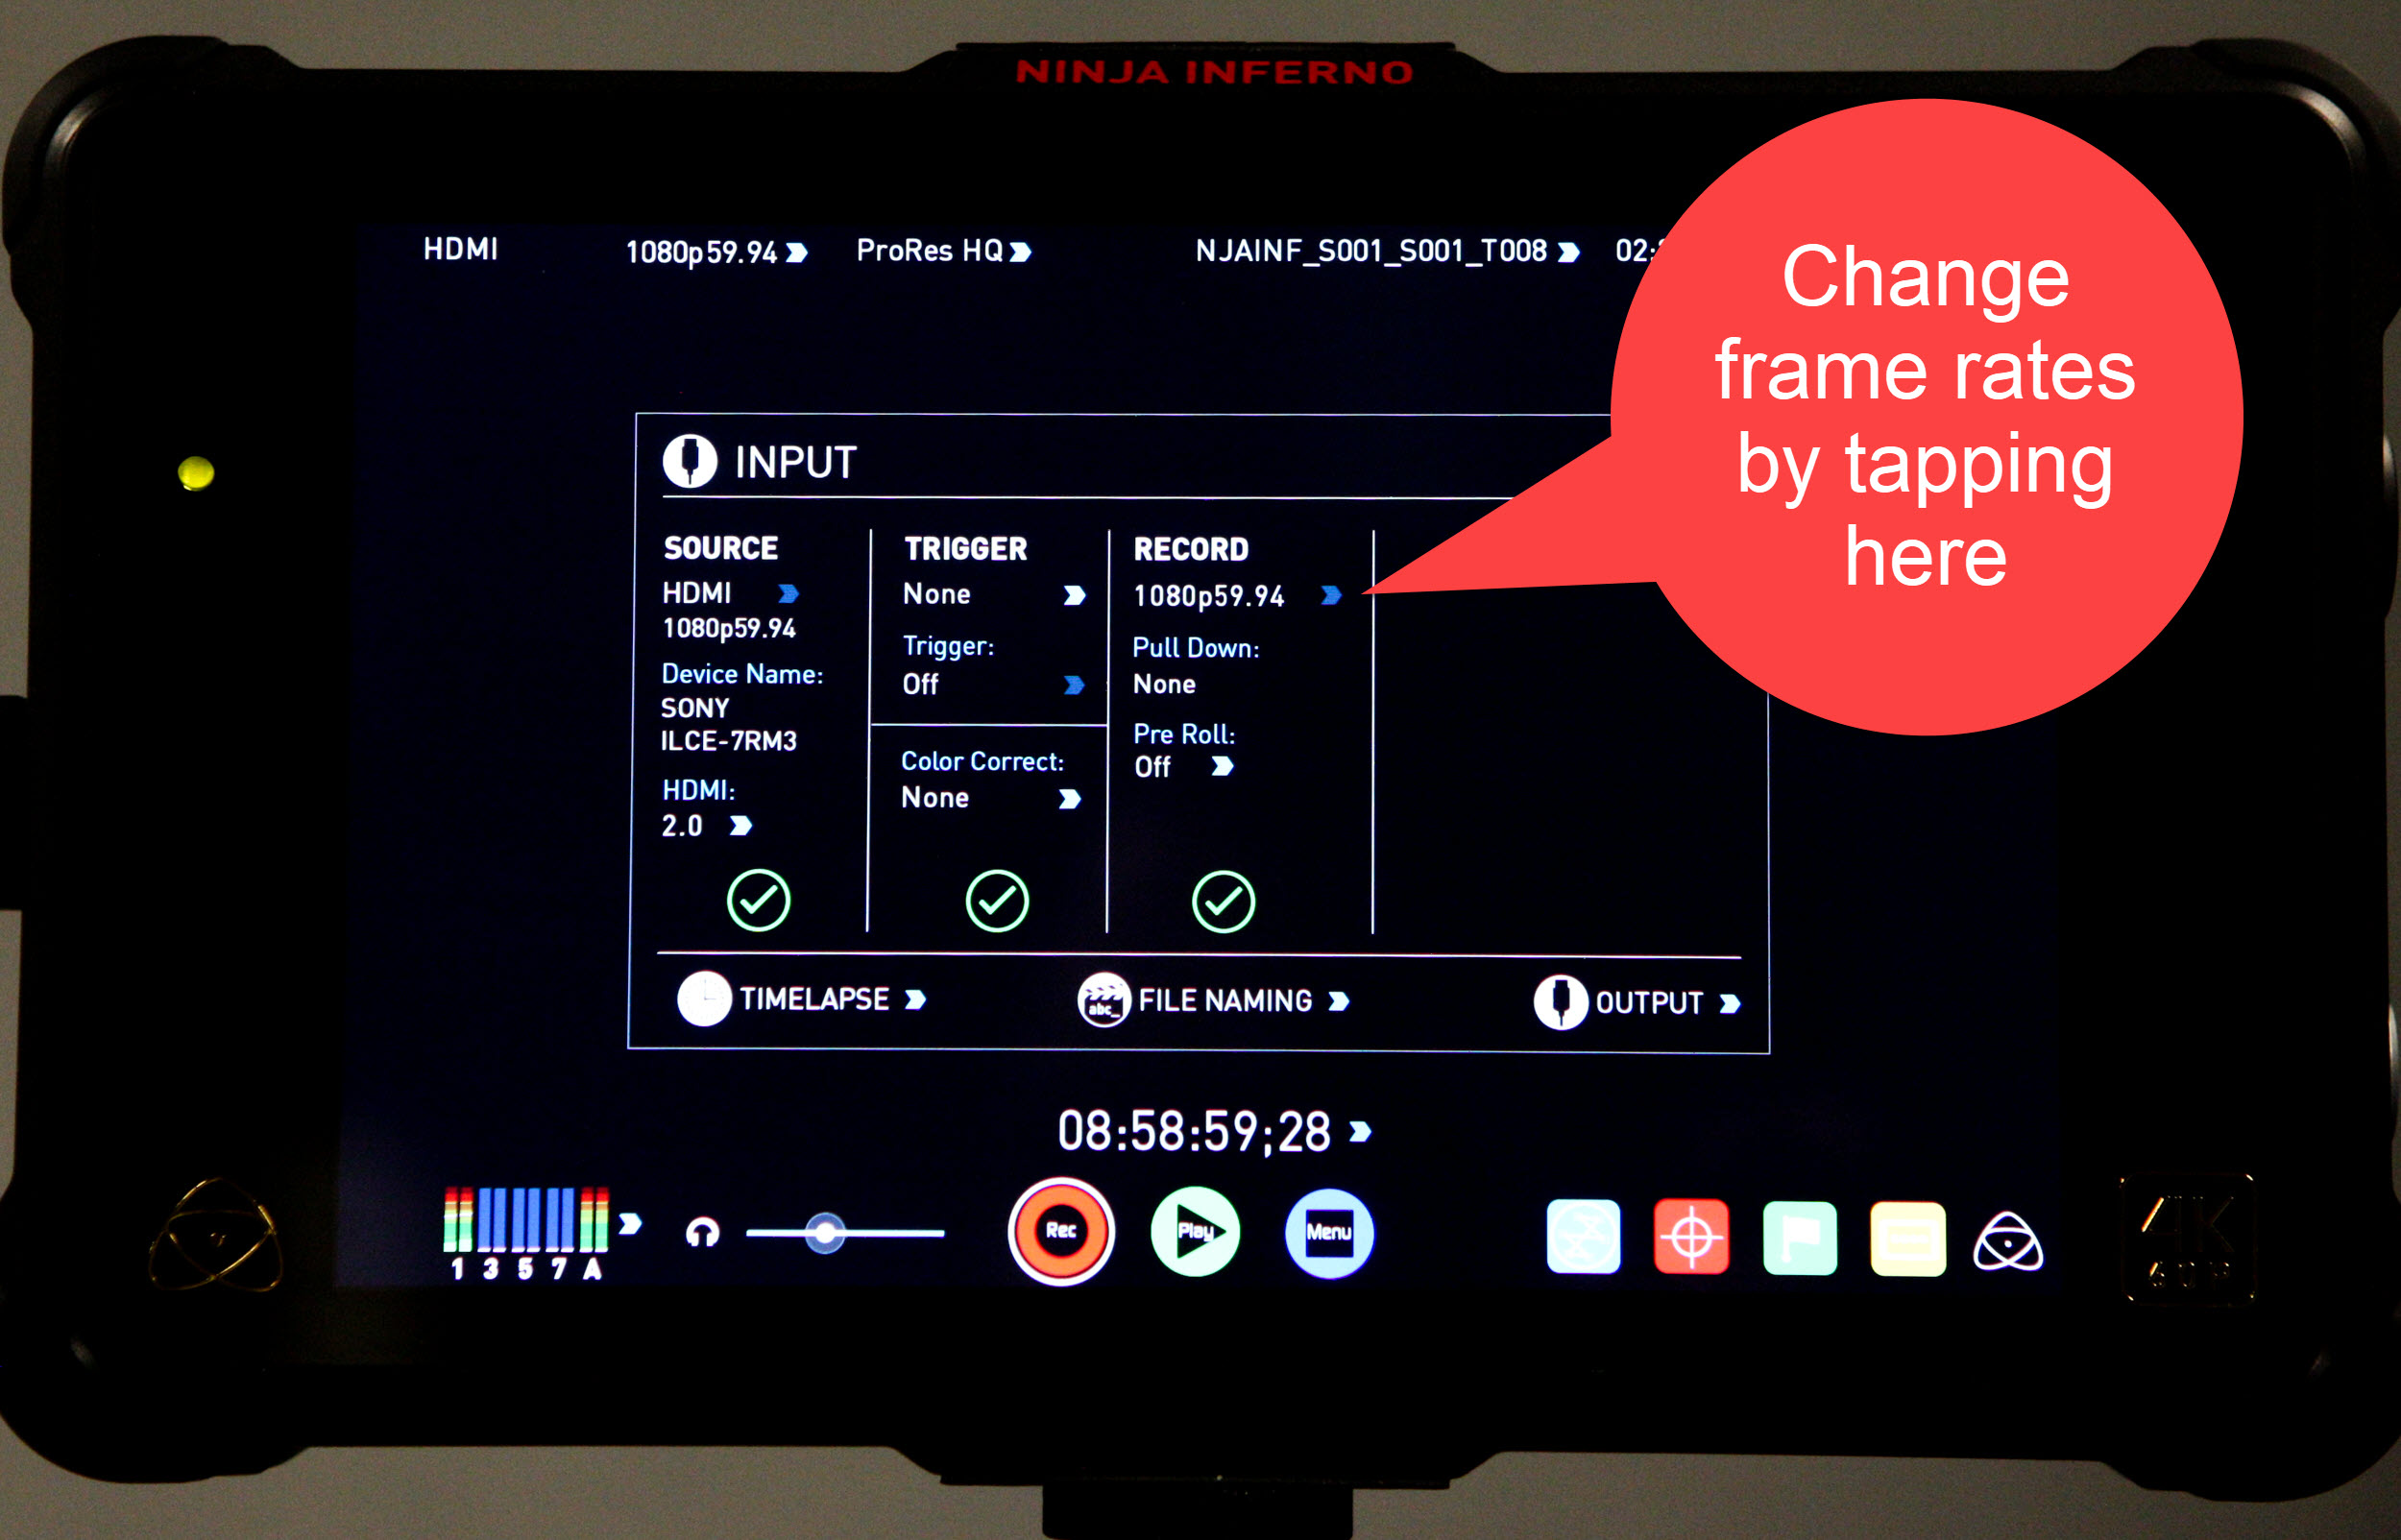
To change the codec, tap the screen where the codec is currently listed (you can see that mine is set to “ProRes HQ” which is the only codec available unless you purchase the Avid DNxHR option). The “RECORD FORMAT” window will open on the Inferno.
To select the quality, touch the arrow next to the currently selected quality setting. The Inferno will allow you to cycle through the different quality settings, and will also interactively display how much recording time each setting allows you.
One Last Setting
This is unlikely to happen, but if you happen to see a bunch of menu items on the Inferno from the camera, you can get rid of those. To do so, hit the “Menu” button on the back of the camera, then go to page 3 of the Setup menu (the little toolbox icon) and scroll down to the list menu item which reads “HDMI Settings”.
Once inside that menu option, make sure the “HDMI Info. Display” option is turned off.. The Inferno records whatever it shows on its monitor (other than its own menu items). It’s literally “what you see is what you get.”
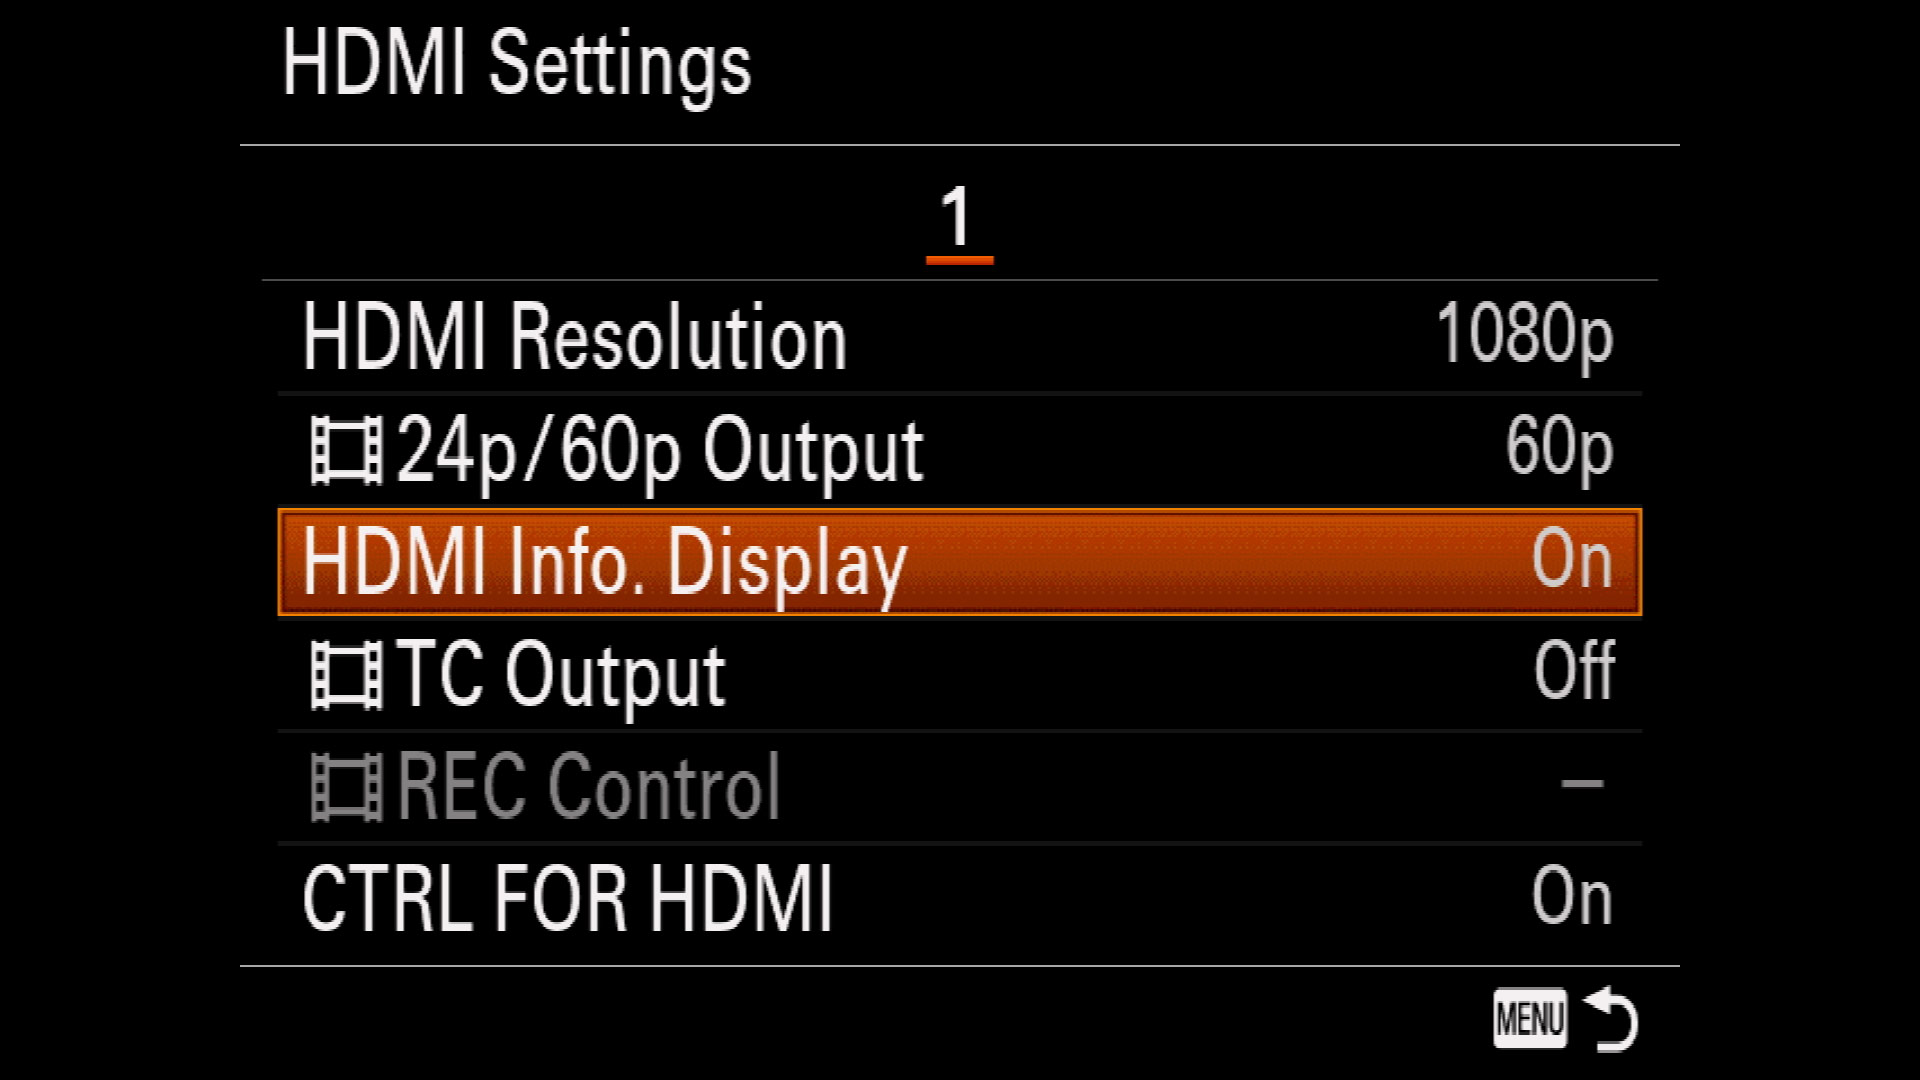
Be sure to set this setting to “Off” before you start recording!
That’s it! The beauty of this system is that you can now record for much longer than the default recording time that’s inherent to the camera, plus there’s far less wear and tear on the camera’s sensor.
Battery Life
While the Ninja Inferno solves the problem of allowing you to record for longer periods of time than the camera default, what about battery life on the camera? Sadly, the standard battery on your camera won’t last very long without a bit of help. Fortunately, there is a solution.
The setup that I put together utilizes these four pieces of equipment (around $200 total):
- EasyAcc Monster 20000mAh Power Bank ($37.99) – this is your “battery”
- Tether Tools Case Relay Camera Power System ($99.99)
- Tether Tools Relay Camera Coupler ($44.99)
- Tether Tools StrapMoore ($18.95)
Here’s how it works:
If you are using a tripod, the first thing to do is attach the Tether Tools StrapMoore to a leg on your tripod, as shown below:
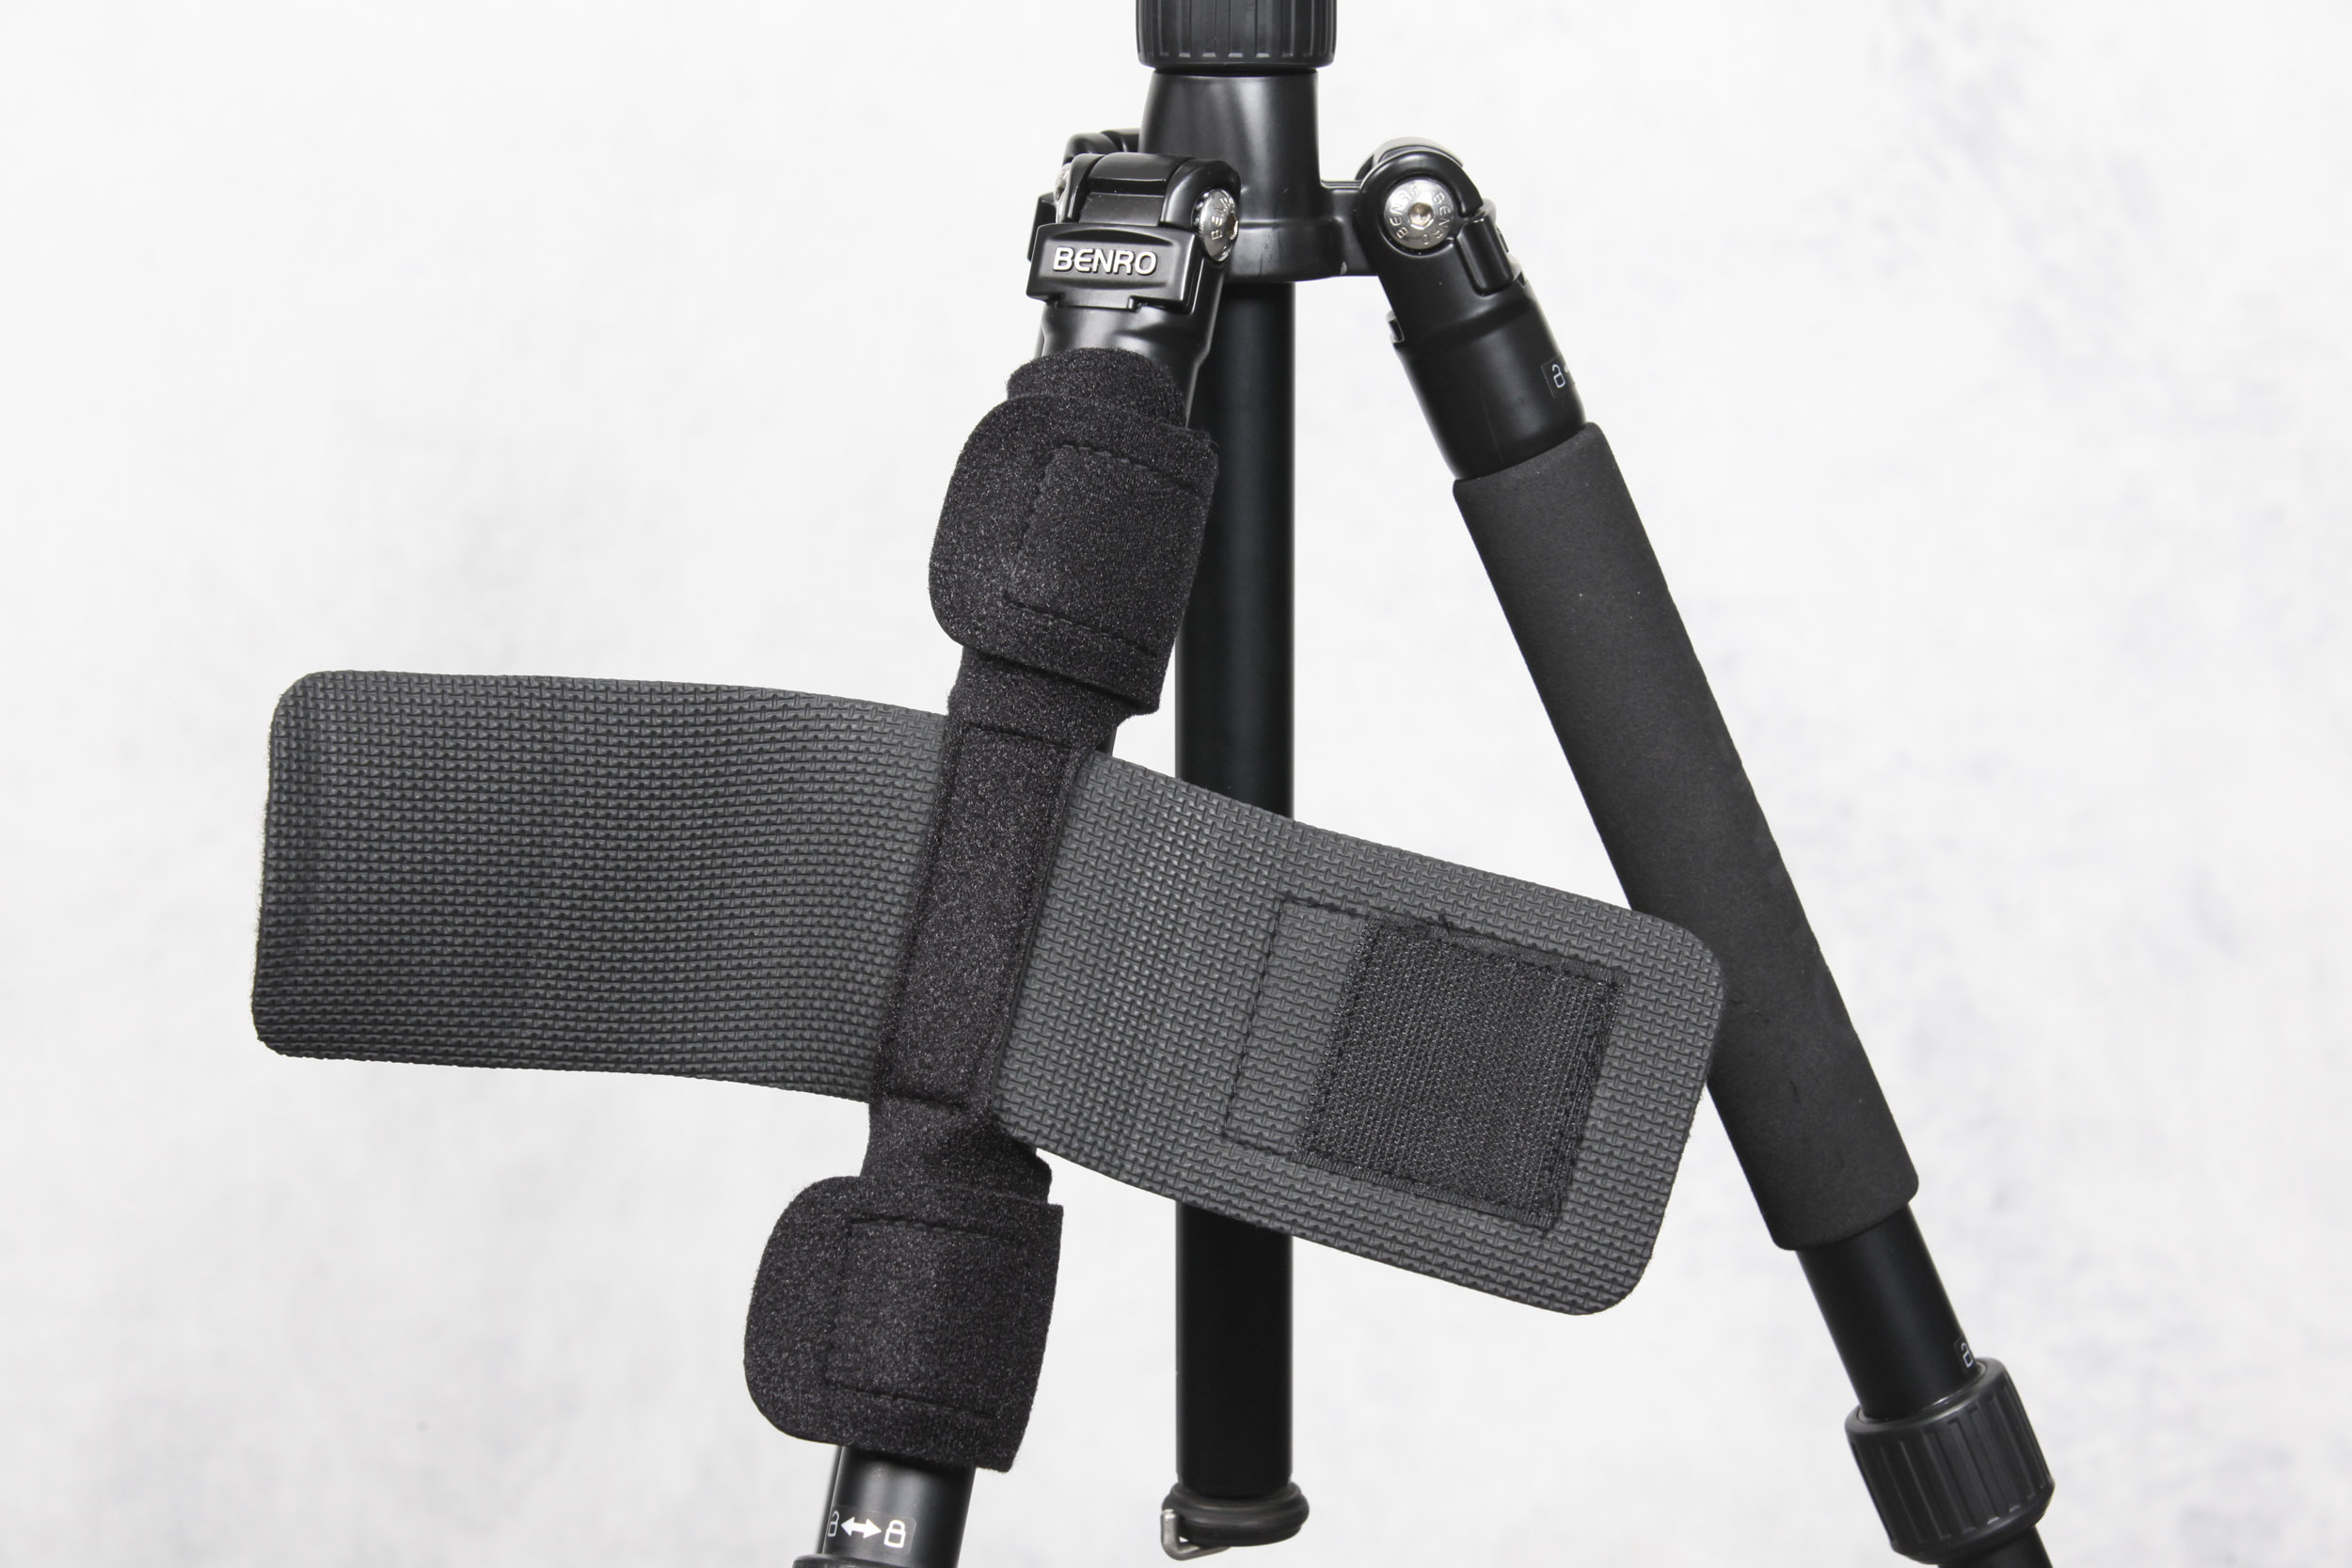
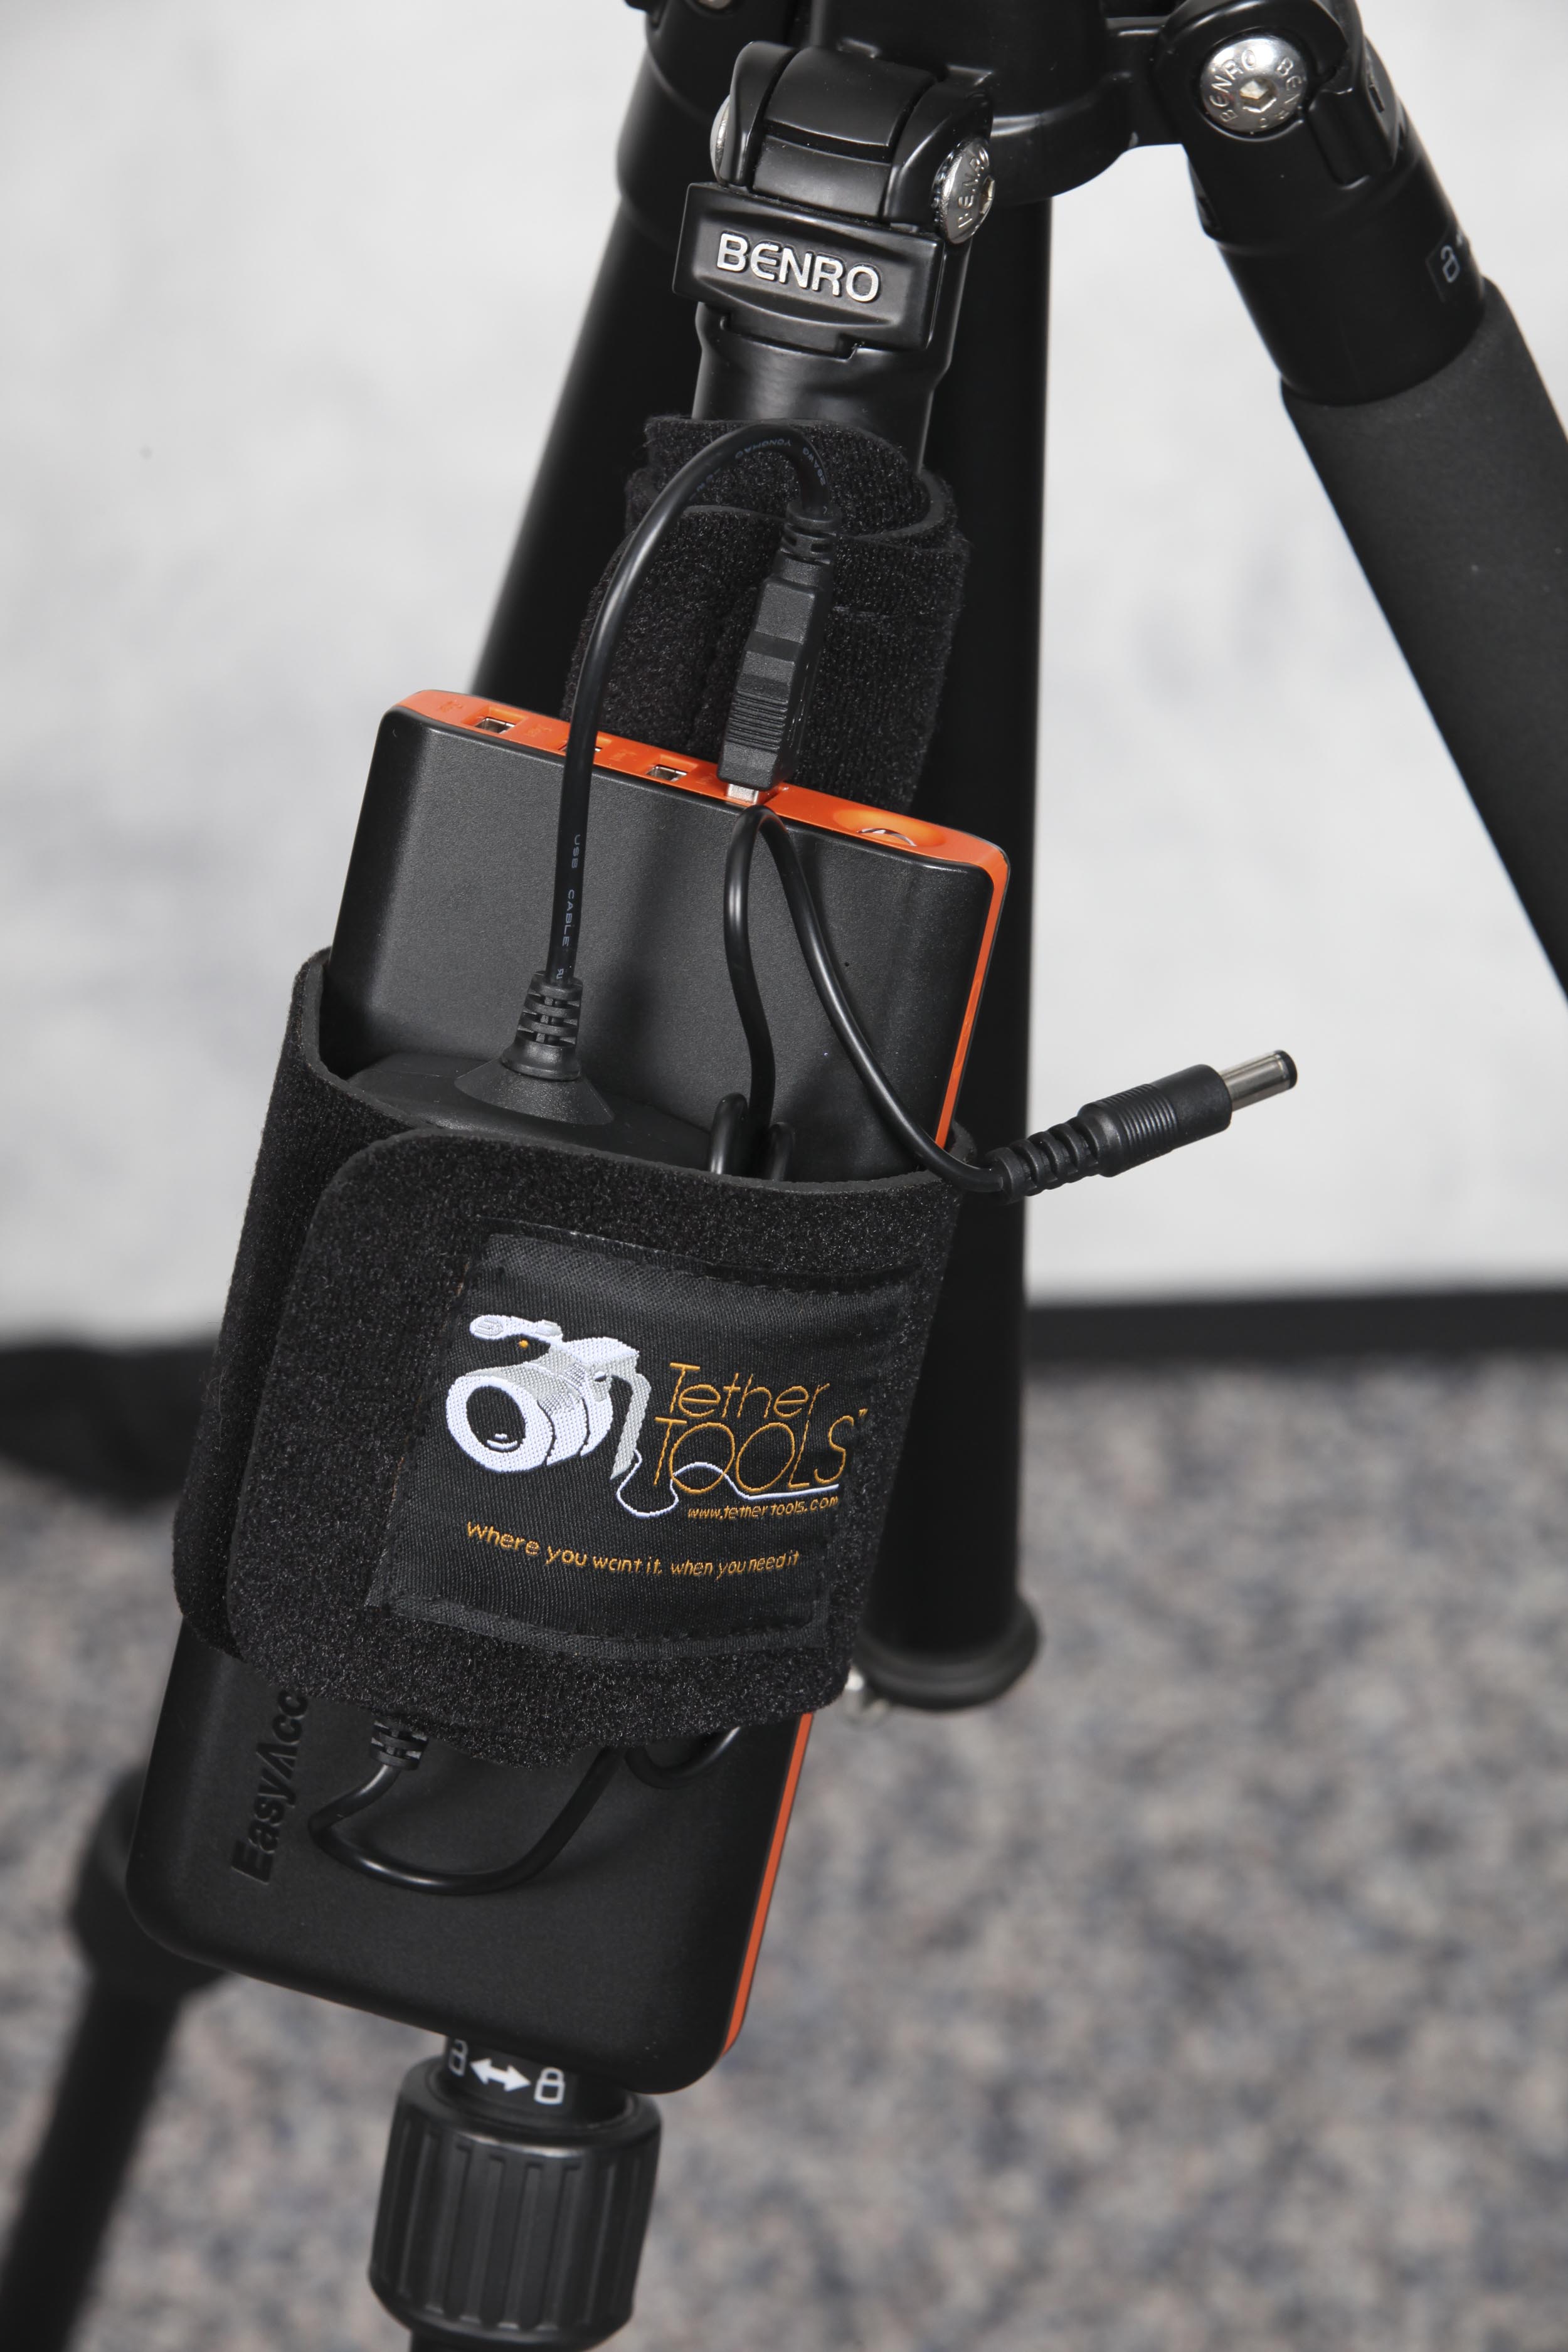
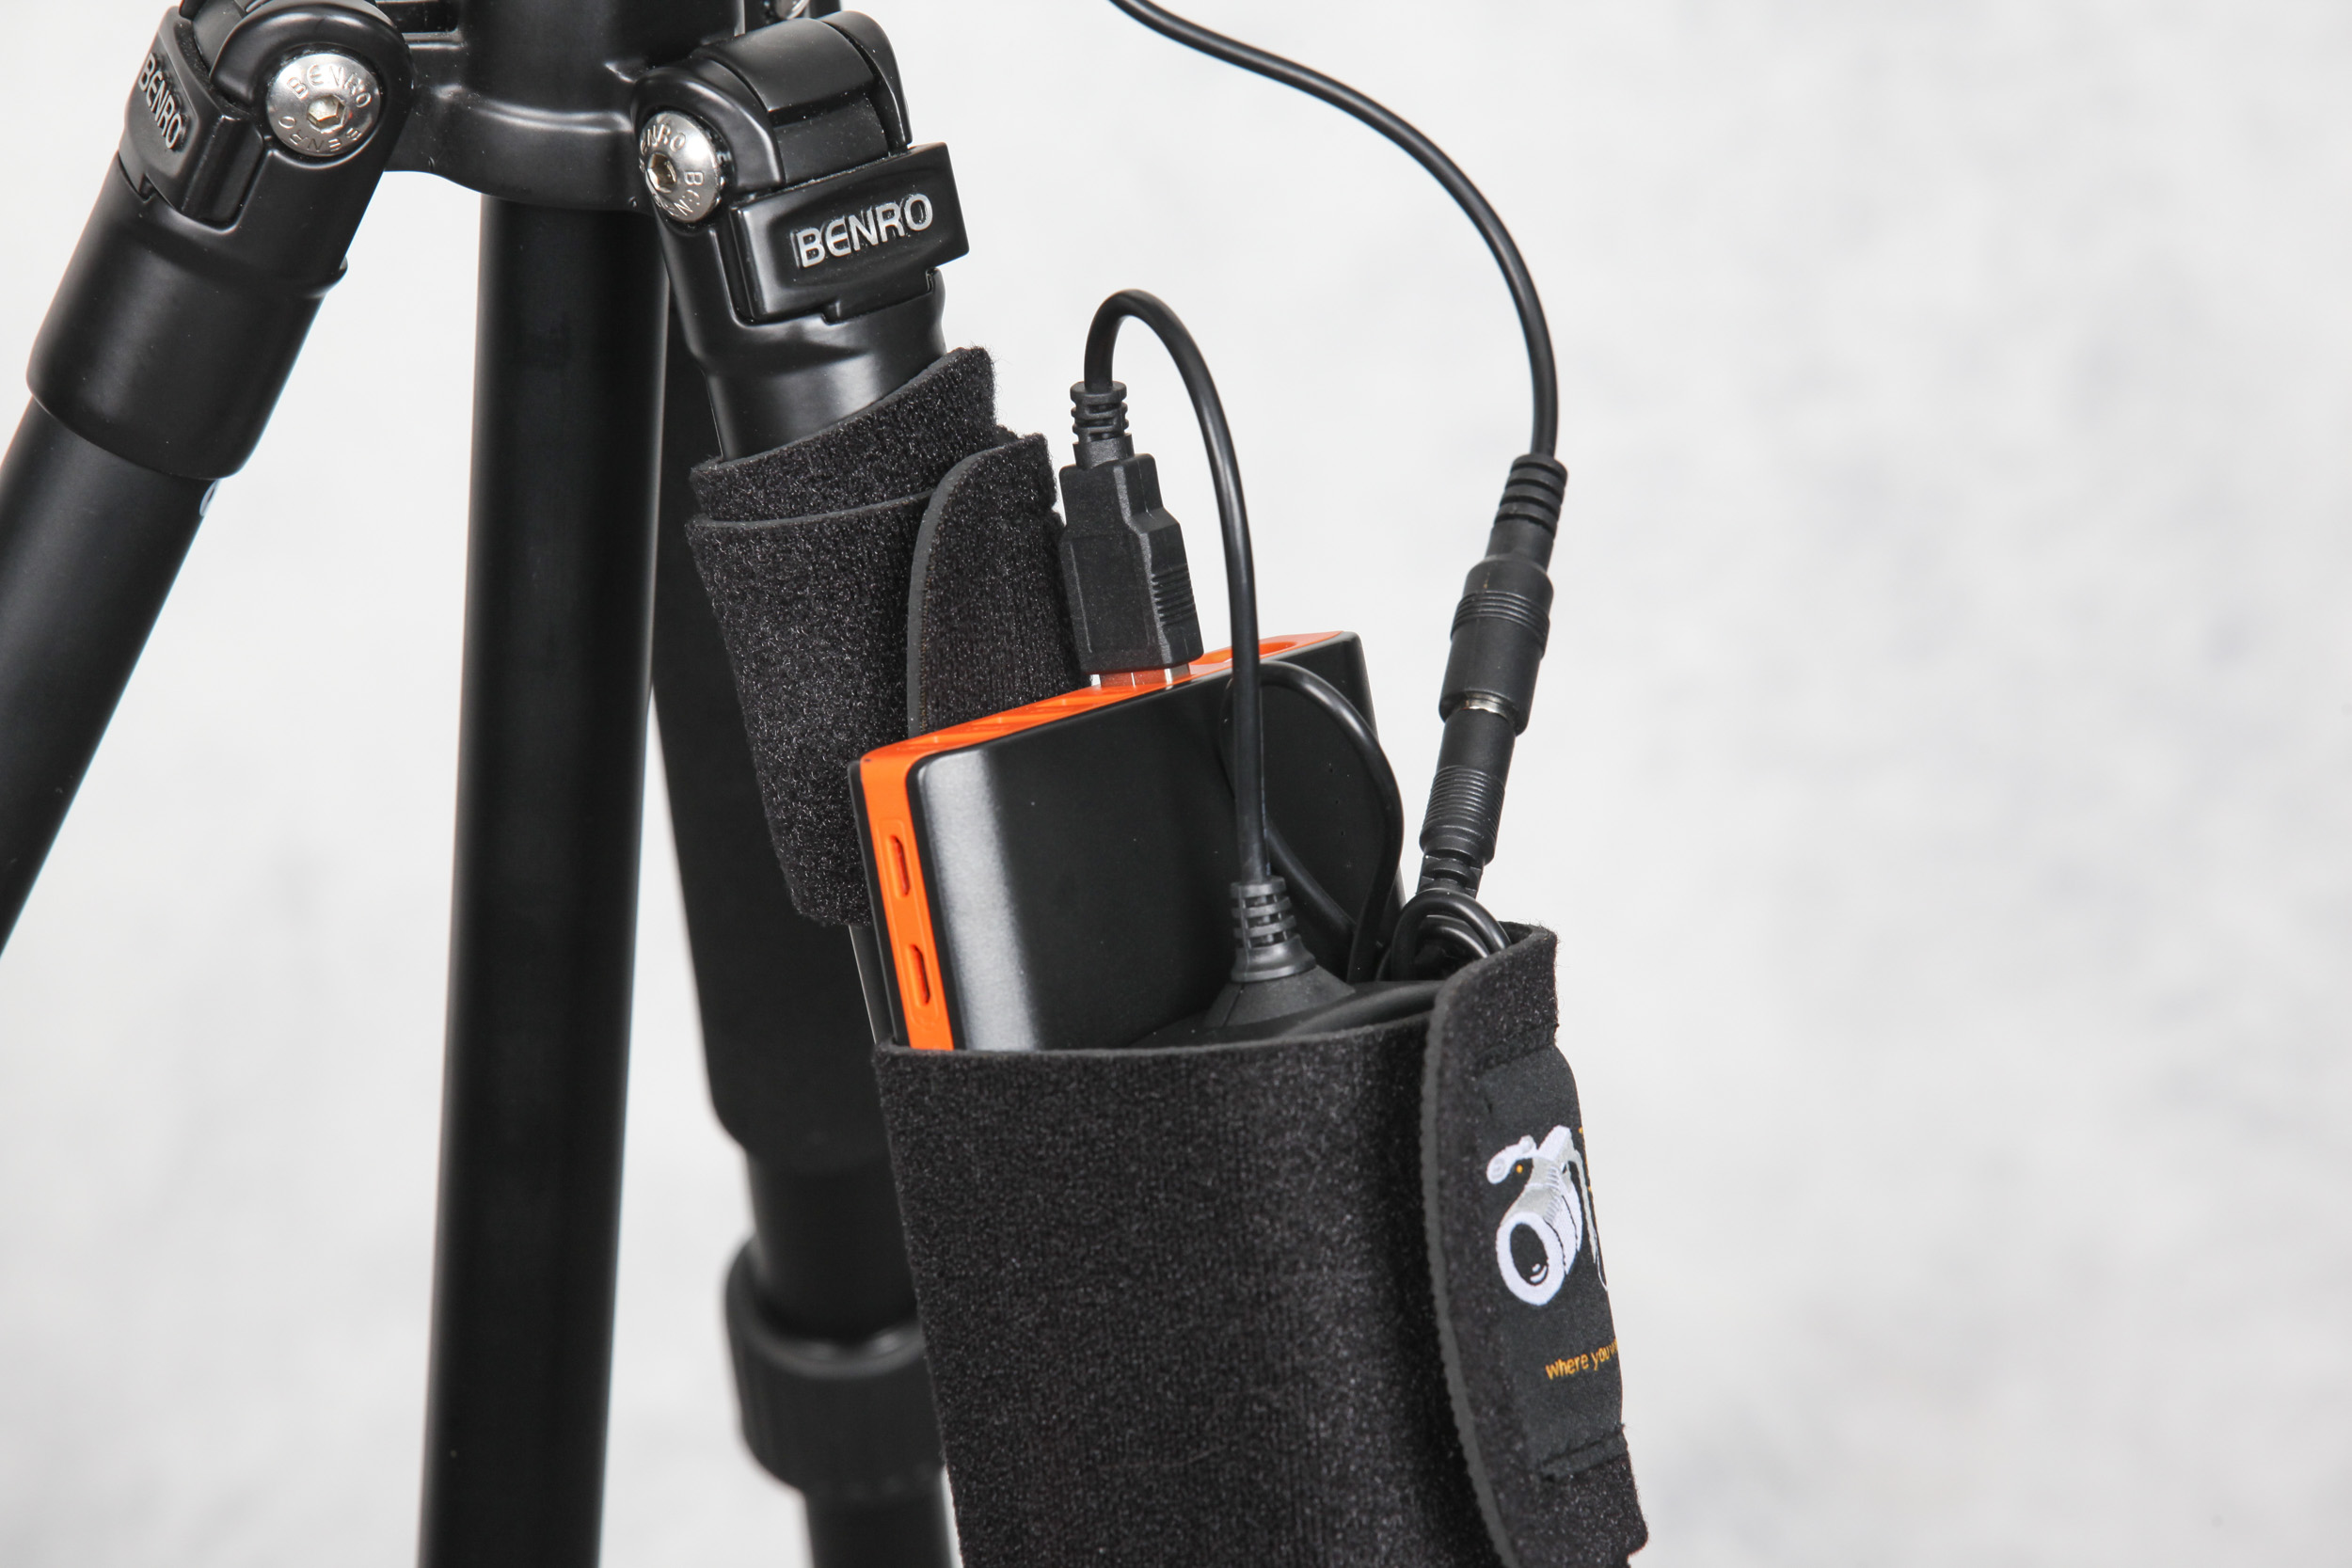
Next, grab the power bank and the Case Relay Camera Power System. For my setup, I stacked the Power System on top of the power bank (in the middle), then holding both together, wrapped the TetherTool’s StrapMoore’s strap around them. The power bank and Power System are held in place both by the StrapMoore’s strap as well as the heavy-duty GripperElastic that the StrapMoore is lined with on the inside. The StrapMoore can hold up to two pounds without a problem.
Once attached, you’ll have both the power bank and the Case Relay Power System fitted snugly to your tripod leg via the StrapMoore. Go ahead and plug the USB cable from the Case Relay Camera Power System into any of the available USB ports on the power bank. Once that’s done, your setup should look similar to what’s shown below:
The only thing left to do now is attach the Tether Tools Relay Camera Coupler and plug it into your camera where your original battery was. Keep in mind that in order for this to work, you’ll need to remove the battery door on your camera body. Shown below are both ends of the Camera Coupler plugged in:
Once the Camera Coupler is attached, you can turn your camera on and enjoy hours of hot-swappable battery life!
If you need a continuous power source for a long video shoot, that can be done as well. I used a Samsung power adapter and plugged the USB cable from the Case Relay power system into it (shown below). If you don’t have a power adapter handy, this one will do the job.
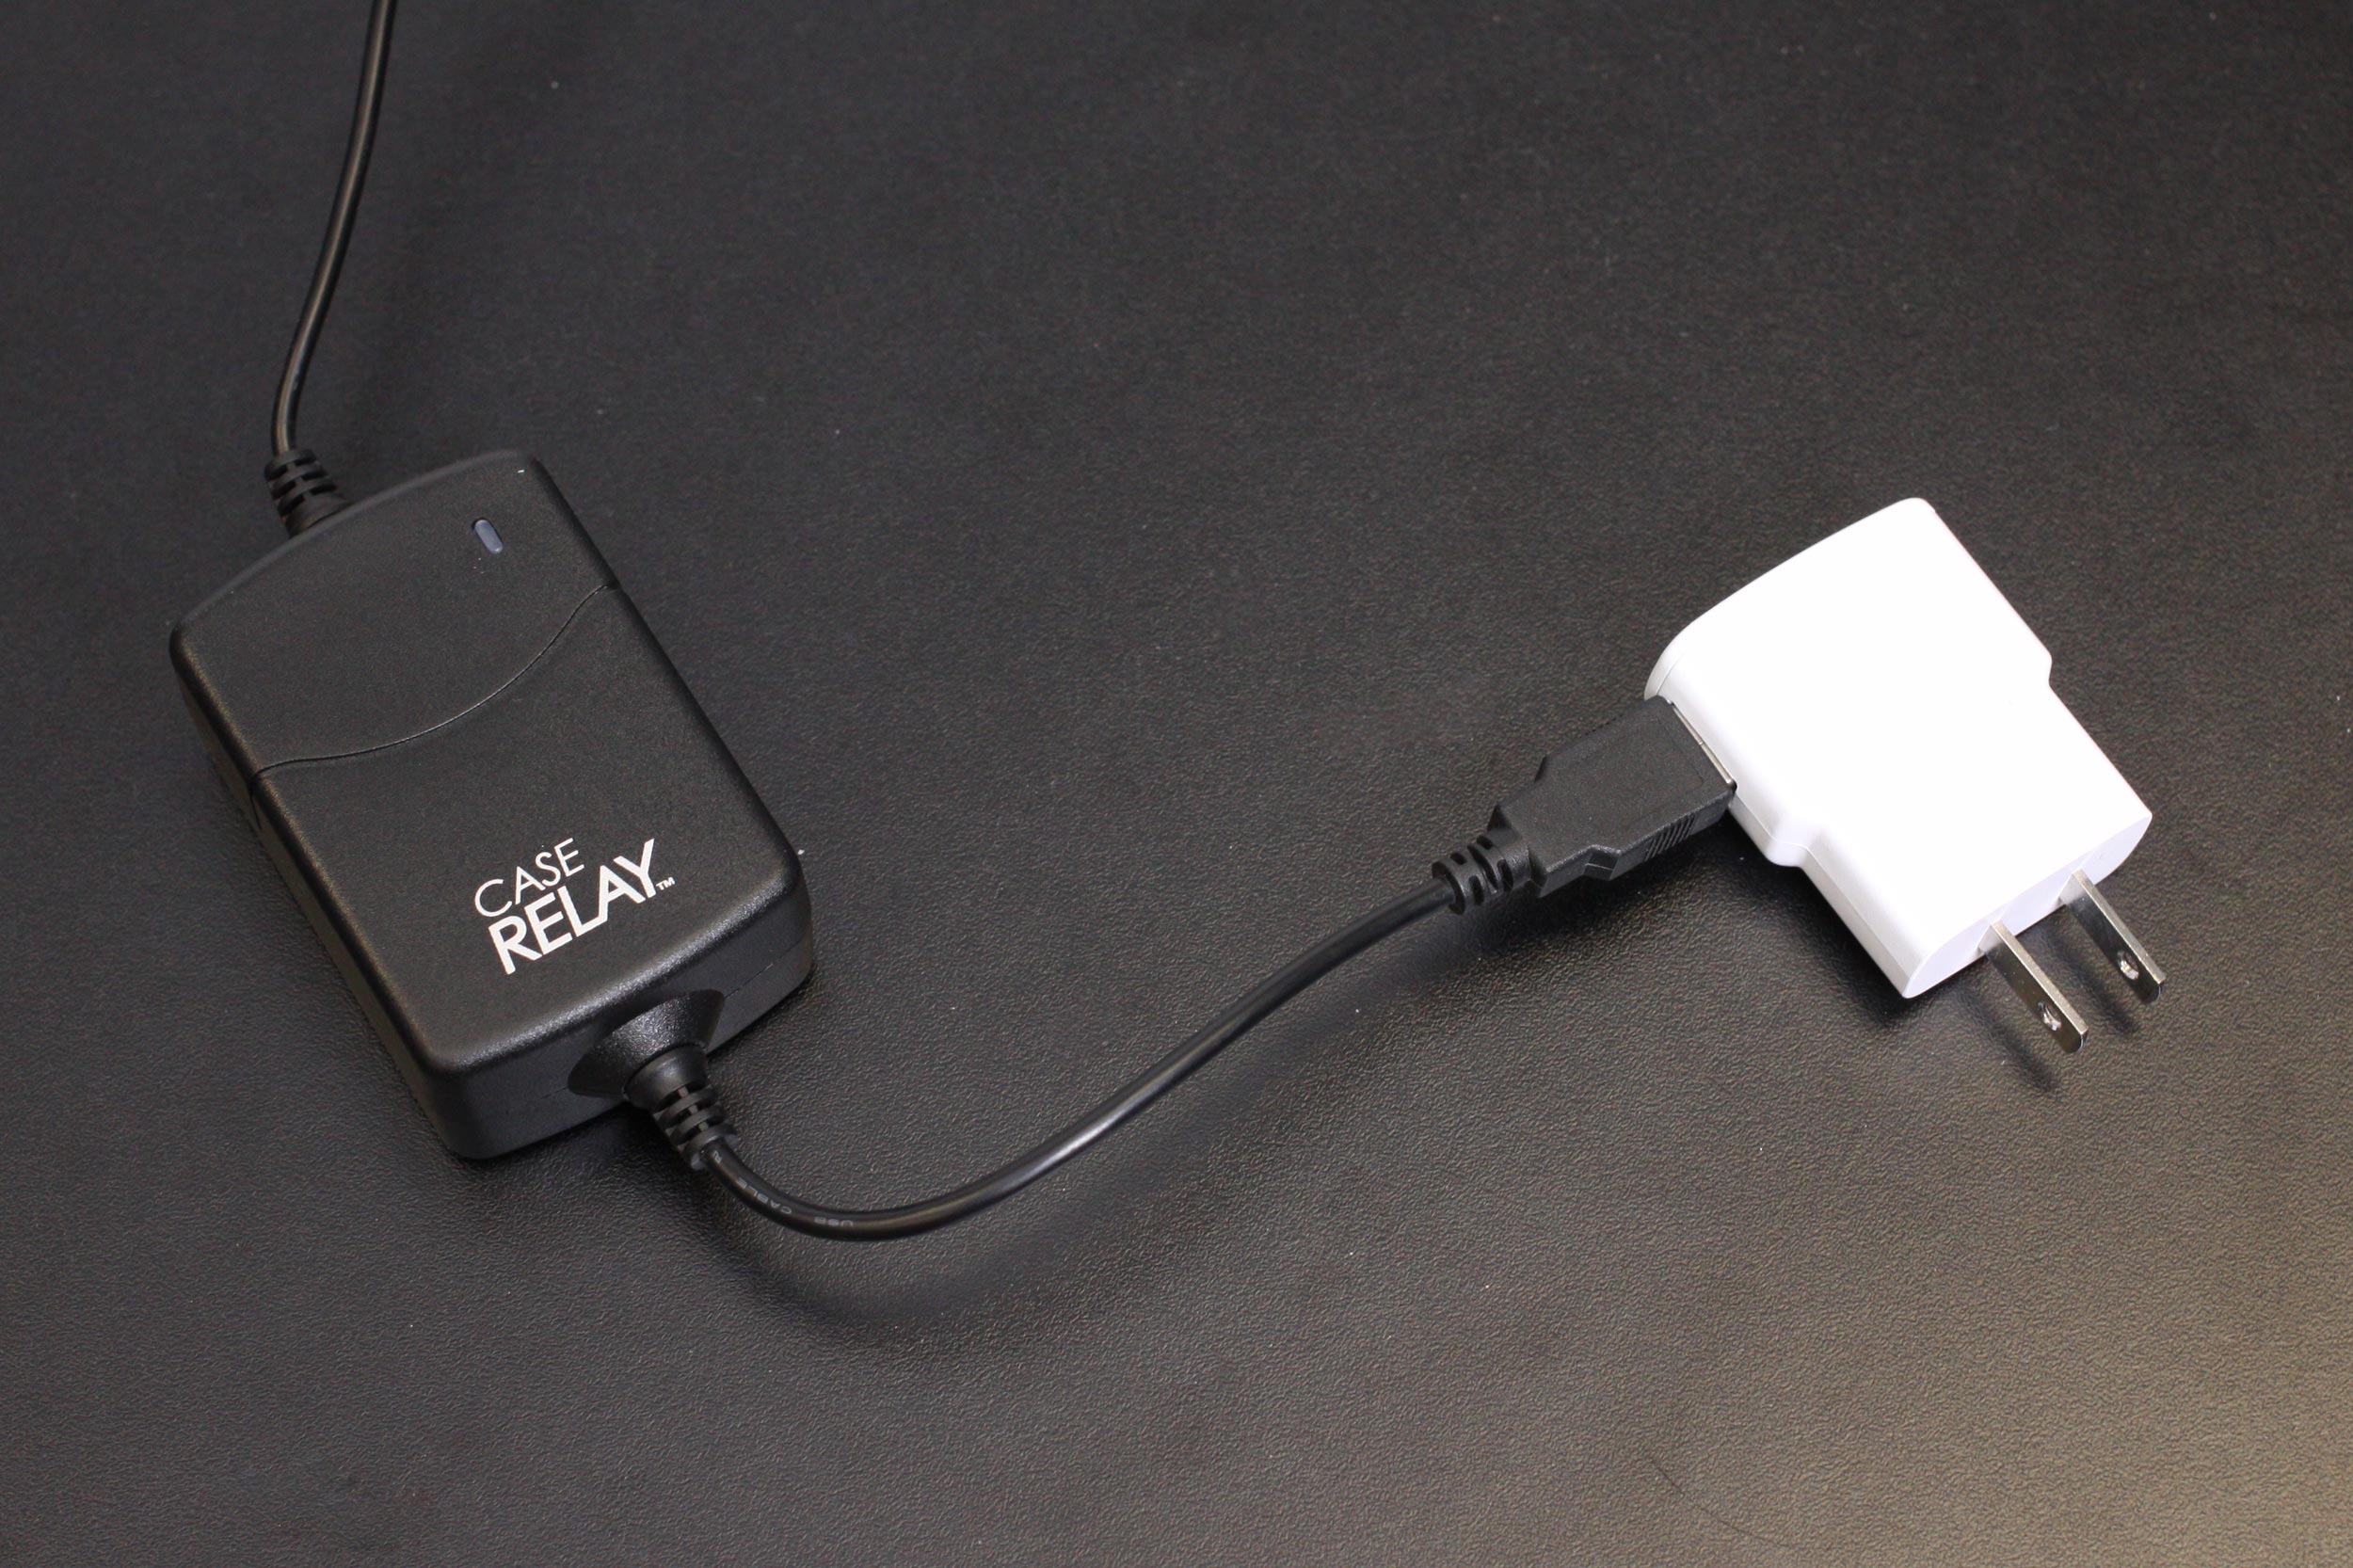
Case Relay Power System plugged into a power adapter
I plugged the Samsung adapter into an extension cord and I was all set! Continuous power for as long as I needed it.
Hopefully this helped anyone who was struggling with using the A7R III and an Atomos external recorder!


